The Perfect Server-Debian Squeeze(Debian 6.0)With BIND、Dovecot&Nginx [ISPConfig 3 ]
DanielHarbottleによって編集および編集されました
このチュートリアルでは、ISPConfig3をインストールするためにDebianSqueeze(Debian 6.0)サーバーを準備する方法とISPConfig3をインストールする方法を示します。ISPConfig3は、Webブラウザーを介して次のサービスを構成できるWebホスティングコントロールパネルです。 Apache Webサーバー、Postfixメールサーバー、MySQL、BINDネームサーバー、PureFTPd、SpamAssassin、ClamAV、その他多数。
このチュートリアルは、優れたチュートリアル「The Perfect Server-Debian Squeeze(Debian 6.0)With BIND&Dovecot[ISPConfig3]」および「ThePerfectServer-Ubuntu 11.10 With Nginx[ISPConfig3]」に基づいています。アイデアは、高速でメモリ効率の高いnginx Webサーバーと、メモリ効率が高いとも言われているDovecotを使用することです。ローカルVMとVPSでテストしたとしても、それが機能することを保証するものではありません。 nginxにはDotdebリポジトリを使用する必要があります。
ISPConfig 3の使用方法を学ぶために、ISPConfig3マニュアルをダウンロードすることを強くお勧めします。
約300ページで、ISPConfig(管理者、再販業者、クライアント)の背後にある概念をカバーし、ISPConfig 3をインストールおよび更新する方法を説明し、有効な入力の例とともにISPConfigのすべてのフォームとフォームフィールドのリファレンスを含み、 ISPConfig 3で最も一般的なタスクです。また、サーバーをより安全にする方法を示し、最後にトラブルシューティングのセクションがあります。
Android用ISPConfigモニターアプリ
ISPConfig Monitor Appを使用すると、サーバーのステータスを確認し、すべてのサービスが期待どおりに実行されているかどうかを確認できます。 TCPおよびUDPポートを確認し、サーバーにpingを実行できます。さらに、このアプリを使用して、ISPConfigがインストールされているサーバーに詳細を要求できます(ISPConfigモニターアプリをサポートするインストール済みのISPConfig3の最小バージョンは3.0.3.3です! );これらの詳細には、ISPConfigコントロールパネルのモニターモジュールから知っているすべてのもの(サービス、メールとシステムのログ、メールキュー、CPUとメモリの情報、ディスク使用量、クォータ、OSの詳細、RKHunterログなど)が含まれます。 、ISPConfigはマルチサーバー対応であるため、ISPConfigマスターサーバーから制御されているすべてのサーバーを確認できます。
ダウンロードと使用方法については、http://www.ispconfig.org/ispconfig-3/ispconfig-monitor-app-for-android/にアクセスしてください。
これがあなたのために働くという保証はありません!
1要件
Debianリポジトリからすべてのパッケージをプルするには、少なくとも8GBのディスクスペースと1GBのRAM、および適度に高速なインターネット接続を備えたベアメタルまたは仮想マシンまたはVPSが必要です。
これを書いている時点では、Debianの最新バージョンは6.0.4です。 ISOをダウンロードして書き込むか、選択した仮想マシン管理GUIまたはコマンドラインユーティリティを使用してマウントすることができます。
AMD64 ISO CD1イメージは次の場所にあります:http://cdimage.debian.org/debian-cd/6.0.4/amd64/iso-cd/debian-6.0.4-amd64-CD-1.iso
>最近のほとんどのコンピュータは64ビット対応ですが、次の場所にあるi386イメージをいつでも使用できます:http://cdimage.debian.org/debian-cd/6.0.4/i386/iso-cd/debian-6.0.4- i386-CD-1.iso
ネットインストールCDを使用することもできますが、インストールするすべてのパッケージがセットアップ中にインターネットからダウンロードされることを除いて、大きな違いはありません。
2予備メモ
このチュートリアルでは、ホスト名server1.example.comとIPアドレス192.168.0.100およびゲートウェイ192.168.0.1を使用します。これらの設定はユーザーによって異なる場合があるため、必要に応じて置き換える必要があります。
3ベースシステム
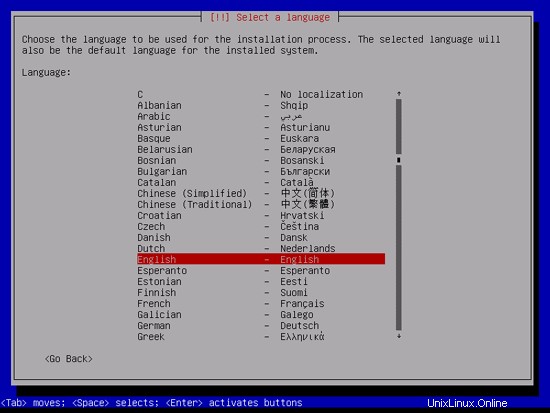
Debian SqueezeネットワークインストールCDをシステムに挿入し、そこから起動します。 [インストール]を選択します(これにより、テキストインストーラーが起動します。グラフィカルインストーラーが必要な場合は、[グラフィカルインストール]を選択してください):
言語を選択してください:
次に、場所を選択します:

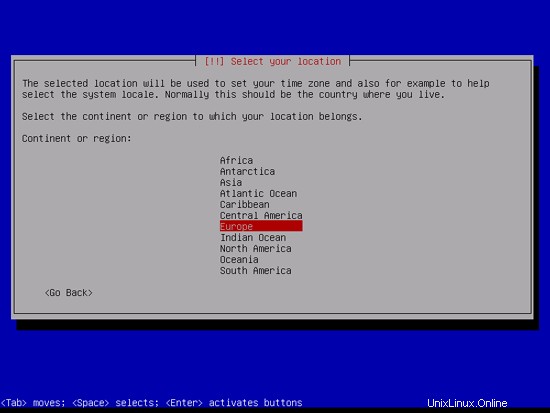

言語と場所の珍しい組み合わせ(私の場合のように、言語として英語、場所としてドイツなど)を選択した場合、インストーラーは、この組み合わせにロケールが定義されていないことを通知する場合があります。この場合、ロケールを手動で選択する必要があります。ここでen_US.UTF-8を選択します:
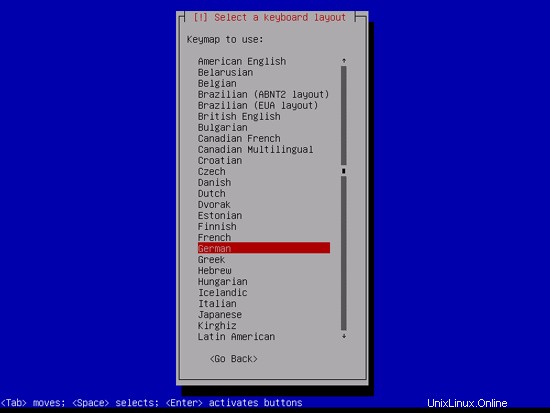
キーボードレイアウトを選択してください:
インストーラーはインストールCDとハードウェアをチェックし、ネットワークにDHCPサーバーがある場合はDHCPを使用してネットワークを構成します。
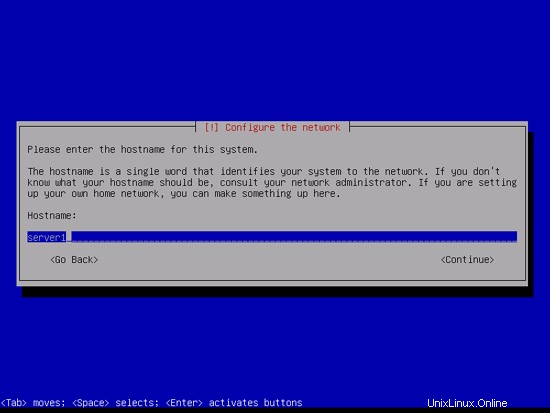
設定するホスト名を入力します。これは、任意のホスト名とドメイン名の組み合わせである必要があります。 myserver.mydomain.com。これについては、チュートリアルの後半でも触れています。この例では、システムの名前はserver1.example.comであるため、server1.example.comと入力します。
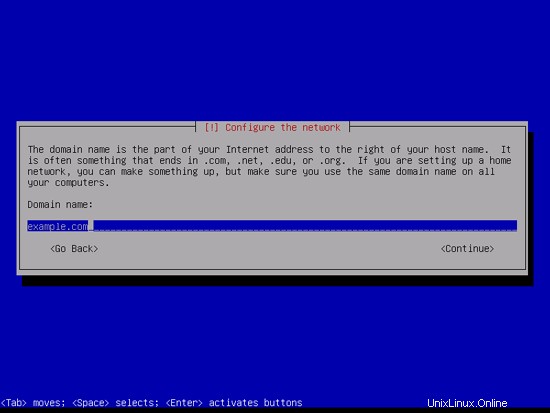
ドメイン名を入力します。この例では、これはexample.comです:
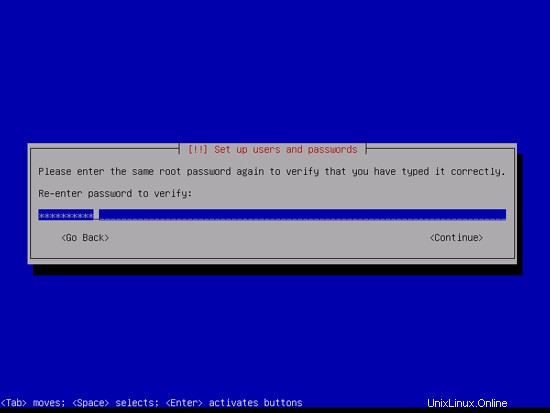
その後、rootユーザーにパスワードを与えます:

タイプミスを避けるために、そのパスワードを確認してください:
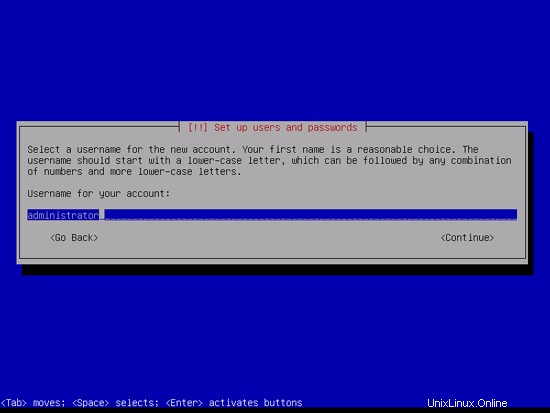
通常のユーザーアカウントを作成します。たとえば、ユーザー名administratorを持つユーザーAdministrator(Debian Squeezeで予約されている名前であるため、ユーザー名adminは使用しないでください):


完璧なサーバー-BIND、Dovecot、Nginxを備えたDebian Squeeze(Debian 6.0)[ISPConfig3]-2ページ
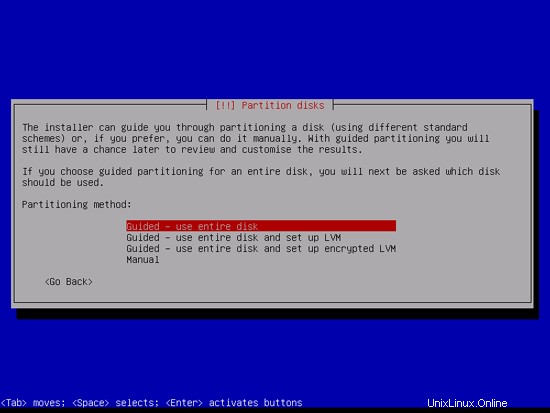
次に、ハードディスクをパーティション分割する必要があります。簡単にするために、1つの大きなパーティション(マウントポイント/を使用)と小さなスワップパーティションを作成するので、[ガイド付き]を選択します-ディスク全体を使用します(もちろん、パーティション分割は完全にあなた次第です-必要に応じて、大きなパーティションが1つだけで、LVMも使用できます):
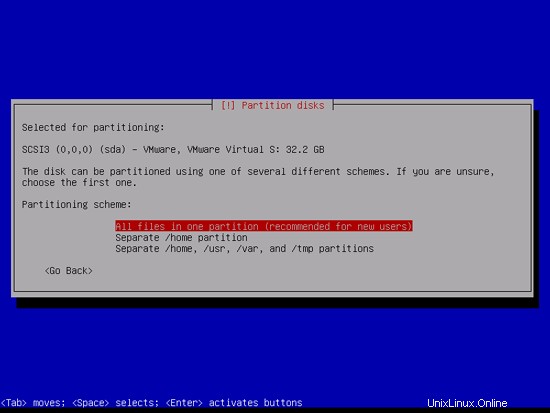
パーティションを作成するディスクを選択します:

次に、パーティションスキームを選択します。前述のように、わかりやすくするために、1つのパーティション内のすべてのファイル(新規ユーザーに推奨)を選択します。ここで選択する内容は、好みに応じて異なります。
終了したら、[パーティション分割を終了してディスクに変更を書き込む]を選択します。
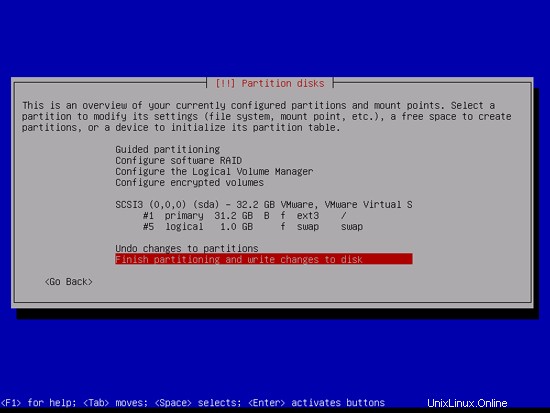
[ディスクに変更を書き込む?]というメッセージが表示されたら、[はい]を選択しますか?:

その後、新しいパーティションが作成され、フォーマットされます。

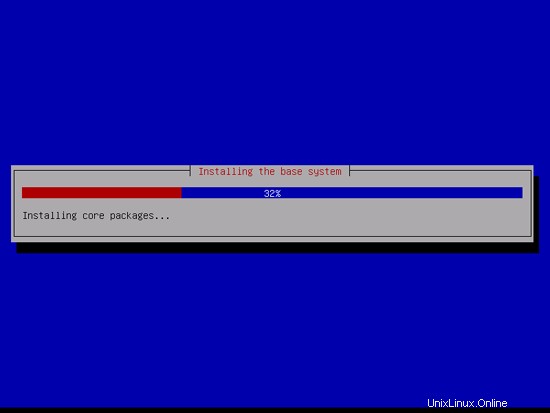
これでベースシステムがインストールされました:
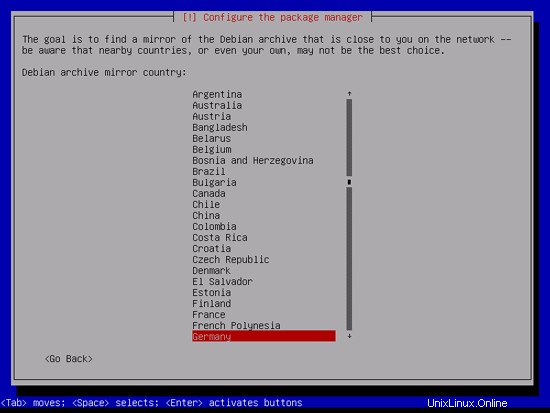
次に、aptを構成する必要があります。限られたパッケージのセットのみを含むDebianSqueezeCD1(またはnetinstall)を常に使用したくない場合があるため、ネットワークミラーを使用する必要があります。使用するネットワークミラーが配置されている国を選択します(通常、これはDebian SqueezeシステムまたはVPSが配置されている国です):
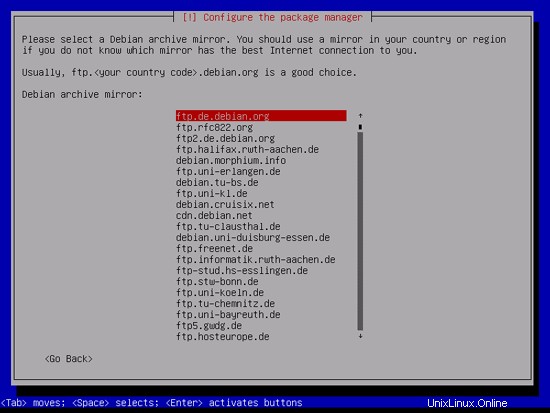
次に、使用するミラーを選択します(例:ftp.de.debian.org):
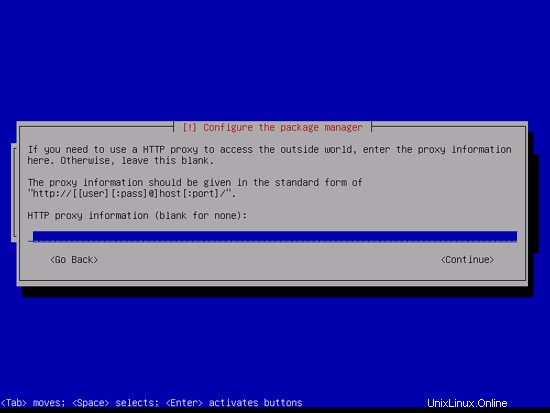
HTTPプロキシを使用しない限り、次のフィールドを空のままにして、[続行]をクリックします。
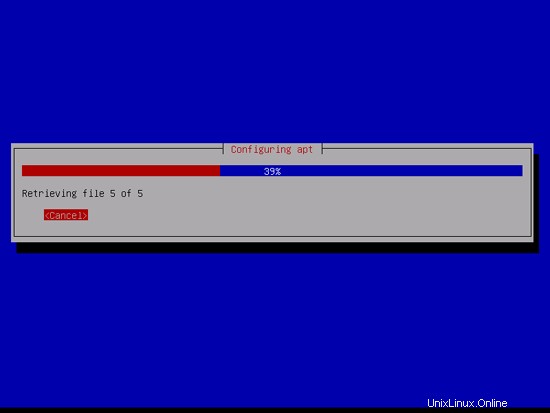
Aptは現在パッケージデータベースを更新しています:
[いいえ]を選択すると、パッケージ使用状況調査をスキップできます:
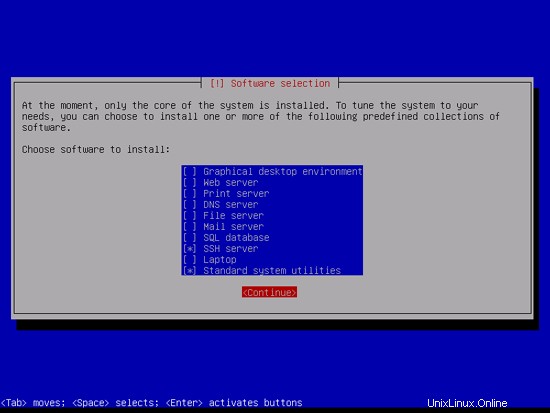
Webサーバー、DNSサーバー、メールサーバー、およびMySQLデータベースが必要ですが、システムにインストールされているものとインストールされていないものを可能な限り制御する方がよいため、現時点ではこれらを選択しないでください。必要なパッケージは後で手動でインストールされます。したがって、標準のシステムユーティリティとSSHサーバーを選択するだけで、インストールが完了して[続行]をクリックした後、ターミナルまたはPuTTYなどのSSHクライアントを使用してシステムにSSH接続を確立できます。
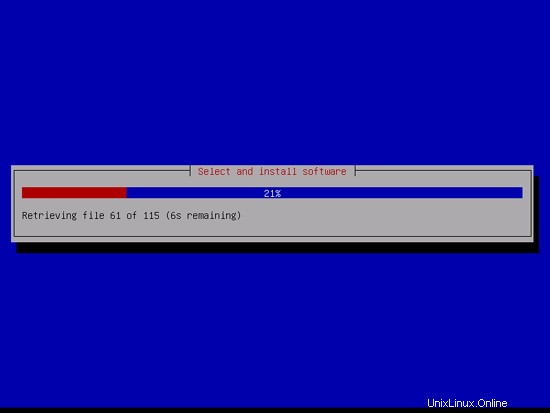
前の手順で各カテゴリから選択したパッケージがダウンロードされ、システムにインストールされます。

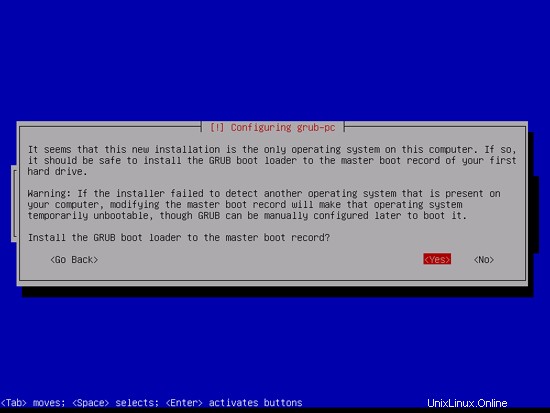
GRUBブートローダーをマスターブートレコードにインストールしますか?というメッセージが表示されたら、[はい]を選択します:
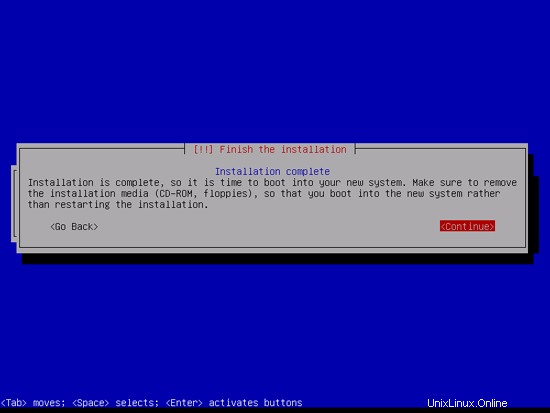
これで基本システムのインストールは完了です。 CDドライブからDebianSqueezeCD1(またはnetinstall)を取り出し、[続行]をクリックしてシステムを再起動します。
完璧なサーバー-BIND、Dovecot、Nginxを備えたDebian Squeeze(Debian 6.0)[ISPConfig3]-3ページ
4SSHサーバーをインストールします
基本的なシステムのインストール中にSSHサーバーをインストールしなかった場合は、今すぐインストールできます:
apt-get install ssh openssh-server
注:このチュートリアルのコマンドは、rootとしてログインしていることを前提としています。 /etc/apt/sources.listのCD-ROM行を削除することもできます:
vi /etc/apt/sources.list
そして、dをすばやく2回押して、すべてのCD-ROMエントリが削除されるまで1行を削除します。削除する行が多すぎる場合は、:q!と入力してください。保存せずに終了して再試行します。
ターミナルまたはPuTTYなどのSSHクライアントを使用して、ワークステーションからDebian Squeezeサーバーに接続し、このチュートリアルの残りの手順に従うことができるはずです。
5 vim-noxをインストールします(推奨)
ターミナル内のテキストエディタとしてviを使用する場合は、次のパッケージをインストールする必要があります。 DebianとUbuntuのデフォルトのviプログラムには、編集を不可能にする重大なバグがいくつかあるため、これを修正するためにvim-noxをインストールします。
apt-get install vim-nox
(viよりも必要な場合は、その手順をスキップして、代わりにjoeやnanoなどの別のテキストエディタをインストールできます。)
6ネットワークの構成
Debian SqueezeインストーラーはDHCP経由でネットワーク設定を取得するようにシステムを構成しているため、サーバーには静的IPアドレスが必要であるため、ここでその構成を変更する必要があります。テキストエディタで/etc/ network / interfacesを編集し、必要に応じて調整します(この例では、IPアドレス192.168.0.100が使用されます)。 allow-hotplugeth0をautoeth0に置き換える必要があることに注意してください。そうしないと、ネットワークインターフェイスの再起動が機能せず、システムの再起動が必要になります。 viで編集するには、次のように入力します。
vi / etc / network / interfaces
#このファイルには、システムで使用可能なネットワークインターフェイス#とそれらをアクティブ化する方法が記載されています。詳細については、interfaces(5)を参照してください。#ループバックネットワークインターフェイスauto loiface lo inet loopback#プライマリネットワークインターフェイス#allow-hotplug eth0#iface eth0 inet dhcpauto eth0ifaceeth0inet静的アドレス192.168.0.100ネットマスク255.255.255.0ネットワーク192.168.0.0ブロードキャスト192.168.0.255ゲートウェイ192.168.0.1 |
/etc/init.d/networking restart
次に、/ etc/hostsを編集します。次のようになります:
vi / etc / hosts
127.0.0.1 localhost.localdomain localhost192.168.0.100 server1.example.com server1#IPv6対応ホストには次の行が望ましいです。:1ip6 -localhost ip6-loopbackfe00 ::0 ip6-localnetff00 ::0 ip6-mcastprefixff02 ::1 ip6-allnodesff02 ::2 ip6-allrouters |
今すぐ実行:
 echo server1.example.com> /etc/hostname
/etc/init.d/hostname.sh start
または
vi / etc / hostname
/etc/init.d/hostname.sh start
そのようにホスト名を編集します。
その後、実行します
 hostname
 hostname -f
両方のコマンドの後にserver1.example.comが表示される必要があります!インストールプロセス中にホスト名とドメイン名をすでに設定している場合は、IPアドレスと完全修飾ドメイン名(FQDN)を/ etc / hostsファイルに挿入する必要がありますが、おそらく正しいはずです。ローカルインストールでは、.localをトップレベルドメイン(TLD)として使用できますが、このシナリオでは、ローカルIPアドレスを解決するように適切に構成されたDNSサーバーが必要です。
7Dotdebリポジトリを追加してDebianシステムを更新する
この手順は、nginxをISPConfig3およびDebian6システムで動作させるために重要です。 /etc/apt/sources.listファイルを編集し、2行とオプションのコメントを挿入してDotdebリポジトリを追加し、GPGキーをダウンロードして追加します。
vi /etc/apt/sources.list
[...]#Dotdeb repositorydeb http://packages.dotdeb.org squeeze alldeb-src http://packages.dotdeb.org squeezeすべて[...] |
次に、適切なGnuPGキーを取得します:
 wget http://www.dotdeb.org/dotdeb.gpg
 cat dotdeb.gpg | apt-key add-
また、/ etc / apt / sources.listにsqueeze-updatesリポジトリが含まれていることを確認してください(これにより、ClamAVウイルススキャナーの最新の更新を常に取得できます。このプロジェクトはリリースを頻繁に公開し、古いバージョンが機能しなくなる場合があります)。
[...] deb http://ftp.de.debian.org/debian/ squeeze-updates main [...] |
実行:
apt-get update
aptパッケージリポジトリデータベースを更新し、アップグレードが利用可能な場合は、次の場合にインストールできるようになります。
apt-get upgrade
8デフォルトシェルの変更
/ bin/shは/bin/ dashへのシンボリックリンクですが、/ bin/dashではなく/bin/bashが必要です。したがって、これを行います:
dpkg-reconfigure dash
デフォルトのシステムシェル(/ bin / sh)としてダッシュを使用しますか? <-いいえ
9システム時計を同期する
インターネットを介してシステムクロックをNTP(ネットワークタイムプロトコル)サーバーと同期することをお勧めします。実行するだけです:
apt-get install ntp ntpdate
システム時刻の同期を保つため。
完璧なサーバー-BIND、Dovecot、Nginxを備えたDebian Squeeze(Debian 6.0)[ISPConfig3]-4ページ
10 Postfix、Dovecot、Saslauthd、MySQL、phpMyAdmin、rkhunter、binutilsをインストールします
Postfix、Dovecot、Saslauthd、MySQL、phpMyAdmin、rkhunter、binutilsを1つのコマンドでインストールできます:
apt-get install postfix postfix-mysql postfix-doc mysql-client mysql-server openssl getmail4 rkhunter binutils dovecot-imapd dovecot-pop3d sudo
次の質問があります:
メール構成の一般的なタイプ:<-インターネットサイト
システムメール名:<-server1.example.com
MySQL「root」ユーザーの新しいパスワード:<-yourrootsqlpassword
繰り返しますMySQLの「root」ユーザーのパスワード:<-yourrootsqlpassword
MySQLがローカルホストだけでなくすべてのインターフェースでリッスンするようにしたいので、/ etc / mysql / my.cnfを編集して、bind-address =127.0.0.1:
の行をコメントアウトします。vi /etc/mysql/my.cnf
[...]#スキップネットワークの代わりに、デフォルトでは、互換性が高く安全性が低くないローカルホストでのみリッスンするようになりました。 #bind-address =127.0.0.1 [...] |
次に、MySQLを再起動します:
/etc/init.d/mysql restart
次に、ネットワーキングが有効になっていることを確認します。実行
netstat -tap | grep mysql
出力は次のようになります。
example@unixlinux.online:〜#netstat -tap | grep mysql
tcp 0 0 *:mysql *:* LISTEN 10617 / mysqld
example@unixlinux.online:
11 Amavisd-new、SpamAssassin、およびClamavをインストールします
amavisd-new、SpamAssassin、およびClamAVをインストールするには、次のコマンドを実行します。
apt-get install amavisd-new spamassassin clamav clamav-daemon zoo unzip bzip2 arj nomarch lzop cabextract apt-listchanges libnet-ldap-perllibauthen-sasl-perlclamav-docsデーモンlibio-string-perllibio-socket-ssl- perl libnet-ident-perl zip libnet-dns-perlISPConfig 3セットアップスクリプトは、SpamAssassinフィルターライブラリを内部的にロードするamavisdを使用するため、SpamAssassinを停止してRAMを解放します。
/etc/init.d/spamassassin stop
update-rc.d -f spamassassin remove
12 Nginx、PHP5(PHP-FPM)、およびFcgiwrapをインストールします
NginxはDotdebリポジトリからパッケージとして入手できます(公式のnginxリポジトリのパッケージは、執筆時点ではISPConfig 3では機能しません)。そのため、インストールするには、次のコマンドを実行します。
apt-get install nginxApacheは、チュートリアルの後半でphpMyAdminの依存関係としてプルされますが、この段階ではインストールしないでください。次のコマンドでApacheを削除します:
apt-get purge apache2 apache2.2-common apache2-doc apache2-mpm-prefork apache2-utilsおよびその他の関連パッケージ。実行することもできます:
apt-get autoremove不要なパッケージが削除されていることを確認します。
PHP5をPHP-FPM(FastCGI Process Manager)を介してnginxで機能させるには、PHP FastCGI実装の代わりに、あらゆるサイズのWebサイト、特にトラフィックの多いWebサイトに対応するいくつかの追加機能を追加します。
apt-get install php5-fpmPHP-FPMは、initスクリプト/etc/init.d/php5-fpmを使用するデーモンプロセスであり、ポート9000でFastCGIサーバーを実行します。
MySQLサポートをPHPに追加するために、php5-mysqlパッケージをインストールできます。 Webアプリケーションの拡張機能をサポートするには、追加のPHP5モジュールも必要になる場合があります。次のような利用可能なPHP5モジュールを検索できます:
apt-cache search php5ディスク容量や、インストールに必要かどうかが気にならない場合は、すべてインストールできます。
apt-get install php5-mysql php5-curl php5-gd php5-intl php-pear php5-imagick php5-imap php5-mcrypt php5-memcache php5-ming php5-ps php5-pspell php5-recode php5-snmp php5 -sqlite php5-tidy php5-xmlrpc php5-xslまたは、不要であることがわかっているものを削除します。
APCは、PHP中間コードをキャッシュおよび最適化するための無料のオープンソースPHPオペコードキャッシャーです。これは、eAcceleratorやXCacheなどの他のPHPオペコードキャッシャーに似ています。 PHPページを高速化するために、これらのいずれかをインストールすることを強くお勧めします。
APCは次のようにインストールできます:
apt-get install php-apcPHP-FPMを再起動します:
/etc/init.d/php5-fpm再起動Fcgiwrapは、複雑なCGIスクリプトでも機能するCGIラッパーであり、各vhostが独自のcgi-binディレクトリを使用できるため、共有ホスティング環境で使用できます。 nginxでCGIをサポートするには、次のようにFcgiwrapパッケージをインストールする必要があります。
apt-get install fcgiwrapインストール後、fcgiwrapデーモンはすでに開始されているはずです。そのソケットは/var/run/fcgiwrap.socketです。実行されていない場合は、/ etc / init.d/fcgiwrapスクリプトを使用して開始できます。
それでおしまい!これで、nginx vhostを作成すると、ISPConfig3が正しいvhost構成を処理します。
13phpMyAdminをインストールしてVhostsのHTTPSを構成する
phpMyAdminをインストールするには、次のコマンドを実行します。
apt-get install phpmyadmin次の質問が表示されます:
自動的に再構成するWebサーバー:<-noneを選択します(オプションとしてapache2とlighttpdのみが使用可能であるため)
dbconfig-commonを使用してphpmyadminのデータベースを構成しますか? <-いいえ[はい]を選択した場合は、次のリンクで読むことができるエラーが表示されます:http://serverfault.com/questions/341116/setting-up-phpmyadmin-got-a-mysql-syntax-error
Apache2はphpMyAdmin依存関係の一部としてインストールされるため、次のコマンドで停止します。
/etc/init.d/apache2停止Apacheのシステム起動リンクを削除します:
insserv -r apache2その後nginxを開始します:
/etc/init.d/nginx startこれで、phpMyAdminは/ usr / share /phpmyadmin/ディレクトリにあります。
ISPConfig 3をインストールした後、次のようにphpMyAdminにアクセスできます。
nginxのポート8081のISPConfig3アプリvhostにはphpMyAdmin構成が付属しているため、http://server1.example.com:8081/phpmyadminまたはhttp://server1.example.com:8081/phpMyAdminを使用してphpMyAdminにアクセスできます。 。
Webサイトから使用できる/phpmyadminまたは/phpMyAdminエイリアスを使用する場合、nginxにはグローバルエイリアス(すべてのvhostに対して定義できるエイリアス)がないため、これはApache2よりも少し複雑です。したがって、指定したURIでphpMyAdminを使用してアクセスできるように、各vhostのエイリアスを定義する必要があります。
これを行うには、ISPConfig3の各Webサイトの[オプション]タブにある[nginxディレクティブ]フィールドに以下を貼り付けます(チュートリアルの後半でインストールした後)。
location / phpmyadmin {root / usr / share /; index index.php index.html index.htm;場所〜^ / phpmyadmin /(。+ \。php)$ {try_files $ uri =404;ルート/usr/ share /; fastcgi_pass 127.0.0.1:9000; fastcgi_index index.php; fastcgi_param SCRIPT_FILENAME $ document_root $ fastcgi_script_name; / etc / nginx/fastcgi_paramsをインクルードします。 fastcgi_buffer_size 128k; fastcgi_buffers 256 4k; fastcgi_busy_buffers_size 256k; fastcgi_temp_file_write_size 256k; fastcgi_intercept_errors on; }場所〜* ^ / phpmyadmin /(。+ \。(jpg | jpeg | gif | css | png | js | ico | html | xml | txt))$ {root / usr / share /; }} location / phpMyAdmin {rewrite ^ / * / phpmyadmin last; } |
vhostにhttpではなくhttpsを使用する場合は、次のようにphpMyAdmin構成にfastcgi_paramHTTPSの行を追加する必要があります。
location / phpmyadmin {root / usr / share /; index index.php index.html index.htm;場所〜^ / phpmyadmin /(。+ \。php)$ {try_files $ uri =404;ルート/usr/ share /; fastcgi_pass 127.0.0.1:9000; fastcgi_paramHTTPSオン; #<-この行を追加fastcgi_index index.php; fastcgi_param SCRIPT_FILENAME $ document_root $ fastcgi_script_name; / etc / nginx/fastcgi_paramsをインクルードします。 fastcgi_buffer_size 128k; fastcgi_buffers 256 4k; fastcgi_busy_buffers_size 256k; fastcgi_temp_file_write_size 256k; fastcgi_intercept_errors on; }場所〜* ^ / phpmyadmin /(。+ \。(jpg | jpeg | gif | css | png | js | ico | html | xml | txt))$ {root / usr / share /; }} location / phpMyAdmin {rewrite ^ / * / phpmyadmin last; } |
データとパスワードをクリアテキストでphpMyAdminに転送するのか、それとも安全を確保したい他のアプリケーションに転送するのかはかなり疑わしいです。したがって、vhostにhttpとhttpsの両方を使用するには、次のセクションを/etc/nginx/nginx.confのhttp {}セクションに追加する必要があります。インクルード行の前に、訪問者がhttpとhttpsのどちらを使用するかを決定し、 $fastcgi_https変数。それに応じて、phpMyAdmin構成でこれを使用してください:
vi /etc/nginx/nginx.conf
[...] http {[...]##HTTPSが使用されていることを検出するmap$schema $fastcgi_https{デフォルトオフ; https on; } [...]} [...] |
後でnginxをリロードすることを忘れないでください:
/etc/init.d/nginxリロード
次に、もう一度nginx Directivesフィールドに移動し、fastcgi_param HTTPS onの代わりに、fastcgi_param HTTPS $ fastcgi_httpsという行を追加して、httpリクエストとhttpsリクエストの両方にphpMyAdminを使用できるようにします。
location / phpmyadmin {root / usr / share /; index index.php index.html index.htm;場所〜^ / phpmyadmin /(。+ \。php)$ {try_files $ uri =404;ルート/usr/ share /; fastcgi_pass 127.0.0.1:9000; fastcgi_param HTTPS $ fastcgi_https; #<-この行を追加fastcgi_index index.php; fastcgi_param SCRIPT_FILENAME $ document_root $ fastcgi_script_name; / etc / nginx/fastcgi_paramsをインクルードします。 fastcgi_buffer_size 128k; fastcgi_buffers 256 4k; fastcgi_busy_buffers_size 256k; fastcgi_temp_file_write_size 256k; fastcgi_intercept_errors on; }場所〜* ^ / phpmyadmin /(。+ \。(jpg | jpeg | gif | css | png | js | ico | html | xml | txt))$ {root / usr / share /; }} location / phpMyAdmin {rewrite ^ / * / phpmyadmin last; } |
14Mailmanをインストール
バージョン3.0.4以降、ISPConfigではMailmanメーリングリストを管理(作成/変更/削除)することもできます。この機能を利用する場合は、次のようにMailmanをインストールします。
apt-get install mailman
Mailmanを開始する前に、mailmanという最初のメーリングリストを作成する必要があります。
newlist mailman
example@unixlinux.online:〜#newlist mailman
リストを実行している人のメールアドレスを入力します:<-admin email address、e.g. example@unixlinux.online
最初のメールマンパスワード:<-メールマンリストの管理者パスワード
メールリストの作成を完了するには、/ etc/aliasesまたは
同等のファイルを編集する必要があります。次の行を追加します:
##mailmanメーリングリスト
mailman: "| / var / lib / mailman / mail / mailman post mailman"
mailman-admin: "|/ var / lib / mailman / mail / mailman admin mailman "
mailman-bounces:" | / var / lib / mailman / mail / mailman bounces mailman "
mailman-confirm:" | / var / lib / mailman / mail / mailman confirm mailman "
mailman-join:" | / var / lib / mailman / mail / mailman join mailman "
mailman-leave:" | / var / lib / mailman / mail / mailman Leave mailman "
mailman-owner:" | / var / lib / mailman / mail / mailman owner mailman "
mailman-request:" | / var / lib / mailman / mail / mailman request mailman "
mailman-subscribe: "| / var / lib / mailman / mail / mailman subscribe mailman"
mailman-unsubscribe: "| / var / lib / mailman / mail / mailman郵便配達員の登録を解除する」
Enterキーを押して、郵便配達員の所有者に通知します... <-ENTER
example@unixlinux.online:〜#
後で/etc/ aliasesを開きます:
vi / etc / aliases
次の行を追加します:
[...] mailman: "| / var / lib / mailman / mail / mailman post mailman" mailman-admin: "| / var / lib / mailman / mail / mailman admin mailman "mailman-bounces:" | / var / lib / mailman / mail / mailman bounces mailman "mailman-confirm:" | / var / lib / mailman / mail / mailmanfirm mailman "mailman- join: "| / var / lib / mailman / mail / mailman join mailman" mailman-leave: "| / var / lib / mailman / mail / mailman Leave mailman" mailman-owner: "| / var / lib / mailman / mail / mailman owner mailman "mailman-request:" | / var / lib / mailman / mail / mailman request mailman "mailman-subscribe:" | / var / lib / mailman / mail / mailman subscribe mailman "mailman-unsubscribe:" | / var / lib / mailman / mail / mailman unsubscribe mailman " |
newaliasesを実行し、Postfixを再起動します:
 newaliases
/etc/init.d/postfix restart
次に、Mailmanデーモンを起動します:
/etc/init.d/mailman start
ISPConfig 3をインストールした後、次のようにMailmanにアクセスできます。
nginxのポート8081のISPConfigアプリvhostにはMailman構成が付属しているため、http://server1.example.com:8081 / cgi-bin / mailman / admin/
個々のWebサイトからMailmanを使用する場合、nginxにはグローバルエイリアス(その後すべてのホストで機能するエイリアスの定義、たとえばdomain.tld / definedalias)がないため、設定はApacheよりも少し複雑になります。したがって、Mailmanにアクセスする各vhostのエイリアスを定義する必要があります。
これを行うには、各Webサイトの[オプション]タブにISPConfigをインストールした後、nginxディレクティブフィールドに以下を貼り付けます。
location / cgi-bin / mailman {root / usr / lib /; fastcgi_split_path_info(^ / cgi-bin / mailman / [^ /] *)(。*)$; / etc / nginx/fastcgi_paramsをインクルードします。 fastcgi_param SCRIPT_FILENAME $ document_root $ fastcgi_script_name; fastcgi_param PATH_INFO $ fastcgi_path_info; fastcgi_param PATH_TRANSLATED $ document_root $ fastcgi_path_info; fastcgi_intercept_errors on; fastcgi_pass unix:/var/run/fcgiwrap.socket; }場所/images/mailman{エイリアス/usr/ share / images / mailman; }場所/pipermail{エイリアス/var/ lib / mailman / archives / public;自動インデックスオン; } |
これにより、vhostのエイリアス/ cgi-bin / mailman /が定義されます。つまり、http://
http://
完璧なサーバー-BIND、Dovecot、Nginxを備えたDebian Squeeze(Debian 6.0)[ISPConfig3]-5ページ
15PureFTPdとクォータのインストール
PureFTPdとquotaは、次のコマンドでインストールできます:
apt-get install pure-ftpd-common pure-ftpd-mysqlquotaquotatool
ファイル/etc/ default / pure-ftpd-commonを編集します:
vi / etc / default / pure-ftpd-common
開始モードはすでにスタンドアロンに設定されている可能性がありますが、VIRTUALCHROOT=trueも次のように定義されていることを確認してください。
[...] STANDALONE_OR_INETD =Standalone [...] VIRTUALCHROOT =true [...] |
すべての行がコメント化されている可能性がありますが、/ etc/inetd.confでftpstreamtcpで始まる行を確認し、コメント化することをお勧めします。ファイルまたは行が存在しない場合は、編集または作成する必要はありません。これにより、inetdがftpを開始しようとするのを防ぎます:
vi /etc/inetd.conf
次のようにコメントアウトします:
[...]#:STANDARD:これらは標準サービスです。#ftpstream tcp nowait root / usr / sbin / tcpd / usr / sbin / pure-ftpd-wrapper [...] |
/etc/inetd.confを変更する必要がある場合は、今すぐinetdを再起動してください:
/etc/init.d/openbsd-inetd restart
これで、FTPおよびTLSセッションを許可するようにPureFTPdを構成できます。 FTPは、すべてのパスワードとデータがクリアテキストで転送されるため、非常に安全でないプロトコルです。 TLSを使用することで、データ転送を暗号化できるため、FTPの安全性が大幅に向上します。
FTPおよびTLSセッションの実行を許可する場合:
echo 1> / etc / pure-ftpd / conf / TLS
TLSを使用するには、SSL証明書を作成する必要があります。次のコマンドを使用して、ディレクトリを作成し、/ etc / ssl /private/にSSL証明書を生成します。
 mkdir -p / etc / ssl / private /
 openssl req -x509 -nodes -days 7300 -newkey rsa:2048 -keyout /etc/ssl/private/pure-ftpd.pem -out / etc / ssl / private / pure-ftpd.pem
国名(2文字のコード)[AU]:<-国名を入力します(例:「DE」)。
州名または州名(フルネーム)[一部の州]:<-州を入力しますまたは州名。
地域名(例:市)[]:<-市区町村を入力してください。
組織名(例:会社)[Internet Widgits Pty Ltd]:<-組織名を入力してください(例:会社名)
組織単位名(例:セクション)[]:<-組織単位名(例:「IT部門」)を入力します。
一般名(例:あなたの名前)[]:<-システムの完全修飾ドメイン名を入力します(例: "server1.example.com")。
メールアドレス[]:<-メールアドレスを入力します。
次に、SSL証明書のアクセス許可を変更し、PureFTPdを再起動します。
 chmod 600 /etc/ssl/private/pure-ftpd.pem
 /etc/init.d/pure-ftpd-mysql restart
マウントポイント/のあるパーティションに、usrjquota =quote.user、grpjquota =quote.group、jqfmt=vfsv0を追加して/etc/ fstabを編集します。別の/varパーティションがある場合は、/varでも実行できます。
vi / etc / fstab
#/ etc / fstab:静的ファイルシステム情報。##「blkid」を使用して、#デバイスのユニバーサル一意識別子を出力します。これは、ディスクが追加および削除された場合でも機能するデバイスに名前を付けるためのより堅牢な方法として、UUID=とともに使用できます。 fstab(5)を参照してください。##<ファイルシステム><マウントポイント><タイプ><オプション><ダンプ><パス>proc / procprocデフォルト00#/インストール中に/ dev/sda1にありましたUUID=92bceda2-5ae4- 4e3a-8748-b14da48fb297 / ext3 errors =remount-ro、usrjquota =aquota.user、grpjquota =aquota.group、jqfmt =vfsv0 0 1#インストール中に/ dev /sda5でスワップが発生しましたUUID=e24b3e9e-095c-4b49-af27-6363a4b7d09 none swap sw 0 0 / dev / scd0 / media / cdrom0 udf、iso9660 user、noauto 0 0 / dev / fd0 / media / floppy0 auto rw、user、noauto 0 0 |
別の/varパーティションでは、次のようなオプションでusrjquota =aquota.user、grpjquota =aquota.group、jqfmt=vfsv0を使用できます。
[...]#/インストール中に/ dev/sda1にあったUUID=92bceda2-5ae4-4e3a-8748-b14da48fb297 / ext3 errors =remount- ro 0 1 [...]#/varはインストール中に/dev/sda3にありましたUUID=be189fc3-b1b0-4e41-822c-6f81aa504bc1 / var ext3 usrjquota =aquota.user、grpjquota =aquota.group、jqfmt =vfsv0 0 2 [ ...] |
UUID、パーティション、ファイルシステムの種類はシステムによって異なる可能性があるため、設定例のものに変更しないでください。
クォータを有効にするには、次のコマンドを実行します。
mount -o remount /
 quotecheck -avugm
 quoteon -avug
If you enabled quota on /var then you might get a similar response on your terminal:
quotacheck:Scanning /dev/sda3 [/var] done
quotacheck:Cannot stat old user quota file:No such file or directory
quotacheck:Cannot stat old group quota file:No such file or directory
quotacheck:Cannot stat old user quota file:No such file or directory
quotacheck:Cannot stat old group quota file:No such file or directory
quotacheck:Checked 335 directories and 3233 files
quotacheck:Old file not found.
quotacheck:Old file not found.
example@unixlinux.online:~# quotaon -avug
/dev/sda3 [/var]:group quotas turned on
/dev/sda3 [/var]:user quotas turned on
16BINDDNSサーバーのインストール
BINDは次のようにインストールできます:
apt-get install bind9 dnsutils
17 Vlogger、Webalizer、およびAWstatsをインストールします
Vlogger、webalizer、AWstatsは次のようにインストールできます:
apt-get install vlogger webalizer awstats geoip-database
Open /etc/cron.d/awstats to edit it...
vi /etc/cron.d/awstats
...そしてそのファイル内の両方のcronジョブをコメントアウトします:
#* / 10 * * * * www-data [-x /usr/share/awstats/tools/update.sh] &&/ usr / share / awstats / tools / update.sh#静的レポートを生成します:#10 03 * * * www-data [-x /usr/share/awstats/tools/buildstatic.sh] &&/usr/share/awstats/tools/buildstatic .sh |
18Jailkitをインストールする
Jailkitは、SSHユーザーをchrootする場合にのみ必要です。 Jailkit must be installed before ISPConfig 3, it cannot be installed afterwards! It can be installed as follows:
apt-get install build-essential autoconf automake1.9 libtool flex bison debhelper
cd /tmp
wget http://olivier.sessink.nl/jailkit/jailkit-2.14.tar.gz
tar xvfz jailkit-2.14.tar.gz
cd jailkit-2.14
./debian/rules binary
cd ..
dpkg -i jailkit_2.14-1_*.deb
rm -rf jailkit-2.14*
The Perfect Server - Debian Squeeze (Debian 6.0) With BIND, Dovecot &Nginx [ISPConfig 3] - Page 6
19fail2banをインストール
This is optional but also recommended, because the ISPConfig monitor tries to show the contents of the log file:
apt-get install fail2ban
To make fail2ban monitor PureFTPd and Dovecot create the file /etc/fail2ban/jail.local...
vi /etc/fail2ban/jail.local
... and insert:
[pureftpd]enabled =trueport =ftpfilter =pureftpdlogpath =/var/log/syslogmaxretry =3[dovecot-pop3imap]enabled =truefilter =dovecot-pop3imapaction =iptables-multiport[name=dovecot-pop3imap, port="pop3,pop3s,imap,imaps", protocol=tcp]logpath =/var/log/mail.logmaxretry =5 |
Then create the two filter files:
vi /etc/fail2ban/filter.d/pureftpd.conf
挿入:
[Definition] failregex=。*pure-ftpd:\(。* @ |
vi /etc/fail2ban/filter.d/dovecot-pop3imap.conf
挿入:
[Definition]failregex =(?:pop3-login|imap-login):.*(?:Authentication failure|Aborted login \(auth failed|Aborted login \(tried to use disabled|Disconnected \(auth failed|Aborted login \(\d+ authentication attempts).*rip=(?P |
Then restart fail2ban:
/etc/init.d/fail2ban再起動
20 Install SquirrelMail (Optional)
This step is entirely optional. If you would like to install Roundcube instead then skip this step and refer to https://www.howtoforge.com/how-to-install-roundcube-0.7-for-ispconfig-3-on-debian-squeeze. You can do so after installing ISPConfig 3. To install the SquirrelMail webmail client just run:
apt-get install squirrelmail
... and configure SquirrelMail:
squirrelmail-configure
We must tell SquirrelMail that we are using Dovecot-IMAP/-POP3:
SquirrelMail Configuration : Read: config.php (1.4.0)
---------------------------------------------------------
Main Menu --
1. Organization Preferences
2. Server Settings
3. Folder Defaults
4. General Options
5. Themes
6. Address Books
7. Message of the Day (MOTD)
8. Plugins
9. Database
10. Languages
D. Set pre-defined settings for specific IMAP servers
C Turn color on
S Save data
Q Quit
Command >> <-- D
SquirrelMail Configuration : Read: config.php
---------------------------------------------------------
While we have been building SquirrelMail, we have discovered some
preferences that work better with some servers that don't work so
well with others. If you select your IMAP server, this option will
set some pre-defined settings for that server.
Please note that you will still need to go through and make sure
everything is correct. This does not change everything. There are
only a few settings that this will change.
Please select your IMAP server:
bincimap = Binc IMAP server
courier = Courier IMAP server
cyrus = Cyrus IMAP server
dovecot = Dovecot Secure IMAP server
exchange = Microsoft Exchange IMAP server
hmailserver = hMailServer
macosx = Mac OS X Mailserver
mercury32 = Mercury/32
uw = University of Washington's IMAP server
gmail = IMAP access to Google mail (Gmail) accounts
quit = Do not change anything
Command >> <-- dovecot
SquirrelMail Configuration : Read: config.php
---------------------------------------------------------
While we have been building SquirrelMail, we have discovered some
preferences that work better with some servers that don't work so
well with others. If you select your IMAP server, this option will
set some pre-defined settings for that server.
Please note that you will still need to go through and make sure
everything is correct. This does not change everything. There are
only a few settings that this will change.
Please select your IMAP server:
bincimap = Binc IMAP server
courier = Courier IMAP server
cyrus = Cyrus IMAP server
dovecot = Dovecot Secure IMAP server
exchange = Microsoft Exchange IMAP server
hmailserver = hMailServer
macosx = Mac OS X Mailserver
mercury32 = Mercury/32
uw = University of Washington's IMAP server
gmail = IMAP access to Google mail (Gmail) accounts
quit = Do not change anything
Command >> dovecot
imap_server_type = dovecot
default_folder_prefix =
trash_folder = Trash
sent_folder = Sent
draft_folder = Drafts
show_prefix_option = false
default_sub_of_inbox = false
show_contain_subfolders_option = false
optional_delimiter = detect
delete_folder = false
Press any key to continue... <-- press a key
SquirrelMail Configuration : Read: config.php (1.4.0)
---------------------------------------------------------
Main Menu --
1. Organization Preferences
2. Server Settings
3. Folder Defaults
4. General Options
5. Themes
6. Address Books
7. Message of the Day (MOTD)
8. Plugins
9. Database
10. Languages
D. Set pre-defined settings for specific IMAP servers
C Turn color on
S Save data
Q Quit
Command >> <-- S
SquirrelMail Configuration : Read: config.php (1.4.0)
---------------------------------------------------------
Main Menu --
1. Organization Preferences
2. Server Settings
3. Folder Defaults
4. General Options
5. Themes
6. Address Books
7. Message of the Day (MOTD)
8. Plugins
9. Database
10. Languages
D. Set pre-defined settings for specific IMAP servers
C Turn color on
S Save data
Q Quit
Command >> <-- Q
Now you can find SquirrelMail in the /usr/share/squirrelmail/ directory.
After you have installed ISPConfig 3, you can access SquirrelMail as follows:
The ISPConfig apps vhost on port 8081 for nginx comes with a SquirrelMail configuration, so you can use http://server1.example.com:8081/squirrelmail or http://server1.example.com:8081/webmail to access SquirrelMail.
If you want to use a /webmail or /squirrelmail alias that you can use from your web sites, this is a bit more complicated than for Apache because nginx does not support global aliases. Therefore you have to define the aliases for each vhost from which you want to access SquirrelMail.
To do this, paste the following into the nginx Directives field on the Options tab of the web site in ISPConfig:
location /squirrelmail { root /usr/share/; index index.php index.html index.htm; location ~ ^/squirrelmail/(.+\.php)$ { try_files $uri =404; root /usr/share/; fastcgi_pass 127.0.0.1:9000; fastcgi_index index.php; fastcgi_param SCRIPT_FILENAME $document_root$fastcgi_script_name; include /etc/nginx/fastcgi_params; fastcgi_buffer_size 128k; fastcgi_buffers 256 4k; fastcgi_busy_buffers_size 256k; fastcgi_temp_file_write_size 256k; fastcgi_intercept_errors on; } location ~* ^/squirrelmail/(.+\.(jpg|jpeg|gif|css|png|js|ico|html|xml|txt))$ { root /usr/share/; } } location /webmail { rewrite ^/* /squirrelmail last; } |
If you use https instead of http for your vhost, you should add the line fastcgi_param HTTPS on; to your SquirrelMail configuration like this:
location /squirrelmail { root /usr/share/; index index.php index.html index.htm; location ~ ^/squirrelmail/(.+\.php)$ { try_files $uri =404; root /usr/share/; fastcgi_pass 127.0.0.1:9000; fastcgi_param HTTPS on; # <-- add this line fastcgi_index index.php; fastcgi_param SCRIPT_FILENAME $document_root$fastcgi_script_name; include /etc/nginx/fastcgi_params; fastcgi_buffer_size 128k; fastcgi_buffers 256 4k; fastcgi_busy_buffers_size 256k; fastcgi_temp_file_write_size 256k; fastcgi_intercept_errors on; } location ~* ^/squirrelmail/(.+\.(jpg|jpeg|gif|css|png|js|ico|html|xml|txt))$ { root /usr/share/; } } location /webmail { rewrite ^/* /squirrelmail last; } |
If you use both http and https for your vhost you should have added the relevant section into /etc/nginx/nginx.conf while setting up phpMyAdmin earlier in the tutorial.
Go to the nginx Directives field again, and instead of fastcgi_param HTTPS on; you add the line fastcgi_param HTTPS $fastcgi_https; so that you can use SquirrelMail for both http and https requests:
location /squirrelmail { root /usr/share/; index index.php index.html index.htm; location ~ ^/squirrelmail/(.+\.php)$ { try_files $uri =404; root /usr/share/; fastcgi_pass 127.0.0.1:9000; fastcgi_param HTTPS $fastcgi_https; # <-- add this line fastcgi_index index.php; fastcgi_param SCRIPT_FILENAME $document_root$fastcgi_script_name; include /etc/nginx/fastcgi_params; fastcgi_buffer_size 128k; fastcgi_buffers 256 4k; fastcgi_busy_buffers_size 256k; fastcgi_temp_file_write_size 256k; fastcgi_intercept_errors on; } location ~* ^/squirrelmail/(.+\.(jpg|jpeg|gif|css|png|js|ico|html|xml|txt))$ { root /usr/share/; } } location /webmail { rewrite ^/* /squirrelmail last; } |
The Perfect Server - Debian Squeeze (Debian 6.0) With BIND, Dovecot &Nginx [ISPConfig 3] - Page 7
21 Install ISPConfig 3
Before you start the ISPConfig installation ensure that Apache is stopped because phpMyAdmin will have installed Apache as a dependency. Should Apache2 already be installed on the system stop it now:
/etc/init.d/apache2 stop
and remove Apache's system startup links if you have not already done so in a previous step:
insserv -r apache2
Make sure that nginx is running:
/etc/init.d/nginx restart
If you have both Apache and nginx installed, the installer asks you which one you want to use:Apache and nginx detected. Select server to use for ISPConfig:(apache,nginx) [apache]:
Type nginx. If only Apache or nginx are installed, this is automatically detected by the installer, and no question is asked.
To install ISPConfig 3 from the latest released version, do this:
cd /tmp
wget http://www.ispconfig.org/downloads/ISPConfig-3-stable.tar.gz
tar xfz ISPConfig-3-stable.tar.gz
cd ispconfig3_install/install/
The next step is to run
php -q install.php
This will start the ISPConfig 3 installer. The installer will configure all services like Postfix, Dovecot, etc. for you. A manual setup as required for ISPConfig 2 (perfect setup guides) is not necessary.
example@unixlinux.online:/tmp/ispconfig3_install/install# php -q install.php
--------------------------------------------------------------------------------
_____ ___________ _____ __ _ ____
|_ _/ ___| ___ \ / __ \ / _(_) /__ \
| | \ `--.| |_/ / | / \/ ___ _ __ | |_ _ __ _ _/ /
| | `--. \ __/ | | / _ \| '_ \| _| |/ _` | |_ |
_| |_/\__/ / | | \__/\ (_) | | | | | | | (_| | ___\ \
\___/\____/\_| \____/\___/|_| |_|_| |_|\__, | \____/
__/ |
|___/
--------------------------------------------------------------------------------
>> Initial configuration
Operating System: Debian or compatible, unknown version.
Following will be a few questions for primary configuration so be careful.
Default values are in [brackets] and can be accepted with
Tap in "quit" (without the quotes) to stop the installer.
Select language (en,de) [en]: <-- ENTER
Installation mode (standard,expert) [standard]: <-- ENTER
Full qualified hostname (FQDN) of the server, eg server1.domain.tld [server1.example.com]: <-- ENTER
MySQL server hostname [localhost]: <-- ENTER
MySQL root username [root]: <-- ENTER
MySQL root password []: <-- yourrootsqlpassword
MySQL database to create [dbispconfig]: <-- ENTER
MySQL charset [utf8]: <-- ENTER
Apache and nginx detected. Select server to use for ISPConfig: (apache,nginx) [apache]: <-- nginx
Generating a 2048 bit RSA private key
........+++
.......+++
writing new private key to 'smtpd.key'
-----
You are about to be asked to enter information that will be incorporated
into your certificate request.
What you are about to enter is what is called a Distinguished Name or a DN.
There are quite a few fields but you can leave some blank
For some fields there will be a default value,
If you enter '.', the field will be left blank.
-----
Country Name (2 letter code) [AU]: <-- ENTER
State or Province Name (full name) [Some-State]: <-- ENTER
Locality Name (eg, city) []: <-- ENTER
Organization Name (eg, company) [Internet Widgits Pty Ltd]: <-- ENTER
Organizational Unit Name (eg, section) []: <-- ENTER
Common Name (eg, YOUR name) []: <-- ENTER
Email Address []: <-- ENTER
Configuring Jailkit
Configur ing SASL
Configuring PAM
Configuring Courier
Configuring Spamassassin
Configuring Amavisd
Configuring Getmail
Configuring Pureftpd
Configuring BIND
Configuring nginx
Configuring Vlogger
Configuring Apps vhost
Configuring Bastille Firewall
Configuring Fail2ban
Installing ISPConfig
ISPConfig Port [8080]: <-- ENTER
Do you want a secure (SSL) connection to the ISPConfig web interface (y,n) [y]: <-- ENTER
Generating RSA private key, 4096 bit long modulus
.............................................................................++
........................................................................................................................++
e is 65537 (0x10001)
You are about to be asked to enter information that will be incorporated
into your certificate request.
What you are about to enter is what is called a Distinguished Name or a DN.
There are q uite a few fields but you can leave some blank
For some fields there will be a default value,
If you enter '.', the field will be left blank.
-----
Country Name (2 letter code) [AU]: <-- ENTER
State or Province Name (full name) [Some-State]: <-- ENTER
Locality Name (eg, city) []: <-- ENTER
Organization Name (eg, company) [Internet Widgits Pty Ltd]: <-- ENTER
Organizational Unit Name (eg, section) []: <-- ENTER
Common Name (eg, YOUR name) []: <-- ENTER
Email Address []: <-- ENTER
Please enter the following 'extra' attributes
to be sent with your certificate request
A challenge password []: <-- ENTER
An optional company name []: <-- ENTER
writing RSA key
Configuring DBServer
Installing ISPConfig crontab
no crontab for root
no crontab for getmail
Restarting services ...
Rather than invoking init scripts through /etc/init.d, use the service(8)
utility, e.g. service mysql restart
Since the script you are attempting to invoke has been converted to an
Upstart job, you may also use the stop(8) and then start(8) utilities,
e.g. stop mysql ; start mysql. The restart(8) utility is also available.
mysql stop/waiting
mysql start/running, process 2463
* Stopping Postfix Mail Transport Agent postfix
...done.
* Starting Postfix Mail Transport Agent postfix
...done.
* Stopping SASL Authentication Daemon saslauthd
...done.
* Starting SASL Authentication Daemon saslauthd
...done.
Stopping amavisd: amavisd-new.
Starting amavisd: amavisd-new.
* Stopping ClamAV daemon clamd
...done.
* Starting ClamAV daemon clamd
Bytecode: Security mode set to "TrustSigned".
...done.
* Stopping Courier authentication services authdaemond
...done.
* Starting Courier authentication services authdaemond
...done.
* Stopping Courier IMAP server imapd
...done.
* Starting Courier IMAP server imapd
...done.
* Stopping Courier IMAP-SSL server imapd-ssl
...done.
* Starting Courier IMAP-SSL se rver imapd-ssl
...done.
* Stopping Courier POP3 server...
...done.
* Starting Courier POP3 server...
...done.
* Stopping Courier POP3-SSL server...
...done.
* Starting Courier POP3-SSL server...
...done.
* Restarting Mailman master qrunner mailmanctl
* Waiting...
...fail!
The master qrunner lock could not be acquired because it appears as if another
master qrunner is already running.
...done.
* Reloading PHP5 FastCGI Process Manager php5-fpm
...done.
Reloading nginx configuration: nginx.
Restarting ftp server: Running: /usr/sbin/pure-ftpd-mysql-virtualchroot -l mysql:/etc/pure-ftpd/db/mysql.conf -l pam -8 UTF-8 -O clf:/var/log/pure-ftpd/transfer.log -D -H -b -A -E -u 1000 -Y 1 -B
Installation completed.
You have mail in /var/mail/root
example@unixlinux.online:/tmp/ispconfig3_install/install#
The installer automatically configures all underlying services, so no manual configuration is needed.
You now also have the possibility to let the installer create an SSL vhost for the ISPConfig control panel, so that ISPConfig can be accessed using https:// instead of http://. To achieve this, just press ENTER when you see this question:Do you want a secure (SSL) connection to the ISPConfig web interface (y,n) [y]:.
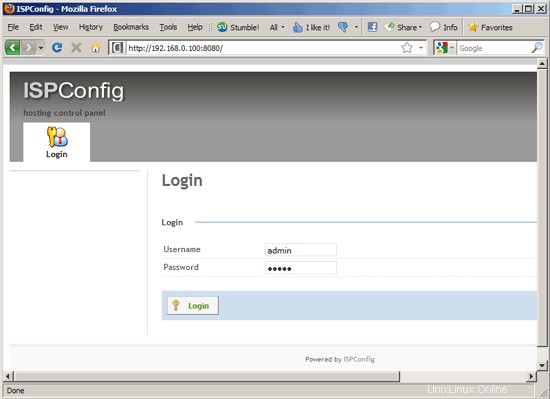
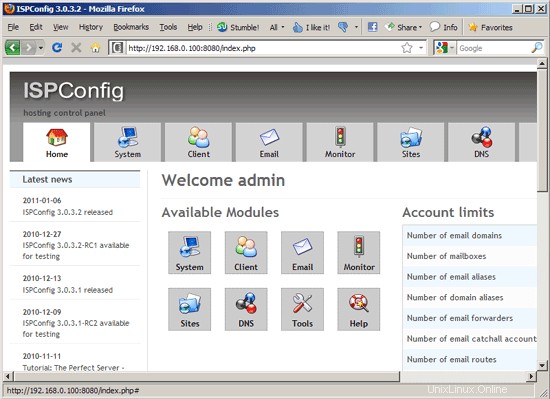
You can then access ISPConfig 3 under http(s)://server1.example.com:8080/ or http(s)://192.168.0.100:8080/ ( http or https depends on what you chose during installation). Log in with the username admin and the password admin (you should change the default password and possibly edit the admin username after your first login):
If your browser indicates a 502 Bad Gateway error, just restart PHP-FPM and try the URL again:
/etc/init.d/php5-fpm restart
It can take a couple of minutes for the control panel to be accessible. The system should be ready to be used except if you have an error in your mail.log then read the note below.
21.1 ISPConfig 3 Manual
ISPConfig 3の使用方法を学ぶために、ISPConfig3マニュアルをダウンロードすることを強くお勧めします。
約300ページで、ISPConfig(管理者、再販業者、クライアント)の背後にある概念をカバーし、ISPConfig 3をインストールおよび更新する方法を説明し、有効な入力の例とともにISPConfigのすべてのフォームとフォームフィールドのリファレンスを含み、 ISPConfig 3で最も一般的なタスクです。また、サーバーをより安全にする方法を示し、最後にトラブルシューティングのセクションがあります。
21.2 ISPConfig Monitor App For Android
ISPConfig Monitor Appを使用すると、サーバーのステータスを確認し、すべてのサービスが期待どおりに実行されているかどうかを確認できます。 TCPおよびUDPポートを確認し、サーバーにpingを実行できます。 In addition to that you can use this app to request details from servers that have ISPConfig installed (please note that the minimum installed ISPConfig 3 version with support for the ISPConfig Monitor App is 3.0.3.3! );これらの詳細には、ISPConfigコントロールパネルのモニターモジュールから知っているすべてのもの(サービス、メールとシステムのログ、メールキュー、CPUとメモリの情報、ディスク使用量、クォータ、OSの詳細、RKHunterログなど)が含まれます。 、ISPConfigはマルチサーバー対応であるため、ISPConfigマスターサーバーから制御されているすべてのサーバーを確認できます。
ダウンロードと使用方法については、http://www.ispconfig.org/ispconfig-3/ispconfig-monitor-app-for-android/にアクセスしてください。
22 Additional Notes
22.1 It is likely that emails are not sent or received so to correct this follow the steps below.
Postfix/Dovecot - warning SASL:Connect to private/auth failed:No such file or directory
Error:Postfix/Dovecot - warning:SASL:Connect to private/auth failed:No such file or directory
Similar error messages will appear in your mail log (cat /var/log/mail.log):
Aug 23 15:55:01 server1 postfix/smtpd[15194]:warning:SASL:Connect to private/auth failed:No such file or directory
Aug 23 15:55:01 server1 postfix/smtpd[15194]:fatal:no SASL authentication mechanisms
Aug 23 15:55:02 server1 postfix/master[3979]:warning:process /usr/libexec/postfix/smtpd pid 15194 exit status 1
Aug 23 15:55:02 server1 postfix/master[3979]:warning:/usr/libexec/postfix/smtpd:bad command startup -- throttling
Solution (this config should already exist after this tutorial):
Open your dovecot.conf /etc/dovecot/dovecot.conf, and make sure you have the following lines in it:
vi /etc/dovecot/dovecot.conf
[...]client { path =/var/spool/postfix/private/auth mode =0660 user =postfix group =postfix}[...] |
Restart Dovecot.
Then check if /var/spool/postfix/private/auth got created:
ls -l /var/spool/postfix/private/auth
Also make sure you add the following line into your /etc/postfix/main.cf file, sensibly on the line next to readme_directory =/usr/share/doc/postfix and restart postfix.
[...]queue_directory =/var/spool/postfix[...] |
/etc/init.d/postfix restart
22.1 OpenVZ
If the Debian server that you have just set up in this tutorial is an OpenVZ container (virtual machine), you should do this on the host system, assuming that the ID of the OpenVZ container is 101, replace it with the correct VPSID on your system:
VPSID=101
for CAP in CHOWN DAC_READ_SEARCH SETGID SETUID NET_BIND_SERVICE NET_ADMIN SYS_CHROOT SYS_NICE CHOWN DAC_READ_SEARCH SETGID SETUID NET_BIND_SERVICE NET_ADMIN SYS_CHROOT SYS_NICE
do
  vzctl set $VPSID --capability ${CAP}:on --save
done
23 Links
- Debian:http://www.debian.org/
- ISPConfig:http://www.ispconfig.org/