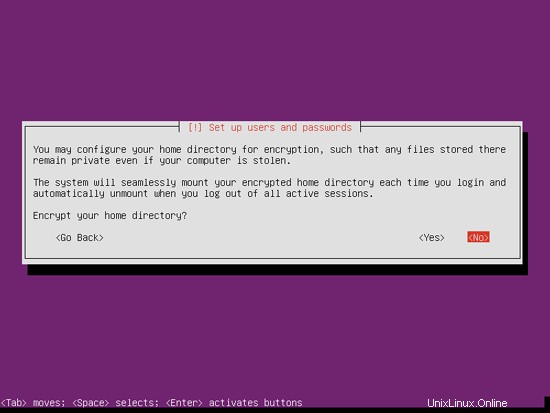
暗号化されたプライベートディレクトリは必要ないので、ここでは[いいえ]を選択します:
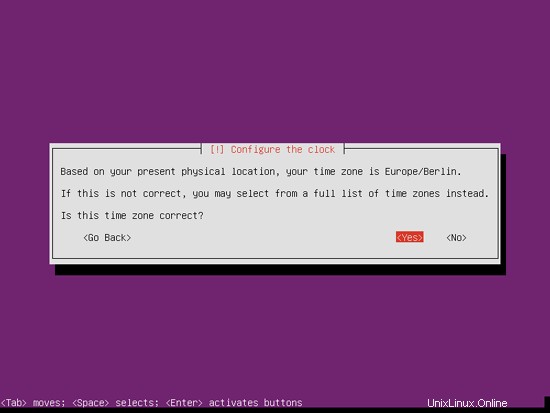
インストーラーがタイムゾーンを正しく検出したかどうかを確認してください。その場合は[はい]を選択し、そうでない場合は[いいえ]を選択します:
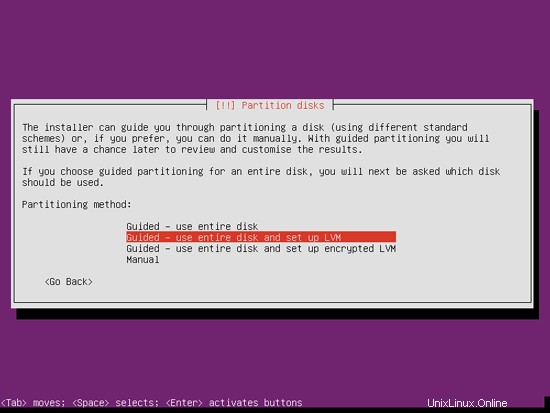
次に、ハードディスクをパーティション分割する必要があります。簡単にするために、ガイド付きを選択します-ディスク全体を使用してLVMをセットアップします-これにより、2つの論理ボリュームを持つ1つのボリュームグループが作成されます.1つは/ファイルシステム用、もう1つはスワップ用です(もちろん、パーティション分割は完全にあなた次第です-もし何をしているのかがわかっているので、パーティションを手動で設定することもできます。
パーティションを作成するディスクを選択します:

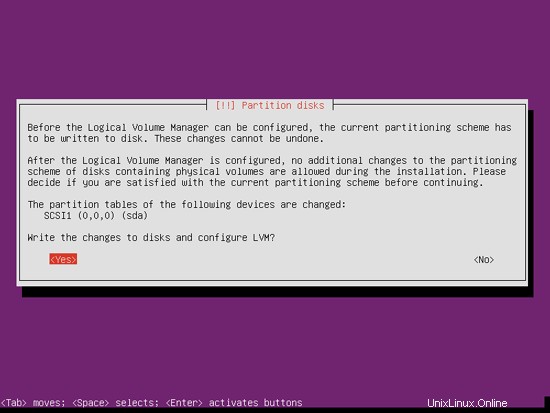
「ディスクに変更を書き込んでLVMを構成しますか?」というメッセージが表示されたら、「はい」を選択します:
[ガイド付き]を選択した場合-ディスク全体を使用してLVMをセットアップすると、パーティショナーはすべてのディスクスペースを使用する1つの大きなボリュームグループを作成します。これで、/およびスワップ用に論理ボリュームが使用するディスクスペースの量を指定できます。後で既存の論理ボリュームを拡張したり、新しい論理ボリュームを作成したりできるように、スペースを未使用のままにしておくことは理にかなっています。これにより、柔軟性が向上します。

終了したら、[ディスクに変更を書き込みますか?:
]というメッセージが表示されたら、[はい]をクリックします。

その後、新しいパーティションが作成され、フォーマットされます。
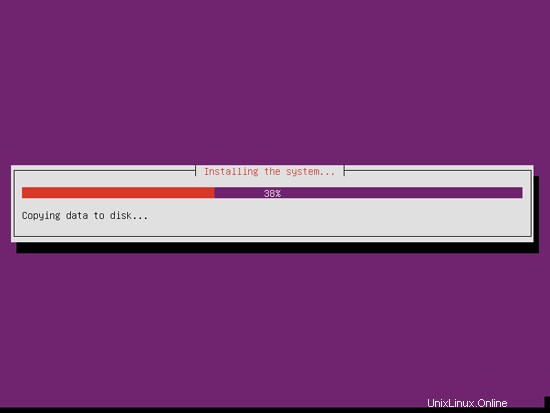
これでベースシステムがインストールされました:
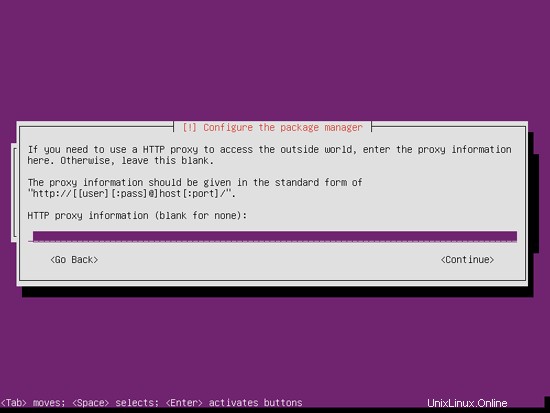
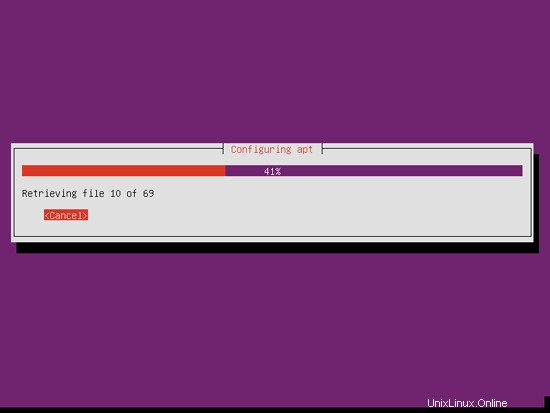
次に、パッケージマネージャーaptが構成されます。プロキシサーバーを使用してインターネットに接続している場合を除き、HTTPプロキシ行は空のままにします。
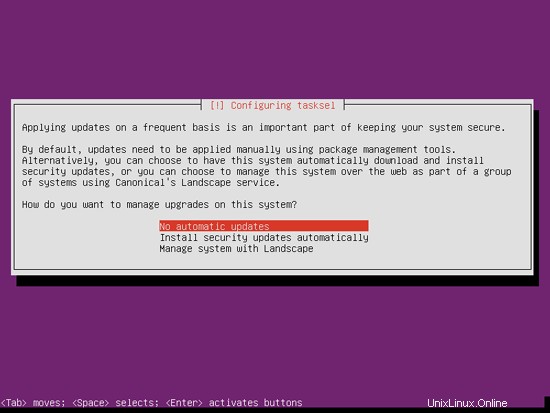
私は少し古風で、サーバーを手動で更新してより詳細に制御するのが好きなので、[自動更新なし]を選択します。もちろん、ここで何を選択するかはあなた次第です:
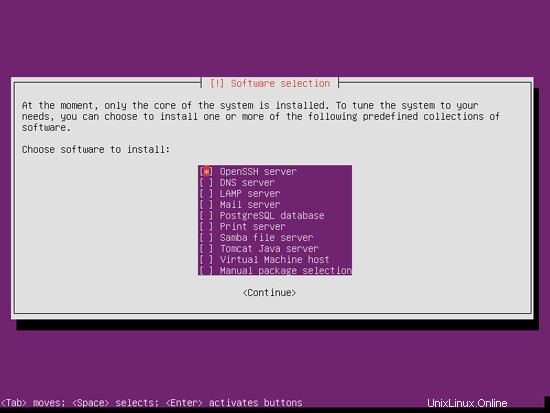
DNS、メール、LAMPサーバーが必要ですが、システムにインストールするものを完全に制御したいので、今はそれらを選択しません。必要なパッケージは後で手動でインストールします。ここで選択するのはOpenSSHサーバーだけなので、インストールが完了したらすぐにPuTTYなどのSSHクライアントを使用してシステムに接続できます。
インストールは続行されます:
GRUBブートローダーがインストールされます:
GRUBブートローダーをマスターブートレコードにインストールしますか?:

これで基本システムのインストールは完了です。インストールCDをCDドライブから取り出し、[続行]をクリックしてシステムを再起動します。

次のステップに進みます...
4ルート権限を取得する
再起動後、以前に作成したユーザー名(管理者など)でログインできます。このチュートリアルのすべてのステップをroot権限で実行する必要があるため、このチュートリアルのすべてのコマンドの前に文字列sudoを付けるか、「
」と入力して今すぐrootになります。sudo su
(実行してルートログインを有効にすることもできます
sudo passwd root
ルートにパスワードを与えます。その後、rootとして直接ログインできますが、これはさまざまな理由でUbuntu開発者やコミュニティに嫌われています。 http://ubuntuforums.org/showthread.php?t=765414を参照してください。)
5 SSHサーバーのインストール(オプション)
システムのインストール中にOpenSSHサーバーをインストールしなかった場合は、今すぐインストールできます。
apt-get install ssh openssh-server
今後は、PuTTYなどのSSHクライアントを使用して、ワークステーションからUbuntu 12.10サーバーに接続し、このチュートリアルの残りの手順に従うことができます。
6 vim-noxをインストールします(オプション)
このチュートリアルでは、テキストエディタとしてviを使用します。デフォルトのviプログラムは、UbuntuとDebianで奇妙な動作をします。これを修正するには、vim-noxをインストールします:
apt-get install vim-nox
(joeやnanoなどの別のテキストエディタを使用する場合は、これを行う必要はありません。)
7ネットワークの構成
UbuntuインストーラーはDHCP経由でネットワーク設定を取得するようにシステムを構成しているため、サーバーには静的IPアドレスが必要であるため、ここで変更する必要があります。 / etc / network / interfacesを編集します 必要に応じて調整します(このセットアップ例では、IPアドレス 192.168.0.100を使用します DNSサーバー8.8.8.8および8.8.4.4-Ubuntu12.04以降、/ etc / resolv.confを直接編集することはできなくなりましたが、ネットワーク構成でネームサーバーを指定する必要があります-
を参照してください。man resolvconf
詳細については):
vi / etc / network / interfaces
#このファイルには、システムで使用可能なネットワークインターフェイス#とそれらをアクティブ化する方法が記載されています。詳細については、interfaces(5)を参照してください。#ループバックネットワークinterfaceauto loiface lo inet loopback#プライマリネットワークinterfaceauto eth0ifaceeth0inet静的アドレス192.168.0.100ネットマスク255.255.255.0ネットワーク192.168.0.0ブロードキャスト192.168.0.255ゲートウェイ192.168.0.1dns-ネームサーバー8.8.8.88.8.4.4 |
次に、ネットワークを再起動します:
/etc/init.d/networkingrestart
次に、/ etc/hostsを編集します。次のようにします:
vi / etc / hosts
127.0.0.1 localhost.localdomain localhost192.168.0.100 server1.example.com server1#IPv6対応ホストには次の行が望ましいです。:1ip6 -localhost ip6-loopbackfe00 ::0 ip6-localnetff00 ::0 ip6-mcastprefixff02 ::1 ip6-allnodesff02 ::2 ip6-allrouters |
今すぐ実行
 echo server1.example.com> /etc/hostname
/etc/init.d/hostname restart
その後、実行します
 hostname
 hostname -f
両方ともserver1.example.comが表示されるはずです。
nginx vhostでIPv6アドレスを使用する場合は、ISPConfigでIPv6 vhostを作成する前に、次の手順を実行してください。
/etc/sysctl.confを開きます...
vi /etc/sysctl.conf
...そしてnet.ipv6.bindv6only=1:
という行を追加します [...] net.ipv6.bindv6only =1 |
実行...
sysctl -p
...その後、変更を有効にします。
8/etc/apt/sources.listを編集してLinuxインストールを更新する
/etc/apt/sources.listを編集します。コメントアウトするか、ファイルからインストールCDを削除し、ユニバースおよびマルチバースリポジトリが有効になっていることを確認します。次のようになります:
vi /etc/apt/sources.list
## deb cdrom:[Ubuntu-Server 12.10 _Quantal Quetzal_-リリースamd64(20121017.2)] / quantal mainstricted#deb cdrom:[Ubuntu-Server 12.10 _Quantal Quetzal_-リリースamd64(20121017.2)] / quantal main limited#distribution.deb http://de.archiveの新しいバージョンにアップグレードする方法についてはhttp://help.ubuntu.com/community/UpgradeNotesを参照してください。 ubuntu.com/ubuntu/ quantal mainstricteddeb-src http://de.archive.ubuntu.com/ubuntu/ quantal mainstricted##主要なバグ修正アップデートは##distribution.debの最終リリース後に作成されましたhttp:// de.archive.ubuntu.com/ubuntu/ quantal-updates main requireddeb-src http://de.archive.ubuntu.com/ubuntu/ quantal-updates mainstricted ## N.B.このリポジトリのソフトウェアは、Ubuntu##チームによって完全にサポートされていません。また、ユニバースのソフトウェアは、Ubuntuセキュリティチームから##レビューやアップデートを受け取らないことに注意してください。debhttp://de.archive.ubuntu.com/ubuntu/ quantal universedeb-src http://de.archive。 ubuntu.com/ubuntu/ quantal universedeb http://de.archive.ubuntu.com/ubuntu/ quantal-updates universedeb-src http://de.archive.ubuntu.com/ubuntu/ quantal-updates universe ## N.B.このリポジトリのソフトウェアは、Ubuntu ##チームによって完全にサポートされておらず、無料のライセンスが適用されていない可能性があります。 ##ソフトウェアを使用する権利についてご満足ください。また、## multiverseのソフトウェアは、Ubuntu##セキュリティチームからレビューやアップデートを受け取らないことに注意してください。debhttp://de.archive.ubuntu.com/ubuntu/ quantal multiversedeb-src http://de。 archive.ubuntu.com/ubuntu/ quantal multiversedeb http://de.archive.ubuntu.com/ubuntu/ quantal-updates multiversedeb-src http://de.archive.ubuntu.com/ubuntu/ quantal-updates multiverse ## N.B.このリポジトリのソフトウェアは、メインリリースに含まれているものほど広範囲にテストされていない可能性がありますが、##便利な機能を提供する可能性のある一部のアプリケーションの新しいバージョンが含まれています。##また、バックポートのソフトウェアは受信しないことに注意してくださいレビュー##またはUbuntuセキュリティチームからの更新.debhttp://de.archive.ubuntu.com/ubuntu/quantal-backportsメイン制限付きユニバースmultiversedeb-srchttp://de.archive.ubuntu.com/ubuntu/ quantal-backportsメイン制限付きユニバースmultiversedebhttp://security.ubuntu.com/ubuntuquantal-securityメインrestricteddeb-srchttp://security.ubuntu.com/ubuntuquantal-securityメインrestricteddebhttp://security.ubuntu.com / ubuntu quantal-security universedeb-src http://security.ubuntu.com/ubuntu quantal-security universedeb http://security.ubuntu.com/ubuntu quantal-security multiversedeb-src http://security.ubuntu.com/ ubuntu quantal-security multiverse ##次の2行のコメントを外して、Canonicalの##'部分からソフトウェアを追加しますner'repository。##このソフトウェアはUbuntuの一部ではありませんが、Canonicalと##それぞれのベンダーによってUbuntuユーザーへのサービスとして提供されています。#deb http://archive.canonical.com/ubuntu quantalpartner#deb- src http://archive.canonical.com/ubuntu quantalpartner ##次の2行のコメントを外して、Ubuntuの##'extras'リポジトリからソフトウェアを追加します。##このソフトウェアはUbuntuの一部ではありませんが、サードパーティによって提供されています。 ##最新のソフトウェアを出荷したい開発者。#deb http://extras.ubuntu.com/ubuntu quantal main#deb-src http://extras.ubuntu.com/ubuntu quantal main |
次に実行します
apt-get update
aptパッケージデータベースを更新するには
apt-get upgrade
最新のアップデートをインストールします(ある場合)。更新の一部として新しいカーネルがインストールされていることがわかった場合は、後でシステムを再起動する必要があります。
再起動
9デフォルトのシェルを変更する
/ bin/shは/bin/ dashへのシンボリックリンクですが、/ bin/dashではなく/bin/bashが必要です。したがって、これを行います:
dpkg-reconfigure dash
デフォルトのシステムシェル(/ bin / sh)としてダッシュを使用しますか? <-いいえ
これを行わないと、ISPConfigのインストールが失敗します。
10AppArmorを無効にする
AppArmorは、拡張セキュリティを提供するセキュリティ拡張機能(SELinuxと同様)です。私の意見では、安全なシステムを構成するためにそれを必要とせず、通常、利点よりも多くの問題を引き起こします(一部のサービスが期待どおりに機能しなかったため、1週間のトラブルシューティングを行った後、それを考えてください。すべてが問題ないことを確認してください。AppArmorだけが問題を引き起こしていました)。したがって、無効にします(後でISPConfigをインストールする場合は必須です)。
次のように無効にできます:
 /etc/init.d/apparmor stop
 update-rc.d -f apparmor remove
 apt-get remove apparmor apparmor-utils
11システム時計を同期する
システムクロックをNTPと同期することをお勧めします( n etwork t ime p rotocol)インターネット上のサーバー。実行するだけです
apt-get install ntp ntpdate
システム時刻は常に同期されます。
12 Postfix、Dovecot、MySQL、phpMyAdmin、rkhunter、binutilsをインストールします
Postfix、Dovecot、MySQL、rkhunter、binutilsを1つのコマンドでインストールできます:
apt-get install postfix postfix-mysql postfix-doc mysql-client mysql-server openssl getmail4 rkhunter binutils dovecot-imapd dovecot-pop3d dovecot-mysql dovecot-sieve sudo
次の質問があります:
MySQL「root」ユーザーの新しいパスワード:<-yourrootsqlpassword
MySQL「root」ユーザーの繰り返しパスワード:<-yourrootsqlpassword
メール構成の一般的なタイプ:<-インターネットサイト
システムメール名:<-server1.example.com
次に、PostfixでTLS / SSLと送信ポートを開きます:
vi /etc/postfix/master.cf
送信セクションとsmtpsセクションのコメントを解除します(不要なため、-o milter_macro_daemon_name =ORIGINATINGのままにします):
[...] subject inet n --- --- smtpd -o syslog_name =postfix / subject -o smtpd_tls_security_level =encrypt -o smtpd_sasl_auth_enable =yes- o smtpd_client_restrictions =permit_sasl_authenticated、reject#-o milter_macro_daemon_name =ORIGINATINGsmtps inet n --- --- smtpd -o syslog_name =postfix / smtps -o smtpd_tls_wrappermode =yes -o smtpd_sasl_auth_enable =...] |
その後、Postfixを再起動します:
/etc/init.d/postfix restart
MySQLがローカルホストだけでなくすべてのインターフェースでリッスンするようにしたいので、/ etc / mysql / my.cnfを編集して、bind-address =127.0.0.1:
の行をコメントアウトします。vi /etc/mysql/my.cnf
[...]#スキップネットワークの代わりに、デフォルトでは、互換性が高く安全性が低くないローカルホストでのみリッスンするようになりました。 #bind-address =127.0.0.1 [...] |
次に、MySQLを再起動します:
/etc/init.d/mysql restart
次に、ネットワークが有効になっていることを確認します。実行
netstat -tap | grep mysql
出力は次のようになります。
[メール保護]:〜#netstat -tap | grep mysql
tcp 0 0 *:mysql *:* LISTEN 21298 / mysqld
example@unixlinux.online:〜#
13 Amavisd-new、SpamAssassin、およびClamavをインストールします
amavisd-new、SpamAssassin、およびClamAVをインストールするには、
を実行します。apt-get install amavisd-new spamassassin clamav clamav-daemon zoo unzip bzip2 arj nomarch lzop cabextract apt-listchanges libnet-ldap-perllibauthen-sasl-perlclamav-docsデーモンlibio-string-perllibio-socket-ssl- perl libnet-ident-perl zip libnet-dns-perlISPConfig 3のセットアップでは、SpamAssassinフィルターライブラリを内部的にロードするamavisdを使用するため、SpamAssassinを停止してRAMを解放できます。
/etc/init.d/spamassassin stop
update-rc.d -f spamassassin remove
14 Nginx、PHP5(PHP-FPM)、およびFcgiwrapをインストールします
NginxはUbuntuのパッケージとして提供されており、次のようにインストールできます。
apt-get install nginxApache2がすでにシステムにインストールされている場合は、今すぐ停止してください...
/etc/init.d/apache2停止...そしてApacheのシステム起動リンクを削除します:
update-rc.d -f apache2 removeその後nginxを開始します:
/etc/init.d/nginx start(Apache2とnginxの両方がインストールされている場合、ISPConfig 3インストーラーはどちらを使用するかを尋ねます。この場合はnginxと答えます。両方の両方がインストールされている場合、ISPConfigは必要な構成を自動的に行います。)
>PHP5をPHP-FPMを介してnginxで動作させることができます(PHP-FPM(FastCGI Process Manager)は、あらゆるサイズのサイト、特に忙しいサイトに役立ついくつかの追加機能を備えた代替のPHP FastCGI実装です)。>>
apt-get install php5-fpmPHP-FPMは、ソケット/var/run/php5-fpm.sockでFastCGIサーバーを実行するデーモンプロセス(initスクリプト/etc/init.d/php5-fpmを使用)です。
PHPでMySQLをサポートするには、php5-mysqlパッケージをインストールします。他のPHP5モジュールをインストールすることをお勧めします。また、アプリケーションでそれらが必要になる場合もあります。次のような利用可能なPHP5モジュールを検索できます:
apt-cache search php5必要なものを選び、次のようにインストールします:
apt-get install php5-mysql php5-curl php5-gd php5-intl php-pear php5-imagick php5-imap php5-mcrypt php5-memcache php5-ming php5-ps php5-pspell php5-recode php5-snmp php5 -sqlite php5-tidy php5-xmlrpc php5-xslXcacheは、PHP中間コードをキャッシュおよび最適化するための無料のオープンPHPオペコードキャッシャーです。これは、eAcceleratorやAPCなどの他のPHPオペコードキャッシャーに似ています。 PHPページを高速化するために、これらのいずれかをインストールすることを強くお勧めします。
Xcacheは次のようにインストールできます:
apt-get install php5-xcachePHP-FPMをリロードします:
/etc/init.d/php5-fpmリロードnginxでCGIをサポートするには、Fcgiwrapをインストールします。
Fcgiwrapは、複雑なCGIスクリプトでも機能するCGIラッパーであり、各vhostが独自のcgi-binディレクトリを使用できるため、共有ホスティング環境で使用できます。
fcgiwrapパッケージをインストールします:
apt-get install fcgiwrapインストール後、fcgiwrapデーモンはすでに開始されているはずです。そのソケットは/var/run/fcgiwrap.socketです。実行されていない場合は、/ etc / init.d/fcgiwrapスクリプトを使用して開始できます。
それでおしまい!これで、nginx vhostを作成すると、ISPConfigが正しいvhost構成を処理します。
14.1追加のPHPバージョン
今後のISPConfig3.0.5以降、FastCGIおよびPHP-FPMを介して実行できる複数のPHPバージョンを1つのサーバー(ISPConfigで選択可能)に配置できるようになります。 Ubuntu 12.10に付属するPHPのバージョンは5.4.6なので、UbuntuのデフォルトのPHPがインストールされているときに同じサーバーで使用できるようにPHP5.3.18をビルドする方法を説明します。 /opt/php-5.3.18ディレクトリにPHP5.3.18をインストールします。
PHP 5.3.18をダウンロードして解凍します:
mkdir /opt/php-5.3.18
mkdir / usr / local / src / php5-build
cd / usr / local / src / php5-build
wget http:/ /de.php.net/get/php-5.3.18.tar.bz2/from/this/mirror -O php-5.3.18.tar.bz2
tar jxf php-5.3.18.tar.bz2cd php-5.3.18 /PHP5を構築するための前提条件をインストールします:
apt-get build-dep php5apt-get install libfcgi-dev libfcgi0ldbl libjpeg62-dbg libmcrypt-dev libssl-devビルドPHP5.3.18を次のように構成します(./configureコマンドは必要に応じて調整できます。
を参照してください。./ configure --help利用可能なすべてのオプションを表示します。別の./configureコマンドを使用すると、追加のライブラリが必要になる可能性があります。そうしないと、ビルドプロセスが失敗します):
./ configure \
--prefix =/ opt / php-5.3.18 \
--with-pdo-pgsql \
--with-zlib-dir \
-with-freetype-dir \
--enable-fpm \
--enable-mbstring \
--with-libxml-dir =/ usr \
- -enable-soap \
--enable-calendar \
--with-curl --with-mcrypt \
--with-zlib \
--with-gd \
--with-pgsql \
--disable-rpath \
--enable-inline-optimization \
--with-bz2 \
--with- zlib \
--enable-sockets \
--enable-sysvsem \
--enable-sysvshm \
--enable-pcntl \
--enable- mbregex \
--with-mhash \
--enable-zip \
--with-pcre-regex \
--with-mysql \
- with-pdo-mysql \
--with-mysqli \
--with-jpeg-dir =/ usr \
--with-png-dir =/ usr \
--enable-gd-native-ttf \
--with-openssl \
--with-fpm-user =www-data \
--with-fpm-group =www-データ\
--with-libdir =/ lib / x86_64-linux-gnumake
make installphp.iniとphp-fpm.confを正しい場所にコピーします:
cp /usr/local/src/php5-build/php-5.3.18/php.ini-production /opt/php-5.3.18/lib/php.inicp /opt/php-5.3.18/etc/php-fpm.conf.default /opt/php-5.3.18/etc/php-fpm.conf/opt/php-5.3.18/etc/php-fpm.confを開き、次の設定を調整します-リッスンラインで未使用のポートを使用する必要があります(例:8999;ポート9000はUbuntuのデフォルトのPHP-FPMですでに使用されている可能性があります)、最後にinclude =/ opt / php-5.3.18 / etc / pool.d /*。confという行を追加する必要があります:
vi /opt/php-5.3.18/etc/php-fpm.conf
[...] pid =run / php-fpm.pid [...] user =www-datagroup =www-data [.. 。]listen=127.0.0.1:8999 [...] include =/opt/php-5.3.18/etc/pool.d/*.conf |
PHP-FPMのプールディレクトリを作成します:
mkdir /opt/php-5.3.18/etc/pool.d
次に、PHP-FPMの初期化スクリプトを作成します。
vi /etc/init.d/php-5.3.18-fpm
#! / bin / sh ### BEGIN INIT INFO#提供:php-5.3.18-fpm#必須-開始:$ all#必須-停止:$ all#デフォルト-開始:2 3 4 5#デフォルト-停止:0 1 6#簡単な説明:php-5.3.18-fpm#を開始します説明:PHP FastCGIProcessManagerデーモンを開始します###ENDINIT INFOphp_fpm_BIN =/ opt / php-5.3.18 / sbin / php-fpmphp_fpm_CONF =/ opt / php -5.3.18 / etc / php-fpm.confphp_fpm_PID =/ opt / php-5.3.18 / var / run / php-fpm.pidphp_opts ="--fpm-config $ php_fpm_CONF" wait_for_pid(){try =0 while test $ try -lt 35; 'created'でcase"$1"を実行)if [-f "$ 2"];次にtry=''break fi;; '削除済み')if [! -f "$ 2"];次にtry=''break fi;; esacecho-n。 try =`expr $ try + 1` sleep 1 done} case" $ 1 "in start)echo -n" Starting php-fpm "$ php_fpm_BIN $ php_opts if [" $? " !=0];次に、echo "failed" exit 1 fi wait_for_pid created $ php_fpm_PID if [-n "$ try"];次に、echo "failed" exit 1 else echo "done" fi;; stop)echo -n"php-fpmを正常にシャットダウンします"if[! -r $ php_fpm_PID];次に、「警告、pidファイルが見つかりません-php-fpmが実行されていませんか?」とエコーします。 exit 1 fi kill -QUIT `cat $ php_fpm_PID` wait_for_pid remove $ php_fpm_PID if [-n" $ try "];次に、echo"failed。force-exit"exit1を使用します。elseecho"done" echo "done" fi;; force-quit)echo -n "Tertaining php-fpm" if [! -r $ php_fpm_PID];次に、「警告、pidファイルが見つかりません-php-fpmが実行されていませんか?」とエコーします。 exit 1 fi kill -TERM `cat $php_fpm_PID`wait_for_pidが$php_fpm_PIDを削除しましたif[-n"$ try "];次に、echo "failed" exit 1 else echo "done" fi;;再起動)$0停止$0開始;; reload)echo -n "Reload service php-fpm" if [! -r $ php_fpm_PID];次に、「警告、pidファイルが見つかりません-php-fpmが実行されていませんか?」とエコーします。 exit 1 fi kill -USR2 `cat $ php_fpm_PID` echo" done ";; *)echo "Usage:$ 0 {start | stop | force-quit | restart | reload}" exit 1;; esac |
initスクリプトを実行可能にし、システム起動リンクを作成します。
 chmod 755 /etc/init.d/php-5.3.18-fpm
 insserv php-5.3.18-fpm
最後にPHP-FPMを開始します:
/etc/init.d/php-5.3.18-fpm start
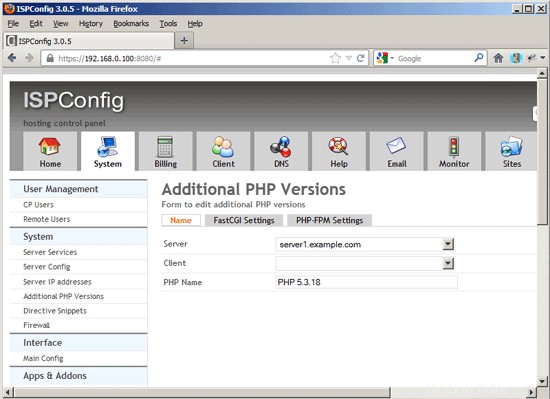
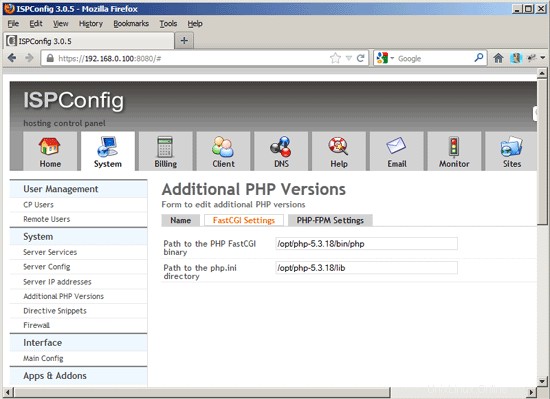
ISPConfig 3.0.5では、[システム]>[追加のPHPバージョン]で新しいPHPバージョンを構成できます。 [名前]タブで、PHPバージョンの名前を入力するだけです(例:PHP 5.3.18)-このPHPバージョンは、ISPConfigのWebサイト設定でこの名前の下に一覧表示されます:
このPHPバージョンをFastCGIで使用する場合は、[FastCGI設定]タブに移動し([PHP-FPM設定]タブは空のままにすることができます)、次のようにフィールドに入力します。
このPHPバージョンをPHP-FPMで使用する場合は、[PHP-FPM設定]タブに移動し([FastCGI設定]タブは空のままにすることができます)、次のようにフィールドに入力します。

14.2phpMyAdminをインストール
次のようにphpMyAdminをインストールします。
apt-get install phpmyadmin
次の質問が表示されます:
自動的に再構成するWebサーバー:<-noneを選択します(オプションとしてapache2とlighttpdのみが使用可能であるため)
dbconfig-commonを使用してphpmyadminのデータベースを構成しますか? <-いいえ
これで、phpMyAdminは/ usr / share /phpmyadmin/ディレクトリにあります。
ISPConfig 3をインストールした後、次のようにphpMyAdminにアクセスできます。
nginxのポート8081のISPConfigアプリvhostにはphpMyAdmin構成が付属しているため、http://server1.example.com:8081/phpmyadminまたはhttp://server1.example.com:8081/phpMyAdminを使用してphpMyAdminにアクセスできます。
Webサイトから使用できる/phpmyadminまたは/phpMyAdminエイリアスを使用する場合、nginxにはグローバルエイリアス(つまり、すべてのvhostに定義できるエイリアス)がないため、これはApacheよりも少し複雑です。したがって、それぞれに対してこれらのエイリアスを定義する必要があります phpMyAdminにアクセスするvhost。
これを行うには、ISPConfigのWebサイトの[オプション]タブにあるnginxディレクティブフィールドに以下を貼り付けます。
location / phpmyadmin {root / usr / share /; index index.php index.html index.htm;場所〜^ / phpmyadmin /(。+ \。php)$ {try_files $ uri =404;ルート/usr/ share /; fastcgi_pass unix:/var/run/php5-fpm.sock; fastcgi_index index.php; fastcgi_param SCRIPT_FILENAME $ request_filename; / etc / nginx/fastcgi_paramsをインクルードします。 fastcgi_param PATH_INFO $ fastcgi_script_name; fastcgi_buffer_size 128k; fastcgi_buffers 256 4k; fastcgi_busy_buffers_size 256k; fastcgi_temp_file_write_size 256k; fastcgi_intercept_errors on; }場所〜* ^ / phpmyadmin /(。+ \。(jpg | jpeg | gif | css | png | js | ico | html | xml | txt))$ {root / usr / share /; }} location / phpMyAdmin {rewrite ^ / * / phpmyadmin last; } |
http sを使用する場合 vhostのhttpの代わりに、fastcgi_paramHTTPSという行を追加する必要があります。次のようにphpMyAdmin構成に追加します:
location / phpmyadmin {root / usr / share /; index index.php index.html index.htm;場所〜^ / phpmyadmin /(。+ \。php)$ {try_files $ uri =404;ルート/usr/ share /; fastcgi_pass unix:/var/run/php5-fpm.sock; fastcgi_paramHTTPSオン; #<-この行を追加fastcgi_index index.php; fastcgi_param SCRIPT_FILENAME $ request_filename; / etc / nginx/fastcgi_paramsをインクルードします。 fastcgi_param PATH_INFO $ fastcgi_script_name; fastcgi_buffer_size 128k; fastcgi_buffers 256 4k; fastcgi_busy_buffers_size 256k; fastcgi_temp_file_write_size 256k; fastcgi_intercept_errors on; }場所〜* ^ / phpmyadmin /(。+ \。(jpg | jpeg | gif | css | png | js | ico | html | xml | txt))$ {root / usr / share /; }} location / phpMyAdmin {rewrite ^ / * / phpmyadmin last; } |
vhostにhttpとhttpsの両方を使用する場合は、訪問者がhttpまたはhttpsのどちらを使用して設定するかを決定する、/ etc / nginx /nginx.confのhttp{}セクションに次のセクションを追加する必要があります(インクルード行の前)。それに応じて、$ fastcgi_https変数(phpMyAdmin構成で使用します):
vi /etc/nginx/nginx.conf
[...] http {[...]##HTTPSが使用されていることを検出するmap$schema $fastcgi_https{デフォルトオフ; https on; } [...]} [...] |
後でnginxをリロードすることを忘れないでください:
/etc/init.d/nginxリロード
次に、nginx Directivesフィールドに再度移動し、fastcgi_paramHTTPSの代わりに;行fastcgi_paramHTTPS$fastcgi_httpsを追加します。 httpリクエストとhttpsリクエストの両方にphpMyAdminを使用できるようにします。
location / phpmyadmin {root / usr / share /; index index.php index.html index.htm;場所〜^ / phpmyadmin /(。+ \。php)$ {try_files $ uri =404;ルート/usr/ share /; fastcgi_pass unix:/var/run/php5-fpm.sock; fastcgi_param HTTPS $ fastcgi_https; #<-この行を追加fastcgi_index index.php; fastcgi_param SCRIPT_FILENAME $ request_filename; / etc / nginx/fastcgi_paramsをインクルードします。 fastcgi_param PATH_INFO $ fastcgi_script_name; fastcgi_buffer_size 128k; fastcgi_buffers 256 4k; fastcgi_busy_buffers_size 256k; fastcgi_temp_file_write_size 256k; fastcgi_intercept_errors on; }場所〜* ^ / phpmyadmin /(。+ \。(jpg | jpeg | gif | css | png | js | ico | html | xml | txt))$ {root / usr / share /; }} location / phpMyAdmin {rewrite ^ / * / phpmyadmin last; } |
15Mailmanをインストール
バージョン3.0.4以降、ISPConfigではMailmanメーリングリストを管理(作成/変更/削除)することもできます。この機能を利用する場合は、次のようにMailmanをインストールします。
apt-get install mailman
少なくとも1つの言語を選択してください。例:
サポートする言語:<-en(英語)
不足しているサイトリスト<-Ok
Mailmanを開始する前に、mailmanという最初のメーリングリストを作成する必要があります。
newlist mailman
[メール保護]:〜#newlist mailman
リストを実行している人のメールアドレスを入力します:<-admin email address、e.g. [メール保護]
最初のメールマンパスワード:<-メールマンリストの管理者パスワード
メールリストの作成を完了するには、/ etc / aliases(または
同等の)ファイルを次のように編集する必要があります。次の行を追加し、場合によっては
`newaliases'プログラムを実行します:
## mailman mailing list
mailman:" | / var / lib / mailman / mail / mailman post mailman "
mailman-admin:" | / var / lib / mailman / mail / mailman admin mailman "
mailman-bounces:" | / var / lib / mailman / mail / mailman bounces mailman "
mailman-confirm: "| / var / lib / mailman / mail / mailman confirm mailman"
mailman-join: "| / var / lib / mailman / mail / mailman join mailman"
mailman- Leave: "| / var / lib / mailman / mail / mailman Leave mailman"
mailman-owner: "| / var / lib / mailman / mail / mailman owner mailman"
mailman-request: "| / var / lib / mailman / mail / mailman request mailman "
mailman-subscribe:" | / var / lib / mailman / mail / mailman subscribe mailman "
mailman-un subscribe: "| / var / lib / mailman / mail / mailman unsubscribe mailman"
Enterキーを押して、mailmanの所有者に通知します... <-ENTER
example@unixlinux.online :〜#
後で/etc/aliasesを開きます...
vi / etc / aliases
...そして次の行を追加します:
[...] ## mailman mailing listmailman: "| / var / lib / mailman / mail / mailman post mailman" mailman-admin: " | / var / lib / mailman / mail / mailman admin mailman "mailman-bounces:" | / var / lib / mailman / mail / mailman bounces mailman "mailman-confirm:" | / var / lib / mailman / mail /mailmanconfirm mailman "mailman-join:" | / var / lib / mailman / mail / mailman join mailman "mailman-leave:" | / var / lib / mailman / mail / mailman Leave mailman "mailman-owner:" | / var / lib / mailman / mail / mailman owner mailman "mailman-request:" | / var / lib / mailman / mail / mailman request mailman "mailman-subscribe:" | / var / lib / mailman / mail / mailman subscribe mailman "mailman-unsubscribe :"| / var / lib / mailman / mail / mailman unsubscribe mailman" |
実行
newaliases
その後、Postfixを再起動します:
/etc/init.d/postfix restart
次に、Mailmanデーモンを起動します:
/etc/init.d/mailman start
ISPConfig 3をインストールした後、次のようにMailmanにアクセスできます。
nginxのポート8081のISPConfigアプリvhostにはMailman構成が付属しているため、http://server1.example.com:8081 / cgi-bin / mailman / admin/
WebサイトからMailmanを使用する場合、nginxにはグローバルエイリアス(つまり、すべてのvhostに定義できるエイリアス)がないため、これはApacheよりも少し複雑です。したがって、それぞれに対してこれらのエイリアスを定義する必要があります Mailmanにアクセスするvhost。
これを行うには、ISPConfigのWebサイトの[オプション]タブにあるnginxディレクティブフィールドに以下を貼り付けます。
location / cgi-bin / mailman {root / usr / lib /; fastcgi_split_path_info(^ / cgi-bin / mailman / [^ /] *)(。*)$; / etc / nginx/fastcgi_paramsをインクルードします。 fastcgi_param SCRIPT_FILENAME $ document_root $ fastcgi_script_name; fastcgi_param PATH_INFO $ fastcgi_path_info; fastcgi_param PATH_TRANSLATED $ document_root $ fastcgi_path_info; fastcgi_intercept_errors on; fastcgi_pass unix:/var/run/fcgiwrap.socket; }場所/images/mailman{エイリアス/usr/ share / images / mailman; }場所/pipermail{エイリアス/var/ lib / mailman / archives / public;自動インデックスオン; } |
これにより、vhostのエイリアス/ cgi-bin / mailman /が定義されます。つまり、http://
http://
16PureFTPdとクォータのインストール
PureFTPdとquotaは、次のコマンドでインストールできます:
apt-get install pure-ftpd-common pure-ftpd-mysqlquotaquotatool
ファイル/etc/ default / pure-ftpd-common ...
を編集しますvi / etc / default / pure-ftpd-common
...そして、開始モードがスタンドアロンに設定されていることを確認し、VIRTUALCHROOT =trueを設定します:
[...] STANDALONE_OR_INETD =Standalone [...] VIRTUALCHROOT =true [...] |
次に、FTPおよびTLSセッションを許可するようにPureFTPdを構成します。 FTPは、すべてのパスワードとすべてのデータがクリアテキストで転送されるため、非常に安全でないプロトコルです。 TLSを使用することで、通信全体を暗号化できるため、FTPの安全性が大幅に向上します。
FTPおよびTLSセッションを許可する場合は、
を実行します。echo 1> / etc / pure-ftpd / conf / TLS
TLSを使用するには、SSL証明書を作成する必要があります。 / etc / ssl / private /に作成するので、最初にそのディレクトリを作成します:
mkdir -p / etc / ssl / private /
その後、次のようにSSL証明書を生成できます。
openssl req -x509 -nodes -days 7300 -newkey rsa:2048 -keyout /etc/ssl/private/pure-ftpd.pem -out /etc/ssl/private/pure-ftpd.pem
国名(2文字のコード)[AU]:<-国名を入力します(例:「DE」)。
州名または州名(フルネーム)[一部の州]:<-州を入力しますまたは州名。
地域名(例:市)[]:<-市区町村を入力してください。
組織名(例:会社)[Internet Widgits Pty Ltd]:<-組織名を入力してください(例:会社名)
組織単位名(例:セクション)[]:<-組織単位名(例:「IT部門」)を入力します。
一般名(例:あなたの名前)[]:<-システムの完全修飾ドメイン名を入力します(例: "server1.example.com")。
メールアドレス[]:<-メールアドレスを入力します。
SSL証明書の権限を変更します:
chmod 600 /etc/ssl/private/pure-ftpd.pem
次に、PureFTPdを再起動します:
/etc/init.d/pure-ftpd-mysql restart
/ etc/fstabを編集します。私の場合は次のようになります(マウントポイントのあるパーティションに、usrjquota =quote.user、grpjquota =quote.group、jqfmt =vfsv0を追加しました/):
vi / etc / fstab
#/ etc / fstab:静的ファイルシステム情報。##「blkid」を使用して、#デバイスのユニバーサル一意識別子を出力します。これは、ディスクが追加および削除された場合でも機能するデバイスに名前を付けるためのより堅牢な方法として、UUID=とともに使用できます。 fstab(5)を参照してください。##<ファイルシステム><マウントポイント><タイプ><オプション><ダンプ><パス>proc / proc proc nodev、noexec、nosuid 0 0 / dev / mapper / server1-root/ext4エラー=remount-ro、usrjquota =quote.user、grpjquota =quote.group、jqfmt =vfsv0 0 1#/bootはインストール中に/dev/sda1にありましたUUID=4b58d345-1c55-4ac5-940e-7245938656a6 / boot ext2 defaults 0 2 / dev / mapper / server1-swap_1 none swap sw 0 0 / dev / fd0 / media / floppy0 auto rw、user、noauto、exec、utf8 0 0 |
クォータを有効にするには、次のコマンドを実行します。
mount -o remount /
 quotecheck -avugm
 quoteon -avug
17BINDDNSサーバーのインストール
BINDは次のようにインストールできます:
apt-get install bind9 dnsutils
18 Vlogger、Webalizer、およびAWstatsをインストールします
Vlogger、webalizer、AWstatsは次のようにインストールできます:
apt-get install vlogger webalizer awstats geoip-database libclass-dbi-mysql-perl
その後、/ etc / cron.d/awstatsを開きます...
vi /etc/cron.d/awstats
...そしてそのファイルのすべてをコメントアウトします:
#MAILTO =root#* / 10 * * * * www-data [-x /usr/share/awstats/tools/update.sh] &&/usr/share/awstats/tools/update.sh#静的レポートを生成します:#10 03 * * * www-data [-x /usr/share/awstats/tools/buildstatic.sh] &&/usr/share/awstats /tools/buildstatic.sh |
19Jailkitをインストールする
Jailkitは、SSHユーザーをchrootする場合にのみ必要です。 It can be installed as follows (important:Jailkit must be installed before ISPConfig - it cannot be installed afterwards!):
apt-get install build-essential autoconf automake1.9 libtool flex bison debhelper binutils-gold
cd /tmp
wget http://olivier.sessink.nl/jailkit/jailkit-2.15.tar.gz
tar xvfz jailkit-2.15.tar.gz
cd jailkit-2.15
./debian/rules binary
You can now install the Jailkit .deb package as follows:
cd ..
dpkg -i jailkit_2.15-1_*.deb
rm -rf jailkit-2.15*
20 Install fail2ban
This is optional but recommended, because the ISPConfig monitor tries to show the log:
apt-get install fail2ban
To make fail2ban monitor PureFTPd and Dovecot, create the file /etc/fail2ban/jail.local:
vi /etc/fail2ban/jail.local
[pureftpd]enabled =trueport =ftpfilter =pureftpdlogpath =/var/log/syslogmaxretry =3[dovecot-pop3imap]enabled =truefilter =dovecot-pop3imapaction =iptables-multiport[name=dovecot-pop3imap, port="pop3,pop3s,imap,imaps", protocol=tcp]logpath =/var/log/mail.logmaxretry =5 |
Then create the following two filter files:
vi /etc/fail2ban/filter.d/pureftpd.conf
[Definition]failregex =.*pure-ftpd:\(.*@ |
vi /etc/fail2ban/filter.d/dovecot-pop3imap.conf
[Definition]failregex =(?:pop3-login|imap-login):.*(?:Authentication failure|Aborted login \(auth failed|Aborted login \(tried to use disabled|Disconnected \(auth failed|Aborted login \(\d+ authentication attempts).*rip=(?P |
Restart fail2ban afterwards:
/etc/init.d/fail2ban restart
21 Install SquirrelMail
To install the SquirrelMail webmail client, run
apt-get install squirrelmail
Then configure SquirrelMail:
squirrelmail-configure
We must tell SquirrelMail that we are using Dovecot-IMAP/-POP3:
SquirrelMail Configuration : Read: config.php (1.4.0)
---------------------------------------------------------
Main Menu --
1. Organization Preferences
2. Server Settings
3. Folder Defaults
4. General Options
5. Themes
6. Address Books
7. Message of the Day (MOTD)
8. Plugins
9. Database
10. Languages
D. Set pre-defined settings for specific IMAP servers
C Turn color on
S Save data
Q Quit
Command >> <-- D
SquirrelMail Configuration : Read: config.php
---------------------------------------------------------
While we have been building SquirrelMail, we have discovered some
preferences that work better with some servers that don't work so
well with others. If you select your IMAP server, this option will
set some pre-defined settings for that server.
Please note that you will still need to go through and make sure
everything is correct. This does not change everything. There are
only a few settings that this will change.
Please select your IMAP server:
bincimap = Binc IMAP server
courier = Courier IMAP server
cyrus = Cyrus IMAP server
dovecot = Dovecot Secure IMAP server
exchange = Microsoft Exchange IMAP server
hmailserver = hMailServer
macosx = Mac OS X Mailserver
mercury32 = Mercury/32
uw = University of Washington's IMAP server
gmail = IMAP access to Google mail (Gmail) accounts
quit = Do not change anything
Command >> <-- dovecot
SquirrelMail Configuration : Read: config.php
---------------------------------------------------------
While we have been building SquirrelMail, we have discovered some
preferences that work better with some servers that don't work so
well with others. If you select your IMAP server, this option will
set some pre-defined settings for that server.
Please note that you will still need to go through and make sure
everything is correct. This does not change everything. There are
only a few settings that this will change.
Please select your IMAP server:
bincimap = Binc IMAP server
courier = Courier IMAP server
cyrus = Cyrus IMAP server
dovecot = Dovecot Secure IMAP server
exchange = Microsoft Exchange IMAP server
hmailserver = hMailServer
macosx = Mac OS X Mailserver
mercury32 = Mercury/32
uw = University of Washington's IMAP server
gmail = IMAP access to Google mail (Gmail) accounts
quit = Do not change anything
Command >> dovecot
imap_server_type = dovecot
default_folder_prefix =
trash_folder = Trash
sent_folder = Sent
draft_folder = Drafts
show_prefix_option = false
default_sub_of_inbox = false
show_contain_subfolders_option = false
optional_delimiter = detect
delete_folder = false
Press enter to continue... <-- ENTER
SquirrelMail Configuration : Read: config.php (1.4.0)
---------------------------------------------------------
Main Menu --
1. Organization Preferences
2. Server Settings
3. Folder Defaults
4. General Options
5. Themes
6. Address Books
7. Message of the Day (MOTD)
8. Plugins
9. Database
10. Languages
D. Set pre-defined settings for specific IMAP servers
C Turn color on
S Save data
Q Quit
Command >> <-- S
SquirrelMail Configuration : Read: config.php (1.4.0)
---------------------------------------------------------
Main Menu --
1. Organization Preferences
2. Server Settings
3. Folder Defaults
4. General Options
5. Themes
6. Address Books
7. Message of the Day (MOTD)
8. Plugins
9. Database
10. Languages
D. Set pre-defined settings for specific IMAP servers
C Turn color on
S Save data
Q Quit
Command >> <-- Q
You can now find SquirrelMail in the /usr/share/squirrelmail/ directory.
After you have installed ISPConfig 3, you can access SquirrelMail as follows:
The ISPConfig apps vhost on port 8081 for nginx comes with a SquirrelMail configuration, so you can use http://server1.example.com:8081/squirrelmail or http://server1.example.com:8081/webmail to access SquirrelMail.
If you want to use a /webmail or /squirrelmail alias that you can use from your web sites, this is a bit more complicated than for Apache because nginx does not have global aliases (i.e., aliases that can be defined for all vhosts). Therefore you have to define these aliases for each vhost from which you want to access SquirrelMail.
To do this, paste the following into the nginx Directives field on the Options tab of the web site in ISPConfig:
location /squirrelmail { root /usr/share/; index index.php index.html index.htm; location ~ ^/squirrelmail/(.+\.php)$ { try_files $uri =404; root /usr/share/; fastcgi_pass unix:/var/run/php5-fpm.sock; fastcgi_index index.php; fastcgi_param SCRIPT_FILENAME $request_filename; / etc / nginx/fastcgi_paramsをインクルードします。 fastcgi_param PATH_INFO $fastcgi_script_name; fastcgi_buffer_size 128k; fastcgi_buffers 256 4k; fastcgi_busy_buffers_size 256k; fastcgi_temp_file_write_size 256k; fastcgi_intercept_errors on; } location ~* ^/squirrelmail/(.+\.(jpg|jpeg|gif|css|png|js|ico|html|xml|txt))$ { root /usr/share/; } } location /webmail { rewrite ^/* /squirrelmail last; } |
If you use https instead of http for your vhost, you should add the line fastcgi_param HTTPS on; to your SquirrelMail configuration like this:
location /squirrelmail { root /usr/share/; index index.php index.html index.htm; location ~ ^/squirrelmail/(.+\.php)$ { try_files $uri =404; root /usr/share/; fastcgi_pass unix:/var/run/php5-fpm.sock; fastcgi_param HTTPS on; # <-- add this line fastcgi_index index.php; fastcgi_param SCRIPT_FILENAME $request_filename; / etc / nginx/fastcgi_paramsをインクルードします。 fastcgi_param PATH_INFO $fastcgi_script_name; fastcgi_buffer_size 128k; fastcgi_buffers 256 4k; fastcgi_busy_buffers_size 256k; fastcgi_temp_file_write_size 256k; fastcgi_intercept_errors on; } location ~* ^/squirrelmail/(.+\.(jpg|jpeg|gif|css|png|js|ico|html|xml|txt))$ { root /usr/share/; } } location /webmail { rewrite ^/* /squirrelmail last; } |
If you use both http and https for your vhost, you need to add the following section to the http {} section in /etc/nginx/nginx.conf (before any include lines) which determines if the visitor uses http or https and sets the $fastcgi_https variable (which we will use in our SquirrelMail configuration) accordingly:
vi /etc/nginx/nginx.conf
[...]http {[...] ## Detect when HTTPS is used map $scheme $fastcgi_https { default off; https on; }[...]}[...] |
Don't forget to reload nginx afterwards:
/etc/init.d/nginx reload
Then go to the nginx Directives field again, and instead of fastcgi_param HTTPS on; you add the line fastcgi_param HTTPS $fastcgi_https; so that you can use SquirrelMail for both http and https requests:
location /squirrelmail { root /usr/share/; index index.php index.html index.htm; location ~ ^/squirrelmail/(.+\.php)$ { try_files $uri =404; root /usr/share/; fastcgi_pass unix:/var/run/php5-fpm.sock; fastcgi_param HTTPS $fastcgi_https; # <-- add this line fastcgi_index index.php; fastcgi_param SCRIPT_FILENAME $request_filename; / etc / nginx/fastcgi_paramsをインクルードします。 fastcgi_param PATH_INFO $fastcgi_script_name; fastcgi_buffer_size 128k; fastcgi_buffers 256 4k; fastcgi_busy_buffers_size 256k; fastcgi_temp_file_write_size 256k; fastcgi_intercept_errors on; } location ~* ^/squirrelmail/(.+\.(jpg|jpeg|gif|css|png|js|ico|html|xml|txt))$ { root /usr/share/; } } location /webmail { rewrite ^/* /squirrelmail last; } |
22 Install ISPConfig 3
Before you start the ISPConfig installation, make sure that Apache is stopped (if it is installed - it is possible that some of your installed packages have installed Apache as a dependency without you knowing). If Apache2 is already installed on the system, stop it now...
/etc/init.d/apache2 stop
... and remove Apache's system startup links:
update-rc.d -f apache2 remove
Make sure that nginx is running:
/etc/init.d/nginx restart
(If you have both Apache and nginx installed, the installer asks you which one you want to use:Apache and nginx detected. Select server to use for ISPConfig:(apache,nginx) [apache]:
Type nginx. If only Apache or nginx are installed, this is automatically detected by the installer, and no question is asked.)
To install ISPConfig 3 from the latest released version, do this:
cd /tmp
wget http://www.ispconfig.org/downloads/ISPConfig-3-stable.tar.gz
tar xfz ISPConfig-3-stable.tar.gz
cd ispconfig3_install/install/
The next step is to run
php -q install.php
This will start the ISPConfig 3 installer. The installer will configure all services like Postfix, SASL, Courier, etc. for you. A manual setup as required for ISPConfig 2 (perfect setup guides) is not necessary.
[email protected]:/tmp/ispconfig3_install/install# php -q install.php
PHP Deprecated: Comments starting with '#' are deprecated in /etc/php5/cli/conf.d/ming.ini on line 1 in Unknown on line 0
--------------------------------------------------------------------------------
_____ ___________ _____ __ _ ____
|_ _/ ___| ___ \ / __ \ / _(_) /__ \
| | \ `--.| |_/ / | / \/ ___ _ __ | |_ _ __ _ _/ /
| | `-。 \ __/ | | / _ \| '_ \| _ | |/ _` | |_ |
_| |_/\__/ / | | \__/\ (_) | | | | | | | (_| | ___\ \
\___/\____/\_| \____/\___/|_| |_|_| |_|\__, | \____/
__/ |
|___/
--------------------------------------------------------------------------------
>> Initial configuration
Operating System: Debian or compatible, unknown version.
Following will be a few questions for primary configuration so be careful.
Default values are in [brackets] and can be accepted with
Tap in "quit" (without the quotes) to stop the installer.
Select language (en,de) [en]: <-- ENTER
Installation mode (standard,expert) [standard]: <-- ENTER
Full qualified hostname (FQDN) of the server, eg server1.domain.tld [server1.example.com]: <-- ENTER
MySQL server hostname [localhost]: <-- ENTER
MySQL root username [root]: <-- ENTER
MySQL root password []: <-- yourrootsqlpassword
MySQL database to create [dbispconfig]: <-- ENTER
MySQL charset [utf8]: <-- ENTER
Apache and nginx detected. Select server to use for ISPConfig: (apache,nginx) [apache]: <-- nginx
Generating a 2048 bit RSA private key
.............+++
...........................+++
writing new private key to 'smtpd.key'
-----
You are about to be asked to enter information that will be incorporated
into your certificate request.
What you are about to enter is what is called a Distinguished Name or a DN.
There are quite a few fields but you can leave some blank
For some fields there will be a default value,
If you enter '.', the field will be left blank.
-----
Country Name (2 letter code) [AU]: <-- ENTER
State or Province Name (full name) [Some-State]: <-- ENTER
Locality Name (eg, city) []: <-- ENTER
Organization Name (eg, company) [Internet Widgits Pty Ltd]: <-- ENTER
Organizational Unit Name (eg, section) []: <-- ENTER
Common Name (e.g. server FQDN or YOUR name) []: <-- ENTER
Email Address []: <-- ENTE R
Configuring Jailkit
Configuring Dovecot
Configuring Spamassassin
Configuring Amavisd
Configuring Getmail
Configuring Pureftpd
Configuring BIND
Configuring nginx
Configuring Vlogger
Configuring Apps vhost
Configuring Bastille Firewall
Configuring Fail2ban
Installing ISPConfig
ISPConfig Port [8080]: <-- ENTER
Do you want a secure (SSL) connection to the ISPConfig web interface (y,n) [y]: <-- ENTER
Generating RSA private key, 4096 bit long modulus
.................................................................
.................................................................
.................................................................
.......................................................++
.................................................................
.................................................................
.................++
e is 65537 (0x10001)
You are about to be asked to enter information that will be incorporated
into your certificate request.
What you are about to enter is what is called a Distinguished Name or a DN.
There are quite a few fields but you can leave some blank
For some fields there will be a default value,
If you enter '.', the field will be left blank.
-----
Country Name (2 letter code) [AU]: <-- ENTER
State or Province Name (full name) [Some-State]: <-- ENTER
Locality Name (eg, city) []: <-- ENTER
Organization Name (eg, company) [Internet Widgits Pty Ltd]: <-- ENTER
Organizational Unit Name (eg, section) []: <-- ENTER
Common Name (e.g. server FQDN or YOUR name) []: <-- ENTER
Email Address []: <-- ENTER
Please enter the following 'extra' attributes
to be sent with your certificate request
A challenge password []: <-- ENTER
An optional company name []: <-- ENTER
writing RSA key
Configuring DBServer
Installing ISPConfig crontab
no crontab for root
no crontab for getmail
Restarting services ...
Rather than invoking init scripts through /etc/init.d, use the service(8)
utility, e.g. service mysql restart
Since the script you are attempting to invoke has been converted to an
Upstart job, you may also use the stop(8) and then start(8) utilities,
e.g. stop mysql ; start mysql. The restart(8) utility is also available.
mysql stop/waiting
mysql start/running, process 2524
* Stopping Postfix Mail Transport Agent postfix
/usr/sbin/postconf: warning: /etc/postfix/master.cf: unused parameter: smtpd_bind_address=127.0.0.1
...done.
* Starting Postfix Mail Transport Agent postfix
postconf: warning: /etc/postfix/master.cf: unused parameter: smtpd_bind_address=127.0.0.1
postconf: warning: /etc/postfix/master.cf: unused parameter: smtpd_bind_address=127.0.0.1
postconf: warning: /etc/postfix/master.cf: unused parameter: smtpd_bind_address=127.0.0.1
postconf: warning: /etc/postfix/master.cf: unused parameter: smtpd_bind_address=127.0.0.1
postconf: warning: /etc/postfix/master.cf: unused parameter: smtpd_bind_address=127.0.0.1
postconf: warning: /etc/postfix/master.cf: unused parameter: smtpd_bind_address=127.0.0.1
/usr/sbin/postconf: warning: /etc/postfix/master.cf: unused parameter: smtpd_bind_address=127.0.0.1
/usr/sbin/postconf: warning: /etc/postfix/master.cf: unused parameter: smtpd_bind_address=127.0.0.1
/usr/sbin/postconf: warning: /etc/postfix/master.cf: unused parameter: smtpd_bind_address=127.0.0.1
/usr/sbin/postconf: warning: /etc/postfix/master.cf: unused parameter: smtpd_bind_address=127.0.0.1
/usr/sbin/postconf: warning: /etc/postfix/master.cf: unused parameter: smtpd_bind_address=127.0.0.1
/usr/sbin/postconf: warning: /etc/postfix/master.cf: unused parameter: smtpd_bind_address=127.0.0.1
/usr/sbin/postconf: warning: /etc/postfix/master.cf: unused parameter: smtpd_bind_address=127.0.0.1
/usr/sbin/postconf: warning: /etc/postfix/master.cf: unused parameter: smtpd_bind_address=127.0.0.1
/usr/sbin/postconf: warning: /etc/postfix/master.cf: unused parameter: smtpd_bind_address=127.0.0.1
/usr/sbin/postconf: warning: /etc/postfix/master.cf: unused parameter: smtpd_bind_address=127.0.0.1
/usr/sbin/postconf: warning: /etc/postfi x/master.cf: unused parameter: smtpd_bind_address=127.0.0.1
/usr/sbin/postconf: warning: /etc/postfix/master.cf: unused parameter: smtpd_bind_address=127.0.0.1
/usr/sbin/postconf: warning: /etc/postfix/master.cf: unused parameter: smtpd_bind_address=127.0.0.1
/usr/sbin/postconf: warning: /etc/postfix/master.cf: unused parameter: smtpd_bind_address=127.0.0.1
/usr/sbin/postconf: warning: /etc/postfix/master.cf: unused parameter: smtpd_bind_address=127.0.0.1
/usr/sbin/postconf: warning: /etc/postfix/master.cf: unused parameter: smtpd_bind_address=127.0.0.1
...done.
Stopping amavisd: (not running).
The amavisd daemon is already running, PID: [1108]
Starting amavisd: (failed).
* Stopping ClamAV daemon clamd
...done.
* Starting ClamAV daemon clamd
...done.
Rather than invoking init scripts through /etc/init.d, use the service(8)
utility, e.g. service dovecot restart
Since the script you are attempting to invoke has been converted to an
Upstart job, you may also use the stop(8) and then start(8) utilities,
e.g. stop dovecot ; start dovecot. The restart(8) utility is also available.
dovecot stop/waiting
dovecot start/running, process 3641
* Restarting Mailman master qrunner mailmanctl
* Waiting...
...done.
...done.
* Reloading PHP5 FastCGI Process Manager php5-fpm
...done.
Reloading nginx configuration: nginx.
Restarting ftp server: Running: /usr/sbin/pure-ftpd-mysql-virtualchroot -l mysql:/etc/pure-ftpd/db/mysql.conf -l pam -E -H -Y 1 -O clf:/var/log/pure-ftpd/transfer.log -8 UTF-8 -b -D -A -u 1000 -B
Installation completed.
You have new mail in /var/mail/root
[email protected]:/tmp/ispconfig3_install/install#
The installer automatically configures all underlying services, so no manual configuration is needed.
You now also have the possibility to let the installer create an SSL vhost for the ISPConfig control panel, so that ISPConfig can be accessed using https:// instead of http://. To achieve this, just press ENTER when you see this question:Do you want a secure (SSL) connection to the ISPConfig web interface (y,n) [y]:.
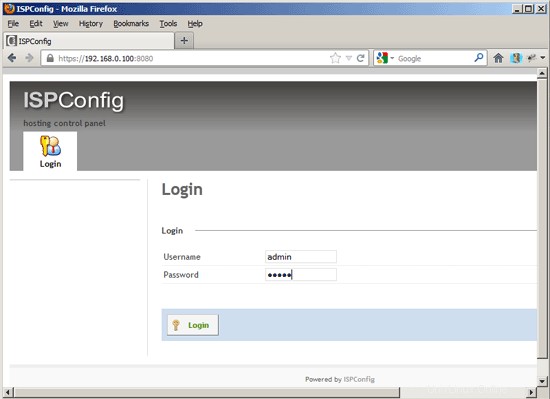
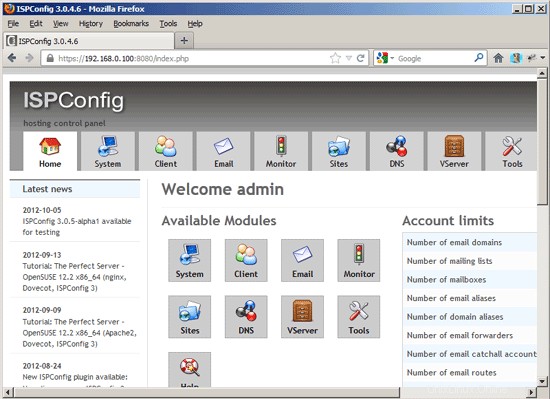
Afterwards you can access ISPConfig 3 under http(s)://server1.example.com:8080/ or http(s)://192.168.0.100:8080/ ( http or https depends on what you chose during installation). Log in with the username admin and the password admin (you should change the default password after your first login):
The system is now ready to be used.
22.1 ISPConfig 3 Manual
ISPConfig 3の使用方法を学ぶために、ISPConfig3マニュアルをダウンロードすることを強くお勧めします。
300ページ以上で、ISPConfig(管理者、再販業者、クライアント)の背後にある概念をカバーし、ISPConfig 3をインストールおよび更新する方法を説明し、有効な入力の例とともにISPConfigのすべてのフォームとフォームフィールドのリファレンスを含み、チュートリアルを提供しますISPConfig 3の最も一般的なタスクについても説明します。また、サーバーをより安全にする方法を示し、最後にトラブルシューティングのセクションがあります。
22.2 ISPConfig Monitor App For Android
ISPConfigモニターアプリを使用すると、サーバーのステータスを確認し、すべてのサービスが期待どおりに実行されているかどうかを確認できます。 TCPおよびUDPポートを確認し、サーバーにpingを実行できます。さらに、このアプリを使用して、ISPConfigがインストールされているサーバーに詳細を要求できます(ISPConfigモニターアプリをサポートするインストール済みのISPConfig3の最小バージョンは3.0.3.3です! );これらの詳細には、ISPConfigコントロールパネルのモニターモジュールから知っているすべてのもの(サービス、メールとシステムログ、メールキュー、CPUとメモリの情報、ディスク使用量、クォータ、OSの詳細、RKHunterログなど)が含まれます。 、ISPConfigはマルチサーバー対応であるため、ISPConfigマスターサーバーから制御されているすべてのサーバーを確認できます。
ダウンロードと使用方法については、http://www.ispconfig.org/ispconfig-3/ispconfig-monitor-app-for-android/にアクセスしてください。
23 Additional Notes
23.1 OpenVZ
If the Ubuntu server that you've just set up in this tutorial is an OpenVZ container (virtual machine), you should do this on the host system (I'm assuming that the ID of the OpenVZ container is 101 - replace it with the correct VPSID on your system):
VPSID=101
for CAP in CHOWN DAC_READ_SEARCH SETGID SETUID NET_BIND_SERVICE NET_ADMIN SYS_CHROOT SYS_NICE CHOWN DAC_READ_SEARCH SETGID SETUID NET_BIND_SERVICE NET_ADMIN SYS_CHROOT SYS_NICE
do
  vzctl set $VPSID --capability ${CAP}:on --save
done
24 Links
- Ubuntu:http://www.ubuntu.com/
- ISPConfig:http://www.ispconfig.org/
About The Author

Falko Timme is the owner of  Timme Hosting (ultra-fast nginx web hosting).彼はHowtoForge(2005年以降)の主任メンテナーであり、ISPConfig(2000年以降)のコア開発者の1人です。彼はまた、O'Reillyの本「LinuxSystemAdministration」にも寄稿しています。