WonderCMSは、シンプルなWebサイトやブログを構築するための、無料のオープンソースのシンプルで軽量なコンテンツ管理システムです。これはフラットファイルCMSであり、データベースを必要としません。インストールプロセスは非常に簡単で、初期構成は必要ありません。 WYSIWYGサポート、柔軟なCSSフレームワーク、SEO対応など、豊富な機能セットを提供します。
このチュートリアルでは、CentOS 8にWonderCMSをインストールし、Let'sEncryptSSLで保護する方法を説明します。
- CentOS8を実行しているサーバー。
- ルートパスワードはサーバーで構成されています。
ApacheとPHPをインストールする
まず、次のコマンドを使用して、Apache Webサーバー、PHP、およびその他のPHP拡張機能をインストールします。
dnf install httpd php php-mysqlnd php-curl php-opcache php-xml php-xmlrpc php-gd php-mbstring php-zip php-json wget unzip git -y
インストールが完了したら、php.iniファイルを開き、いくつかの設定を変更します。
nano /etc/php.ini
要件に応じて値を変更します:
memory_limit = 128M
post_max_size = 32M
upload_max_filesize = 16M
max_execution_time = 300
date.timezone = Asia/Kolkata
終了したら、ファイルを保存して閉じます。次に、次のコマンドを使用して、Apacheサービスを開始し、再起動して、システムの再起動後に開始します。
systemctl start httpd
 systemctl enable httpd
WonderCMSをダウンロード
まず、Gitリポジトリから最新バージョンのWonderCMSをダウンロードします。
cd /var/www/html
 git clone https://github.com/robiso/wondercms.git
ダウンロードが完了したら、次のコマンドを使用して、ダウンロードしたディレクトリに適切な権限を付与します。
chown -R apache:apache /var/www/html/wondercms
 chmod -R 775 /var/www/html/wondercms
WonderCMS用にApacheを構成する
まず、次のコマンドを使用して、WonderCMS用の新しいApache仮想ホスト構成ファイルを作成します。
nano /etc/httpd/conf.d/wondercms.conf
次の行を追加します:
<VirtualHost *:80>
  ServerName wonder.linuxbuz.com
  DirectoryIndex index.php
  DocumentRoot /var/www/html/wondercms
  Redirect /wondercms/loginURL /loginURL

  ErrorLog /var/log/httpd/linuxbuz.com-error.log
  CustomLog /var/log/httpd/linuxbuz.com-access.log combined

  <Directory /var/www/html/wondercms>
      Options FollowSymLinks
      AllowOverride All
      Require all granted
  </Directory>

</VirtualHost>
ファイルを保存して閉じます。次に、次のコマンドを使用してApacheサービスを再起動します。
systemctl restart httpd
次のコマンドを使用して、Apacheサービスのステータスを確認することもできます。
systemctl status httpd
次の出力が表示されます。
? httpd.service - The Apache HTTP Server
   Loaded: loaded (/usr/lib/systemd/system/httpd.service; disabled; vendor preset: disabled)
  Drop-In: /usr/lib/systemd/system/httpd.service.d
           ??php-fpm.conf
   Active: active (running) since Wed 2020-02-19 08:51:34 EST; 1min 25s ago
     Docs: man:httpd.service(8)
 Main PID: 4716 (httpd)
   Status: "Total requests: 6; Idle/Busy workers 100/0;Requests/sec: 0.0759; Bytes served/sec: 812 B/sec"
    Tasks: 278 (limit: 12558)
   Memory: 43.1M
   CGroup: /system.slice/httpd.service
           ??4716 /usr/sbin/httpd -DFOREGROUND
           ??4718 /usr/sbin/httpd -DFOREGROUND
           ??4719 /usr/sbin/httpd -DFOREGROUND
           ??4720 /usr/sbin/httpd -DFOREGROUND
           ??4721 /usr/sbin/httpd -DFOREGROUND
           ??4935 /usr/sbin/httpd -DFOREGROUND

Feb 19 08:51:34 centos8 systemd[1]: Starting The Apache HTTP Server...
SSLを暗号化してLet'sでWonderCMSを保護
次に、次のコマンドを使用してCertbotLet'sEncryptクライアントをインストールします。
wget https://dl.eff.org/certbot-auto
 mv certbot-auto /usr/local/bin/certbot-auto
 chown root /usr/local/bin/certbot-auto
 chmod 0755 /usr/local/bin/certbot-auto
次に、次のコマンドを実行して、WonderCMSWebサイトのSSL証明書を取得してインストールします。
certbot-auto --apache -d wonder.linuxbuz.com
上記のコマンドは、最初に必要なすべての依存関係をサーバーにインストールします。インストールすると、以下に示すように、メールアドレスを入力して利用規約に同意するよう求められます。
注 :SSL証明書関連のエラーが発生した場合は、Apacheサービスを再起動して、上記のコマンドを再度実行してください。
Saving debug log to /var/log/letsencrypt/letsencrypt.log
Plugins selected: Authenticator apache, Installer apache
Enter email address (used for urgent renewal and security notices) (Enter 'c' to
cancel): [email protected]

- - - - - - - - - - - - - - - - - - - - - - - - - - - - - - - - - - - - - - - -
Please read the Terms of Service at
https://letsencrypt.org/documents/LE-SA-v1.2-November-15-2017.pdf. You must
agree in order to register with the ACME server at
https://acme-v02.api.letsencrypt.org/directory
- - - - - - - - - - - - - - - - - - - - - - - - - - - - - - - - - - - - - - - -
(A)gree/(C)ancel: A

- - - - - - - - - - - - - - - - - - - - - - - - - - - - - - - - - - - - - - - -
Would you be willing to share your email address with the Electronic Frontier
Foundation, a founding partner of the Let's Encrypt project and the non-profit
organization that develops Certbot? We'd like to send you email about our work
encrypting the web, EFF news, campaigns, and ways to support digital freedom.
- - - - - - - - - - - - - - - - - - - - - - - - - - - - - - - - - - - - - - - -
(Y)es/(N)o: Y


Obtaining a new certificate
Performing the following challenges:
http-01 challenge for wonder.linuxbuz.com
Waiting for verification...
Cleaning up challenges
Deploying Certificate to VirtualHost /etc/nginx/conf.d/wondercms.conf
次に、以下に示すように、HTTPトラフィックをHTTPSにリダイレクトするかどうかを選択する必要があります。
Please choose whether or not to redirect HTTP traffic to HTTPS, removing HTTP access.
- - - - - - - - - - - - - - - - - - - - - - - - - - - - - - - - - - - - - - - -
1: No redirect - Make no further changes to the webserver configuration.
2: Redirect - Make all requests redirect to secure HTTPS access. Choose this for
new sites, or if you're confident your site works on HTTPS. You can undo this
change by editing your web server's configuration.
- - - - - - - - - - - - - - - - - - - - - - - - - - - - - - - - - - - - - - - -
Select the appropriate number [1-2] then [enter] (press 'c' to cancel): 2
2と入力します Enterを押します 続ける。インストールが完了すると、次の出力が表示されます。
Redirecting all traffic on port 80 to ssl in /etc/nginx/conf.d/wondercms.conf

- - - - - - - - - - - - - - - - - - - - - - - - - - - - - - - - - - - - - - - -
Congratulations! You have successfully enabled https://wonder.linuxbuz.com

You should test your configuration at:
https://www.ssllabs.com/ssltest/analyze.html?d=wonder.linuxbuz.com
- - - - - - - - - - - - - - - - - - - - - - - - - - - - - - - - - - - - - - - -

IMPORTANT NOTES:
 - Congratulations! Your certificate and chain have been saved at:
   /etc/letsencrypt/live/wonder.linuxbuz.com/fullchain.pem
   Your key file has been saved at:
   /etc/letsencrypt/live/wonder.linuxbuz.com/privkey.pem
   Your cert will expire on 2020-03-23. To obtain a new or tweaked
   version of this certificate in the future, simply run certbot-auto
   again with the "certonly" option. To non-interactively renew *all*
   of your certificates, run "certbot-auto renew"
 - If you like Certbot, please consider supporting our work by:

   Donating to ISRG / Let's Encrypt:   https://letsencrypt.org/donate
   Donating to EFF:                    https://eff.org/donate-le
次に、外部ネットワークからのHTTPおよびHTTPSサービスを許可するファイアウォールルールを作成する必要があります。次のコマンドで許可できます:
firewall-cmd --permanent --add-service=http
firewall-cmd --permanent --add-service=https
 firewall-cmd --reload
次に、WonderCMS用にSELinuxを設定する必要があります。次のコマンドを使用してSELinuxを設定できます:
setsebool httpd_can_network_connect on -P
 chcon -R -u system_u -t httpd_sys_rw_content_t -r object_r /var/www/html/wondercms
最後に、Apacheサービスを再起動して、変更を適用します。
systemctl restart httpd
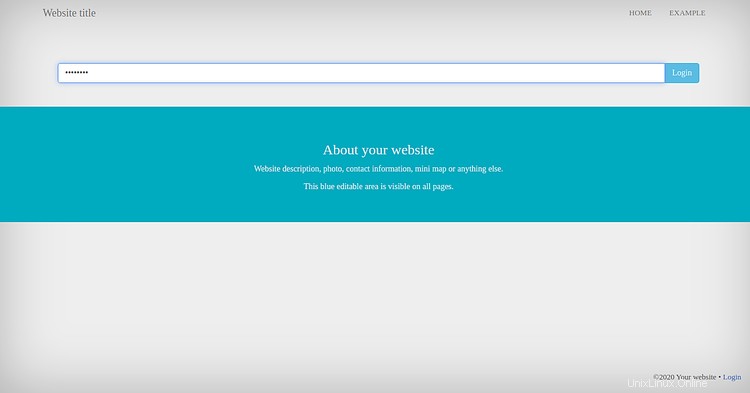
次に、Webブラウザーを開き、URLhttps://wonder.linuxbuz.comを入力します。 WonderCMSホームページにリダイレクトされます:

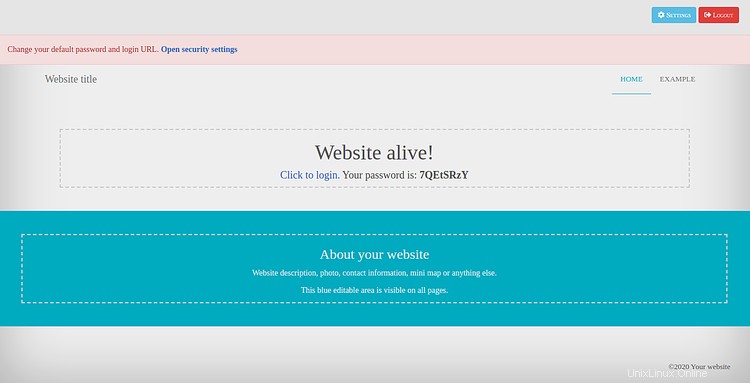
次に、上のページからパスワードをコピーし、[クリックしてログイン]をクリックします。 ボタン。次のページが表示されます:
パスワードを貼り付けて、ログインをクリックします ボタン。次のページが表示されます:
次に、設定をクリックします =>セキュリティ 。次のページが表示されます:
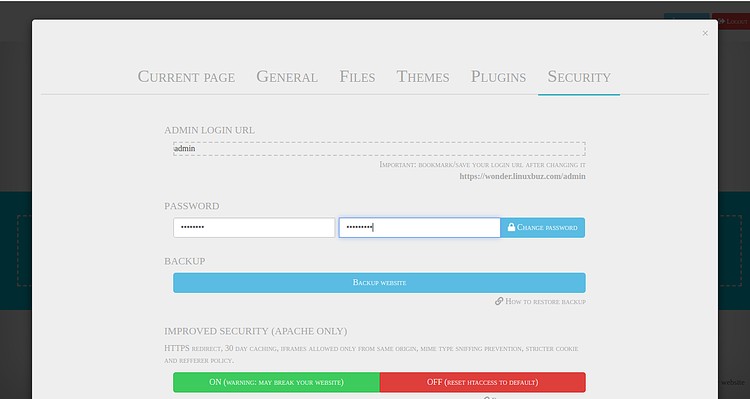
ログインURLとパスワードを変更し、変更をクリックします パスワード ボタン。
おめでとう! Let'sEncryptSSLを使用してCentOS8にWonderCMSを正常にインストールして保護しました。 WonderCMSを使用して、独自のブログやWebサイトを簡単にホストできるようになりました。