Mattermostは、無料のオープンソースのセルフホスト型エンタープライズチームコラボレーションメッセージングシステムです。 GolangとReactで記述されており、データベースバックエンドとしてMySQL / MariaDB/PostgreSQLを使用します。 Windows、macOS、Linux用のデスクトップクライアントとiOSおよびAndroid用のモバイルアプリケーションを提供します。Slackと非常によく似ており、チームのすべてのコミュニケーションを1か所にまとめます。 1対1およびグループメッセージング、ファイル共有、ビデオコール、カスタム絵文字、Webhookとコマンドなど、非常に便利な機能を提供します。
このチュートリアルでは、CentOS8にMattermostをインストールする方法を紹介します。
- CentOS8を実行しているサーバー。
- ルートパスワードはサーバーで構成されています。
MariaDBデータベースのインストールと構成
Mattermostは、MariaDB/MySQLをデータベースバックエンドとして使用します。したがって、MariaDBをサーバーにインストールする必要があります。インストールされていない場合は、次のコマンドでインストールできます。
dnf install mariadb-server -y
インストールしたら、MariaDBサービスを開始し、次のコマンドを使用してシステムの再起動後に開始できるようにします。
systemctl start mariadb
 systemctl enable mariadb
デフォルトでは、MariaDBは保護されておらず、ルートパスワードはCentOS 8で設定されていません。したがって、次のコマンドで設定できます。
mysql_secure_installation
以下に示すように、すべての質問に答えてください。
Enter current password for root (enter for none):
Set root password? [Y/n] Y
New password:
Re-enter new password:
Remove anonymous users? [Y/n] Y
Disallow root login remotely? [Y/n] Y
Remove test database and access to it? [Y/n] Y
Reload privilege tables now? [Y/n] Y
完了したら、rootユーザーでMariaDBにログインします:
mysql -u root -p
ルートパスワードを入力し、次のコマンドを使用してMattermostのデータベースとユーザーを作成します。
MariaDB [(none)]> CREATE DATABASE mattermostdb;
 MariaDB [(none)]> GRANT ALL PRIVILEGES ON mattermostdb.* TO [email protected] IDENTIFIED BY 'password';
次に、特権をフラッシュし、次のコマンドを使用してMariaDBシェルを終了します。
MariaDB [(none)]> FLUSH PRIVILEGES;
 MariaDB [(none)]> EXIT;
終了したら、次のステップに進むことができます。
まず、Mattermostを実行するために別のユーザーを作成する必要があります。次のコマンドで作成できます:
useradd -d /opt/mattermost -U -M mattermost
次に、次のコマンドを使用してMattermostの最新バージョンをダウンロードします。
wget https://releases.mattermost.com/5.21.0/mattermost-5.21.0-linux-amd64.tar.gz
ダウンロードが完了したら、次のコマンドを使用してダウンロードしたファイルを抽出します。
tar -xvzf mattermost-5.21.0-linux-amd64.tar.gz
次に、次のコマンドを使用して、抽出したディレクトリを/optに移動します。
mv mattermost /opt/
次に、mattermost内にデータディレクトリを作成し、次のコマンドを使用して、mattermostに適切な権限を付与します。
mkdir /opt/mattermost/data
 chown -R mattermost:mattermost /opt/mattermost
 chmod -R g+w /opt/mattermost
終了したら、次のステップに進むことができます。
次に、Mattermostでデータベースを定義する必要があります。ファイルconfig.jsonを編集することでそれを行うことができます:
nano /opt/mattermost/config/config.json
データベース設定に従って、次の行を変更します。
  "SqlSettings": {
    "DriverName": "mysql",
    "DataSource": "mattermost:[email protected](localhost:3306)/mattermostdb?charset=utf8mb4,utf8\u0026readTimeout=30s\u0026writeTimeout=30s",
終了したら、ファイルを保存して閉じます。次に、ディレクトリを/ opt / mattermostに変更し、次のコマンドでMattermostサーバーを起動します。
cd /opt/mattermost
 sudo -u mattermost bin/mattermost
サーバーが正常に起動すると、次の出力が表示されます。
{"level":"info","ts":1585379681.8383002,"caller":"utils/i18n.go:83","msg":"Loaded system translations","for locale":"en","from locale":"/opt/mattermost/i18n/en.json"}
{"level":"info","ts":1585379681.83874,"caller":"app/server_app_adapters.go:58","msg":"Server is initializing..."}
{"level":"info","ts":1585379681.8470004,"caller":"sqlstore/supplier.go:221","msg":"Pinging SQL","database":"master"}
{"level":"info","ts":1585379684.7858346,"caller":"sqlstore/upgrade.go:112","msg":"The database schema version has been set","version":"5.21.0"}
{"level":"error","ts":1585379690.8182986,"caller":"app/server_app_adapters.go:129","msg":"SiteURL must be set. Some features will operate incorrectly if the SiteURL is not set. See documentation for details: http://about.mattermost.com/default-site-url"}
{"level":"info","ts":1585379690.821083,"caller":"app/license.go:39","msg":"License key from https://mattermost.com required to unlock enterprise features."}
次に、CTRL+Cを押してMattermostサーバーを停止します。
MattermostのSystemdサービスファイルを作成する
次に、Mattermostサービスを管理するためのsystemdサービスファイルを作成する必要があります。次のコマンドで作成できます:
nano /etc/systemd/system/mattermost.service
次の行を追加します:
[Unit]
Description=Mattermost
After=syslog.target network.target mariadb.service

[Service]
Type=notify
WorkingDirectory=/opt/mattermost
User=mattermost
ExecStart=/opt/mattermost/bin/mattermost
PIDFile=/var/run/mattermost.pid
TimeoutStartSec=3600
LimitNOFILE=49152

[Install]
WantedBy=multi-user.target
終了したら、ファイルを保存して閉じます。次に、次のコマンドを使用してsystemdデーモンをリロードします。
systemctl daemon-reload
次に、Mattermostサービスを開始し、次のコマンドを使用してシステムの再起動後に開始できるようにします。
systemctl start mattermost
 systemctl enable mattermost
次のコマンドを使用して、Mattermostサービスのステータスを確認することもできます。
systemctl status mattermost
次の出力が得られるはずです:
? mattermost.service - Mattermost
   Loaded: loaded (/etc/systemd/system/mattermost.service; disabled; vendor preset: disabled)
   Active: active (running) since Sat 2020-03-28 03:17:07 EDT; 14s ago
 Main PID: 15204 (mattermost)
    Tasks: 21 (limit: 25028)
   Memory: 120.8M
   CGroup: /system.slice/mattermost.service
           ??15204 /opt/mattermost/bin/mattermost
           ??15214 plugins/com.mattermost.nps/server/dist/plugin-linux-amd64

Mar 28 03:17:07 centos8 mattermost[15204]: {"level":"info","ts":1585379827.1131086,"caller":"app/server.go:247","msg":"Printing current workin>
Mar 28 03:17:07 centos8 mattermost[15204]: {"level":"info","ts":1585379827.1131282,"caller":"app/server.go:248","msg":"Loaded config","source">
この時点で、Mattermostサーバーは実行されており、ポート8065でリッスンしています。次のコマンドで確認できます。
netstat -antup | grep 8065
次の出力が得られるはずです:
tcp6 0 0 :::8065 :::* LISTEN 15204/mattermost
NginxをMattermostのリバースプロキシとして構成する
パフォーマンスとセキュリティを向上させるために、Nginxをリバースプロキシとしてインストールして構成することをお勧めします。
まず、次のコマンドを使用してNginxWebサーバーをインストールします。
dnf install nginx -y
Nginx Webサーバーをインストールした後、次のコマンドを使用してNginxサービスを開始し、システムの再起動後に開始できるようにします。
systemctl start nginx
 systemctl enable nginx
次に、次のコマンドを使用して、Mattermost用の新しいNginx仮想ホストファイルを作成します。
nano /etc/nginx/conf.d/mattermost.conf
次の行を追加します:
upstream mattermost {
   server 127.0.0.1:8065;
   keepalive 32;
}

proxy_cache_path /var/cache/nginx levels=1:2 keys_zone=mattermost_cache:10m max_size=3g inactive=120m use_temp_path=off;

server {
   listen 80;
   server_name    mattermost.example.com;

   location ~ /api/v[0-9]+/(users/)?websocket$ {
       proxy_set_header Upgrade $http_upgrade;
       proxy_set_header Connection "upgrade";
       client_max_body_size 50M;
       proxy_set_header Host $http_host;
       proxy_set_header X-Real-IP $remote_addr;
       proxy_set_header X-Forwarded-For $proxy_add_x_forwarded_for;
       proxy_set_header X-Forwarded-Proto $scheme;
       proxy_set_header X-Frame-Options SAMEORIGIN;
       proxy_buffers 256 16k;
       proxy_buffer_size 16k;
       client_body_timeout 60;
       send_timeout 300;
       lingering_timeout 5;
       proxy_connect_timeout 90;
       proxy_send_timeout 300;
       proxy_read_timeout 90s;
       proxy_pass http://mattermost;
   }
   location / {
       client_max_body_size 50M;
       proxy_set_header Connection "";
       proxy_set_header Host $http_host;
       proxy_set_header X-Real-IP $remote_addr;
       proxy_set_header X-Forwarded-For $proxy_add_x_forwarded_for;
       proxy_set_header X-Forwarded-Proto $scheme;
       proxy_set_header X-Frame-Options SAMEORIGIN;
       proxy_buffers 256 16k;
       proxy_buffer_size 16k;
       proxy_read_timeout 600s;
       proxy_cache mattermost_cache;
       proxy_cache_revalidate on;
       proxy_cache_min_uses 2;
       proxy_cache_use_stale timeout;
       proxy_cache_lock on;
       proxy_http_version 1.1;
       proxy_pass http://mattermost;
   }
}
完了したら、ファイルを保存して閉じます。次に、次のコマンドを使用して、構文エラーがないかNginxを確認します。
nginx -t
次の出力が得られるはずです:
nginx: the configuration file /etc/nginx/nginx.conf syntax is ok
nginx: configuration file /etc/nginx/nginx.conf test is successful
最後に、Nginxサービスを再起動して、変更を適用します。
systemctl restart nginx
この時点で、NginxWebサーバーはMattermostにサービスを提供するように構成されています。これで、次のステップに進むことができます。
SELinuxとFirewalldを構成する
デフォルトでは、SELinuxはCentOS8で有効になっています。Mattermostでは無効にすることをお勧めします。 / etc / selinux /configファイルを編集して無効にすることができます:
nano /etc/selinux/config
次の行を見つけます:
SELINUX=enforcing
そして、それを次の行に置き換えます:
SELINUX=permissive
終了したら、ファイルを保存して閉じます。次に、システムを再起動して変更を適用します。
次に、firewalldを介してポート80を許可する必要があります。次のコマンドで許可できます:
firewall-cmd --add-service=http --permanent
次に、firewalldをリロードして変更を適用します:
firewall-cmd --reload
次に、Webブラウザーを開き、URLhttp://mattermost.example.comを入力します。 Mattermostユーザー作成ページが表示されます:
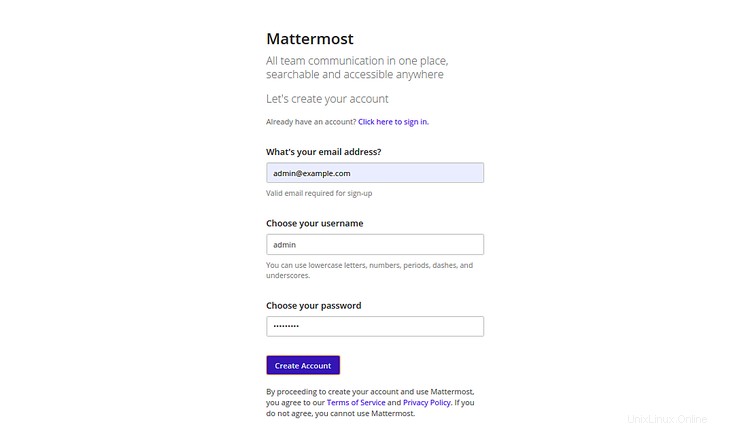
メールアドレス、ユーザー名、パスワードを入力し、作成をクリックします アカウント ボタン。次のページが表示されます:
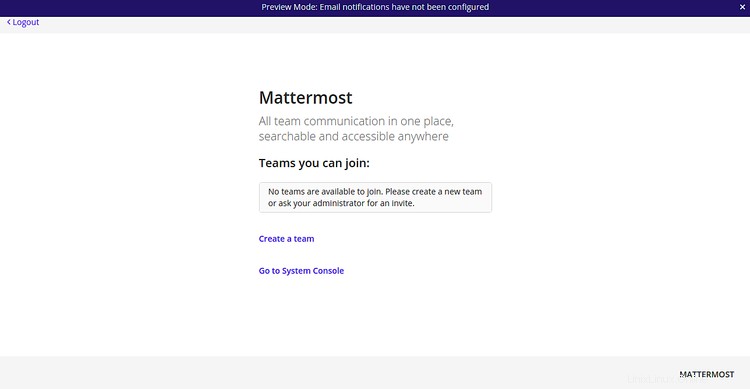
次に、作成をクリックします 新しいチーム チームを作成します。次のページが表示されます:
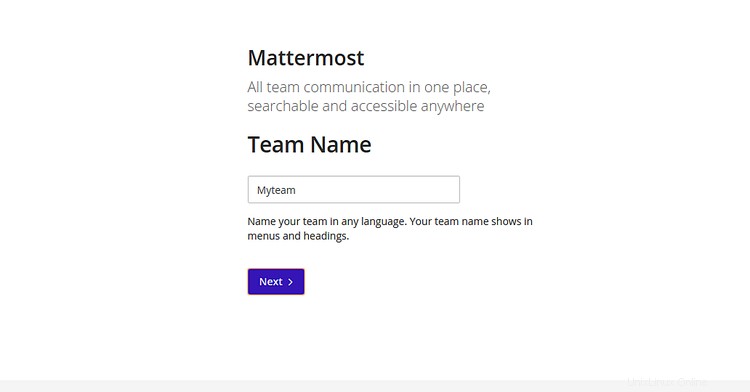
チーム名を入力して、次へをクリックします ボタン。次のページが表示されます:
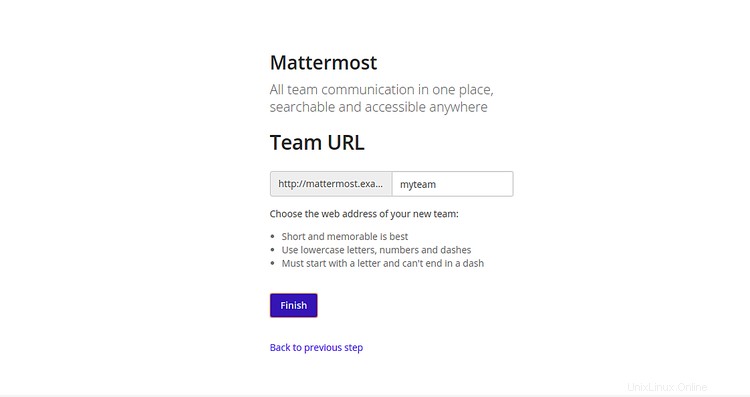
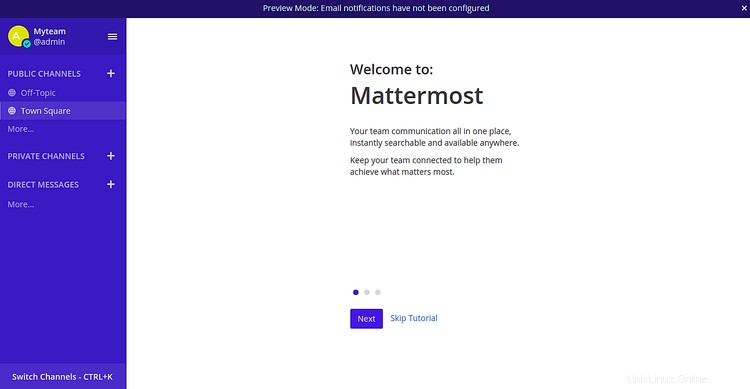
チームのURLを入力し、完了をクリックします インストールを完了します。次のページにMattermostダッシュボードが表示されます。
おめでとう!これで、CentOS8サーバーにMattermostが正常にインストールおよび構成されました。これで、組織のチームを作成して、チームとのコラボレーションを開始できます。