Wekanは、Meteor JavaScriptフレームワークで構築された無料のオープンソースかんばんボードであり、MITライセンスの下で配布されています。これは、WorkflowyやTrelloと非常によく似ており、日常のタスクの管理、ToDoリストの作成、他の人の管理などに役立ちます。完全にレスポンシブなWebインターフェイスが付属し、多くの言語に翻訳されています。 Wekanには、Wekanボードのエクスポート、Trelloボードのインポート、SMTP設定、アーカイブボードの復元、ユーザー管理モジュール、ドラッグアンドドロップ機能などの豊富な機能セットが付属しています。
このチュートリアルでは、Debian10にプロキシサーバーとしてNginxを使用してWekanかんばんボードをインストールする方法を示します。
- Debian10を実行しているサーバー。
- サーバーIPで指定された有効なドメイン名。
- ルートパスワードはサーバーで構成されています。
開始する前に、次のコマンドを使用してサーバーを最新バージョンに更新することをお勧めします。
apt-get update -y
 apt-get upgrade -y
サーバーが更新されたら、サーバーを再起動して変更を実装します。
Debian 10にWekanをインストールする最も簡単な方法は、snapを使用することです。デフォルトでは、snapパッケージはDebian10リポジトリで利用可能です。次のコマンドを実行してインストールできます:
apt-get install snapd -y
スナップがインストール/ストールされたら、次のコマンドを実行してWekanをインストールできます。
snap install wekan
Wekanがインストールされると、WekanとMongodbのサービスが自動的に開始されます。
次のコマンドを使用して、Wekanサービスのステータスを確認できます。
systemctl status snap.wekan.wekan
次の出力が表示されます。
? snap.wekan.wekan.service - Service for snap application wekan.wekan
   Loaded: loaded (/etc/systemd/system/snap.wekan.wekan.service; enabled; vendor preset: enabled)
   Active: active (running) since Sun 2019-12-22 07:43:34 UTC; 7s ago
 Main PID: 7836 (wekan-control)
    Tasks: 11 (limit: 2359)
   Memory: 156.3M
   CGroup: /system.slice/snap.wekan.wekan.service
           ??7836 /bin/bash /snap/wekan/678/bin/wekan-control
           ??8522 /snap/wekan/678/bin/node main.js

Dec 22 07:43:35 debian10 wekan.wekan[7836]: HEADER_LOGIN_EMAIL=Header login email. Example for siteminder: HEADEREMAILADDRESS (default value)
Dec 22 07:43:35 debian10 wekan.wekan[7836]: LOGOUT_WITH_TIMER=false (default value)
Dec 22 07:43:35 debian10 wekan.wekan[7836]: LOGOUT_IN= (default value)
Dec 22 07:43:35 debian10 wekan.wekan[7836]: LOGOUT_ON_HOURS= (default value)
Dec 22 07:43:35 debian10 wekan.wekan[7836]: LOGOUT_ON_MINUTES= (default value)
Dec 22 07:43:35 debian10 wekan.wekan[7836]: DEFAULT_AUTHENTICATION_METHOD= (default value)
Dec 22 07:43:35 debian10 wekan.wekan[7836]: ATTACHMENTS_STORE_PATH= (default value)
Dec 22 07:43:35 debian10 wekan.wekan[7836]: MONGO_URL=mongodb://127.0.0.1:27019/wekan
Dec 22 07:43:37 debian10 wekan.wekan[7836]: Presence started serverId=ijqY8RbEWv8Hg9RSb
Dec 22 07:43:38 debian10 wekan.wekan[7836]: Meteor APM: completed instrumenting the app
デフォルトでは、Wekanはポート8080で実行されます。Wekanポートを3001に変更する場合は、次のコマンドを実行します。
snap set wekan port='3001'
次に、WekanとMongoDBサービスを再起動して、変更を適用します。
systemctl restart snap.wekan.mongodb
 systemctl restart snap.wekan.wekan
WekanおよびMongoDBサービスを管理する
Wekanサービスを開始および停止するには、次のコマンドを実行します。
systemctl stop snap.wekan.wekan
 systemctl start snap.wekan.wekan
MongoDBサービスを開始および停止するには、次のコマンドを実行します。
systemctl stop snap.wekan.mongodb
 systemctl start snap.wekan.mongodb
Nginxをリバースプロキシとして構成する
これでWekanがインストールされ、ポート 3001でリッスンします。 。次に、Nginxプロキシの背後でWekanを実行することをお勧めします。
これを行うには、最初に次のコマンドを使用してNginxWebサーバーをインストールします。
apt-get install nginx -y
インストールしたら、/ etc / nginx / nginx.confファイルを開き、hash_bucket_sizeを設定します:
nano /etc/nginx/nginx.conf
次の行のコメントを解除します:
server_names_hash_bucket_size 64;
終了したら、ファイルを保存して閉じます。次に、Nginxサービスを再起動して、変更を適用します。
systemctl restart nginx
次に、以下に示すように、Wekan用のNginx仮想ホストファイルを作成します。
nano /etc/nginx/conf.d/wekan.conf
次の行を追加します:
map $http_upgrade $connection_upgrade {
    default upgrade;
    ''      close;
}
server {
    listen 80;
    server_name wekan.linuxbuz.com;
    if ($http_user_agent ~ "MSIE" ) {
        return 303 https://browser-update.org/update.html;
    }
    location / {
        proxy_pass http://127.0.0.1:3001;
        proxy_http_version 1.1;
        proxy_set_header Upgrade $http_upgrade; # allow websockets
        proxy_set_header Connection $connection_upgrade;
        proxy_set_header X-Forwarded-For $remote_addr; # preserve client IP
    }
}
終了したら、ファイルを保存して閉じます。次に、次のコマンドを使用して、構文エラーがないかNginxを確認します。
nginx -t
次の出力が表示されます。
nginx: the configuration file /etc/nginx/nginx.conf syntax is ok
nginx: configuration file /etc/nginx/nginx.conf test is successful
最後に、Nginxサービスを再起動して、変更を適用します。
systemctl restart nginx
この時点で、NginxはリクエストをWekanポート3001に転送するように構成されています。
次に、Let'sEncryptの無料SSLを使用してWekanを保護することをお勧めします。そのためには、サーバーにCertbotクライアントをインストールする必要があります。 Certbotは、無料のSSLをダウンロードし、この証明書を使用するようにNginxを構成するために使用できるLet'sEncryptクライアントです。
デフォルトでは、Certbotの最新バージョンはDebian10デフォルトリポジトリで利用できません。そのため、サーバーにCertbotリポジトリを追加する必要があります。
次のコマンドを使用してリポジトリを追加できます:
echo "deb http://ftp.debian.org/debian buster-backports main" >> /etc/apt/sources.list
次に、リポジトリを更新し、次のコマンドを使用してCertbotクライアントをインストールします。
apt-get update -y
 apt-get install python-certbot-nginx -t buster-backports
インストールが完了したら、次のコマンドを実行して、ドメインのSSL証明書を取得してインストールします。
certbot --nginx -d wekan.linuxbuz.com
以下に示すように、メールアドレスを入力し、利用規約に同意するよう求められます。
Saving debug log to /var/log/letsencrypt/letsencrypt.log
Plugins selected: Authenticator nginx, Installer nginx
Enter email address (used for urgent renewal and security notices) (Enter 'c' to
cancel): [email protected]

- - - - - - - - - - - - - - - - - - - - - - - - - - - - - - - - - - - - - - - -
Please read the Terms of Service at
https://letsencrypt.org/documents/LE-SA-v1.2-November-15-2017.pdf. You must
agree in order to register with the ACME server at
https://acme-v02.api.letsencrypt.org/directory
- - - - - - - - - - - - - - - - - - - - - - - - - - - - - - - - - - - - - - - -
(A)gree/(C)ancel: A

- - - - - - - - - - - - - - - - - - - - - - - - - - - - - - - - - - - - - - - -
Would you be willing to share your email address with the Electronic Frontier
Foundation, a founding partner of the Let's Encrypt project and the non-profit
organization that develops Certbot? We'd like to send you email about our work
encrypting the web, EFF news, campaigns, and ways to support digital freedom.
- - - - - - - - - - - - - - - - - - - - - - - - - - - - - - - - - - - - - - - -
(Y)es/(N)o: N
Obtaining a new certificate
Performing the following challenges:
http-01 challenge for wekan.linuxbuz.com
Waiting for verification...
Cleaning up challenges
Deploying Certificate to VirtualHost /etc/nginx/conf.d/wekan.conf
次に、HTTPトラフィックをHTTPSにリダイレクトするかどうかを選択する必要があります。
Please choose whether or not to redirect HTTP traffic to HTTPS, removing HTTP access.
- - - - - - - - - - - - - - - - - - - - - - - - - - - - - - - - - - - - - - - -
1: No redirect - Make no further changes to the webserver configuration.
2: Redirect - Make all requests redirect to secure HTTPS access. Choose this for
new sites, or if you're confident your site works on HTTPS. You can undo this
change by editing your web server's configuration.
- - - - - - - - - - - - - - - - - - - - - - - - - - - - - - - - - - - - - - - -
Select the appropriate number [1-2] then [enter] (press 'c' to cancel): 2
2と入力し、Enterキーを押して、インストールプロセスを開始します。インストールが完了すると、次の出力が表示されます。
Redirecting all traffic on port 80 to ssl in /etc/nginx/conf.d/wekan.conf

- - - - - - - - - - - - - - - - - - - - - - - - - - - - - - - - - - - - - - - -
Congratulations! You have successfully enabled https://wekan.linuxbuz.com

You should test your configuration at:
https://www.ssllabs.com/ssltest/analyze.html?d=wekan.linuxbuz.com
- - - - - - - - - - - - - - - - - - - - - - - - - - - - - - - - - - - - - - - -

IMPORTANT NOTES:
 - Congratulations! Your certificate and chain have been saved at:
   /etc/letsencrypt/live/wekan.linuxbuz.com/fullchain.pem
   Your key file has been saved at:
   /etc/letsencrypt/live/wekan.linuxbuz.com/privkey.pem
   Your cert will expire on 2020-03-25. To obtain a new or tweaked
   version of this certificate in the future, simply run certbot again
   with the "certonly" option. To non-interactively renew *all* of
   your certificates, run "certbot renew"
 - Your account credentials have been saved in your Certbot
   configuration directory at /etc/letsencrypt. You should make a
   secure backup of this folder now. This configuration directory will
   also contain certificates and private keys obtained by Certbot so
   making regular backups of this folder is ideal.
 - If you like Certbot, please consider supporting our work by:

   Donating to ISRG / Let's Encrypt:   https://letsencrypt.org/donate
   Donating to EFF:                    https://eff.org/donate-le
次に、Webブラウザーを開き、URL https://wekan.linuxbuz.comを入力します。 。次のページにリダイレクトされます:
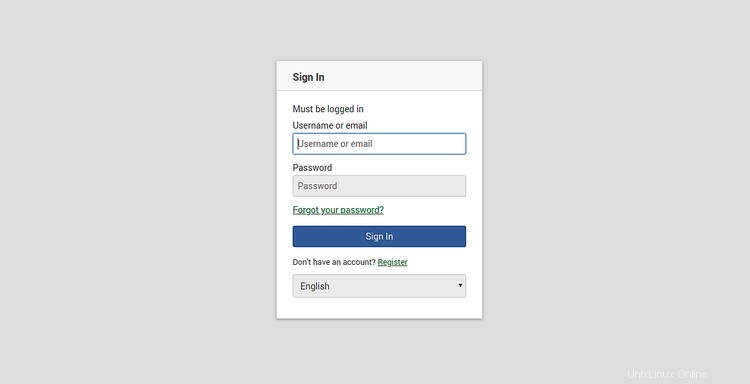
登録をクリックします ボタン。次のページが表示されます:
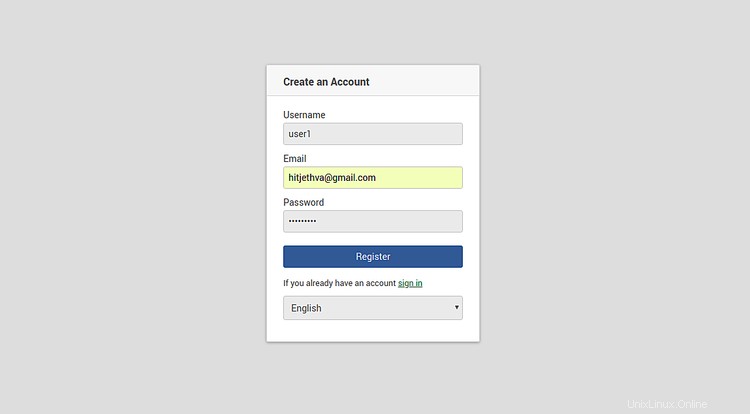
ご希望のユーザー名、パスワード、メールアドレスを入力し、登録をクリックしてください ボタン。次に、記号をクリックします で ボタン。次のページが表示されます:
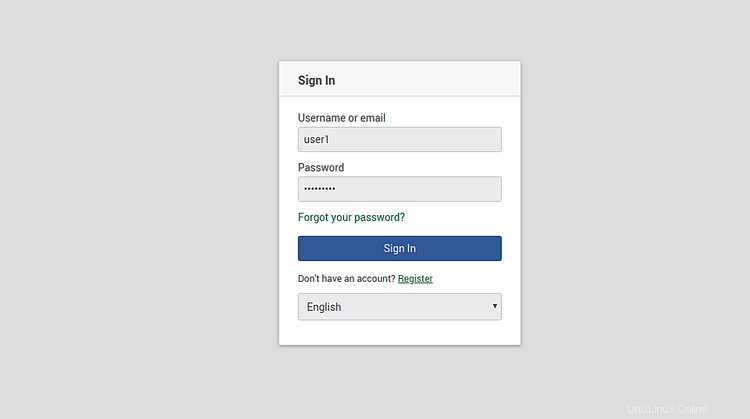
ユーザー名とパスワードを入力し、署名をクリックします で ボタン。次のページにWekanダッシュボードが表示されます。
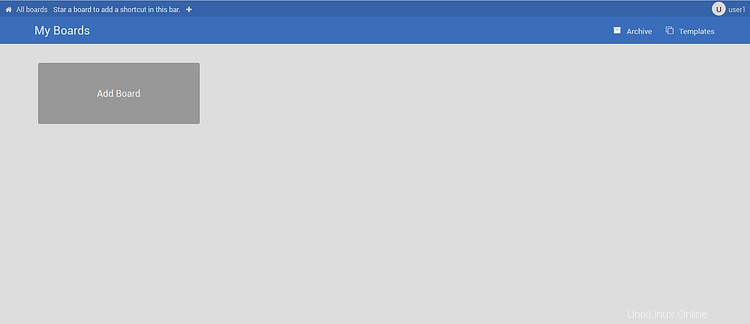
今のところ以上です。これで、WekanかんばんがDebian 10サーバーに正常にインストールされ、Let'sEncryptの無料SSLで保護されました。