DokuWikiは、PHPで記述された無料のオープンソースで強力なWikiソフトウェアアプリケーションです。データベースを使用する代わりに、ファイルを使用してデータを保存します。シンプルで軽量で、WebブラウザからWebサイトを作成および編集できます。それはあなたがあなたのウェブサイトを簡単に拡大縮小して最適化することを可能にする多くの機能を提供します。クリーンで読みやすい構文、メンテナンスのしやすさ、バックアップ、統合により、多くのユーザーが使用しています。
このチュートリアルでは、Apacheを使用してDokuWikiをインストールし、Debian11にSSLを暗号化する方法を紹介します。
- Ubuntu20.04を実行しているサーバー。
- サーバーIPで指定された有効なドメイン名。
- ルートパスワードはサーバーで構成されています。
開始する前に、システムパッケージを最新バージョンに更新することをお勧めします。次のコマンドを実行して更新できます:
apt-get update -y
すべてのパッケージが更新されたら、次のステップに進むことができます。
ApacheとPHPをインストールする
DokuWikiはApacheまたはNginxで実行され、PHP言語で記述されています。そのため、Apache、PHP、およびその他の必要な拡張機能をサーバーにインストールする必要があります。次のコマンドを実行してインストールできます:
apt-get install apache2 php php-gd php-xml php-json -y
すべてのパッケージがインストールされたら、Apacheサービスを開始し、システムの再起動時に開始できるようにします。
systemctl start apache2
systemctl enable apache2
終了したら、次のステップに進むことができます。
DokuWikiをインストールする
まず、DokuWikiのダウンロードページに移動し、次のコマンドを使用してDokuWikiの最新バージョンをダウンロードします。
wget https://download.dokuwiki.org/src/dokuwiki/dokuwiki-stable.tgz
ダウンロードが完了したら、ApacheWebルートディレクトリ内にDokuWikiのディレクトリを作成します。
mkdir /var/www/html/dokuwiki
次に、次のコマンドを使用して、ダウンロードしたファイルをDokuWikiディレクトリに抽出します。
tar -xvzf dokuwiki-stable.tgz -C /var/www/html/dokuwiki/ --strip-components=1
次に、次のコマンドを使用して、必要なファイルをいくつかコピーします。
cp /var/www/html/dokuwiki/.htaccess{.dist,} 次に、DokuWikiディレクトリに適切な所有権を設定します:
chown -R www-data:www-data /var/www/html/dokuwiki
終了したら、次のステップに進むことができます。
DokuWiki用のApache仮想ホストを作成する
次に、インターネット上でDokuWikiをホストするためのApache仮想ホスト構成ファイルを作成する必要があります。次のコマンドを使用して作成できます。
nano /etc/apache2/sites-available/dokuwiki.conf
次の行を追加します:
<VirtualHost *:80>
        ServerName    dokuwiki.example.com
        DocumentRoot  /var/www/html/dokuwiki

        <Directory ~ "/var/www/html/dokuwiki/(bin/|conf/|data/|inc/)">
            <IfModule mod_authz_core.c>
                AllowOverride All
                Require all denied
            </IfModule>
            <IfModule !mod_authz_core.c>
                Order allow,deny
                Deny from all
            </IfModule>
        </Directory>

        ErrorLog   /var/log/apache2/dokuwiki_error.log
        CustomLog  /var/log/apache2/dokuwiki_access.log combined
</VirtualHost>
ファイルを保存して閉じ、次のコマンドを使用して仮想ホスト構成ファイルを有効にします。
a2ensite dokuwiki.conf
次に、Apacheをリロードして変更を適用します。
systemctl reload apache2
次のコマンドを使用して、Apacheのステータスを確認することもできます。
systemctl status apache2
次の出力が得られます:
? apache2.service - The Apache HTTP Server
     Loaded: loaded (/lib/systemd/system/apache2.service; enabled; vendor preset: enabled)
     Active: active (running) since Wed 2021-10-24 04:01:29 UTC; 9min ago
       Docs: https://httpd.apache.org/docs/2.4/
    Process: 27698 ExecReload=/usr/sbin/apachectl graceful (code=exited, status=0/SUCCESS)
      Tasks: 77 (limit: 4691)
     Memory: 12.5M
     CGroup: /system.slice/apache2.service
             ??21346 /usr/sbin/apache2 -k start
             ??27703 Passenger watchdog
             ??27706 Passenger core
             ??27711 Passenger ust-router
             ??27729 /usr/sbin/apache2 -k start
             ??27730 /usr/sbin/apache2 -k start
Apacheを設定した後、Let'sEncryptSSL証明書を使用してWikiサイトを保護することをお勧めします。そのためには、システムにCertbotクライアントをインストールする必要があります。 Certbotは、EFF、Mozillaなどによって起動されたオープン認証局からLet's Encryptから証明書をフェッチし、それをWebサーバーに展開する使いやすいクライアントです。 Certbot Let's Encryptクライアントを使用すると、ドメインのSSL証明書を簡単にダウンロード、インストール、更新できます。
次のコマンドでCertbotをインストールできます:
apt-get install certbot python3-certbot-apache -y
Certbotクライアントが正常にインストールされたら、次のコマンドを実行して、WebサイトにLet'sEncryptSSLをインストールします。
certbot --apache -d dokuwiki.example.com
以下に示すように、有効なメールアドレスを提供し、利用規約に同意するよう求められます。
Saving debug log to /var/log/letsencrypt/letsencrypt.log
Plugins selected: Authenticator apache, Installer apache
Enter email address (used for urgent renewal and security notices) (Enter 'c' to
cancel): [email protected]

- - - - - - - - - - - - - - - - - - - - - - - - - - - - - - - - - - - - - - - -
Please read the Terms of Service at
https://letsencrypt.org/documents/LE-SA-v1.2-November-15-2017.pdf. You must
agree in order to register with the ACME server at
https://acme-v02.api.letsencrypt.org/directory
- - - - - - - - - - - - - - - - - - - - - - - - - - - - - - - - - - - - - - - -
(A)gree/(C)ancel: A

- - - - - - - - - - - - - - - - - - - - - - - - - - - - - - - - - - - - - - - -
Would you be willing to share your email address with the Electronic Frontier
Foundation, a founding partner of the Let's Encrypt project and the non-profit
organization that develops Certbot? We'd like to send you email about our work
encrypting the web, EFF news, campaigns, and ways to support digital freedom.
- - - - - - - - - - - - - - - - - - - - - - - - - - - - - - - - - - - - - - - -
(Y)es/(N)o: Y

Obtaining a new certificate
Performing the following challenges:
http-01 challenge for dokuwiki.example.com
Enabled Apache rewrite module
Waiting for verification...
Cleaning up challenges
Created an SSL vhost at /etc/apache2/sites-available/dokuwiki-le-ssl.conf
Enabled Apache socache_shmcb module
Enabled Apache ssl module
Deploying Certificate to VirtualHost /etc/apache2/sites-available/dokuwiki-le-ssl.conf
Enabling available site: /etc/apache2/sites-available/dokuwiki-le-ssl.conf
次に、次の出力に示すように、HTTPトラフィックをHTTPSにリダイレクトするか、すべてのトラフィックを安全なHTTPSアクセスにリダイレクトするようにNginxを構成するかを選択します。
Please choose whether or not to redirect HTTP traffic to HTTPS, removing HTTP access.
- - - - - - - - - - - - - - - - - - - - - - - - - - - - - - - - - - - - - - - -
1: No redirect - Make no further changes to the webserver configuration.
2: Redirect - Make all requests redirect to secure HTTPS access. Choose this for
new sites, or if you're confident your site works on HTTPS. You can undo this
change by editing your web server's configuration.
- - - - - - - - - - - - - - - - - - - - - - - - - - - - - - - - - - - - - - - -
Select the appropriate number [1-2] then [enter] (press 'c' to cancel): 2
2と入力し、Enterキーを押してプロセスを開始します。インストールが完了すると、次の出力が表示されます。
Enabled Apache rewrite module
Redirecting vhost in /etc/apache2/sites-enabled/dokuwiki.conf to ssl vhost in /etc/apache2/sites-available/dokuwiki-le-ssl.conf

- - - - - - - - - - - - - - - - - - - - - - - - - - - - - - - - - - - - - - - -
Congratulations! You have successfully enabled https://dokuwiki.example.com

You should test your configuration at:
https://www.ssllabs.com/ssltest/analyze.html?d=dokuwiki.example.com
- - - - - - - - - - - - - - - - - - - - - - - - - - - - - - - - - - - - - - - -

IMPORTANT NOTES:
 - Congratulations! Your certificate and chain have been saved at:
   /etc/letsencrypt/live/dokuwiki.example.com/fullchain.pem
   Your key file has been saved at:
   /etc/letsencrypt/live/dokuwiki.example.com/privkey.pem
   Your cert will expire on 2021-01-25. To obtain a new or tweaked
   version of this certificate in the future, simply run certbot again
   with the "certonly" option. To non-interactively renew *all* of
   your certificates, run "certbot renew"
 - If you like Certbot, please consider supporting our work by:

   Donating to ISRG / Let's Encrypt:   https://letsencrypt.org/donate
   Donating to EFF:                    https://eff.org/donate-le
この時点で、DokuwikiサイトはLet'sEncryptSSLで保護されています。これで、HTTPSプロトコルを使用してサイトに安全にアクセスできます。
Let'sEncryptのSSL証明書の自動更新の設定
デフォルトでは、Let’sEncrypt証明書は90日間有効です。そのため、SSL証明書を自動更新するためにcronジョブを設定する必要があります。毎週または毎日実行するcronジョブを作成しても安全です。
SSL証明書を手動で更新する場合は、次のコマンドを実行します。
certbot renew --dry-run
次のファイルを編集することにより、毎日午前10時にSSL証明書を自動更新するcronジョブを設定できます。
crontab -e
次の行を追加します:
00 10 * * * root /usr/bin/certbot renew >/dev/null 2>&1
終了したら、ファイルを保存して閉じます。
次に、Webブラウザーを開き、URL https://dokuwiki.example.com/install.phpを入力します。 。 DokuWikiのインストール画面が表示されます:
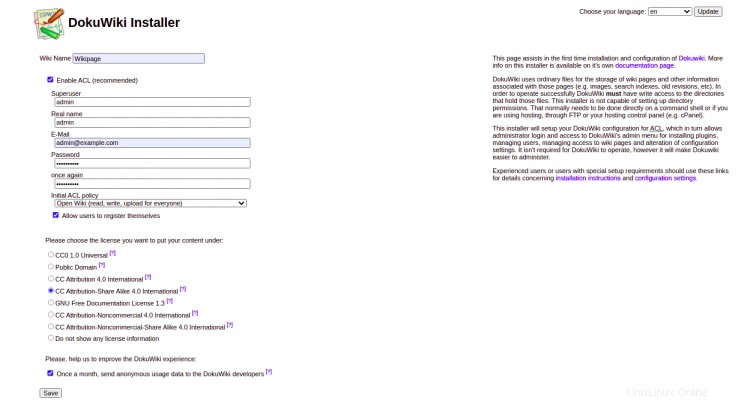
Wiki名、管理者ユーザー名、パスワード、電子メールを入力し、ポリシーを選択して、保存をクリックします。 ボタン。次のページにリダイレクトされます:
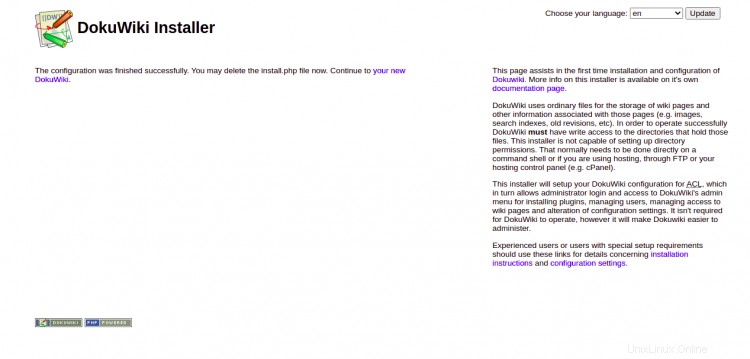
「新しいDokuWiki」をクリックします "。次の画面が表示されます:
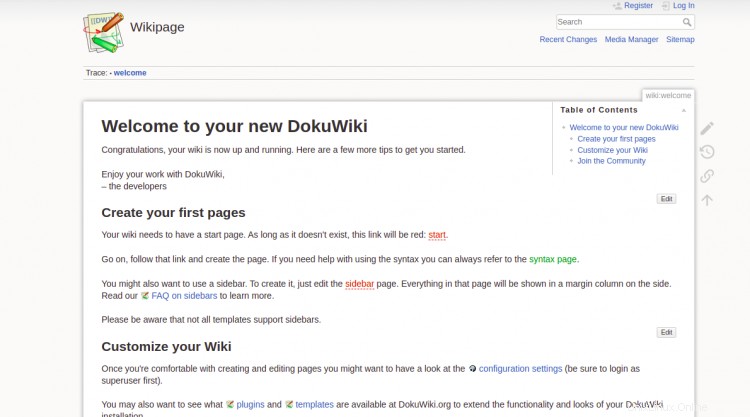
ログインをクリックします ボタン。以下に示すように、DokuWikiのログイン画面にリダイレクトされます。
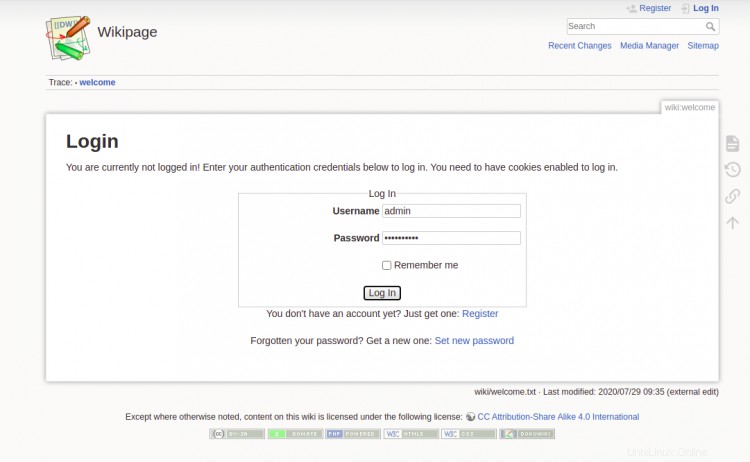
管理者のユーザー名とパスワードを入力し、ログインをクリックします ボタン。次の画面にDokuWikiダッシュボードが表示されます。
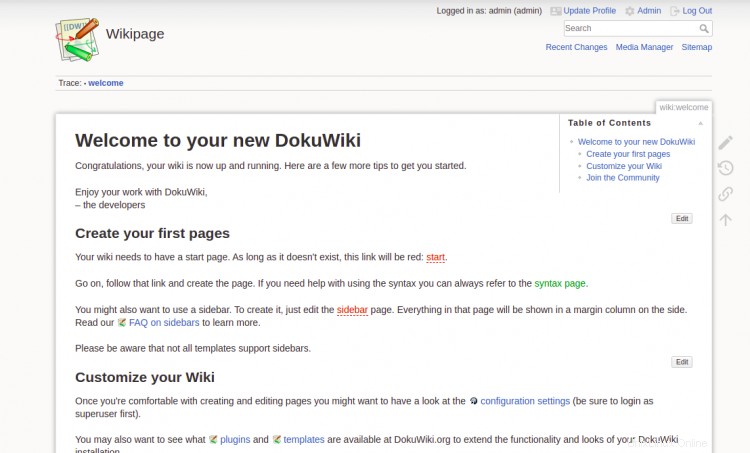
おめでとう!これで、DokuWikiが正常にインストールされ、Debian11でLet'sEncrypt SSLを使用して保護されました。これで、DokuWikiを使用して最初のWebサイトの作成を開始できます。ご不明な点がございましたら、お気軽にお問い合わせください。