TikiWikiは、PHP言語で記述された無料のオープンソースコンテンツ管理システムです。これは非常に強力でフル機能を備えており、Webサイト、Wiki、Webアプリケーション、ナレッジベース、ポータル、画像ギャラリーなどの作成に使用できます。 TikiWikiは、コンテンツ作成および管理ツール、コミュニケーションツール、構成および管理ツール、コンテンツ編成ツールおよびナビゲーション支援機能の4つの主要コンポーネントで構成されています。これらにより、コンテンツの作成と管理、およびサイトの構成が可能になります。 TikiWikiには、フォーラム、ブログ、マップ、ワークスペース、スライドショー、ショッピングカート、バグと問題の追跡システム、多言語、ファイルと画像のギャラリー、イベントなど、豊富な機能が備わっています。
このチュートリアルでは、Debian10にTikiWikiCMSをインストールする方法を学びます。
- Debian10を実行しているサーバー。
- ルートパスワードがサーバーに設定されます。
開始する前に、システムを最新バージョンに更新する必要があります。これを行うには、次のコマンドを実行します。
apt-get update -y
 apt-get upgrade -y
サーバーが更新されたら、サーバーを再起動して変更を適用します。
LAMPサーバーをインストールする
TikiWikiは、PHP言語で記述されたApache / Nginx Webサーバー上で実行され、MariaDB/MySQLを使用してデータを保存します。そのため、Apache、MariaDB、PHP、およびその他の必要な拡張機能をサーバーにインストールする必要があります。まず、次のコマンドを使用してApacheおよびMariaDBサーバーをインストールします。
apt-get install apache2 mariadb-server unzip -y
デフォルトでは、Debian10にはPHPバージョン7.3が付属しています。ただし、TikiWikiはPHP7.3をサポートしていません。そのため、PHP7.2およびその他の必要な拡張機能をインストールする必要があります。
SURYリポジトリを追加するには、最初に次のコマンドを使用してGPGキーをダウンロードします。
wget https://packages.sury.org/php/apt.gpg
 apt-key add apt.gpg
次に、次のコマンドを使用してSURYリポジトリをAPTに追加します。
echo "deb https://packages.sury.org/php/ $(lsb_release -sc) main" | tee /etc/apt/sources.list.d/php.list
次に、リポジトリを更新し、次のコマンドを使用して、必要なすべての拡張機能とともにPHP7.2をインストールします。
apt-get update -y
 apt-get install php7.2 libapache2-mod-php7.2 php7.2-common php7.2-sqlite3 php7.2-curl php7.2-intl php7.2-mbstring php7.2-xmlrpc php7.2-mysql php7.2-gd php7.2-xml php7.2-cli php7.2-zip -y
PHP7.2をインストールした後、php.iniファイルを開き、いくつかの設定を微調整します。
nano /etc/php/7.2/apache2/php.ini
次の行を追加します:
memory_limit = 256M
upload_max_filesize = 100M
max_execution_time = 360
date.timezone = Asia/Kolkata
終了したら、ファイルを保存して閉じます。次に、次の手順に進みます。
TikiWikiのデータベースを作成
デフォルトでは、MariaDBは保護されていません。したがって、最初にそれを保護する必要があります。次のスクリプトで保護できます:
mysql_secure_installation
以下に示すように、すべての質問に答える必要があります:
    Enter current password for root (enter for none):
    Set root password? [Y/n]: N
    Remove anonymous users? [Y/n]: Y
    Disallow root login remotely? [Y/n]: Y
    Remove test database and access to it? [Y/n]:  Y
    Reload privilege tables now? [Y/n]:  Y
MariaDBが保護されたら、MariaDBシェルにログインします。
mysql -u root -p
プロンプトが表示されたらrootパスワードを入力し、次のコマンドを使用してTikiWikiのデータベースとユーザーを作成します。
MariaDB [(none)]> CREATE DATABASE tikidb;
 MariaDB [(none)]> CREATE USER 'tiki'@'localhost' IDENTIFIED BY 'password';
次に、次のコマンドを使用して、TikiWikiデータベースにすべての権限を付与します。
MariaDB [(none)]> GRANT ALL ON tikidb.* TO 'tiki'@'localhost' IDENTIFIED BY 'password' WITH GRANT OPTION;
次に、特権をフラッシュし、次のコマンドを使用してMariaDBシェルを終了します。
MariaDB [(none)]> FLUSH PRIVILEGES;
 MariaDB [(none)]> EXIT;
完了したら、次のステップに進むことができます。
TikiWikiをダウンロード
まず、SourceforgeのWebサイトから最新バージョンのTikiWikiをダウンロードする必要があります。次のコマンドでダウンロードできます:
cd /var/www/html/
 wget https://sourceforge.net/projects/tikiwiki/files/latest/download -O tikiwiki.zip
ダウンロードが完了したら、次のコマンドを使用してダウンロードしたファイルを解凍します。
unzip tikiwiki.zip
次に、次のコマンドを使用して、抽出したディレクトリの名前をtikiwikiに変更します。
mv tiki-20.0 tikiwiki
次に、次のコマンドを使用して、tikiwikiディレクトリに適切な権限を付与します。
chown -R www-data:www-data /var/www/html/tikiwiki/
 chmod -R 755 /var/www/html/tikiwiki/
終了したら、次のステップに進むことができます。
TikiWiki用にApacheを設定する
次に、TikiWiki用のApache仮想ホスト構成ファイルを作成する必要があります。次のコマンドで作成できます:
nano /etc/apache2/sites-available/tikiwiki.conf
次のコンテンツを追加します:
<VirtualHost *:80>
     ServerAdmin [email protected]
     DocumentRoot /var/www/html/tikiwiki
     ServerName example.com

     <Directory /var/www/html/tikiwiki/>
          Options FollowSymlinks
          AllowOverride All
          Require all granted
     </Directory>

     ErrorLog ${APACHE_LOG_DIR}/tikiwiki_error.log
     CustomLog ${APACHE_LOG_DIR}/tikiwiki_access.log combined

</VirtualHost>
ファイルを保存して閉じます。次に、次のコマンドを使用して仮想ホスト構成ファイルを有効にします。
a2ensite tikiwiki.conf
最後に、Apache rewriteモジュールを有効にし、Apacheサービスを再起動して、次のコマンドで構成の変更を再ロードします。
a2enmod rewrite
 systemctl restart apache2
TikiWikiWebインターフェイスにアクセス
次に、Webブラウザーを開き、URLhttp://example.comを入力します。 TikiWikiのウェルカムページにリダイレクトされます:
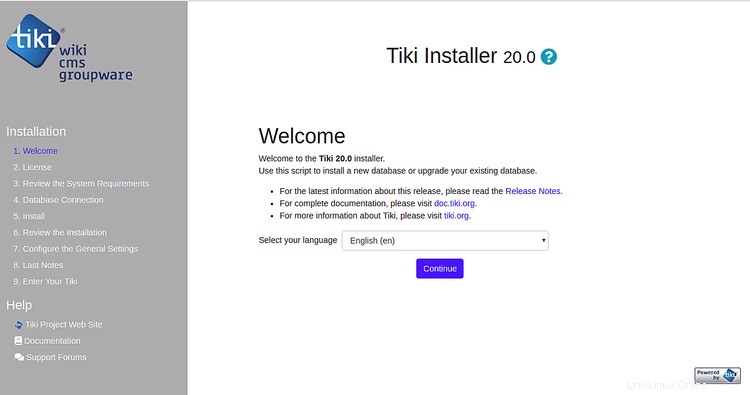
言語を選択して、続行をクリックします ボタン。次のページが表示されます:
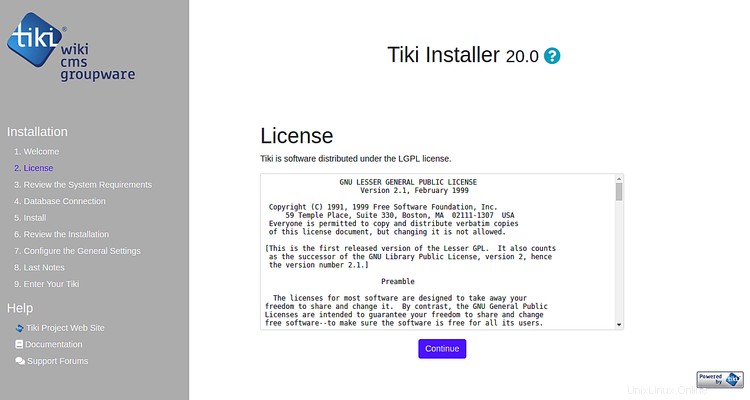
使用許諾契約に同意し、続行をクリックします ボタン。次のページが表示されます:
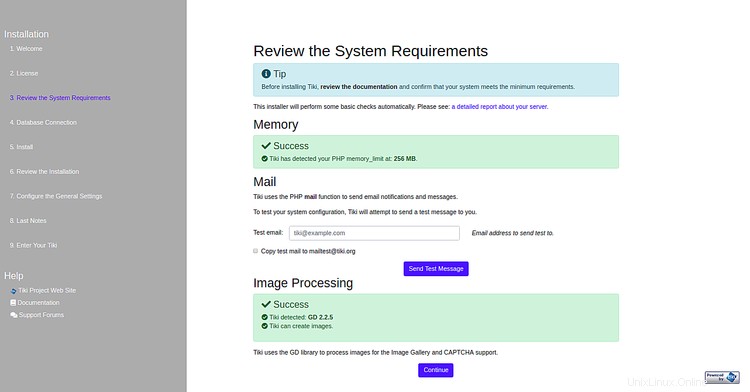
システムが最小要件を満たしていることを確認し、続行をクリックします ボタン。次のページが表示されます:

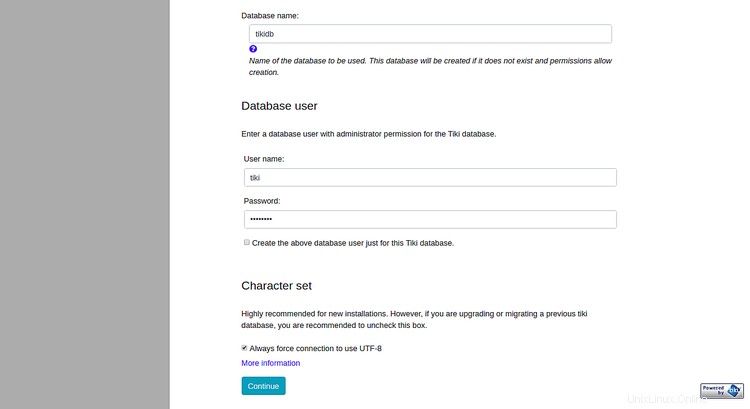
データベース名、データベースのユーザー名、およびパスワードを入力します。次に、続行をクリックします ボタン。次のページが表示されます:
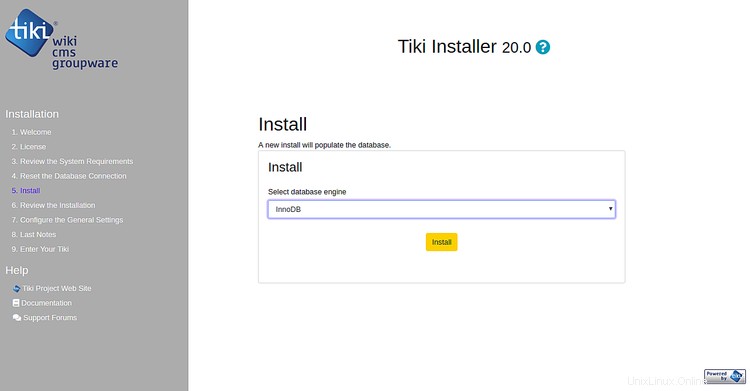
データベースエンジンを選択し、インストールをクリックします ボタンをクリックしてインストールを開始します。インストールが正常に完了すると、次のページが表示されます。

次に、続行をクリックします ボタンをクリックすると、次のページが表示されます:
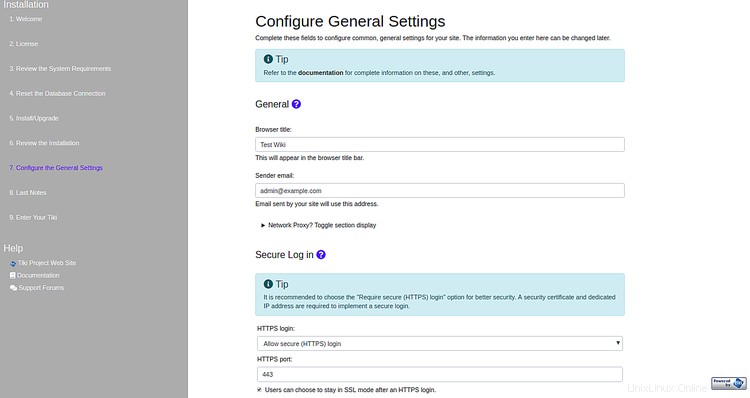
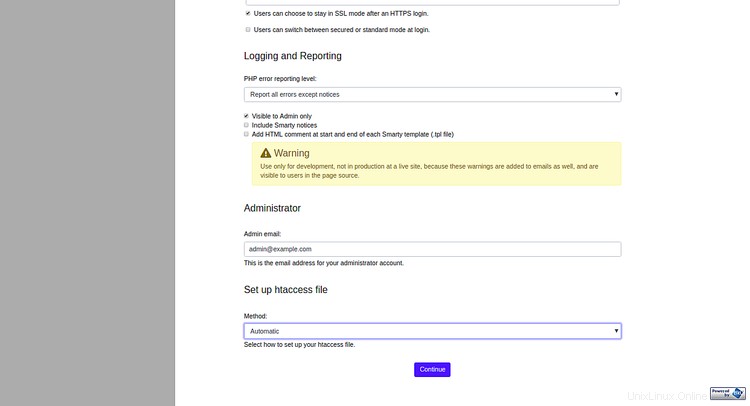
Wikiタイトル、送信者メール、安全なログイン、管理者メールなどの必要な情報をすべて入力し、続行をクリックします。 ボタン。次のページが表示されます:
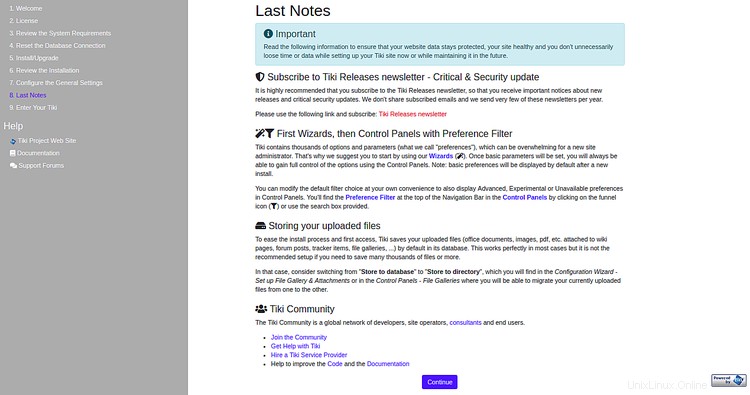
すべての情報を読み、続行をクリックします ボタン。次のページが表示されます:
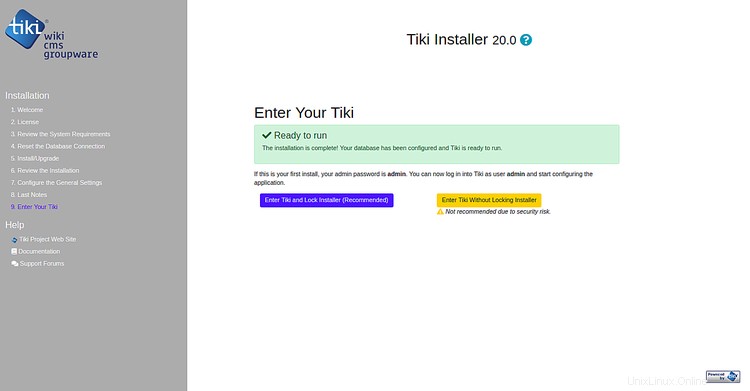
次に、[ Tiki andLockInstallerを入力]をクリックします。 「」ボタン。次のページが表示されます:
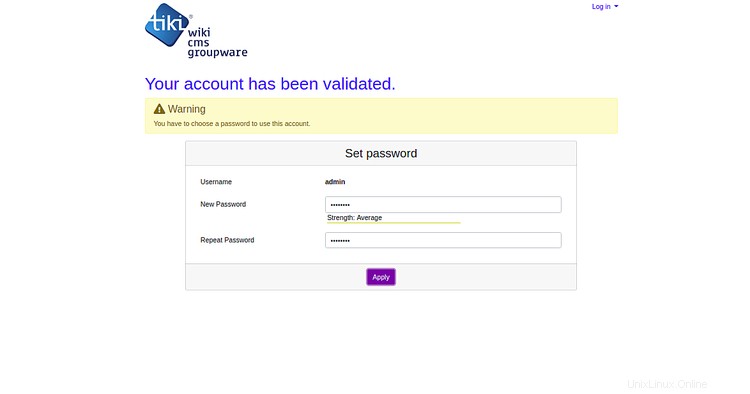
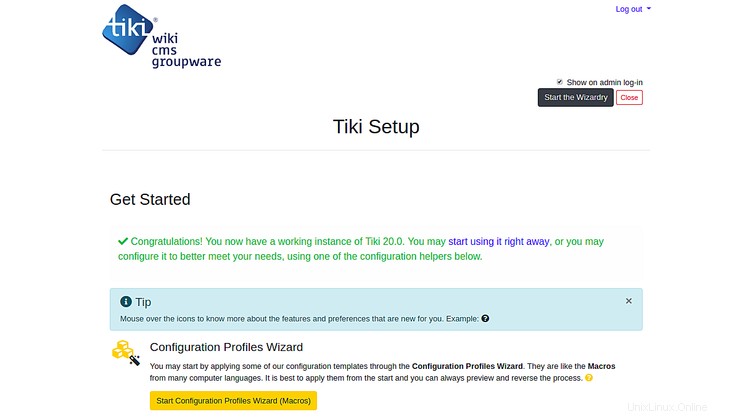
次に、管理者パスワードを設定し、適用をクリックします。 ボタン。次のページが表示されます:
Let’sEncryptを使用してTikiWikiを保護する
このセクションでは、Let’sEncryptの無料SSLを使用してTikiWikiサイトを保護する方法について説明します。
まず、Certbotツールをインストールして、WebサイトにLet’sEncryptの無料SSLをダウンロードしてインストールする必要があります。デフォルトでは、Certbotの最新バージョンはDebian10デフォルトリポジトリで利用できません。したがって、Certbotリポジトリをシステムに追加する必要があります。
次のコマンドを使用して、Certbotリポジトリを追加できます。
apt-get install software-properties-common
 add-apt-repository ppa:certbot/certbot
次に、リポジトリを更新し、次のコマンドを使用してCertbotをインストールします。
apt-get update -y
 apt-get install certbot python-certbot-apache -y
インストールしたら、Let’sEncryptのwell-known.confファイルを作成してドメインを検証します。
まず、.well-knownディレクトリを作成し、適切な権限を付与します。
mkdir -p /var/lib/letsencrypt/.well-known
 chgrp www-data /var/lib/letsencrypt
 chmod g+s /var/lib/letsencrypt
次に、次のコマンドを使用してwell-known.confファイルを作成します。
nano /etc/apache2/conf-available/well-known.conf
次の行を追加します:
Alias /.well-known/acme-challenge/ "/var/lib/letsencrypt/.well-known/acme-challenge/"
<Directory "/var/lib/letsencrypt/">
    AllowOverride None
    Options MultiViews Indexes SymLinksIfOwnerMatch IncludesNoExec
    Require method GET POST OPTIONS
</Directory>
ファイルを保存して閉じます。次に、次のコマンドを使用して必要なモジュールを有効にします。
a2enmod ssl
 a2enmod http2
 a2enmod headers
 a2enconf well-known
次に、Apacheサービスを再起動して、すべての構成変更を適用します。
systemctl restart apache2
それでは、次のコマンドを使用して、ドメインexample.comの無料のSSL証明書のインストールを開始しましょう。
certbot --apache -d example.com
まず、有効なメールアドレスを提供し、以下に示す利用規約に同意する必要があります。
Saving debug log to /var/log/letsencrypt/letsencrypt.log
Plugins selected: Authenticator apache, Installer apache
Enter email address (used for urgent renewal and security notices) (Enter 'c' to
cancel): [email protected]

- - - - - - - - - - - - - - - - - - - - - - - - - - - - - - - - - - - - - - - -
Please read the Terms of Service at
https://letsencrypt.org/documents/LE-SA-v1.2-November-15-2017.pdf. You must
agree in order to register with the ACME server at
https://acme-v02.api.letsencrypt.org/directory
- - - - - - - - - - - - - - - - - - - - - - - - - - - - - - - - - - - - - - - -
(A)gree/(C)ancel: A

- - - - - - - - - - - - - - - - - - - - - - - - - - - - - - - - - - - - - - - -
Would you be willing to share your email address with the Electronic Frontier
Foundation, a founding partner of the Let's Encrypt project and the non-profit
organization that develops Certbot? We'd like to send you email about our work
encrypting the web, EFF news, campaigns, and ways to support digital freedom.
- - - - - - - - - - - - - - - - - - - - - - - - - - - - - - - - - - - - - - - -
(Y)es/(N)o: Y
Obtaining a new certificate
Performing the following challenges:
http-01 challenge for example.com
Enabled Apache rewrite module
Waiting for verification...
Cleaning up challenges
Created an SSL vhost at /etc/apache2/sites-available/example.com-le-ssl.conf
Deploying Certificate to VirtualHost /etc/apache2/sites-available/example.com-le-ssl.conf
Enabling available site: /etc/apache2/sites-available/example.com-le-ssl.conf

Please choose whether or not to redirect HTTP traffic to HTTPS, removing HTTP access.
- - - - - - - - - - - - - - - - - - - - - - - - - - - - - - - - - - - - - - - -
1: No redirect - Make no further changes to the webserver configuration.
2: Redirect - Make all requests redirect to secure HTTPS access. Choose this for
new sites, or if you're confident your site works on HTTPS. You can undo this
change by editing your web server's configuration.
- - - - - - - - - - - - - - - - - - - - - - - - - - - - - - - - - - - - - - - -
Select the appropriate number [1-2] then [enter] (press 'c' to cancel): 2
次に、オプション2を選択して、ドメインの無料のSSL証明書をダウンロードしてインストールします。インストールが正常に完了したら。次の出力が得られるはずです:
Enabled Apache rewrite module
Redirecting vhost in /etc/apache2/sites-enabled/example.com.conf to ssl vhost in /etc/apache2/sites-available/
example.com-le-ssl.conf

- - - - - - - - - - - - - - - - - - - - - - - - - - - - - - - - - - - - - - - -
Congratulations! You have successfully enabled https://example.com

You should test your configuration at:
https://www.ssllabs.com/ssltest/analyze.html?d=example.com
- - - - - - - - - - - - - - - - - - - - - - - - - - - - - - - - - - - - - - - -

IMPORTANT NOTES:
 - Congratulations! Your certificate and chain have been saved at:
   /etc/letsencrypt/live/example.com/fullchain.pem
   Your key file has been saved at:
   /etc/letsencrypt/live/example.com/privkey.pem
   Your cert will expire on 2019-10-22. To obtain a new or tweaked
   version of this certificate in the future, simply run certbot again
   with the "certonly" option. To non-interactively renew *all* of
   your certificates, run "certbot renew"
 - Your account credentials have been saved in your Certbot
   configuration directory at /etc/letsencrypt. You should make a
   secure backup of this folder now. This configuration directory will
   also contain certificates and private keys obtained by Certbot so
   making regular backups of this folder is ideal.
 - If you like Certbot, please consider supporting our work by:
   Donating to ISRG / Let's Encrypt:   https://letsencrypt.org/donate
   Donating to EFF:                    https://eff.org/donate-le
それでおしまい。次に、Webブラウザーを開き、URLhttps://example.comを使用してTikiWikiCMSにアクセスします。 TikiWikiサイトが無料のSSL証明書で適切に保護されている必要があります。