
ステージング環境や本番環境に簡単にデプロイできる、クリーンで問題のないコードを用意することは、すべての開発者の夢です。これを実現するのに役立つツールの1つは、CI/CDパイプラインにあるSonarQubeです。 SonarQube は、ソースコードの継続的な検査に使用されるクロスプラットフォームのWebベースのツールです。 Javaで書かれています。 SonarQubeを使用すると、コードを検査し、バグやその他の不整合を検出することで、よりクリーンで安全なコードを記述できます。
SonarQubeは、GitHub、Gitlab、BitBucket、Azure DevOpsなどのプラットフォームに統合して、いくつかのプラットフォームに言及することができます。 Community、Developer、Enterprise、Datacenterの各エディションを含むさまざまなエディションがあります。
このチュートリアルでは、SonarQubeをインストールする方法を学びます。 Ubuntu 20.04 。 SSL証明書を無料でダウンロードして有効にすることができるため、Communityエディションをインストールします。 (https) Let's Encrypt Nginxをリバースプロキシとして設定します。
前提条件
始める前に、次の要件を満たしていることを確認してください。
- sudoユーザーが構成されたUbuntu20.04LTS。
- システムに最低4GBのRAMと2vCPUコアがあることを確認してください
いくつかのツールをインストールする必要があります
$ sudo apt update
$ sudo apt install net-tools unzip vim curl
また、仮想メモリカーネルを増やす必要があります
$ sudo sysctl -w vm.max_map_count=262144開いているファイルの最大数
$ sudo sysctl -w fs.file-max=65536およびリソース制限
$ ulimit -n 65536$ ulimit -u 4096
/etc/sysctl.conf 構成ファイル
$ sudo vim /etc/sysctl.conf次の行を追加します。
vm.max_map_count=262144
fs.file-max=65536
ulimit -n 65536
ulimit -u 4096
保存して終了。その後、 limits.confを開きます ファイル
$ sudo vim /etc/security/limits.conf一番下に、次の行を追加します
sonarqube - nofile 65536
sonarqube - nproc 4096
保存して終了。変更を有効にするには、サーバーを再起動します。
ステップ1:OpenJDKをインストールする
Javaで記述されているため、SonarQubeはJavaに依存して機能します。 Javaを提供するOpenJDK11をインストールします。
$ sudo apt install openjdk-11-jdkインストールすると、Javaのバージョンを確認できます。
$ java -versionステップ2:PostgreSQLデータベースをインストールする
2016年から、SonarQubeはMySQLのサポートを終了し、PostgreSQLのみをサポートするようになりました。そのため、PostgreSQLデータベースをインストールする必要があります。
まず、PostgreSQLGPGキーをダウンロードして追加します。
$ wget -q https://www.postgresql.org/media/keys/ACCC4CF8.asc -O - | sudo apt-key add -その後、PostgreSQLリポジトリを追加します。
$ sudo sh -c 'echo "deb http://apt.postgresql.org/pub/repos/apt/ `lsb_release -cs`-pgdg main" >> /etc/apt/sources.list.d/pgdg.list'次に、パッケージインデックスを更新して、新しいリポジトリを同期します。
$ sudo apt updateパッケージリストの更新が完了したら、PostgreSQLデータベースとその依存関係をインストールします。
$ sudo apt install postgresql postgresql-contribデフォルトでは、PostgreSQLサービスはインストール後に開始されます。開始されていない場合は、次のコマンドを実行します。
$ sudo systemctl start postgresqlすべてが期待どおりに実行されていることを確認するために、実行ステータスを確認します。
$ sudo systemctl status postgresql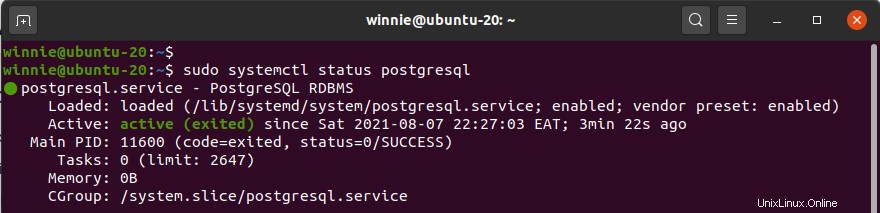
リッスンしているポートを確認することもできます:
$ sudo netstat -pnltu | grep 5432tcp 0 0 127.0.0.1:5432 0.0.0.0:* LISTEN 7768/postgres
tcp6 0 0 ::1:5432 :::* LISTEN 7768/postgres 起動時にPostgreSQLが自動的に起動するようにします:
$ sudo systemctl enable postgresqlこれまでのところ、PostgreSQLは問題なく稼働しています。
ステップ3:PostgreSQLを構成する
次に、PostgreSQLのインストール時に通常デフォルトで提供されるPostgresユーザーのパスワードを設定します。これを行うには、次のコマンドを実行します:
$ sudo passwd postgresパスワードを入力して確認します。次に、Postgresユーザーに切り替えます。
$ su - postgres次に、次に進み、新しいデータベースユーザーを作成します。
$ createuser sonar完了したら、次のコマンドを使用してPostgreSQLプロンプトに切り替えます。
$ psqlPostgreSQLシェルにアクセスして、作成したばかりのユーザーのパスワードを作成します。
ALTER USER sonar WITH ENCRYPTED PASSWORD 'strong_password';次に、作成したユーザーを所有者としてSonarQubeデータベースを作成します
CREATE DATABASE sonarqube OWNER sonar;次に、データベースを変更するためのすべての権限を持つように、データベースの使用にすべての権限を割り当てるか付与します。
GRANT ALL PRIVILEGES ON DATABASE sonarqube to sonar;次にデータベースを終了します。
\qステップ4:SonarQubeをダウンロードして構成する
次に、最新のSonarQubeバイナリzipファイルをダウンロードします。現時点では、Long Term Service(LTS)リリースである最新のCommunity Editionリリースは、SonarQubeバージョン9.0.1です。最新のダウンロードについては、SonarQubeダウンロードページにアクセスしてください。
zipファイルをダウンロードするには、次のコマンドを発行します。
$ wget https://binaries.sonarsource.com/Distribution/sonarqube/sonarqube-9.0.1.46107.zip 次に、zipファイルを解凍します。
$ unzip sonarqube-9.0.1.46107.zipそして、それを/opt/パスに移動します。
$ sudo mv sonarqube-9.0.1.46107 /opt/sonarqubeステップ5:新しいユーザーとグループを作成する
次に、SonarQubeサービスを実行する新しいユーザーとグループを作成します。したがって、グループを作成します。
$ sudo groupadd sonar次に、新しく作成したグループにユーザーを追加するときに、ホームディレクトリを/ opt/sonarqubeに設定してユーザーを作成します。
$ sudo useradd -c "SonarQube - User" -d /opt/sonarqube/ -g sonar sonar次に、所有権を/ opt/sonarqubeディレクトリに設定します。
$ sudo chown -R sonar:sonar /opt/sonarqube/ステップ6:SonarQubeを構成する
それでは、SonarQubeを設定しましょう。 SonarQube構成ファイルを開きます。
$ sudo vim /opt/sonarqube/conf/sonar.properties
次の行を見つけてコメントを外します
sonar.jdbc.username=
sonar.jdbc.password=
これらは、PostgreSQLデータベースサーバーで作成したSonarQubeデータベースのユーザーとパスワードを表しています。したがって、それに応じて値を入力してください。
sonar.jdbc.username=sonar_user
sonar.jdbc.password=strong_password
次に、これらの行を変更して、提供されているもののように見せます
sonar.jdbc.url=jdbc:postgresql://localhost:5432/sonarqubesonar.search.javaOpts=-Xmx512m -Xms512m -XX:MaxDirectMemorySize=256m -XX:+HeapDumpOnOutOfMemoryErrorその後、次の行を変更して、見た目どおりに表示します。
sonar.web.host=0.0.0.0sonar.web.port=9000sonar.web.javaAdditionalOpts=-serversonar.log.level=INFOsonar.path.logs=logs次に、表示されているファイルを編集して、SonarQubeサービスを実行するユーザーを変更します。
$ sudo vim /opt/sonarqube/bin/linux-x86-64/sonar.sh下にスクロールして、下の行が次のように表示されることを確認します。
RUN_AS_USER=sonarステップ7:SonarQubeのSystemdサービスファイルを作成する
現時点では、私たちのシステムにはSonarQubeサービスを開始する方法がありません。したがって、systemdサービスを作成する必要があります。これを行うには、次のコマンドを実行します:
$ sudo vim /etc/systemd/system/sonarqube.service次の行を追加します。
[Unit]
Description=SonarQube service
After=syslog.target network.target

[Service]
Type=forking
ExecStart=/opt/sonarqube/bin/linux-x86-64/sonar.sh start
ExecStop=/opt/sonarqube/bin/linux-x86-64/sonar.sh stop
User=sonar
Group=sonar
Restart=always
LimitNOFILE=65536
LimitNPROC=4096

[Install]
WantedBy=multi-user.target
変更を保存してファイルを終了します。
起動時にSonarQubeサービスを開始できるようにする
$ sudo systemctl enable sonarqubeそして、SonarQubeサービスを開始します。
$ sudo systemctl start sonarqubeSonarQubeサービスが実行されていることを確認するには、次のコマンドを実行します。
$ sudo systemctl status sonarqube
また、ポート9000が開いていることを確認してください
$ sudo ufw allow '9000'Rules updated
Rules updated (v6)サービスがポート9000でリッスンしているかどうかを確認します
$ sudo netstat -pnltu | grep 9000tcp6 0 0 :::9000 :::* LISTEN 65140/java
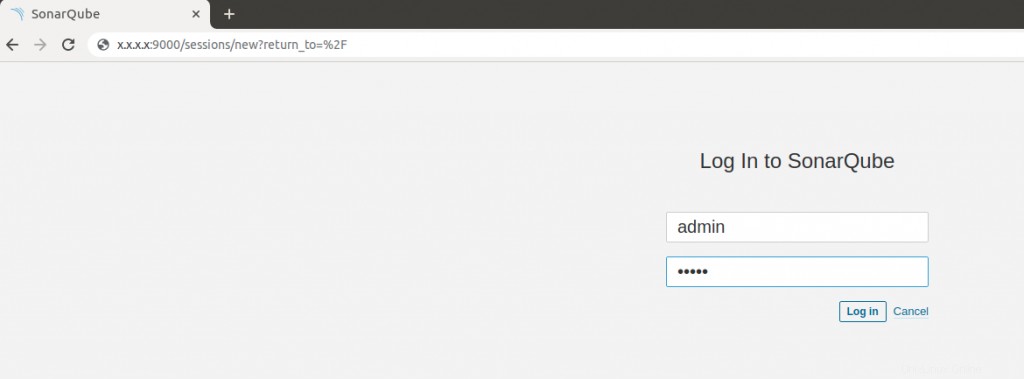
これで、サーバーのパブリックIPとブラウザからのポート番号(http://<server-ip>:9000/)を入力して、ログインページにアクセスできるかどうかを確認できます。 。デフォルトの管理者ユーザー名は「admin」で、パスワードは「admin」です。
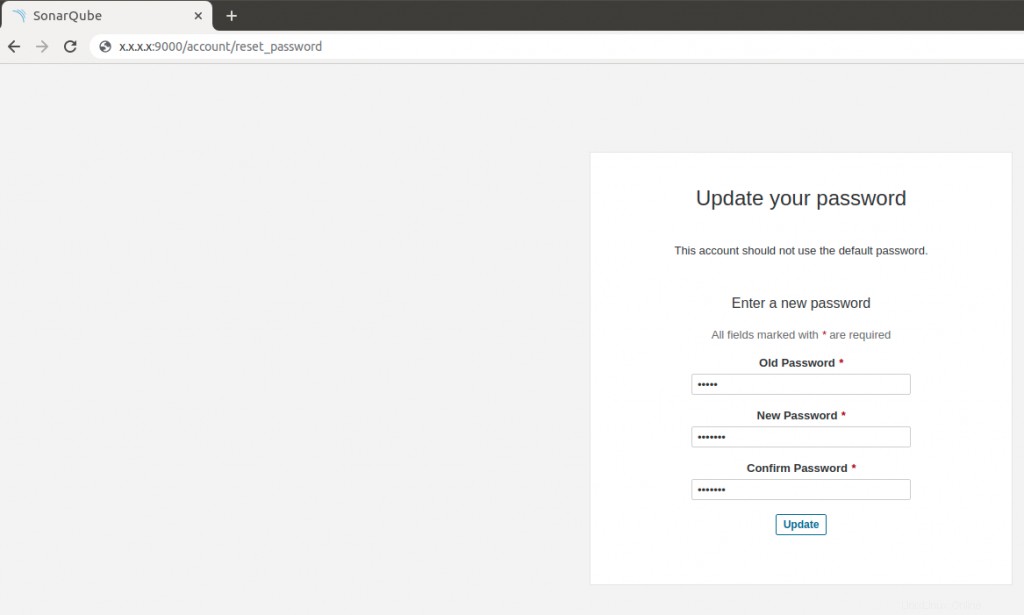
Sonarqubeは、デフォルトのパスワードを変更するためにパスワードを更新するように要求します。
ステップ8:SSLを使用したNginxのインストールと構成(オプション)
SSLが有効なドメイン名でSonarqubeにアクセスするには、Nginxなどのリバースプロキシをインストールする必要があります。ウェブサーバーはSonarQubeへの接続をプロキシし、開発者がセキュリティで保護されたドメイン名からアクセスできるようにします。
Nginxのインストールはシンプルで簡単で、1つのコマンドで実行できます。
$ sudo apt install nginxインストール後、Nginxウェブサーバーが起動時に起動できるようにします。
$ sudo systemctl enable nginxそしてサービスを開始します
$ sudo systemctl start nginxWebサーバーがSonarQubeを認識できるように、表示されている構成ファイルを作成します。
$ sudo vim /etc/nginx/sites-available/sonarqube.conf次に、提供されたコンテンツを貼り付けます。
server {

listen 80;
server_name example.com or SERVER-IP;
access_log /var/log/nginx/sonar.access.log;
error_log /var/log/nginx/sonar.error.log;
proxy_buffers 16 64k;
proxy_buffer_size 128k;

location / {
proxy_pass http://127.0.0.1:9000;
proxy_next_upstream error timeout invalid_header http_500 http_502 http_503 http_504;
proxy_redirect off;
proxy_set_header Host $host;
proxy_set_header X-Real-IP $remote_addr;
proxy_set_header X-Forwarded-For $proxy_add_x_forwarded_for;
proxy_set_header X-Forwarded-Proto http;
}
}
保存して終了。次に、Sonarqubeサイトを有効にします:
$ sudo ln -s /etc/nginx/sites-available/sonarqube.conf /etc/nginx/sites-enabled/sonarqube.conf構成が正しいかどうかを確認します
$ sudo nginx -tnginx: the configuration file /etc/nginx/nginx.conf syntax is ok
nginx: configuration file /etc/nginx/nginx.conf test is successful次に、変更を適用するためにNginxWebサーバーを再起動します。
$ sudo systemctl restart nginx次に、nginxを許可するようにUFWファイアウォールを構成する必要があります。これを行うには、コマンドを実行します
$ sudo ufw allow 'Nginx Full'次に、ファイアウォールをリロードして変更を有効にします。
$ sudo ufw --reloadこれで、ドメイン名を使用してSonarQubeにアクセスできます
ここでは、無料の証明書を暗号化しましょうを使用します。 Nginx用にcerbotを実行する必要があることを構成するには:
$ sudo certbot --nginxSaving debug log to /var/log/letsencrypt/letsencrypt.log Plugins selected: Authenticator nginx, Installer nginx Enter email address (used for urgent renewal and security notices) (Enter 'c' to cancel): alain@websitefortesting.com Please read the Terms of Service at https://letsencrypt.org/documents/LE-SA-v1.2-November-15-2017.pdf. You must agree in order to register with the ACME server at https://acme-v02.api.letsencrypt.org/directory (A)gree/(C)ancel: A Would you be willing to share your email address with the Electronic Frontier Foundation, a founding partner of the Let's Encrypt project and the non-profit organization that develops Certbot? We'd like to send you email about our work encrypting the web, EFF news, campaigns, and ways to support digital freedom. (Y)es/(N)o: NSaving debug log to /var/log/letsencrypt/letsencrypt.log Plugins selected: Authenticator nginx, Installer nginx Which names would you like to activate HTTPS for? 1: websitefortesting.com Select the appropriate numbers separated by commas and/or spaces, or leave input blank to select all options shown (Enter 'c' to cancel): 1 Obtaining a new certificate Performing the following challenges: http-01 challenge for websitefortesting.com Waiting for verification… Cleaning up challenges Deploying Certificate to VirtualHost /etc/nginx/sites-enabled/sonarqube.conf Please choose whether or not to redirect HTTP traffic to HTTPS, removing HTTP access. 1: No redirect - Make no further changes to the webserver configuration. 2: Redirect - Make all requests redirect to secure HTTPS access. Choose this for new sites, or if you're confident your site works on HTTPS. You can undo this change by editing your web server's configuration. Select the appropriate number [1-2] then [enter] (press 'c' to cancel): 2 Redirecting all traffic on port 80 to ssl in /etc/nginx/sites-enabled/sonarqube.conf Congratulations! You have successfully enabled https://websitefortesting.com You should test your configuration at: https://www.ssllabs.com/ssltest/analyze.html?d=websitefortesting.com IMPORTANT NOTES: Congratulations! Your certificate and chain have been saved at: /etc/letsencrypt/live/websitefortesting.com/fullchain.pem Your key file has been saved at: /etc/letsencrypt/live/websitefortesting.com/privkey.pem Your cert will expire on 2021-11-27. To obtain a new or tweaked version of this certificate in the future, simply run certbot again with the "certonly" option. To non-interactively renew all of your certificates, run "certbot renew" If you like Certbot, please consider supporting our work by: Donating to ISRG / Let's Encrypt: https://letsencrypt.org/donate Donating to EFF: https://eff.org/donate-le
デフォルトでは、暗号化してNginxサーバーブロックファイルにいくつかの行を追加します。
このようなものが必要です
server { server_name websitefortesting.com; add_header Strict-Transport-Security max-age=2592000; #rewrite ^ https://$server_name$request_uri? permanent; access_log /var/log/nginx/sonarqube.access.log; error_log /var/log/nginx/sonarqube.error.log; proxy_buffers 16 64k; proxy_buffer_size 128k; location / { proxy_pass http://127.0.0.1:9000; proxy_set_header Host $host; proxy_set_header X-Real-IP $remote_addr; proxy_set_header X-Forwarded-For $proxy_add_x_forwarded_for; proxy_set_header X-Forwarded-Proto http; } listen 443 ssl; # managed by Certbot ssl_certificate /etc/letsencrypt/live/websitefortesting.com/fullchain.pem; # managed by Certbot ssl_certificate_key /etc/letsencrypt/live/websitefortesting.com/privkey.pem; # managed by Certbot include /etc/letsencrypt/options-ssl-nginx.conf; # managed by Certbot ssl_dhparam /etc/letsencrypt/ssl-dhparams.pem; # managed by Certbot } server { if ($host = websitefortesting.com) { return 301 https://$host$request_uri; } # managed by Certbotlisten 80;server_name websitefortesting.com; return 404; # managed by Certbot }
ステップ10:HTTPSを使用してSonarQubeにアクセスする
これで、Let'sEncryptで構成されたHTTPSURLを使用してSonarQubeに安全にアクセスできます。
https://domain-name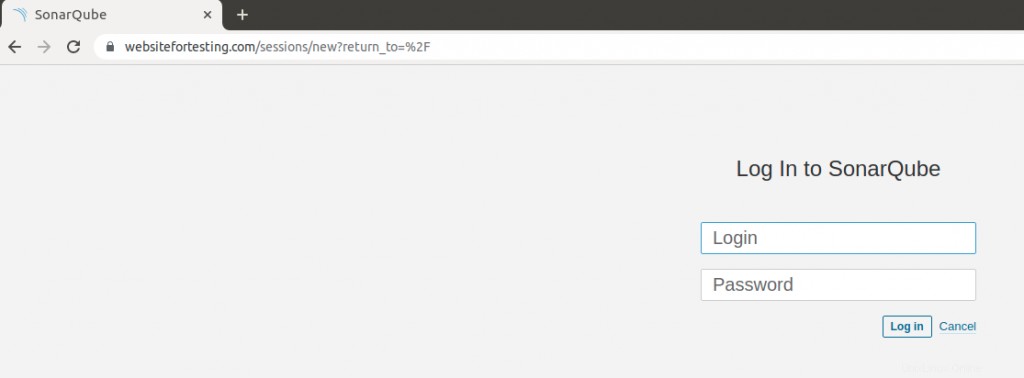
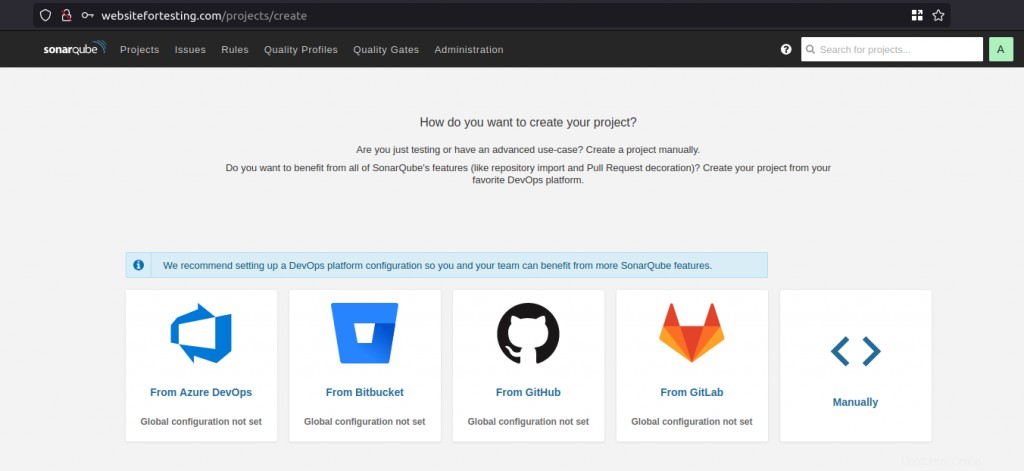
ログインすると、ランディングページが表示されます。
結論
このチュートリアルでは、Ubuntu20.04にSonarQubeをインストールする方法を学びました。リバースプロキシとしてNginxを使用してLet'sEncrypt証明書を使用し、SSLでSonarqubeを有効にしました。