Taigaは、スタートアップ、アジャイル開発者、デザイナー向けの無料のオープンソースのシンプルで強力なプロジェクト管理ツールです。スクラムとかんばんの両方のフレームワークでアジャイルを実行するチームをサポートします。フロントエンドはJavaScriptで記述され、バックエンドはPythonとDjangoで記述されています。これは非常に強力で完全にカスタマイズ可能なアプリケーションであり、開発者とチームの単純なプロジェクトと複雑なプロジェクトの両方を処理できます。かんばん、スクラム、Talky.io、Appear.inなどの多くのサービスと簡単に統合できます。
このチュートリアルでは、Ubuntu20.04サーバーにTaigaプロジェクト管理ツールをインストールする方法を示します。
- Ubuntu20.04を実行しているサーバー。
- サーバーIPで指定された有効なドメイン名。
- ルートパスワードがサーバーに設定されます。
まず、次のコマンドを使用して、システムパッケージを最新バージョンに更新します。
apt-get update -y
すべてのパッケージが更新されたら、次のコマンドを実行して、Taigaに必要な他の依存関係をインストールします。
apt-get install git gnupg2 pwgen automake wget curl gettext python3 virtualenvwrapper python3-dev python3-pip python3-dev libssl-dev tmux build-essential libgdbm-dev binutils-doc autoconf flex gunicorn bison libjpeg-dev libzmq3-dev libfreetype6-dev zlib1g-dev libncurses5-dev libtool libxslt-dev libxml2-dev libffi-dev
次に、システムに完全修飾ホスト名を設定する必要があります。次のコマンドで設定できます:
hostnamectl set-hostname taiga.example.com
次に、ホスト名をIPアドレスにバインドする必要があります。 / etc / hostsファイルを編集することでそれを行うことができます:
nano /etc/hosts
次の行を追加します:
your-server-ip taiga.example.com
終了したら、ファイルを保存して閉じます。
Node.jsをインストール
次に、Node.jsをシステムにインストールする必要があります。デフォルトでは、最新バージョンのNode.jsはUbuntu20.04のデフォルトリポジトリでは利用できません。そのため、Node.jsリポジトリをシステムに追加する必要があります。次のコマンドで追加できます:
curl -sL https://deb.nodesource.com/setup_12.x | bash -
リポジトリが追加されたら、次のコマンドを使用して最新バージョンのNode.jsをインストールします。
apt-get install nodejs -y
Node.jsをインストールした後、次のコマンドを使用して、インストールされているNode.jsのバージョンを確認します。
node -v
次の出力が得られるはずです:
v12.19.0
PostgreSQLのインストールと構成
TaigaはPostgreSQLサーバーをデータベースバックエンドとして使用します。したがって、システムにインストールする必要があります。まず、次のコマンドを使用してPostgreSQLGPGキーを追加します。
wget --quiet -O - https://www.postgresql.org/media/keys/ACCC4CF8.asc | apt-key add -
次に、次のコマンドを使用してPostgreSQLリポジトリを追加します。
echo "deb http://apt.postgresql.org/pub/repos/apt/ focal-pgdg main" | tee /etc/apt/sources.list.d/pgdg.list
次に、リポジトリを更新し、次のコマンドを使用してPostgreSQLの最新バージョンをインストールします。
apt-get update -y
apt-get install postgresql -y
次に、次のコマンドを使用してPostgreSQLのパスワードを変更します。
passwd postgres
次の出力が得られるはずです:
New password:
Retype new password:
passwd: password updated successfully
次に、ユーザーをpostgresに切り替えて、Taigaのユーザーを作成します。
su - postgres
[email protected]:~$ createuser taiga
次に、次のコマンドを使用してPostgreSQLシェルにログインします。
[email protected]:~$ psql
出力:
psql (13.0 (Ubuntu 13.0-1.pgdg20.04+1))
Type "help" for help.
ログインしたら、次のコマンドを使用してユーザーとデータベースを作成します。
postgres=# ALTER USER taiga WITH ENCRYPTED password 'yourpassword';
postgres=# CREATE DATABASE taiga OWNER taiga;
次に、次のコマンドを使用してPostgreSQLシェルとユーザーを終了します。
postgres=# \q
[email protected]:~$ exit
RabbitMQとRedisをインストールする
TaigaはRabbitMQをメッセージブローカーとして使用し、Redisをキャッシュに使用します。したがって、システムに両方のパッケージをインストールする必要があります。次のコマンドで両方のパッケージをインストールできます:
apt-get install rabbitmq-server redis-server -y
次に、次のコマンドを使用して、RabbitMQの新しいユーザーと仮想ホストを作成します。
rabbitmqctl add_user taiga yourpassword
rabbitmqctl add_vhost taiga
rabbitmqctl set_permissions -p taiga taiga ".*" ".*" ".*"
終了したら、次のステップに進むことができます。
Taigaバックエンドのインストールと構成
まず、次のコマンドを使用して、Taiga用に別のユーザーを作成します。
adduser taiga
次に、次のコマンドを使用して、Taigaユーザーをsudoグループに追加します。
adduser taiga sudo
次に、ユーザーをtaigaに変更し、taigaログを保存するディレクトリを作成します。
su - taiga
mkdir -p ~/logs
次に、次のコマンドを使用して、GitリポジトリからTaigaバックエンドをダウンロードします。
git clone https://github.com/taigaio/taiga-back.git
次に、ディレクトリをダウンロードしたディレクトリに変更し、最新のブランチを確認します。
cd taiga-back
git checkout stable
次に、次のコマンドを使用してmkvirtualenvコマンドをアクティブにします。
nano ~/.bashrc
次の行を追加します:
source '/usr/share/virtualenvwrapper/virtualenvwrapper.sh'
次のコマンドを使用して、新しいプロファイルをアクティブ化します。
source ~/.bashrc
次に、Taiga用のPython仮想環境を作成します:
mkvirtualenv -p /usr/bin/python3 taiga_venv
次に、次のコマンドを使用して、必要なすべての依存関係をインストールします。
pip3 install -r requirements.txt
次に、次のコマンドを使用してデータを移行およびロードします。
python3 manage.py migrate --noinput
python3 manage.py loaddata initial_user
python3 manage.py loaddata initial_project_templates
python3 manage.py compilemessages
python3 manage.py collectstatic --noinput
次に、local.pyファイルを編集し、アプリケーションとデータベースの設定を定義する必要があります。
nano ~/taiga-back/settings/local.py
次の行を追加します:
from .common import *

MEDIA_URL = "http://taiga.example.com/media/"
STATIC_URL = "http://taiga.example.com/static/"
SITES["front"]["scheme"] = "http"
SITES["front"]["domain"] = "taiga.example.com"

SECRET_KEY = "OQOEJNSJIQHDBQNSUQEJSNNANsqQPAASQLSMSOQND"

DEBUG = False
PUBLIC_REGISTER_ENABLED = True

DEFAULT_FROM_EMAIL = "[email protected]"
SERVER_EMAIL = DEFAULT_FROM_EMAIL

#CELERY_ENABLED = True

EVENTS_PUSH_BACKEND = "taiga.events.backends.rabbitmq.EventsPushBackend"
EVENTS_PUSH_BACKEND_OPTIONS = {"url": "amqp://taiga:[email protected]:5672/taiga"}
ファイルを保存して閉じてから、次のコマンドでTaigaバックエンドサーバーを起動します。
workon taiga_venv
python manage.py runserver
サーバーが正常に起動すると、次の出力が表示されます。
System check identified no issues (0 silenced).
November 02, 2020 - 09:24:41
Django version 2.2.16, using settings 'settings'
Starting development server at http://127.0.0.1:8000/
Quit the server with CONTROL-C.
CTRL+Cを押してサーバーを停止します。
次に、次のコマンドを使用して仮想環境を非アクティブ化します。
deactivate
TaigaForntendのインストールと構成
まず、ユーザーをTaigaに変更し、Gitリポジトリから最新バージョンのTaigaフロントエンドをダウンロードします。
su - taiga
git clone https://github.com/taigaio/taiga-front-dist.git
ディレクトリをダウンロードしたディレクトリに変更し、次のコマンドで最新の安定したブランチをチェックアウトします。
cd taiga-front-dist
git checkout stable
次に、次のコマンドを使用してサンプル構成ファイルをコピーします。
cp ~/taiga-front-dist/dist/conf.example.json ~/taiga-front-dist/dist/conf.json
次に、次のコマンドを使用して構成ファイルを編集します。
nano ~/taiga-front-dist/dist/conf.json
次の行を変更します:
{
    "api": "http://taiga.example.com/api/v1/",
    "eventsUrl": "ws://taiga.example.com/events",
    "eventsMaxMissedHeartbeats": 5,
    "eventsHeartbeatIntervalTime": 60000,
    "eventsReconnectTryInterval": 10000,
    "debug": true,
    "debugInfo": false,
    "defaultLanguage": "en",
    "themes": ["taiga"],
    "defaultTheme": "taiga",
    "publicRegisterEnabled": true,
    "feedbackEnabled": true,
    "supportUrl": "https://tree.taiga.io/support",
    "privacyPolicyUrl": null,
    "termsOfServiceUrl": null,
    "GDPRUrl": null,
    "maxUploadFileSize": null,
    "contribPlugins": [],
    "tribeHost": null,
    "importers": [],
    "gravatar": true,
    "rtlLanguages": ["fa"]
}
終了したら、ファイルを保存して閉じます。
Taigaイベントのインストールと構成
次に、ホームディレクトリに移動し、次のコマンドを使用して最新バージョンのTaigaイベントをダウンロードします。
cd ~
git clone https://github.com/taigaio/taiga-events.git taiga-events
次に、ディレクトリをダウンロードしたディレクトリに変更し、次のコマンドを使用してすべてのNPMモジュールをインストールします。
cd taiga-events
npm install
次に、次のコマンドを使用してサンプル構成ファイルをコピーします。
cp config.example.json config.json
次に、config.jsonファイルを編集し、rabbitmqURLと秘密鍵を設定します::
nano config.json
次の行を追加/変更します:
{
    "url": "amqp://taiga:[email protected]:5672/taiga",
    "secret": "OQOEJNSJIQHDBQNSUQEJSNNANsqQPAASQLSMSOQND",
    "webSocketServer": {
        "port": 8888
    }
}
ファイルを保存して閉じてから、次のコマンドを使用してTaigaユーザーからログアウトします。
exit
Systemdサービスファイルを作成する
次に、TaigaおよびTaigaイベント用のsystemdサービスファイルを作成する必要があります。まず、次のコマンドを使用して、Taigaイベントのsystemdサービスファイルを作成します。
nano /etc/systemd/system/taiga_events.service
次の行を追加します:
[Unit]
Description=taiga_events
After=network.target

[Service]
User=taiga
WorkingDirectory=/home/taiga/taiga-events
ExecStart=/bin/bash -c "node_modules/coffeescript/bin/coffee index.coffee"
Restart=always
RestartSec=3

[Install]
WantedBy=default.target
ファイルを保存して閉じてから、次のコマンドを使用してsystemdサービスをリロードします。
systemctl daemon-reload
次に、Taigaイベントサービスを開始し、次のコマンドを使用してシステムの再起動時に開始できるようにします。
systemctl start taiga_events
systemctl enable taiga_events
次に、次のコマンドを使用してTaigaのsystemdサービスファイルを作成します。
nano /etc/systemd/system/taiga.service
次の行を追加します:
[Unit]
Description=taiga_back
After=network.target

[Service]
User=taiga
Environment=PYTHONUNBUFFERED=true
WorkingDirectory=/home/taiga/taiga-back
ExecStart=/home/taiga/.virtualenvs/taiga_venv/bin/gunicorn --workers 4 --timeout 60 -b 127.0.0.1:8001 taiga.wsgi
Restart=always
RestartSec=3

[Install]
WantedBy=default.target
ファイルを保存して閉じてから、次のコマンドを使用してsystemdサービスをリロードします。
systemctl daemon-reload
次に、Taigaサービスを開始し、次のコマンドを使用してシステムの再起動時に開始できるようにします。
systemctl start taiga
systemctl enable taiga
次に、次のコマンドを使用して、TaigaイベントとTaigaサービスのステータスを確認します。
systemctl status taiga_events taiga
次の出力が表示されます。
? taiga_events.service - taiga_events
     Loaded: loaded (/etc/systemd/system/taiga_events.service; disabled; vendor preset: enabled)
     Active: active (running) since Mon 2020-11-02 09:30:21 UTC; 46s ago
   Main PID: 26383 (node)
      Tasks: 7 (limit: 2353)
     Memory: 15.2M
     CGroup: /system.slice/taiga_events.service
             ??26383 node node_modules/coffeescript/bin/coffee index.coffee

Nov 02 09:30:21 taiga.example.com systemd[1]: Started taiga_events.

? taiga.service - taiga_back
     Loaded: loaded (/etc/systemd/system/taiga.service; disabled; vendor preset: enabled)
     Active: active (running) since Mon 2020-11-02 09:30:55 UTC; 13s ago
   Main PID: 26478 (gunicorn)
      Tasks: 5 (limit: 2353)
     Memory: 266.4M
     CGroup: /system.slice/taiga.service
             ??26478 /home/taiga/.virtualenvs/taiga_venv/bin/python /home/taiga/.virtualenvs/taiga_venv/bin/gunicorn --workers 4 --timeout 60 >
             ??26494 /home/taiga/.virtualenvs/taiga_venv/bin/python /home/taiga/.virtualenvs/taiga_venv/bin/gunicorn --workers 4 --timeout 60 >
             ??26495 /home/taiga/.virtualenvs/taiga_venv/bin/python /home/taiga/.virtualenvs/taiga_venv/bin/gunicorn --workers 4 --timeout 60 >
             ??26496 /home/taiga/.virtualenvs/taiga_venv/bin/python /home/taiga/.virtualenvs/taiga_venv/bin/gunicorn --workers 4 --timeout 60 >
             ??26497 /home/taiga/.virtualenvs/taiga_venv/bin/python /home/taiga/.virtualenvs/taiga_venv/bin/gunicorn --workers 4 --timeout 60 >

Nov 02 09:30:55 taiga.example.com gunicorn[26495]: [2020-11-02 09:30:55 +0000] [26495] [INFO] Booting worker with pid: 26495
Nov 02 09:30:55 taiga.example.com gunicorn[26496]: [2020-11-02 09:30:55 +0000] [26496] [INFO] Booting worker with pid: 26496
Nov 02 09:30:55 taiga.example.com gunicorn[26494]: Trying import local.py settings...
Nov 02 09:30:55 taiga.example.com gunicorn[26495]: Trying import local.py settings...
Nov 02 09:30:55 taiga.example.com gunicorn[26497]: Trying import local.py settings...
Nov 02 09:30:55 taiga.example.com gunicorn[26497]: 2020-11-02 09:30:55 +0000] [26497] [INF
Nov 02 09:30:55 taiga.example.com gunicorn[26495]: 2
Nov 02 09:30:55 taiga.example.com gunicorn[26496]: 2
Nov 02 09:30:55 taiga.example.com gunicorn[26496]: rying import local.py settings...
Nov 02 09:30:55 taiga.example.com gunicorn[26497]: rying import local.py settings...
Nginxをリバースプロキシとして構成する
NginxをTaigaのリバースプロキシとして構成することをお勧めします。まず、次のコマンドを使用してNginxをインストールします。
apt-get install nginx -y
インストールしたら、次のコマンドを使用してNginx仮想ホスト構成ファイルを作成します。
nano /etc/nginx/conf.d/taiga.conf
次の行を追加します:
server {
    listen 80;
    server_name taiga.example.com;

    large_client_header_buffers 4 32k;
    client_max_body_size 50M;
    charset utf-8;

    access_log /home/taiga/logs/nginx.access.log;
    error_log /home/taiga/logs/nginx.error.log;

    # Frontend
    location / {
        root /home/taiga/taiga-front-dist/dist/;
        try_files $uri $uri/ /index.html;
    }

    # Backend
    location /api {
        proxy_set_header Host $http_host;
        proxy_set_header X-Real-IP $remote_addr;
        proxy_set_header X-Scheme $scheme;
        proxy_set_header X-Forwarded-Proto $scheme;
        proxy_set_header X-Forwarded-For $proxy_add_x_forwarded_for;
        proxy_pass http://127.0.0.1:8001/api;
        proxy_redirect off;
    }

    # Admin access (/admin/)
    location /admin {
        proxy_set_header Host $http_host;
        proxy_set_header X-Real-IP $remote_addr;
        proxy_set_header X-Scheme $scheme;
        proxy_set_header X-Forwarded-Proto $scheme;
        proxy_set_header X-Forwarded-For $proxy_add_x_forwarded_for;
        proxy_pass http://127.0.0.1:8001$request_uri;
        proxy_redirect off;
    }

    # Static files
    location /static {
        alias /home/taiga/taiga-back/static;
    }

    # Media files
    location /media {
        alias /home/taiga/taiga-back/media;
    }

    # Events
    location /events {
        proxy_pass http://127.0.0.1:8888/events;
        proxy_http_version 1.1;
        proxy_set_header Upgrade $http_upgrade;
        proxy_set_header Connection "upgrade";
        proxy_connect_timeout 7d;
        proxy_send_timeout 7d;
        proxy_read_timeout 7d;
    }
}
ファイルを保存して閉じてから、Nginxを再起動して変更を適用します:
systemctl restart nginx
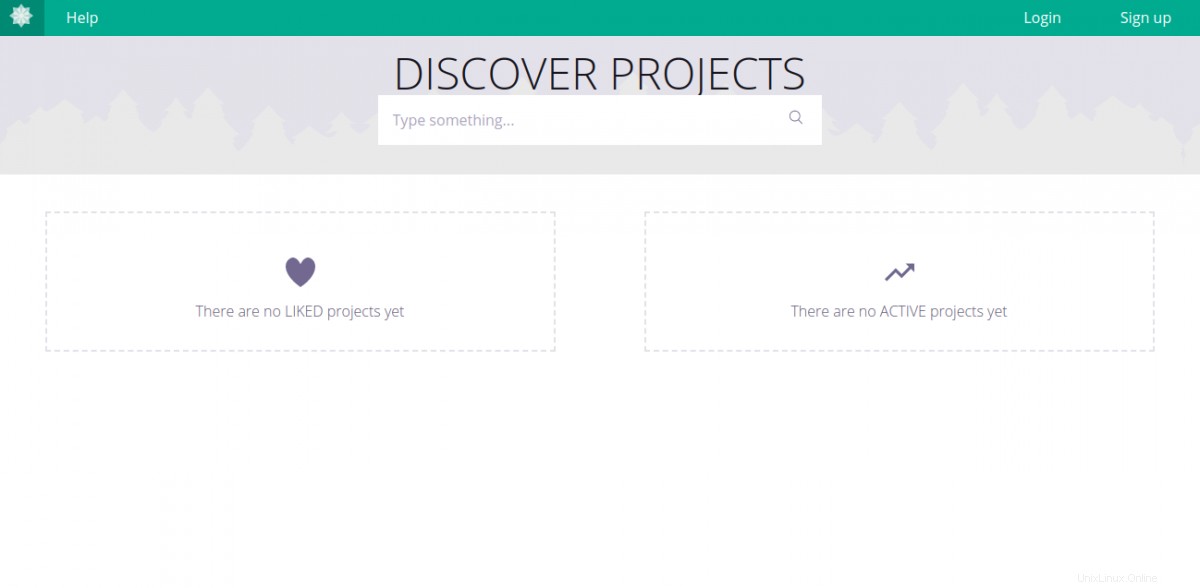
次に、Webブラウザーを開き、URL http://taiga.example.comを使用してTaigaWebインターフェースにアクセスします。 。次のページにリダイレクトされます:
ログインをクリックします ボタン。次のページにリダイレクトされます:
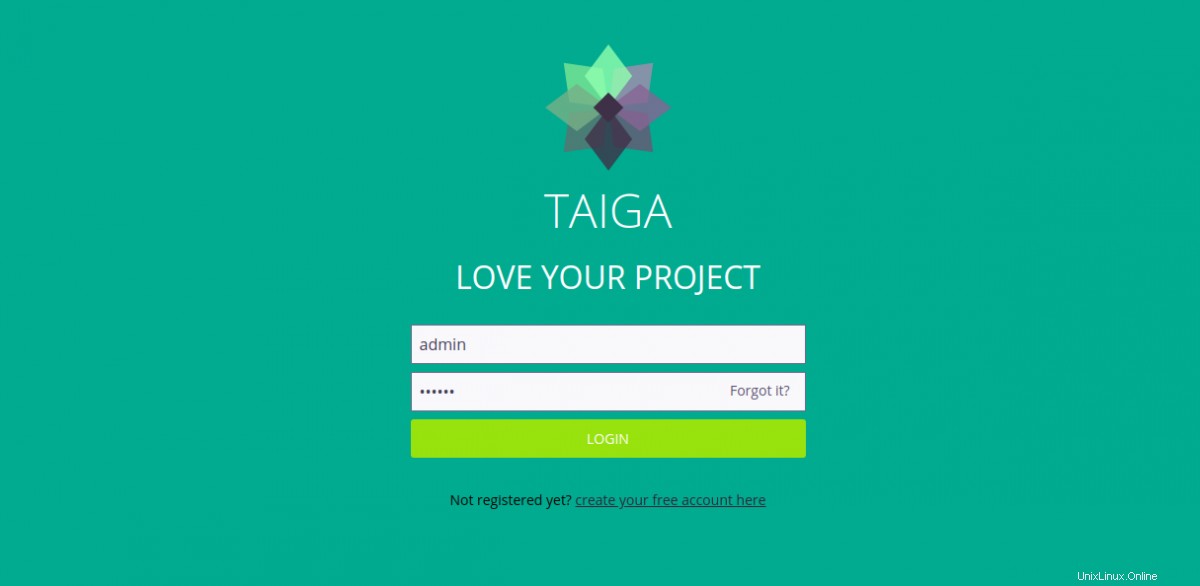
デフォルトのユーザー名をadminとして指定します パスワードは123123 ログインをクリックします ボタン。次のページにTaigaダッシュボードが表示されます。
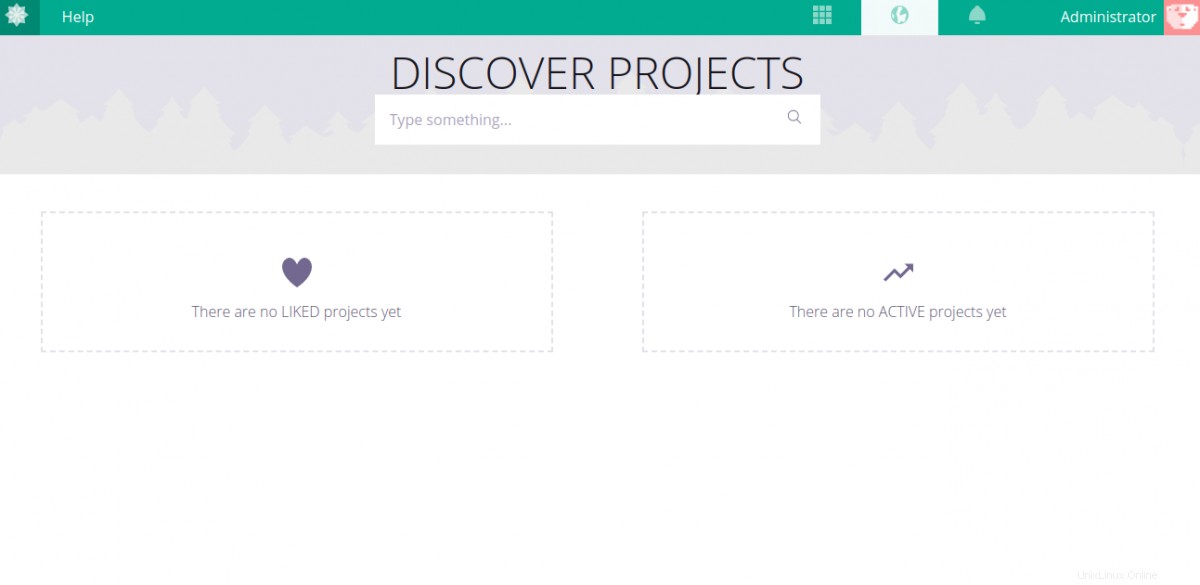
おめでとう!これで、Ubuntu20.04にNginxを使用してTaigaプロジェクト管理ツールが正常にインストールおよび構成されました。これで、開発環境にTaigaをデプロイして、作業を開始できます。