Shopware CEは、SymfonyとVue.jsで記述された無料のオープンソースeコマースプラットフォームです。これは、非常に最新のテクノロジースタックに基づいており、Magentoなどの別のeコマースアプリケーションの非常に優れた代替手段です。これは非常に強力で柔軟なアプリケーションであり、成長の可能性をすばやく簡単に活用し、完璧な顧客体験に集中する自由を提供します。クライアントと注文を管理するためのシンプルで使いやすい管理インターフェースを提供します。これにより、製品の価格を管理したり、テーマを変更または更新したり、製品をマーケティングするための電子メールテンプレートを設計したり、統計結果を生成したりできます。
このチュートリアルでは、ShopwareCEとNginxおよびLet'sEncryptをUbuntu20.04にインストールする方法を紹介します。
- 4GB以上のRAMを搭載したUbuntu20.04を実行しているサーバー。
- サーバーで指定された有効なドメイン名。
- ルートパスワードはサーバーで構成されています。
NginxとMariaDBをインストールする
まず、次のコマンドを使用してNginxWebサーバーとMariaDBデータベースサーバーをインストールします。
apt-get install nginx mariadb-server -y
両方のパッケージがインストールされたら、NginxとMariaDBサービスを開始し、システムの起動時に開始できるようにします。
systemctl start nginx
systemctl start mariadb
systemctl enable nginx
systemctl enable mariadb
PHPおよびその他のコンポーネントのインストール
Shopware 6は、7.2から7.3までのPHPバージョンをサポートしています。そのため、システムに他のライブラリと一緒にPHPをインストールする必要があります。
まず、次のコマンドを使用して、システムにPHPリポジトリを追加します。
apt-get install software-properties-common -y
add-apt-repository ppa:ondrej/php
リポジトリが追加されたら、次のコマンドを使用して他のライブラリと一緒にPHPをインストールします。
apt-get install php7.2 php7.2-cli php7.2-fpm php7.2-common php7.2-mysql php7.2-curl php7.2-json php7.2-zip php7.2-gd php7.2-xml php7.2-mbstring php7.2-intl php7.2-opcache git unzip socat curl bash-completion -y
すべてのパッケージがインストールされたら、php.iniファイルを編集し、必要な設定を微調整します。
nano /etc/php/7.2/fpm/php.ini
次の行を変更します:
memory_limit = 512M
upload_max_filesize = 20M
max_execution_time = 300
終了したら、ファイルを保存して閉じます。
次に、システムにIonCubeローダーをインストールする必要があります。
まず、次のコマンドでダウンロードします。
wget https://downloads.ioncube.com/loader_downloads/ioncube_loaders_lin_x86-64.tar.gz
ダウンロードしたら、次のコマンドを使用してダウンロードしたファイルを抽出します。
tar xfz ioncube_loaders_lin_x86-64.tar.gz
次に、PHP拡張ディレクトリのパスを見つけます:
php -i | grep extension_dir
次の出力が表示されます。
extension_dir => /usr/lib/php/20190902 => /usr/lib/php/20190902
次に、IonCubeローダーをPHP拡張ディレクトリにコピーします。
cp ioncube/ioncube_loader_lin_7.2.so /usr/lib/php/20180731/
次に、php.iniファイルを編集し、IonCubeローダーを定義します。
nano /etc/php/7.2/fpm/php.ini
[PHP]セクション内に次の行を追加します:
zend_extension = /usr/lib/php/20180731/ioncube_loader_lin_7.2.so
ファイルを保存して閉じてから、PHP-FPMサービスを再起動して変更を適用します。
systemctl restart php7.2-fpm
MariaDBデータベースを構成する
まず、MariaDBのインストールを保護し、次のスクリプトを使用してルートパスワードを設定します。
mysql_secure_installation
以下に示すように、すべての質問に答えてください。
Enter current password for root (enter for none):
Set root password? [Y/n] Y
New password:
Re-enter new password:
Remove anonymous users? [Y/n] Y
Disallow root login remotely? [Y/n] Y
Remove test database and access to it? [Y/n] Y
Reload privilege tables now? [Y/n] Y
完了したら、次のコマンドを使用してMariaDBシェルにログインします。
mysql -u root -p
MariaDBのrootパスワードを入力してから、Shopwareのデータベースとユーザーを作成します。
MariaDB [(none)]> CREATE DATABASE shopwaredb;
MariaDB [(none)]> GRANT ALL ON shopwaredb.* TO 'shopware'@'localhost' IDENTIFIED BY 'password';
次に、特権をフラッシュし、次のコマンドを使用してMariaDBを終了します。
MariaDB [(none)]> flush privileges;
MariaDB [(none)]> exit;
終了したら、次のステップに進むことができます。
Composerは、PHPの依存関係マネージャーです。 Shopwareのインストールに必要なすべてのPHP依存関係をインストールするために使用されます。
以下に示すように、curlコマンドを使用してインストールできます。
curl -sS https://getcomposer.org/installer | php -- --install-dir=/usr/bin --filename=composer
インストールしたら、次のコマンドを使用してComposerのバージョンを確認します。
composer --version
次の出力が得られるはずです:
Composer version 1.10.7 2020-06-03 10:03:56
まず、NginxWebルートディレクトリ内にShopwareのディレクトリを作成します。
mkdir /var/www/html/shopware
次に、ディレクトリをショップウェアに変更し、次のコマンドを使用して最新バージョンのショップウェアをダウンロードします。
cd /var/www/html/shopware
wget https://www.shopware.com/en/Download/redirect/version/sw6/file/install_6.2.2_1592398977.zip
ダウンロードしたら、次のコマンドでダウンロードしたファイルを解凍します。
unzip install_6.2.2_1592398977.zip
次に、次のコマンドを使用してすべてのPHP依存関係をインストールします。
composer install
次に、ショップウェアディレクトリの所有権を変更し、次のコマンドを使用して適切な権限を付与します。
chown -R www-data:www-data /var/www/html/shopware
chmod -R 755 /var/www/html/shopware
完了したら、次のステップに進むことができます。
まず、Shopware用の新しいNginx仮想ホスト構成ファイルを作成します。
nano /etc/nginx/sites-available/shopware.conf
次の行を追加します:
server {
    listen 80;

    index index.php index.html;
    server_name shopware.linuxbuz.com;
    root /var/www/html/shopware/public;

    location /recovery/install {
        index index.php;
        try_files $uri /recovery/install/index.php$is_args$args;
    }

    location /recovery/update/ {
        location /recovery/update/assets {
        }
        if (!-e $request_filename){
            rewrite . /recovery/update/index.php last;
        }
    }

    location / {
        try_files $uri /index.php$is_args$args;
    }

    location ~ \.php$ {
        fastcgi_split_path_info ^(.+\.php)(/.+)$;
        include fastcgi.conf;
        fastcgi_param HTTP_PROXY "";
        fastcgi_buffers 8 16k;
        fastcgi_buffer_size 32k;
        client_max_body_size 24M;
        client_body_buffer_size 128k;
        fastcgi_pass unix:/run/php/php7.2-fpm.sock;
        http2_push_preload on;
    }
}
ファイルを保存して閉じ、次のコマンドでShopware仮想ホストファイルを有効にします。
ln -s /etc/nginx/sites-available/shopware.conf /etc/nginx/sites-enabled/
次に、次のコマンドを使用して、構文エラーがないかNginxを確認します。
nginx -t
次の出力が得られるはずです:
nginx: the configuration file /etc/nginx/nginx.conf syntax is ok
nginx: configuration file /etc/nginx/nginx.conf test is successful
次に、Nginxサービスを再起動して、変更を適用します。
systemctl reload nginx
この時点で、Shopwareがシステムにインストールされています。次に、Webブラウザーを開き、URLhttp://shopware.linuxbuz.comを入力します。 ShopwareWebインストールウィザードが表示されます。

言語を選択して、次へをクリックします ボタン。次の画面が表示されます。
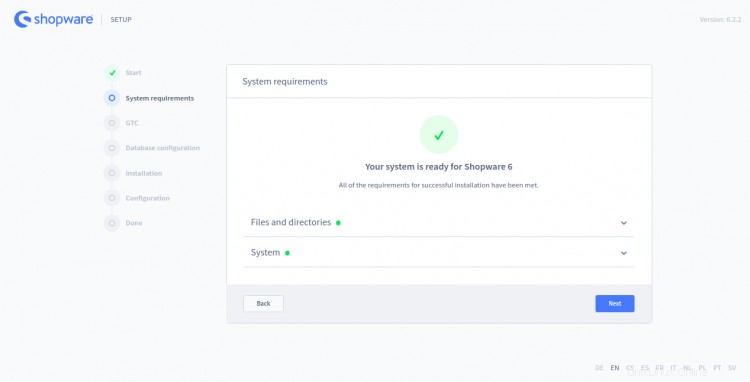
必要な依存関係がすべてインストールされていることを確認してから、次へをクリックします ボタン。次の画面が表示されます。
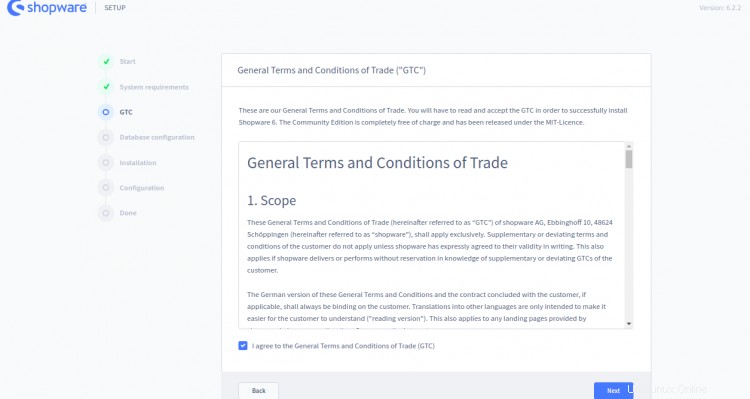
利用規約に同意し、次へをクリックします ボタン。次の画面が表示されます。
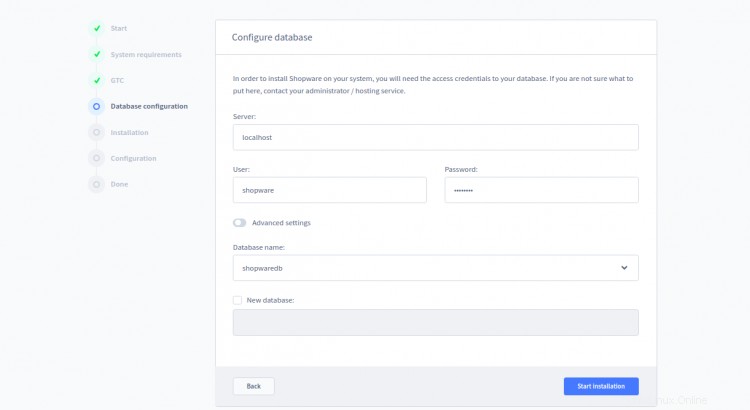
データベースの詳細を入力し、インストールの開始をクリックします ボタン。インストールが正常に完了すると、次の画面が表示されます。
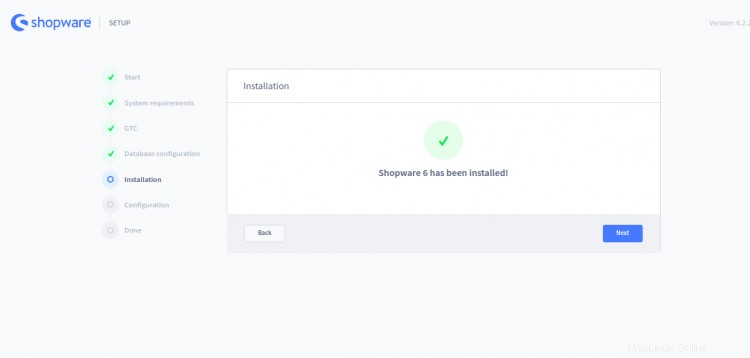
次に、次へをクリックします ボタン。 Shopware構成画面が表示されます:

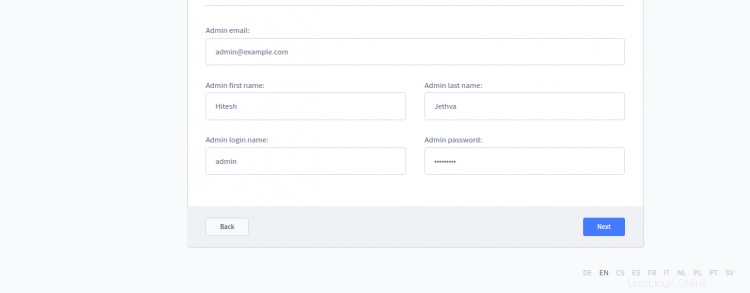
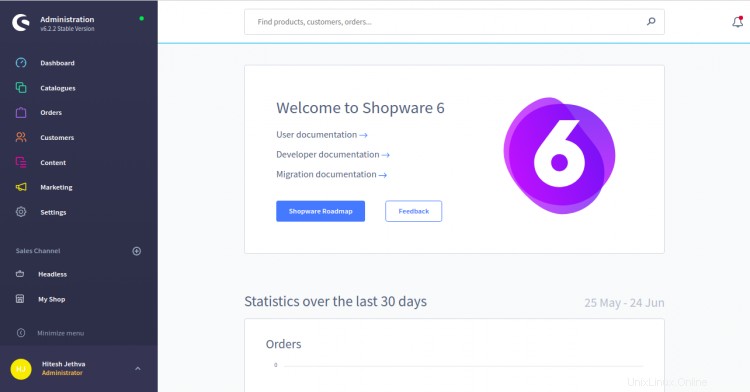
ショップ名、メールアドレス、国、管理者メールアドレス、管理者ユーザー名、パスワードを入力し、次へをクリックします ボタン。 Shopwareダッシュボード画面にリダイレクトされます:
次へをクリックします ボタン。次の画面が表示されます。
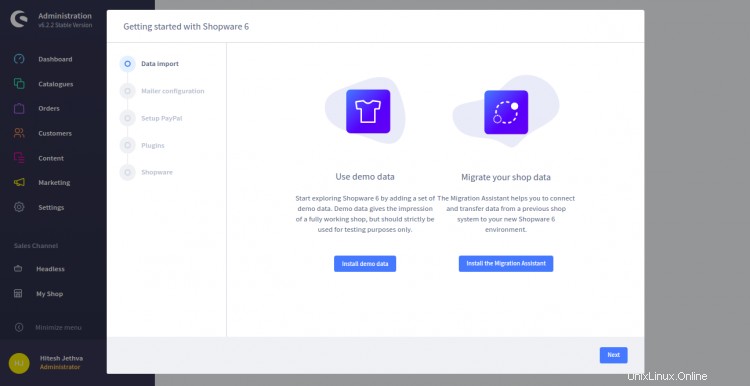
目的のデータをインストールして、次へをクリックします ボタン。次の画面が表示されます。
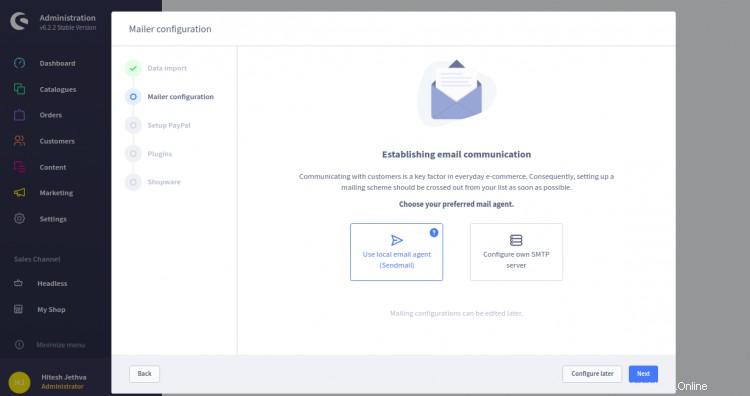
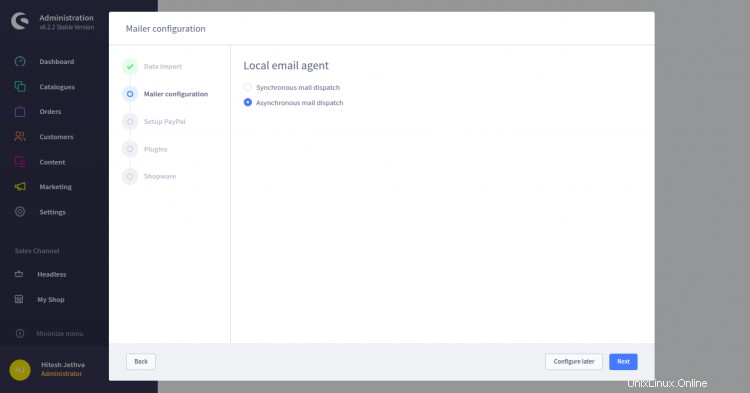
目的のメールエージェントを選択し、次へをクリックします ボタン。次の画面が表示されます。
目的のオプションを選択し、次へをクリックします ボタン。次の画面が表示されます。

PayPalを設定するか、スキップをクリックします ボタン。次の画面が表示されます。
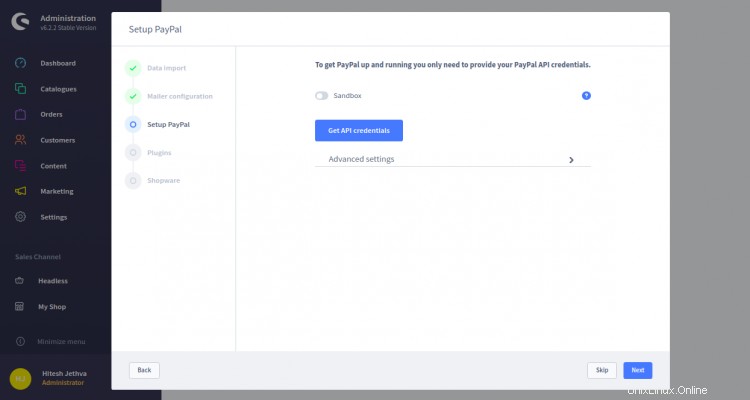
PayPalのクレデンシャルを設定するか、スキップをクリックします ボタン。次の画面が表示されます。
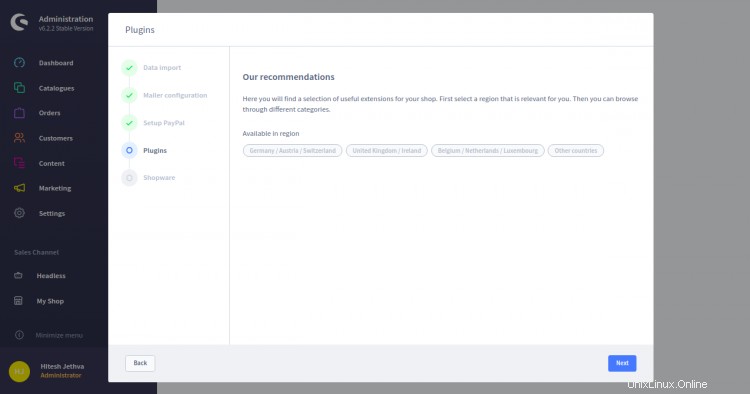
お住まいの地域を選択して、次へをクリックしてください ボタン。次の画面が表示されます。
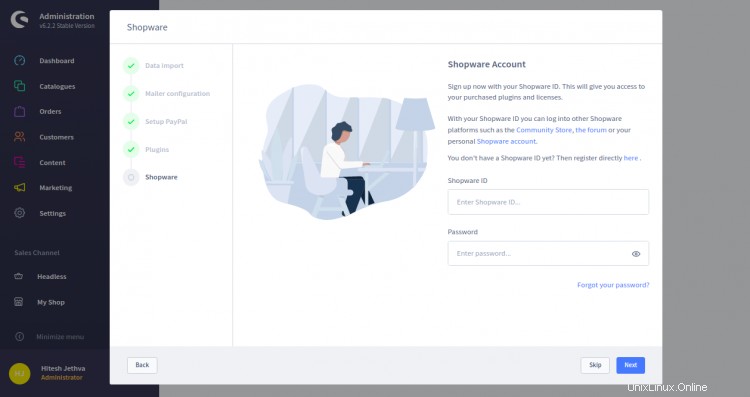
スキップをクリックします ボタン。 Shopwareを構成すると、次の画面が表示されます。
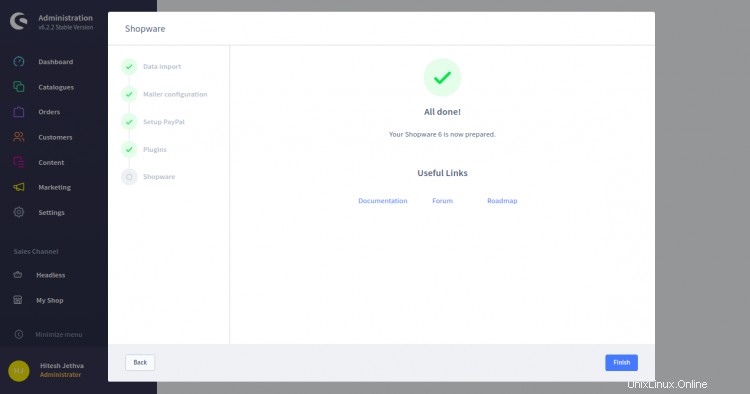
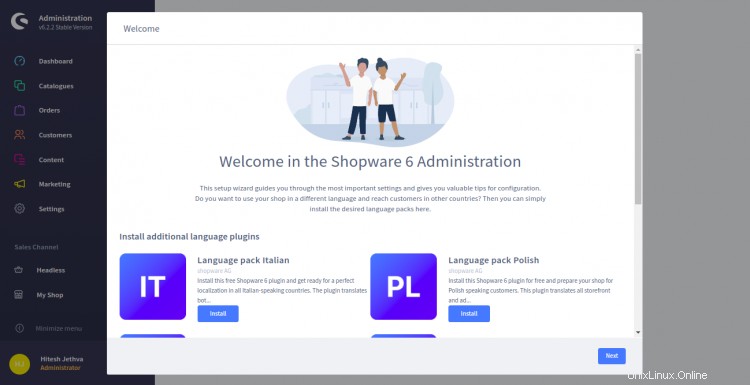
完了をクリックします ボタン。次の画面にShopwareダッシュボードが表示されます。
開始する前に、システムにCertbotクライアントをインストールして、Let'sEncryptSSLをインストールおよび管理する必要があります。次のコマンドを使用してインストールできます:
apt-get install certbot python3-certbot-nginx -y
Certbotクライアントがインストールされたら、次のコマンドを実行して、Webサイト用のLet'sEncryptSSLをダウンロードしてインストールします。
certbot --nginx -d shopware.linuxbuz.com
以下に示すように、メールアドレスを入力し、利用規約に同意します。
Saving debug log to /var/log/letsencrypt/letsencrypt.log
Plugins selected: Authenticator nginx, Installer nginx
Enter email address (used for urgent renewal and security notices) (Enter 'c' to
cancel): [email protected]

- - - - - - - - - - - - - - - - - - - - - - - - - - - - - - - - - - - - - - - -
Please read the Terms of Service at
https://letsencrypt.org/documents/LE-SA-v1.2-November-15-2017.pdf. You must
agree in order to register with the ACME server at
https://acme-v02.api.letsencrypt.org/directory
- - - - - - - - - - - - - - - - - - - - - - - - - - - - - - - - - - - - - - - -
(A)gree/(C)ancel: A

- - - - - - - - - - - - - - - - - - - - - - - - - - - - - - - - - - - - - - - -
Would you be willing to share your email address with the Electronic Frontier
Foundation, a founding partner of the Let's Encrypt project and the non-profit
organization that develops Certbot? We'd like to send you email about our work
encrypting the web, EFF news, campaigns, and ways to support digital freedom.
- - - - - - - - - - - - - - - - - - - - - - - - - - - - - - - - - - - - - - - -
(Y)es/(N)o: Y
Obtaining a new certificate
Performing the following challenges:
http-01 challenge for shopware.linuxbuz.com
Waiting for verification...
Cleaning up challenges
Deploying Certificate to VirtualHost /etc/nginx/sites-enabled/shopware.conf
HTTPトラフィックをHTTPSにリダイレクトするかどうかを選択します:
Please choose whether or not to redirect HTTP traffic to HTTPS, removing HTTP access.
- - - - - - - - - - - - - - - - - - - - - - - - - - - - - - - - - - - - - - - -
1: No redirect - Make no further changes to the webserver configuration.
2: Redirect - Make all requests redirect to secure HTTPS access. Choose this for
new sites, or if you're confident your site works on HTTPS. You can undo this
change by editing your web server's configuration.
- - - - - - - - - - - - - - - - - - - - - - - - - - - - - - - - - - - - - - - -
Select the appropriate number [1-2] then [enter] (press 'c' to cancel): 2
2と入力し、Enterキーを押してプロセスを開始します。インストールが完了すると、次の出力が表示されます。
Redirecting all traffic on port 80 to ssl in /etc/nginx/sites-enabled/shopware.conf

- - - - - - - - - - - - - - - - - - - - - - - - - - - - - - - - - - - - - - - -
Congratulations! You have successfully enabled https://shopware.linuxbuz.com

You should test your configuration at:
https://www.ssllabs.com/ssltest/analyze.html?d=shopware.linuxbuz.com
- - - - - - - - - - - - - - - - - - - - - - - - - - - - - - - - - - - - - - - -

IMPORTANT NOTES:
 - Congratulations! Your certificate and chain have been saved at:
   /etc/letsencrypt/live/shopware.linuxbuz.com/fullchain.pem
   Your key file has been saved at:
   /etc/letsencrypt/live/shopware.linuxbuz.com/privkey.pem
   Your cert will expire on 2020-09-22. To obtain a new or tweaked
   version of this certificate in the future, simply run certbot again
   with the "certonly" option. To non-interactively renew *all* of
   your certificates, run "certbot renew"
 - If you like Certbot, please consider supporting our work by:

   Donating to ISRG / Let's Encrypt:   https://letsencrypt.org/donate
   Donating to EFF:                    https://eff.org/donate-le
この時点で、ShopwareWebサイトはLet'sEncryptSSLで保護されています。これで、URLhttps://shopware.linuxbuz.comを使用してWebサイトに安全にアクセスできます。
おめでとう!これで、Ubuntu20.04にNginxとLet'sEncryptSSLを使用してShopwareが正常にインストールされました。これで、Shopwareを使用して独自のオンラインビジネスの設定を開始できます。ご不明な点がございましたら、お気軽にお問い合わせください。