インターネットの接続速度は、私たちが自宅やオフィスで常にチェックしているものです。私たちが使用する最も一般的な方法は、speedtest.netなどの速度テストWebサイトにアクセスすることです。そのサイトでは、JavaScriptアプリケーションがWebブラウザーにロードされ、ping時間に基づいて最適な(近くの)サーバーが選択され、そのサーバーの速度テストの結果が表示されます。 Speedtest.netはまた、フラッシュプレーヤーを使用して結果をグラフィカルに生成します。
これらのWebベースの速度テストを使用する場合の問題は、速度テストを定期的にスケジュールできないことです。 cronジョブとして使用し、ヘッドレスサーバーでは使用できません。この問題を解決できるアプリケーションの1つは、「speedtest-cli」です。このアプリケーションを使用すると、コマンドラインを使用してインターネット速度を確認できます。
speedtest-cliとは何ですか?
Speedtest-cliは、インターネット速度を双方向で測定するPythonプログラミング言語で記述されたスクリプトです。このアプリケーションを使用すると、距離(km)でインターネット速度を確認でき、特定のサーバーに対してテストできます。また、インターネットで結果を共有できるようにURLを提供します。
Linuxにspeedtest-cliをインストールするにはどうすればよいですか?
speedtest-cliアプリケーションをインストールするには、Python2.4-3.4またはアップグレードされたバージョンがシステムにインストールされている必要があります。
speedtest-cliツールは2つの方法でインストールできます。最初の方法にはpython-pipパッケージマネージャーの使用が含まれ、2番目の方法はPythonスクリプトを手動でダウンロードし、実行可能にしてからアプリケーションを実行することです。
方法1:python-pipを使用してspeedtest-cliをインストールする
次のステップはrootユーザーとして実行する必要があります。コマンドごとにsudoを追加したくないので、最初にUbuntuで次のコマンドを実行してrootユーザーになります。
sudo su
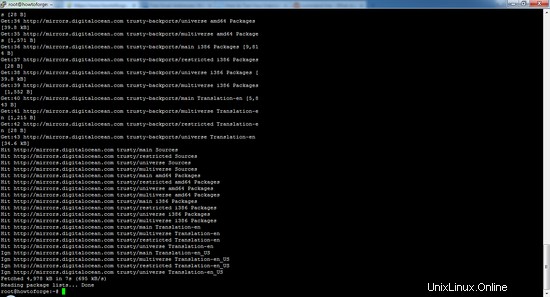
1.最初のステップは、次のコマンドを実行して、すべてのUbuntuリポジトリとPPAのパッケージのリストが最新であることを確認することです。
apt-get update
サンプル出力:
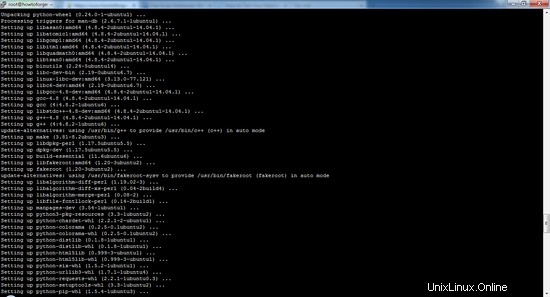
2.次のステップは、システムにpipパッケージマネージャーをインストールすることです。ご覧のとおり、このコマンドは多くの依存関係もインストールします。
apt-get install python-pip
[email protected]:/# apt-get install python-pip
Reading package lists... Done
Building dependency tree
Reading state information... Done
The following additional packages will be installed:
 libexpat1-dev libpython-all-dev libpython-dev libpython2.7-dev python-all python-all-dev python-asn1crypto python-cffi-backend python-crypto python-cryptography python-dbus python-dev
 python-enum34 python-gi python-idna python-ipaddress python-keyring python-keyrings.alt python-pip-whl python-pkg-resources python-secretstorage python-setuptools python-six
 python-wheel python-xdg python2.7-dev
Suggested packages:
 python-crypto-doc python-cryptography-doc python-cryptography-vectors python-dbus-dbg python-dbus-doc python-enum34-doc python-gi-cairo gnome-keyring libkf5wallet-bin
 gir1.2-gnomekeyring-1.0 python-fs python-gdata python-keyczar python-secretstorage-doc python-setuptools-doc
The following NEW packages will be installed:
 libexpat1-dev libpython-all-dev libpython-dev libpython2.7-dev python-all python-all-dev python-asn1crypto python-cffi-backend python-crypto python-cryptography python-dbus python-dev
 python-enum34 python-gi python-idna python-ipaddress python-keyring python-keyrings.alt python-pip python-pip-whl python-pkg-resources python-secretstorage python-setuptools python-six
 python-wheel python-xdg python2.7-dev
0 upgraded, 27 newly installed, 0 to remove and 60 not upgraded.
Need to get 32.1 MB of archives.
After this operation, 53.6 MB of additional disk space will be used.
Do you want to continue? [Y/n] y
Yキーを押して続行します
サンプル出力:
3.パッケージをインストールした後、次のpipコマンドを使用してアプリケーションをインストールできます。
pip install speedtest-cli
Collecting speedtest-cli
 Downloading https://files.pythonhosted.org/packages/61/8b/58d1de9a7fff3e91c5ab956ab4ba72b49f42d9f73d5f3e248c740dfcc816/speedtest_cli-2.1.1-py2.py3-none-any.whl
Installing collected packages: speedtest-cli
Successfully installed speedtest-cli-2.1.1
4.将来、speedtest-cliアプリケーションをアップグレードする場合は、次のコマンドを使用できます。
pip install speedtest-cli –-upgrade
Requirement already up-to-date: speedtest-cli in /usr/local/lib/python2.7/dist-packages
Cleaning up...
方法2:GitHubから手動で最新のspeedtest-cliをインストールする
1.まず、コマンドを使用してGitHubからPythonスクリプトをダウンロードする必要があります
cd /tmp
wget https://github.com/sivel/speedtest-cli/archive/master.zip
--2019-04-25 19:24:47-- https://github.com/sivel/speedtest-cli/archive/master.zip
Resolving github.com (github.com)... 140.82.118.4, 140.82.118.3
Connecting to github.com (github.com)|140.82.118.4|:443... connected.
HTTP request sent, awaiting response... 302 Found
Location: https://codeload.github.com/sivel/speedtest-cli/zip/master [following]
--2019-04-25 19:24:47-- https://codeload.github.com/sivel/speedtest-cli/zip/master
Resolving codeload.github.com (codeload.github.com)... 192.30.253.121, 192.30.253.120
Connecting to codeload.github.com (codeload.github.com)|192.30.253.121|:443... connected.
HTTP request sent, awaiting response... 200 OK
Length: unspecified [application/zip]
Saving to: ‘master.zip’

master.zip [ <=> ] 27.55K 103KB/s in 0.3s

2019-04-25 19:24:48 (103 KB/s) - ‘master.zip’ saved [28215]
2. 2番目のステップは、ダウンロードしたファイル(master.zip)を解凍し、unzipコマンドを使用して解凍することです。
unzip master.zip
Archive: master.zip
681cdf20a5fe774ba3aefedd0cd88cbff5384439
 creating: speedtest-cli-master/
 inflating: speedtest-cli-master/.gitignore
 inflating: speedtest-cli-master/.travis.yml
 inflating: speedtest-cli-master/CONTRIBUTING.md
 inflating: speedtest-cli-master/LICENSE
 inflating: speedtest-cli-master/MANIFEST.in
 inflating: speedtest-cli-master/README.rst
 extracting: speedtest-cli-master/setup.cfg
 inflating: speedtest-cli-master/setup.py
 inflating: speedtest-cli-master/speedtest-cli.1
 inflating: speedtest-cli-master/speedtest.py
 creating: speedtest-cli-master/tests/
 creating: speedtest-cli-master/tests/scripts/
 inflating: speedtest-cli-master/tests/scripts/source.py
 inflating: speedtest-cli-master/tox.ini
3.ファイルを抽出したら、抽出したディレクトリに移動し、chownコマンドを使用して、抽出したスクリプトを実行可能にします。
cd speedtest-cli-master/
chmod 755 speedtest.py
4.毎回フルパスを入力しないようにするには、次のコマンドを使用して実行可能ファイルを/ usr / local/binに移動します。
sudo mv speedtest.py /usr/local/bin/speedtest-cli
speedtest-cliを使用してインターネット接続速度をテストするにはどうすればよいですか?
speedtest-cliコマンドを実行して、引数なしでインターネット接続のダウンロードとアップロードの速度をテストします。
speedtest-cli
Testing download speed........................................
Download: 916.39 Mbit/s
Testing upload speed..................................................
Upload: 489.57 Mbit/s
速度の結果をビットではなくバイトで確認する場合は、次のコマンドを使用します。
speedtest-cli --bytes
Testing download speed........................................
Download: 114.15 Mbyte/s
Testing upload speed..................................................
Upload: 49.61 Mbyte/s
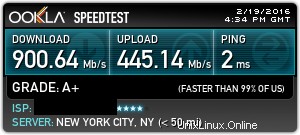
速度の結果を友達と共有したい場合は、結果の後に提供されたURLを使用して結果の画像をダウンロードできます。
speedtest-cli --share
Retrieving speedtest.net configuration...
Testing from Hetzner Online GmbH (..........)...
Retrieving speedtest.net server list...
Selecting best server based on ping...
Hosted by avrx (Limburg an der Lahn) [140.88 km]: 14.379 ms
Testing download speed................................................................................
Download: 309.68 Mbit/s
Testing upload speed................................................................................................
Upload: 316.33 Mbit/s
Share results: http://www.speedtest.net/result/xxxxxxxxxxx.png
以下は、上記のテストの速度テスト結果の写真です。
pingに関する情報のみが必要な場合は、ダウンロードしてアップロードしてから、次を使用してください。
speedtest-cli --simple
Ping: 5.23 ms
Download: 877.56 Mbit/s
Upload: 162.21 Mbit/s
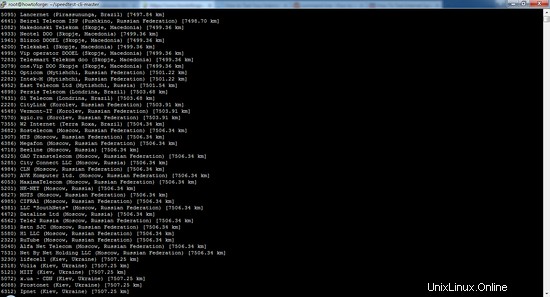
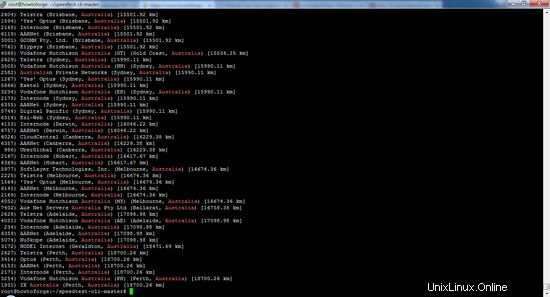
次を使用して、km単位の距離に基づいてサーバーのリストを確認することもできます。
speedtest-cli --list
2628) Telstra (Adelaide, Australia) [17098.98 km]
4051) Vodafone Hutchison Australia (AE) (Adelaide, Australia) [17098.98 km]
...........................................................................
3254) Vodafone Hutchison Australia (PH) (Perth, Australia) [18700.26 km]
1931) IX Australia (Perth, Australia) [18700.26 km]
距離の観点からリストを検索することにより、サーバーの大きなリストを生成した可能性があります。特定のエリアのサーバーの結果を確認する場合は、結果をgrepコマンドにパイプすることで確認できます(オーストラリアはその地域の例です):
speedtest-cli --list | grep –i Australia
2604) Telstra (Brisbane, Australia) [15501.92 km]
1594) 'Yes' Optus (Brisbane, Australia) [15501.92 km]
...............................................................................................
3254) Vodafone Hutchison Australia (PH) (Perth, Australia) [18700.26 km]
1931) IX Australia (Perth, Australia) [18700.26 km]
特定のサーバーに対する接続速度をテストするには、手順5と6で生成されたサーバーIDを使用する必要があります。
speedtest-cli --server [server ID]
speedtest-cli --server 2604
ここでは、サーバーID2604を例として使用しています。
Hosted by Telstra (Brisbane) [15501.92 km]: 452.614 ms
Testing download speed........................................
Download: 28.79 Mbit/s
Testing upload speed..................................................
Upload: 11.71 Mbit/s
speedtest-cliツールのヘルプとバージョン番号を確認する場合は、次のコマンドを使用します。
speedtest-cli --version
0.3.4
speedtest-cli --help
usage: speedtest_cli [-h] [--bytes] [--share] [--simple] [--list]
 [--server SERVER] [--mini MINI] [--source SOURCE]
 [--timeout TIMEOUT] [--secure] [--version]
Command line interface for testing internet bandwidth using speedtest.net.
--------------------------------------------------------------------------
https://github.com/sivel/speedtest-cli
optional arguments:
 -h, --help show this help message and exit
 --bytes Display values in bytes instead of bits. Does not affect
 the image generated by --share
 --share Generate and provide a URL to the speedtest.net share
 results image
 --simple Suppress verbose output, only show basic information
 --list Display a list of speedtest.net servers sorted by
 distance
 --server SERVER Specify a server ID to test against
 --mini MINI URL of the Speedtest Mini server
 --source SOURCE Source IP address to bind to
 --timeout TIMEOUT HTTP timeout in seconds. Default 10
 --secure Use HTTPS instead of HTTP when communicating with
 speedtest.net operated servers
 --version Show the version number and exit
speedtest-cliを使用してインターネット速度ログを作成する
Speedtest-cliをcronジョブとして実行して、インターネット速度テストログを取得できます。次のコマンドでcrontabを開きます:
crontab -e
そして、この行をcrontabに追加します(speedtest_cli.pyが/ usr / local / binにインストールされていると仮定します):
30 00 * * * /usr/local/bin/speedtest-cli >> /tmp/speedlog.txt
変更を保存して、crontabエディターを終了します。これにより、毎日0:30に速度テストが実行され、結果がファイル/tmp/speedlog.txtに追加されます。
このアプリケーションは軽量で使いやすく、問題なく実行できるため、開発者やシステム管理者にとって必須のツールです。