FreeIPAは、LinuxおよびUnixベースのシステム向けのオープンソースの統合されたIDおよび認証ソリューションです。ユーザー、グループ、ホスト、およびその他のオブジェクトに関するデータを保存することにより、一元化された認証を提供します。 Linux、Mac、およびWindows用の統合ID管理サービスを提供します。 FreeIPAは、389 Directory Server、Kerberos、SSSD、ドッグタグ、NTP、およびDNSに基づいています。中央の場所からレルム内のLinuxユーザーとクライアントを管理するためのWebベースのインターフェースを提供します。
このチュートリアルでは、CentOS8にFreeIPAサーバーをインストールする方法を紹介します。
- CentOS8を実行しているサーバー。
- ルートパスワードがサーバーに設定されます。
まず、システムで完全修飾ホスト名を設定する必要があります。次のコマンドで設定できます:
hostnamectl set-hostname freeipa.mydomain10.com
次に、/ etc / hostsファイルを編集し、サーバーのIPとホスト名を追加します。
nano /etc/hosts
次の行を追加します:
45.58.43.185 freeipa.mydomain10.com
終了したら、ファイルを保存して閉じます。
FreeIPAサーバーをインストールする
デフォルトでは、FreeIPAパッケージはCentOS標準リポジトリでは利用できません。そのため、システムでidm:DL1リポジトリを有効にする必要があります。
次のコマンドで有効にできます:
dnf module enable idm:DL1
次に、次のコマンドを使用してリポジトリを同期します。
dnf distro-sync
次に、次のコマンドを実行して、システムにFreeIPAサーバーをインストールします。
dnf install ipa-server ipa-server-dns -y
インストールが完了したら、次の手順に進むことができます。
FreeIPAサーバーのセットアップ
次に、FreeIPAサーバーをセットアップする必要があります。次のコマンドで設定できます:
ipa-server-install
以下に示すように、統合DNSを構成するように求められます。
The log file for this installation can be found in /var/log/ipaserver-install.log
ipa-server-install

The log file for this installation can be found in /var/log/ipaserver-install.log
==============================================================================
This program will set up the IPA Server.
Version 4.8.4

This includes:
  * Configure a stand-alone CA (dogtag) for certificate management
  * Configure the NTP client (chronyd)
  * Create and configure an instance of Directory Server
  * Create and configure a Kerberos Key Distribution Center (KDC)
  * Configure Apache (httpd)
  * Configure the KDC to enable PKINIT

To accept the default shown in brackets, press the Enter key.

Do you want to configure integrated DNS (BIND)? [no]:
Enterキーを押して、[いいえ]を選択します。サーバーのホスト名を入力するように求められます:
Enter the fully qualified domain name of the computer on which you're setting up server software. Using the form. Example: master.example.com. Server host name [freeipa.mydomain10.com]:
Enterキーを押して、デフォルトのホスト名を選択します。以下に示すように、ドメイン名の確認を求められます。
The domain name has been determined based on the host name.

Please confirm the domain name [mydomain10.com]:
Enterキーを押して、デフォルトのドメイン名を選択します。以下に示すように、ディレクトリマネージャのパスワードを設定するように求められます。
The kerberos protocol requires a Realm name to be defined.
This is typically the domain name converted to uppercase.

Please provide a realm name [MYDOMAIN10.COM]:
Certain directory server operations require an administrative user.
This user is referred to as the Directory Manager and has full access
to the Directory for system management tasks and will be added to the
instance of directory server created for IPA.
The password must be at least 8 characters long.

Directory Manager password:
Password (confirm):
希望のパスワードを入力してEnterキーを押します。以下に示すように、IPA管理者パスワードを設定するように求められます。
The IPA server requires an administrative user, named 'admin'.
This user is a regular system account used for IPA server administration.

IPA admin password:
Password (confirm):
希望のパスワードを入力してEnterキーを押します。以下に示すように、NTPサーバーを構成するように求められます。
Do you want to configure chrony with NTP server or pool address? [no]:
Enterキーを押して、デフォルトオプションを選択します。次の出力が得られるはずです:
The IPA Master Server will be configured with:
Hostname:       freeipa.mydomain10.com
IP address(es): 45.58.43.185
Domain name:    mydomain10.com
Realm name:     MYDOMAIN10.COM

The CA will be configured with:
Subject DN:   CN=Certificate Authority,O=MYDOMAIN10.COM
Subject base: O=MYDOMAIN10.COM
Chaining:     self-signed

Continue to configure the system with these values? [no]: yes
yesと入力し、Enterキーを押して、上記の値でシステムを構成します。セットアップが完了すると、次の出力が表示されます。
SSSD enabled
Configured /etc/openldap/ldap.conf
Configured /etc/ssh/ssh_config
Configured /etc/ssh/sshd_config
Configuring mydomain10.com as NIS domain.
Client configuration complete.
The ipa-client-install command was successful

unable to resolve host name freeipa.mydomain10.com. to IP address, ipa-ca DNS record will be incomplete
unable to resolve host name freeipa.mydomain10.com. to IP address, ipa-ca DNS record will be incomplete
Please add records in this file to your DNS system: /tmp/ipa.system.records._u0fzahd.db
==============================================================================
Setup complete

Next steps:
	1. You must make sure these network ports are open:
		TCP Ports:
		  * 80, 443: HTTP/HTTPS
		  * 389, 636: LDAP/LDAPS
		  * 88, 464: kerberos
		UDP Ports:
		  * 88, 464: kerberos
		  * 123: ntp

	2. You can now obtain a kerberos ticket using the command: 'kinit admin'
	   This ticket will allow you to use the IPA tools (e.g., ipa user-add)
	   and the web user interface.

Be sure to back up the CA certificates stored in /root/cacert.p12
These files are required to create replicas. The password for these
files is the Directory Manager password
The ipa-server-install command was successful
終了したら、次のステップに進むことができます。
システムにfirewalldがインストールされている場合は、FreeIPAで使用される一部のポートを許可する必要があります。次のコマンドで許可できます:
firewall-cmd --add-service={http,https,dns,ntp,freeipa-ldap,freeipa-ldaps} --permanent 次に、次のコマンドを使用してfirewalldをリロードし、変更を適用します。
firewall-cmd --reload
次に、システム内のSELinuxも無効にする必要があります。
/ etc / selinux / configファイルを編集してSELinuxを無効にできます:
nano /etc/selinux/config
次の行を見つけます:
SELINUX=enforcing
そして、それを次の行に置き換えます:
SELINUX=permissive
ファイルを保存して閉じます。次に、システムを再起動して変更を適用します。
FreeIPAWebUIにアクセス
次に、Webブラウザーを開き、URLhttps://freeipa.mydomain10.comを使用してFreeIPAWebインターフェースにアクセスします。以下に示すように、FreeIPAログインページにリダイレクトされます。
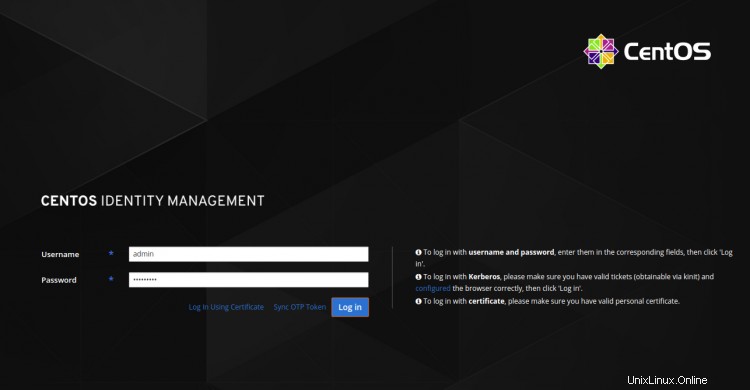
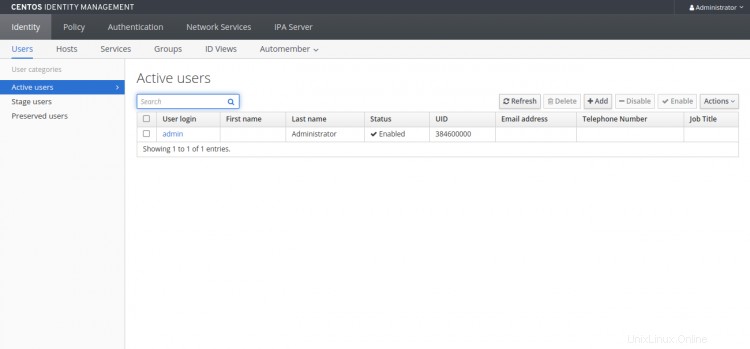
管理者のユーザー名とパスワードを入力し、ログをクリックします で ボタン。次のページにFreeIPAダッシュボードが表示されます。
FreeIPACLIの操作
FreeIPAは、新しいユーザー、グループ、サービスプリンシパルを追加し、あるグループから別のグループへの特定の属性への書き込みアクセスを許可するコマンドラインツールも提供します。
CLIツールを使用する前に、次のコマンドでKerberosチケットを取得する必要があります。
kinit admin
以下に示すように、パスワードの入力を求められます。
Password for [email protected]:
管理者パスワードを入力し、Enterキーを押してKerberosチケットを取得します。
次に、次のコマンドを実行して、チケットの有効期限を確認します。
klist
次の出力が得られるはずです:
Ticket cache: KCM:0
Default principal: [email protected]

Valid starting       Expires              Service principal
2020-09-28T03:36:54  2020-09-29T03:36:50  krbtgt/[email protected]
次に、次のコマンドを使用して新しいユーザーアカウントを追加します。
ipa user-add user1 --first=hit --last=jethva [email protected] --password
次の出力が得られるはずです:
Password:
Enter Password again to verify:
------------------
Added user "user1"
------------------
  User login: user1
  First name: hit
  Last name: jethva
  Full name: hit jethva
  Display name: hit jethva
  Initials: hj
  Home directory: /home/user1
  GECOS: hit jethva
  Login shell: /bin/sh
  Principal name: [email protected]
  Principal alias: [email protected]
  User password expiration: 20200928073905Z
  Email address: [email protected]
  UID: 384600001
  GID: 384600001
  Password: True
  Member of groups: ipausers
  Kerberos keys available: True
次のコマンドを使用して、システム内のすべてのユーザーアカウントを一覧表示することもできます。
ipa user-find
次の出力が表示されます。
---------------
2 users matched
---------------
  User login: admin
  Last name: Administrator
  Home directory: /home/admin
  Login shell: /bin/bash
  Principal alias: [email protected]
  UID: 384600000
  GID: 384600000
  Account disabled: False

  User login: user1
  First name: hit
  Last name: jethva
  Home directory: /home/user1
  Login shell: /bin/sh
  Principal name: [email protected]
  Principal alias: [email protected]
  Email address: [email protected]
  UID: 384600001
  GID: 384600001
  Account disabled: False
----------------------------
Number of entries returned 2
おめでとう!これで、CentOS 8にFreeIPAサーバーが正常にインストールおよび構成されました。これで、FreeIPAクライアントをインストールして、認証の集中化のためにFreeIPAサーバーに追加できます。ご不明な点がございましたら、お気軽にお問い合わせください。