パーフェクトサーバー-OpenSUSE12.2x86_64(nginx、Dovecot、ISPConfig 3)
このチュートリアルでは、 OpenSUSE 12.2 64ビット(x86_64)を準備する方法を示します。 ISPConfig 3のインストール用のnginxを備えたサーバー、およびISPConfig 3のインストール方法バージョン3.0.4以降、ISPConfigはApacheに加えてnginx Webサーバーを完全にサポートします。このチュートリアルでは、nginxを使用するサーバーのセットアップについて説明します。 Apacheの代わりに。 ISPConfig 3は、ウェブブラウザを介して次のサービスを設定できるウェブホスティングコントロールパネルです:nginxおよびApacheウェブサーバー、Postfixメールサーバー、MySQL、Dovecot POP3 / IMAP、BINDまたはMyDNSネームサーバー、PureFTPd、SpamAssassin、ClamAV、および多くのもっと。
ISPConfigでApacheの代わりにnginxを使用する場合は、nginxのバージョンが0.8.21以上である必要があり、PHP-FPMもインストールする必要があることに注意してください。 CGI / Perlをサポートするには、fcgiwrapを使用する必要があります。これはすべてこのチュートリアルでカバーされています。
次のソフトウェアを使用します:
- Webサーバー:PHP5を使用したnginx
- データベースサーバー:MySQL
- メールサーバー:仮想ユーザーによるPostfix
- DNSサーバー:BIND
- FTPサーバー:pureftpd
- POP3 / IMAP:Dovecot
- Webサイト統計用のWebalizerとAWStats
最終的には、信頼性が高く、ISPConfig3コントロールパネルで簡単に管理できるシステムが必要です。次のガイドは、64ビットバージョンのOpenSUSEを対象としています。
まず、このようなシステムを構築する方法はこれだけではありません。この目標を達成する方法はたくさんありますが、これが私のやり方です。これがあなたのために働くという保証はありません!
注意:このガイドは、ISPConfig3.0.4以降を対象としています。 ISPConfig2.xには適していません。
ISPConfig3マニュアル
ISPConfig 3の使用方法を学ぶために、ISPConfig3マニュアルをダウンロードすることを強くお勧めします。
約300ページで、ISPConfig(管理者、再販業者、クライアント)の背後にある概念をカバーし、ISPConfig 3をインストールおよび更新する方法を説明し、有効な入力の例とともにISPConfigのすべてのフォームとフォームフィールドのリファレンスを含み、 ISPConfig 3で最も一般的なタスクです。また、サーバーをより安全にする方法を示し、最後にトラブルシューティングのセクションがあります。
Android用ISPConfigモニターアプリ
ISPConfig Monitor Appを使用すると、サーバーのステータスを確認し、すべてのサービスが期待どおりに実行されているかどうかを確認できます。 TCPおよびUDPポートを確認し、サーバーにpingを実行できます。さらに、このアプリを使用して、ISPConfigがインストールされているサーバーに詳細を要求できます(ISPConfigモニターアプリをサポートするインストール済みのISPConfig3の最小バージョンは3.0.3.3です! );これらの詳細には、ISPConfigコントロールパネルのモニターモジュールから知っているすべてのもの(サービス、メールとシステムのログ、メールキュー、CPUとメモリの情報、ディスク使用量、クォータ、OSの詳細、RKHunterログなど)が含まれます。 、ISPConfigはマルチサーバー対応であるため、ISPConfigマスターサーバーから制御されているすべてのサーバーを確認できます。
ダウンロードと使用方法については、http://www.ispconfig.org/ispconfig-3/ispconfig-monitor-app-for-android/にアクセスしてください。
1要件
このようなシステムをインストールするには、次のものが必要です。
- OpenSUSE 12.2 DVD 。ここからダウンロードできます:http://download.opensuse.org/distribution/12.2/iso/openSUSE-12.2-DVD-x86_64.iso
- 高速インターネット接続...
2予備メモ
このチュートリアルでは、ホスト名server1.example.comとIPアドレス192.168.0.100およびゲートウェイ192.168.0.1を使用します。これらの設定はユーザーによって異なる場合があるため、必要に応じて置き換える必要があります。
3ベースシステム
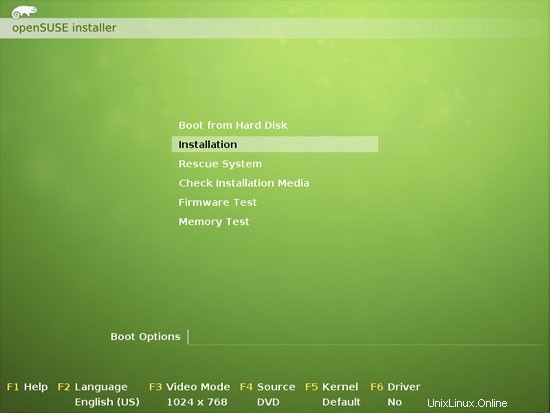
OpenSUSE 12.2 DVDから起動し、[インストール]を選択します:
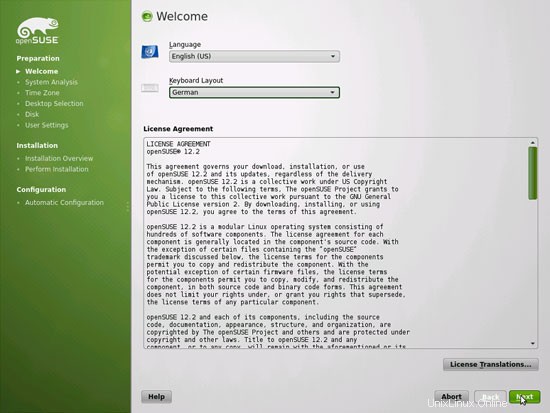
言語、キーボードレイアウトを選択し、ライセンス条項に同意します:
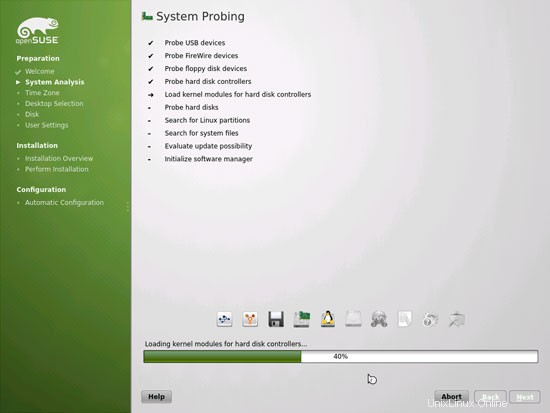
インストーラーはハードウェアを分析し、ソフトウェアリポジトリキャッシュを構築します:
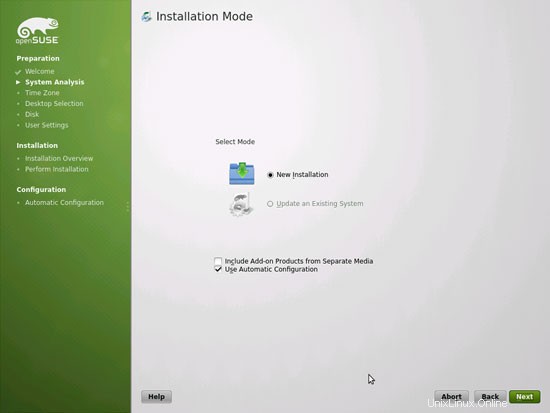
新規インストールを選択します:
地域とタイムゾーンを選択します:

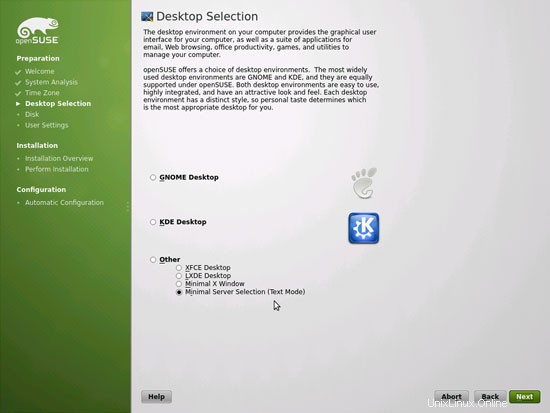
X-Windowデスクトップなしでサーバーをインストールするため、ここで[その他]> [最小サーバー選択(テキストモード)]を選択します。 X-Windowシステムはサーバーを実行するために必要ではなく、システムの速度を低下させます。シェル上またはSSH接続を介してすべての管理タスクを実行します。リモートデスクトップからPuTTY経由。
[パーティション設定の編集...]をクリックして、提案されたパーティションを変更します。これはサーバーのセットアップであるため、/homeパーティションの代わりに大きな/srvパーティションが必要です。

完璧なサーバー-OpenSUSE12.2x86_64(nginx、Dovecot、ISPConfig 3)-ページ2
4ネットワーク設定を構成する
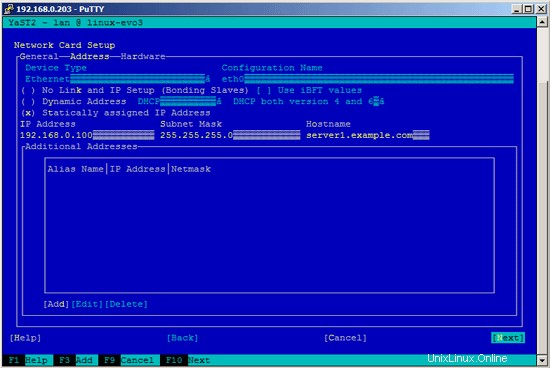
OpenSuSEシステム管理ツールであるYastを使用して、ネットワークカードの設定を再構成します。最初の起動後、システムはDHCPでIPアドレスを取得するように構成されます。サーバーの場合は、静的IPアドレスに切り替えます。
実行
yast2
[ネットワークデバイス]>[ネットワーク設定]を選択します:

ネットワークカードを選択してから編集:

[静的に割り当てられたIPアドレス]を選択し、IPアドレス、サブネットマスク、およびホスト名を入力し、[次へ]を選択して変更を保存します。
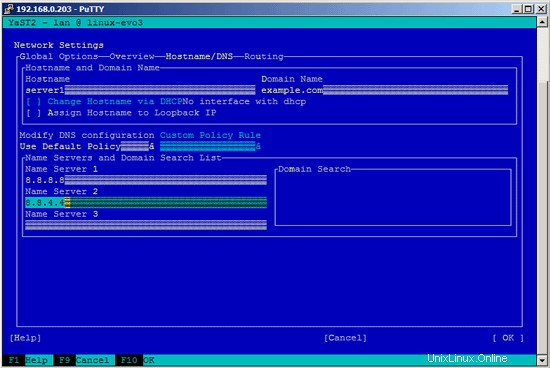
次に、[ホスト名/ DNS]を選択し、ホスト名(例:server1.example.com)とネームサーバー(例:8.8.8.8および8.8.4.4)を入力します。
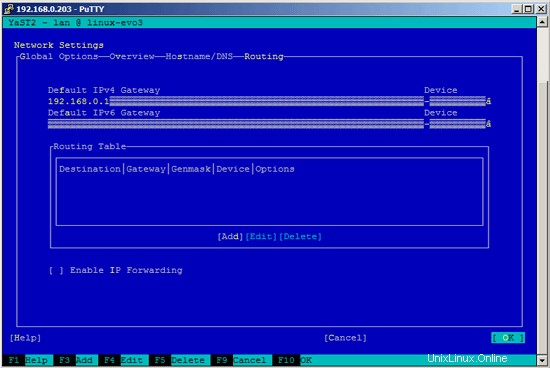
次に、[ルーティング]を選択し、デフォルトゲートウェイを入力して、[OK]をクリックします。
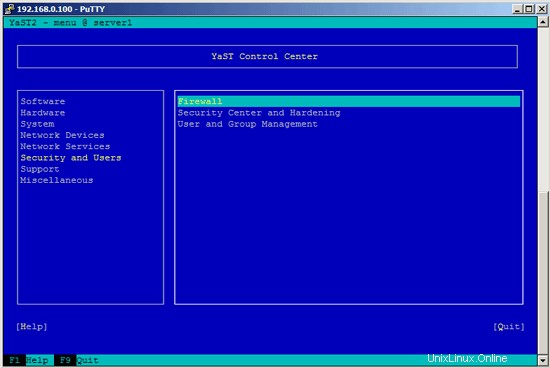
ファイアウォールを設定するには(基本インストール時にファイアウォールを設定しなかった場合)、[セキュリティとユーザー]> [Yastのファイアウォール]を選択します:
このチュートリアルの最後に、独自のファイアウォールが付属しているISPConfigをインストールしたいと思います。そのため、今はデフォルトのOpenSUSEファイアウォールを無効にしています。もちろん、自由にオンのままにして、必要に応じて構成できます(ただし、OpenSUSEファイアウォールに干渉する可能性が高いため、後で他のファイアウォールを使用しないでください)。
[ファイアウォールの自動開始を無効にする]と[ファイアウォールを今すぐ停止する]を選択し、[次へ]をクリックします。
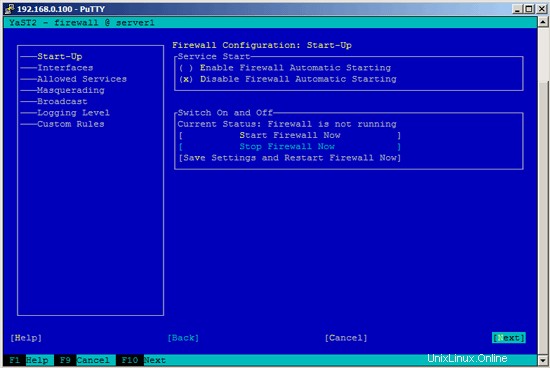
[完了]をクリックしてYastを終了します:

その後、確認する必要があります
ifconfig
ネットワーク構成が正しい場合。そうでない場合(たとえば、eth0がない場合)、システムを再起動します...
reboot
...その後、ネットワーク構成をもう一度確認します。これで正しいはずです。
5つのアップデートのインストール
次に、openSUSEリポジトリから最新のアップデートをインストールします。実行
zypper update
そして、カーネルアップデートもインストールした可能性が高いため、サーバーを再起動します。
reboot
6いくつかの基本パッケージをインストールする
実行
zypper install findutils readline glibc-devel findutils-locate gcc flex lynx compat-readline4 db-devel wget gcc-c++ subversion make vim telnet cron iptables iputils man man-pages nano pico sudo perl-TimeDate
7ジャーナルクォータ
クォータをインストールするには
を実行しますzypper install quota
/ etc / fstabを次のように編集します(マウントポイント/および/ srvに、usrjquota =aquota.user、grpjquota =aquota.group、jqfmt =vfsv0を追加しました):
vi /etc/fstab
/dev/disk/by-id/ata-VBOX_HARDDISK_VB1d06c935-e9b5de19-part1 swap swap defaults 0 0 /dev/disk/by-id/ata-VBOX_HARDDISK_VB1d06c935-e9b5de19-part2 / ext4 acl,user_xattr,usrjquota=aquota.user,grpjquota=aquota.group,jqfmt=vfsv0 1 1 /dev/disk/by-id/ata-VBOX_HARDDISK_VB1d06c935-e9b5de19-part3 /srv ext4 acl,user_xattr,usrjquota=aquota.user,grpjquota=aquota.group,jqfmt=vfsv0 1 2 proc /proc proc defaults 0 0 sysfs /sys sysfs noauto 0 0 debugfs /sys/kernel/debug debugfs noauto 0 0 usbfs /proc/bus/usb usbfs noauto 0 0 devpts /dev/pts devpts mode=0620,gid=5 0 0 |
次に実行します:
mount -o remount /
mount -o remount / srv
quotacheck -avugm
quote-avug
これらのエラーメッセージが表示されても心配しないでください。quotacheckを初めて実行するときは正常です:
server1:〜#quotacheck -avugm
quotecheck:スキャン/ dev / sda2 [/] done
quotecheck:古いユーザーquotaファイルを統計できません:そのようなファイルまたはディレクトリはありません
quotecheck:古いグループを統計できませんクォータファイル:そのようなファイルまたはディレクトリはありません
quotecheck:古いユーザーを統計できませんクォータファイル:そのようなファイルまたはディレクトリはありません
quotecheck:古いグループのクォータファイルを統計できません:そのようなファイルまたはディレクトリはありません
quotecheck: 3872ディレクトリと32991ファイルをチェックしました
quotacheck:古いファイルが見つかりません。
quotecheck:古いファイルが見つかりません。
quotecheck:/ dev / sda3 [/srv]のスキャンが完了しました
quotacheck:古いユーザークォータファイルを統計できません:そのようなファイルまたはディレクトリはありません
quotecheck:古いグループクォータファイルを統計できません:そのようなファイルまたはディレクトリはありません
quotecheck:古いユーザークォータファイルを統計できません:そのようなファイルまたはディレクトリはありません
quotecheck:古いグループのクォータファイルを統計できません:そのようなファイルまたはディレクトリはありません
quotecheck:6つのディレクトリと0のファイルをチェックしました
quotecheck:古いファイルが見つかりません。
quotecheck:古いファイルが見つかりません。
ser ver1:〜#
完璧なサーバー-OpenSUSE12.2x86_64(nginx、Dovecot、ISPConfig 3)-4ページ
8 Postfix、Dovecot、MySQLをインストール
実行
zypper install postfix postfix-mysql mysql-community-server libmysqlclient-devel dovecot21 dovecot21-backend-mysql pwgen cron python
次のメッセージが表示された場合は、eximのアンインストールを選択してください。
問題:postfix-2.8.11-2.6.1.x86_64がexim-4.77-2.1.3.x86_64によって提供されるeximと競合する
解決策1:次のアクションが実行されます:
postfix-2.8をインストールしないでください.11-2.6.1.x86_64
postfix-mysql-2.8.11-2.6.1.x86_64をインストールしないでください
解決策2:exim-4.77-2.1.3.x86_64の削除
上記のソリューションから番号で選択するか、スキップ、再試行、またはキャンセルします[1/2 / s / r / c](c):<-2
また、patterns-openSUSE-minimal_base-conflicts-12.2-5.5.1.x86_64をアンインストールする必要がある場合があります:
問題:patterns-openSUSE-minimal_base-conflicts-12.2-5.5.1.x86_64は、python-2.7.3-3.6.1.x86_64によって提供されるpythonと競合します
解決策1:patterns-openSUSE-minimal_base-conflicts-の削除12.2-5.5.1.x86_64
ソリューション2:python-2.7.3-3.6.1.x86_64をインストールしないでください
上記のソリューションから番号で選択するか、スキップ、再試行、またはキャンセルします[1 / 2 / s / r / c](c):<-1
次のシンボリックリンクを作成します:
ln -s /usr/lib64/dovecot/modules /usr/lib/dovecot
この時点で、MySQLがエラーで開始することを拒否したため、再起動する必要がありました:
Failed to issue method call: Unit mysql.service failed to load: No such file or directory. See system logs and 'systemctl status mysql.service' for details.
reboot
MySQL、Postfix、およびDovecotを起動し、起動時にサービスを開始できるようにします。
systemctl enable mysql.service
systemctl start mysql.service
systemctl enable postfix.service
systemctl start postfix.service
systemctl enable dovecot.service
systemctl start dovecot.service
次に、getmailパッケージをインストールします:
zypper install getmail
MySQLのインストールを保護するには、次のコマンドを実行します。
mysql_secure_installation
ここで、いくつかの質問があります:
server1:〜#mysql_secure_installation
注:このスクリプトのすべての部分を実行することは、すべてのMySQLに推奨されます
本番環境で使用するサーバー!各ステップを注意深くお読みください。
MySQLにログインしてセキュリティで保護するには、rootユーザーの現在の
パスワードが必要です。 MySQLをインストールしたばかりで、
rootパスワードをまだ設定していない場合、パスワードは空白になります。
ここで、Enterキーを押すだけです。
Enter rootの現在のパスワード(noneの場合は入力):<-ENTER
OK、正常に使用されたパスワード、次に進みます...
rootパスワードを設定すると、誰もMySQLにログインできないようになります
適切な権限のないrootユーザー。
rootパスワードを設定しますか? [Y / n] <-Y
新しいパスワード:<-yourrootsqlpassword
新しいパスワードを再入力してください:<-yourrootsqlpassword
パスワードが正常に更新されました!
特権テーブルを再読み込みしています。 。
...成功!
デフォルトでは、MySQLのインストールには匿名のユーザーが含まれているため、ユーザーアカウントを持たなくても誰でもMySQLにログインできます。
それらのために作成されました。これは、テストのみを目的としており、インストールを
少しスムーズにすることを目的としています。
本番環境に移動する前に、それらを削除する必要があります。
匿名ユーザーを削除しますか? [Y / n] <-Y
...成功!
通常、rootは「localhost」からの接続のみを許可する必要があります。これにより、
誰かが、ネットワークからのルートパスワードを推測できないようになります。
ルートログインをリモートで禁止しますか? [Y / n] <-Y
...成功!
デフォルトでは、MySQLには「test」という名前のデータベースが付属しており、誰でもアクセスできます。
これもテストのみを目的としており、
本番環境に移動する前に削除する必要があります。
テストデータベースを削除して、データベースにアクセスしますか? [Y / n] <-Y
-テストデータベースを削除しています...
...成功しました!
-テストデータベースの特権を削除しています...
...成功しました!
特権テーブルを再読み込みすると、これまでに行われたすべての変更が
すぐに有効になります。
特権テーブルを今すぐ再読み込みしますか? [Y / n] <-Y
...成功!
クリーンアップ...
すべて完了しました!上記のすべての手順を完了した場合、MySQLのインストールは安全になっているはずです。
MySQLをご利用いただきありがとうございます。
server1: 〜#
これで、MySQLのセットアップが保護されます。
9 Amavisd-new、Spamassassin And Clamav
Amavisd-new、Spamassassin、Clamavアンチウイルスをインストールします。実行
zypper install amavisd-new clamav clamav-db zoo unzip unrar bzip2 unarj perl-DBD-mysql
/etc/amavisd.confを開きます...
vi /etc/amavisd.conf
...そして$mydomain行の下に正しいホスト名で$myhostname行を追加します:
[...] $mydomain = 'example.com'; # a convenient default for other settings $myhostname = "server1.$mydomain"; [...] |
次に、/ var / run / clamav/clamdから/var/ lib / clamav/clamd-socketへのシンボリックリンクを作成します。
mkdir -p / var / run / clamav
ln -s / var / lib / clamav / clamd-socket / var / run / clamav / clamd
OpenSUSE 12.2には、ランタイムデータを保存するための/runディレクトリがあります。 / runはtmpfsになり、/ var /runはtmpfsから/runにバインドマウントされるようになったため、再起動時に空になります。
これは、再起動後、作成したばかりのディレクトリ/ var / run / clamavが存在しなくなるため、clamdの起動に失敗することを意味します。したがって、ファイル/etc/tmpfiles.d/clamav.confを作成します。これにより、システムの起動時にこのディレクトリが作成されます(詳細については、http://0pointer.de/public/systemd-man/tmpfiles.d.htmlを参照してください)。
vi /etc/tmpfiles.d/clamav.conf
D /var/run/clamav 0755 root root - |
amavisdとclamdを開始する前に、/ etc / init.d / amavis initスクリプトを編集する必要があります-デフォルトのinitスクリプトでamavisdを確実に開始、停止、再起動できませんでした:
vi /etc/init.d/amavis
開始セクションと停止セクションの次の行をコメントアウトします。
[...]
    start)
        # ZMI 20100428 check for stale pid file
        #if test -f $AMAVIS_PID ; then
        #       checkproc -p $AMAVIS_PID amavisd
        #       if test $? -ge 1 ; then
        #               # pid file is stale, remove it
        #               echo -n "(stale amavisd pid file $AMAVIS_PID found, removing. Did amavisd crash?)"
        #               rm -f $AMAVIS_PID
        #       fi
        #fi
        echo -n "Starting virus-scanner (amavisd-new): "
        $AMAVISD_BIN start
        #if ! checkproc amavisd; then
        #    rc_failed 7
        #fi
        rc_status -v
        #if [ "$AMAVIS_SENDMAIL_MILTER" == "yes" ]; then
        #    rc_reset
        #    echo -n "Starting amavis-milter:"
        #    startproc -u vscan $AMAVIS_MILTER_BIN -p $AMAVIS_MILTER_SOCK > /dev/null 2>&1
        #    rc_status -v
        #fi
        ;;
    stop)
        echo -n "Shutting down virus-scanner (amavisd-new): "
        #if checkproc amavisd; then
        #    rc_reset
            $AMAVISD_BIN stop
        #else
        #    rc_reset
        #fi
        rc_status -v
        #if [ "$AMAVIS_SENDMAIL_MILTER" == "yes" ]; then
        #    rc_reset
        #    echo -n "Shutting down amavis-milter: "
        #    killproc -TERM $AMAVIS_MILTER_BIN
        #    rc_status -v
        #fi
        ;;
[...] |
initスクリプトを変更したため、実行する必要があります
systemctl --system daemon-reload
今。
サービスを有効にするには、次のコマンドを実行します:
systemctl enable amavis.service
systemctl enable clamd.service
systemctl start amavis.service
systemctl start clamd.service
10 Nginx、PHP5(PHP-FPM)、およびFcgiwrapをインストールします
Nginxは、OpenSUSEのパッケージとして提供されており、次のようにインストールできます。
zypper install nginx-1.0
Apache2がすでにシステムにインストールされている場合は、今すぐ停止してください...
systemctl stop apache2.service
...そしてApacheのシステムスタートアップリンクを削除します:
systemctl disable apache2.service
次に、nginxのシステム起動リンクを作成して起動します:
systemctl enable nginx.service
systemctl start nginx.service
(Apache2とnginxの両方がインストールされている場合、ISPConfig 3インストーラーはどちらを使用するかを尋ねます。この場合はnginxと答えます。両方の両方がインストールされている場合、ISPConfigは必要な構成を自動的に行います。)
>nginx vhostでIPv6アドレスを使用する場合は、ISPConfigでIPv6 vhostを作成する前に、次の手順を実行してください。
/etc/sysctl.confを開きます...
vi /etc/sysctl.conf
...そしてnet.ipv6.bindv6only=1:
という行を追加します [...] net.ipv6.bindv6only = 1 |
実行...
sysctl -p
...その後、変更を有効にします。
PHP5をPHP-FPMを介してnginxで動作させることができます(PHP-FPM(FastCGI Process Manager)は、あらゆるサイズのサイト、特に忙しいサイトに役立ついくつかの追加機能を備えた代替のPHP FastCGI実装です)。>>
zypper install php5-fpm
PHP-FPMを開始する前に、/ etc / php5 / fpm/php-fpm.conf.defaultの名前を/etc/php5/fpm/php-fpm.confに変更します。
mv /etc/php5/fpm/php-fpm.conf.default /etc/php5/fpm/php-fpm.conf
PHPのセッションディレクトリの権限を変更します:
chmod 1733 /var/lib/php5
次に、/ etc / php5 / fpm / php-fpm.conf ...
を開きます。vi /etc/php5/fpm/php-fpm.conf
...そしてerror_logを/var/log/php-fpm.logに変更します:
[...] error_log = /var/log/php-fpm.log [...] |
OpenSUSE 12.2にはPHP-FPM用のphp.iniファイルがないため、CLIphp.iniをコピーします。
cp /etc/php5/cli/php.ini /etc/php5/fpm/
次に/etc/php5/fpm/php.iniを開きます...
vi /etc/php5/fpm/php.ini
...そしてcgi.fix_pathinfoを0に設定します:
[...] ; cgi.fix_pathinfo provides *real* PATH_INFO/PATH_TRANSLATED support for CGI. PHP's ; previous behaviour was to set PATH_TRANSLATED to SCRIPT_FILENAME, and to not grok ; what PATH_INFO is. For more information on PATH_INFO, see the cgi specs. Setting ; this to 1 will cause PHP CGI to fix its paths to conform to the spec. A setting ; of zero causes PHP to behave as before. Default is 1. You should fix your scripts ; to use SCRIPT_FILENAME rather than PATH_TRANSLATED. ; http://php.net/cgi.fix-pathinfo cgi.fix_pathinfo=0 [...] |
次に、php-fpmのシステム起動リンクを作成して再起動します:
systemctl enable php-fpm.service
systemctl restart php-fpm.service
PHP-FPMは、ポート9000でFastCGIサーバーを実行するデーモンプロセスです。これは、
の出力で確認できます。netstat -tapn
server1:〜#netstat -tapn
アクティブなインターネット接続(サーバーおよび確立済み)
Proto Recv-Q Send-Q Local Address Foreign Address PID / Program name
t 3310 0.0.0.0:* LISTEN 10357/clamd
tcp 0 0 0.0.0.0:143 0.0.0.0:* LISTEN 9869/dovecot
tcp 0 0 0.0.0.0:80 0.0.0.0:* LISTEN 10521 /nginx
tcp 0 0 0.0.0.0:22 0.0.0.0:* LISTEN 1275/sshd
tcp 0 0 127.0.0.1:25 0.0.0.0:* LISTEN 9816/master
tcp 0 0 127.0.0.1:9000 0.0.0.0:* LISTEN 10695/php-fpm.conf)
tcp 0 0 127.0.0.1:10024 0.0.0.0:* LISTEN 10337/amavisd (mast
tcp 0 0 0.0.0.0:33060.0.0.0:*聞く9694/mysqld
tcp 0 0 192.168.0.100:22 192.168.0.199:4630 ESTABLISHED 1332/0
tcp 0 0 :::22 :::* LISTEN 1275/sshd
tcp 0 0 ::1:25 :::*聞く9816/master
server1:〜#
PHPでMySQLをサポートするために、php5-mysqlパッケージをインストールできます。他のPHP5モジュールをインストールすることをお勧めします。また、アプリケーションでそれらが必要になる場合もあります。
zypper install php5-mysql php5-bcmath php5-bz2 php5-calendar php5-ctype php5-curl php5-dom php5-ftp php5-gd php5-gettext php5-gmp php5-iconv php5-imap php5-ldap php5-mbstring php5-mcrypt php5-odbc php5-openssl php5-pcntl php5-pgsql php5-posix php5-shmop php5-snmp php5-soap php5-sockets php5-sqlite php5-sysvsem php5-tokenizer php5-wddx php5-xmlrpc php5-xsl php5-zlib php5-exif php5-pear php5-sysvmsg php5-sysvshm
PHP-FPMを再起動します:
systemctl restart php-fpm.service
nginxでCGIをサポートするには、Fcgiwrapをインストールします。
Fcgiwrapは、複雑なCGIスクリプトでも機能するCGIラッパーであり、各vhostが独自のcgi-binディレクトリを使用できるため、共有ホスティング環境で使用できます。
OpenSUSEにはfcgiwrapパッケージがないため、自分で作成する必要があります。まず、いくつかの前提条件をインストールします:
zypper install git patch automake glibc-devel gcc flex compat-readline4 db-devel wget gcc-c++ make vim libtool FastCGI-devel
次のシンボリックリンクを作成します。
ln -s /usr/include/fastcgi/fastcgi.h /usr/local/include/
ln -s /usr/include/fastcgi/fcgi_config.h / usr / local / include /
ln- s /usr/include/fastcgi/fcgi_stdio.h / usr / local / include /
ln -s /usr/include/fastcgi/fcgiapp.h / usr / local / include /
ln -s / usr / include / fastcgi / fcgimisc.h / usr / local / include /
ln -s /usr/include/fastcgi/fcgio.h / usr / local / include /
ln -s / usr / include / fastcgi / fcgios.h / usr / local / include /
これで、次のようにfcgiwrapを作成できます。
cd /usr/local/src/
git clone git://github.com/gnosek/fcgiwrap.git
cd fcgiwrap
autoreconf -i
./configure
make
make install
これにより、fcgiwrapが/ usr / local / sbin/fcgiwrapにインストールされます。
次に、fcgiwrapをデーモンとして実行できるようにするspawn-fcgiパッケージをインストールします。
zypper install spawn-fcgi
これで、次のようにfcgiwrapを開始できます。
spawn-fcgi -u wwwrun -g www -s /var/run/fcgiwrap.socket -S -M 0770 -F 1 -P /var/run/spawn-fcgi.pid -- /usr/local/sbin/fcgiwrap
これで、ユーザーwwwrunとグループwwwが所有するfcgiwrapソケットが/var/run/fcgiwrap.socketにあるはずです。ここで、ユーザーnginxをグループwww:
に追加する必要があります。usermod -A www nginx
後でnginxをリロードします:
systemctl reload nginx.service
システムを起動するたびに手動でfcgiwrapを起動したくない場合は、/ etc / init.d / boot.local ...
を開きます。vi /etc/init.d/boot.local
...そしてファイルの最後にspawn-fcgiコマンドを追加します-これにより、ブートプロセスの最後にfcgiwrapが自動的に開始されます:
[...] /usr/bin/spawn-fcgi -u wwwrun -g www -s /var/run/fcgiwrap.socket -S -M 0770 -F 1 -P /var/run/spawn-fcgi.pid -- /usr/local/sbin/fcgiwrap |
それでおしまい!これで、nginx vhostを作成すると、ISPConfigが正しいvhost構成を処理します。
10.1phpMyAdminをインストールする
次に、phpMyAdminをインストールします:
zypper install phpMyAdmin
これによりApacheが依存関係としてインストールされるため、Apacheのシステムスタートアップリンクを削除します。
systemctl disable apache2.service
phpMyAdminは/srv/ www / htdocs / phpMyAdminディレクトリにありますが、/ usr / share / phpmyadmin /ディレクトリに配置する必要があるため、シンボリックリンクを作成します。
ln -s /srv/www/htdocs/phpMyAdmin /usr/share/phpmyadmin
ISPConfig 3をインストールした後、次のようにphpMyAdminにアクセスできます。
nginxのポート8081のISPConfigアプリvhostにはphpMyAdmin構成が付属しているため、http://server1.example.com:8081/phpmyadminまたはhttp://server1.example.com:8081/phpMyAdminを使用してphpMyAdminにアクセスできます。
Webサイトから使用できる/phpmyadminまたは/phpMyAdminエイリアスを使用する場合、nginxにはグローバルエイリアス(つまり、すべてのvhostに定義できるエイリアス)がないため、これはApacheよりも少し複雑です。したがって、それぞれに対してこれらのエイリアスを定義する必要があります phpMyAdminにアクセスするvhost。
これを行うには、ISPConfigのWebサイトの[オプション]タブにある[nginxディレクティブ]フィールドに以下を貼り付けます。
        location /phpmyadmin {
               root /usr/share/;
               index index.php index.html index.htm;
               location ~ ^/phpmyadmin/(.+\.php)$ {
                       try_files $uri =404;
                       root /usr/share/;
                       fastcgi_pass 127.0.0.1:9000;
                       fastcgi_index index.php;
                       fastcgi_param SCRIPT_FILENAME $request_filename;
                       include /etc/nginx/fastcgi_params;
                       fastcgi_param PATH_INFO $fastcgi_script_name;
                       fastcgi_buffer_size 128k;
                       fastcgi_buffers 256 4k;
                       fastcgi_busy_buffers_size 256k;
                       fastcgi_temp_file_write_size 256k;
                       fastcgi_intercept_errors on;
               }
               location ~* ^/phpmyadmin/(.+\.(jpg|jpeg|gif|css|png|js|ico|html|xml|txt))$ {
                       root /usr/share/;
               }
        }
        location /phpMyAdmin {
               rewrite ^/* /phpmyadmin last;
} |
http sを使用する場合 vhostのhttpの代わりに、fastcgi_paramHTTPSという行を追加する必要があります。このようにphpMyAdmin構成に:
        location /phpmyadmin {
               root /usr/share/;
               index index.php index.html index.htm;
               location ~ ^/phpmyadmin/(.+\.php)$ {
                       try_files $uri =404;
                       root /usr/share/;
                       fastcgi_pass 127.0.0.1:9000;
                       fastcgi_param HTTPS on; # <-- add this line
                       fastcgi_index index.php;
                       fastcgi_param SCRIPT_FILENAME $request_filename;
                       include /etc/nginx/fastcgi_params;
                       fastcgi_param PATH_INFO $fastcgi_script_name;
                       fastcgi_buffer_size 128k;
                       fastcgi_buffers 256 4k;
                       fastcgi_busy_buffers_size 256k;
                       fastcgi_temp_file_write_size 256k;
                       fastcgi_intercept_errors on;
               }
               location ~* ^/phpmyadmin/(.+\.(jpg|jpeg|gif|css|png|js|ico|html|xml|txt))$ {
                       root /usr/share/;
               }
        }
        location /phpMyAdmin {
               rewrite ^/* /phpmyadmin last;
} |
vhostにhttpとhttpsの両方を使用する場合は、訪問者がhttpまたはhttpsのどちらを使用して設定するかを決定する、/ etc / nginx /nginx.confのhttp{}セクションに次のセクションを追加する必要があります(インクルード行の前)。それに応じて、$ fastcgi_https変数(phpMyAdmin構成で使用します):
vi /etc/nginx/nginx.conf
[...]
http {
[...]
        ## Detect when HTTPS is used
        map $scheme $fastcgi_https {
          default off;
          https on;

        }
[...]
}
[...] |
後でnginxをリロードすることを忘れないでください:
systemctl reload nginx.service
次に、nginx Directivesフィールドに再度移動し、fastcgi_paramHTTPSの代わりに;行fastcgi_paramHTTPS$fastcgi_httpsを追加します。 httpリクエストとhttpsリクエストの両方にphpMyAdminを使用できるようにします。
        location /phpmyadmin {
               root /usr/share/;
               index index.php index.html index.htm;
               location ~ ^/phpmyadmin/(.+\.php)$ {
                       try_files $uri =404;
                       root /usr/share/;
                       fastcgi_pass 127.0.0.1:9000;
                       fastcgi_param HTTPS $fastcgi_https; # <-- add this line
                       fastcgi_index index.php;
                       fastcgi_param SCRIPT_FILENAME $request_filename;
                       include /etc/nginx/fastcgi_params;
                       fastcgi_param PATH_INFO $fastcgi_script_name;
                       fastcgi_buffer_size 128k;
                       fastcgi_buffers 256 4k;
                       fastcgi_busy_buffers_size 256k;
                       fastcgi_temp_file_write_size 256k;
                       fastcgi_intercept_errors on;
               }
               location ~* ^/phpmyadmin/(.+\.(jpg|jpeg|gif|css|png|js|ico|html|xml|txt))$ {
                       root /usr/share/;
               }
        }
        location /phpMyAdmin {
               rewrite ^/* /phpmyadmin last;
} |
The Perfect Server - OpenSUSE 12.2 x86_64 (nginx, Dovecot, ISPConfig 3) - Page 5
11 Install PureFTPd
Install the pure-ftpd FTP daemon. Run:
zypper install pure-ftpd
systemctl enable pure-ftpd.service
systemctl start pure-ftpd.service
Now we configure PureFTPd to allow FTP and TLS sessions. FTP is a very insecure protocol because all passwords and all data are transferred in clear text. By using TLS, the whole communication can be encrypted, thus making FTP much more secure.
OpenSSL is needed by TLS; to install OpenSSL, we simply run:
zypper install openssl
Open /etc/pure-ftpd/pure-ftpd.conf...
vi /etc/pure-ftpd/pure-ftpd.conf
If you want to allow FTP and TLS sessions, set TLS to 1:
[...] # This option can accept three values : # 0 : disable SSL/TLS encryption layer (default). # 1 : accept both traditional and encrypted sessions. # 2 : refuse connections that don't use SSL/TLS security mechanisms, # including anonymous sessions. # Do _not_ uncomment this blindly. Be sure that : # 1) Your server has been compiled with SSL/TLS support (--with-tls), # 2) A valid certificate is in place, # 3) Only compatible clients will log in. TLS 1 [...] |
If you want to accept TLS sessions only (no FTP), set TLS to 2:
[...] # This option can accept three values : # 0 : disable SSL/TLS encryption layer (default). # 1 : accept both traditional and encrypted sessions. # 2 : refuse connections that don't use SSL/TLS security mechanisms, # including anonymous sessions. # Do _not_ uncomment this blindly. Be sure that : # 1) Your server has been compiled with SSL/TLS support (--with-tls), # 2) A valid certificate is in place, # 3) Only compatible clients will log in. TLS 2 [...] |
To not allow TLS at all (only FTP), set TLS to 0:
[...] # This option can accept three values : # 0 : disable SSL/TLS encryption layer (default). # 1 : accept both traditional and encrypted sessions. # 2 : refuse connections that don't use SSL/TLS security mechanisms, # including anonymous sessions. # Do _not_ uncomment this blindly. Be sure that : # 1) Your server has been compiled with SSL/TLS support (--with-tls), # 2) A valid certificate is in place, # 3) Only compatible clients will log in. TLS 0 [...] |
In order to use TLS, we must create an SSL certificate. I create it in /etc/ssl/private/, therefore I create that directory first:
mkdir -p /etc/ssl/private/
Afterwards, we can generate the SSL certificate as follows:
openssl req -x509 -nodes -days 7300 -newkey rsa:2048 -keyout /etc/ssl/private/pure-ftpd.pem -out /etc/ssl/private/pure-ftpd.pem
Country Name (2 letter code) [AU]:<-- Enter your Country Name (e.g., "DE").
State or Province Name (full name) [Some-State]:<-- Enter your State or Province Name.
Locality Name (eg, city) []:<-- Enter your City.
Organization Name (eg, company) [Internet Widgits Pty Ltd]:<-- Enter your Organization Name (e.g., the name of your company).
Organizational Unit Name (eg, section) []:<-- Enter your Organizational Unit Name (e.g. "IT Department").
Common Name (eg, YOUR name) []:<-- Enter the Fully Qualified Domain Name of the system (e.g. "server1.example.com").
Email Address []:<-- Enter your Email Address.
Change the permissions of the SSL certificate:
chmod 600 /etc/ssl/private/pure-ftpd.pem
Finally restart PureFTPd:
systemctl restart pure-ftpd.service
それでおしまい。 You can now try to connect using your FTP client; however, you should configure your FTP client to use TLS - see the next chapter how to do this with FileZilla.
12 Install BIND
The BIND nameserver can be installed as follows:
zypper install bind
Create the BIND system startup links and start it:
systemctl enable named.service
systemctl start named.service
13 Install Webalizer And AWStats
Since ISPConfig 3 lets you choose if you want to use Webalizer or AWStats to create your web site statistics, we install both:
zypper install webalizer perl-DateManip
zypper install http://download.opensuse.org/repositories/network:/utilities/openSUSE_12.2/noarch/awstats-7.0-14.1.noarch.rpm
14 Install fail2ban
fail2ban can be installed as follows:
zypper install fail2ban
15 Install Jailkit
Jailkit can be installed like this:
zypper install http://download.opensuse.org/repositories/security/openSUSE_12.2/x86_64/jailkit-2.13-1.3.x86_64.rpm
16 Synchronize The System Clock
If you want to have the system clock synchronized with an NTP server do the following:
zypper install xntp
Then add system startup links for ntp and start ntp:
systemctl enable ntp.service
systemctl start ntp.service
17 Install rkhunter
rkhunter can be installed as follows:
zypper install rkhunter
18 Install SquirrelMail
To install the SquirrelMail webmail client, run:
zypper installhttp://download.opensuse.org/repositories/server:/php:/applications/openSUSE_12.2/noarch/squirrelmail-1.4.22-1.1.noarch.rpm
Then configure SquirrelMail:
/srv/www/htdocs/squirrelmail/config/conf.pl
We must tell SquirrelMail that we are using Dovecot:
SquirrelMail Configuration : Read: config.php (1.4.0)
---------------------------------------------------------
Main Menu --
1. Organization Preferences
2. Server Settings
3. Folder Defaults
4. General Options
5. User Interface
6. Address Books
7. Message of the Day (MOTD)
8. Plugins
9. Database
10. Language settings
11. Tweaks
D. Set pre-defined settings for specific IMAP servers
C Turn color on
S Save data
Q Quit
Command >> <-- D
SquirrelMail Configuration : Read: config.php
---------------------------------------------------------
While we have been building SquirrelMail, we have discovered some
preferences that work better with some servers that don't work so
well with others. If you select your IMAP server, this option will
set some pre-defined settings for that server.
Please note that you will still need to go through and make sure
everything is correct. This does not change everything. There are
only a few settings that this will change.
Please select your IMAP server:
bincimap = Binc IMAP server
courier = Courier IMAP server
cyrus = Cyrus IMAP server
dovecot = Dovecot Secure IMAP server
exchange = Microsoft Exchange IMAP server
hmailserver = hMailServer
macosx = Mac OS X Mailserver
mercury32 = Mercury/32
uw = University of Washington's IMAP server
gmail = IMAP access to Google mail (Gmail) accounts
quit = Do not change anything
Command >> <-- dovecot
SquirrelMail Configuration : Read: config.php
---------------------------------------------------------
While we have been building SquirrelMail, we have discovered some
preferences that work better with some servers that don't work so
well with others. If you select your IMAP server, this option will
set some pre-defined settings for that server.
Please note that you will still need to go through and make sure
everything is correct. This does not change everything. There are
only a few settings that this will change.
Please select your IMAP server:
bincimap = Binc IMAP server
courier = Courier IMAP server
cyrus = Cyrus IMAP server
dovecot = Dovecot Secure IMAP server
exchange = Microsoft Exchange IMAP server
hmailserver = hMailServer
macosx = Mac OS X Mailserver
mercury32 = Mercury/32
uw = University of Washington's IMAP server
gmail = IMAP access to Google mail (Gmail) accounts
quit = Do not change anything
Command >> dovecot
imap_server_type = dovecot
default_folder_prefix =
trash_folder = Trash
sent_folder = Sent
draft_folder = Drafts
show_prefix_option = false
default_sub_of_inbox = false
show_contain_subfolders_option = false
optional_delimiter = detect
delete_folder = false
force_username_lowercase = true
Press enter to continue... <-- ENTER
SquirrelMail Configuration : Read: config.php (1.4.0)
---------------------------------------------------------
Main Menu --
1. Organization Preferences
2. Server Settings
3. Folder Defaults
4. General Options
5. User Interface
6. Address Books
7. Message of the Day (MOTD)
8. Plugins
9. Database
10. Language settings
11. Tweaks
D. Set pre-defined settings for specific IMAP servers
C Turn color on
S Save data
Q Quit
Command >> <-- S
SquirrelMail Configuration : Read: config.php (1.4.0)
---------------------------------------------------------
Main Menu --
1. Organization Preferences
2. Server Settings
3. Folder Defaults
4. General Options
5. User Interface
6. Address Books
7. Message of the Day (MOTD)
8. Plugins
9. Database
10. Language settings
11. Tweaks
D. Set pre-defined settings for specific IMAP servers
C Turn color on
S Save data
Q Quit
Command >> S
Data saved in config.php
Done activating plugins; registration data saved in plugin_hooks.php
Press enter to continue... <-- ENTER
SquirrelMail Configuration : Read: config.php (1.4.0)
---------------------------------------------------------
Main Menu --
1. Organization Preferences
2. Server Settings
3. Folder Defaults
4. General Options
5. User Interface
6. Address Books
7. Message of the Day (MOTD)
8. Plugins
9. Database
10. Language settings
11. Tweaks
D. Set pre-defined settings for specific IMAP servers
C Turn color on
S Save data
Q Quit
Command >> <-- Q
SquirrelMail is located in the /srv/www/htdocs/squirrelmail directory, but we need it in the /usr/share/squirrelmail/ directory. Therefore we create a symlink:
ln -s /srv/www/htdocs/squirrelmail /usr/share/squirrelmail
In addition to that, we change the owner of the /srv/www/htdocs/squirrelmail/data/ directory to nobody:
chown nobody /srv/www/htdocs/squirrelmail/data/
After you have installed ISPConfig 3, you can access SquirrelMail as follows:
The ISPConfig apps vhost on port 8081 for nginx comes with a SquirrelMail configuration, so you can use http://server1.example.com:8081/squirrelmail or http://server1.example.com:8081/webmail to access SquirrelMail.
If you want to use a /webmail or /squirrelmail alias that you can use from your web sites, this is a bit more complicated than for Apache because nginx does not have global aliases (i.e., aliases that can be defined for all vhosts). Therefore you have to define these aliases for each vhost from which you want to access SquirrelMail.
To do this, paste the following into the nginx Directives field on the Options tab of the web site in ISPConfig:
        location /squirrelmail {
               root /usr/share/;
               index index.php index.html index.htm;
               location ~ ^/squirrelmail/(.+\.php)$ {
                       try_files $uri =404;
                       root /usr/share/;
                       fastcgi_pass 127.0.0.1:9000;
                       fastcgi_index index.php;
                       fastcgi_param SCRIPT_FILENAME $request_filename;
                       include /etc/nginx/fastcgi_params;
                       fastcgi_param PATH_INFO $fastcgi_script_name;
                       fastcgi_buffer_size 128k;
                       fastcgi_buffers 256 4k;
                       fastcgi_busy_buffers_size 256k;
                       fastcgi_temp_file_write_size 256k;
                       fastcgi_intercept_errors on;
               }
               location ~* ^/squirrelmail/(.+\.(jpg|jpeg|gif|css|png|js|ico|html|xml|txt))$ {
                       root /usr/share/;
               }
        }
        location /webmail {
               rewrite ^/* /squirrelmail last;
} |
If you use https instead of http for your vhost, you should add the line fastcgi_param HTTPS on; to your SquirrelMail configuration like this:
        location /squirrelmail {
               root /usr/share/;
               index index.php index.html index.htm;
               location ~ ^/squirrelmail/(.+\.php)$ {
                       try_files $uri =404;
                       root /usr/share/;
                       fastcgi_pass 127.0.0.1:9000;
                       fastcgi_param HTTPS on; # <-- add this line
                       fastcgi_index index.php;
                       fastcgi_param SCRIPT_FILENAME $request_filename;
                       include /etc/nginx/fastcgi_params;
                       fastcgi_param PATH_INFO $fastcgi_script_name;
                       fastcgi_buffer_size 128k;
                       fastcgi_buffers 256 4k;
                       fastcgi_busy_buffers_size 256k;
                       fastcgi_temp_file_write_size 256k;
                       fastcgi_intercept_errors on;
               }
               location ~* ^/squirrelmail/(.+\.(jpg|jpeg|gif|css|png|js|ico|html|xml|txt))$ {
                       root /usr/share/;
               }
        }
        location /webmail {
               rewrite ^/* /squirrelmail last;
} |
If you use both http and https for your vhost, you need to add the following section to the http {} section in /etc/nginx/nginx.conf (before any include lines) which determines if the visitor uses http or https and sets the $fastcgi_https variable (which we will use in our SquirrelMail configuration) accordingly:
vi /etc/nginx/nginx.conf
[...]
http {
[...]
        ## Detect when HTTPS is used
        map $scheme $fastcgi_https {
          default off;
          https on;

        }
[...]
}
[...] |
Don't forget to reload nginx afterwards:
systemctl reload nginx.service
Then go to the nginx Directives field again, and instead of fastcgi_param HTTPS on; you add the line fastcgi_param HTTPS $fastcgi_https; so that you can use SquirrelMail for both http and https requests:
        location /squirrelmail {
               root /usr/share/;
               index index.php index.html index.htm;
               location ~ ^/squirrelmail/(.+\.php)$ {
                       try_files $uri =404;
                       root /usr/share/;
                       fastcgi_pass 127.0.0.1:9000;
                       fastcgi_param HTTPS $fastcgi_https; # <-- add this line
                       fastcgi_index index.php;
                       fastcgi_param SCRIPT_FILENAME $request_filename;
                       include /etc/nginx/fastcgi_params;
                       fastcgi_param PATH_INFO $fastcgi_script_name;
                       fastcgi_buffer_size 128k;
                       fastcgi_buffers 256 4k;
                       fastcgi_busy_buffers_size 256k;
                       fastcgi_temp_file_write_size 256k;
                       fastcgi_intercept_errors on;
               }
               location ~* ^/squirrelmail/(.+\.(jpg|jpeg|gif|css|png|js|ico|html|xml|txt))$ {
                       root /usr/share/;
               }
        }
        location /webmail {
               rewrite ^/* /squirrelmail last;
} |
The Perfect Server - OpenSUSE 12.2 x86_64 (nginx, Dovecot, ISPConfig 3) - Page 6
19 ISPConfig 3
Before we install ISPConfig 3, make sure that the /var/vmail/ directory exists:
mkdir /var/vmail/
Before you start the ISPConfig installation, make sure that Apache is stopped (if it is installed - it is possible that some of your installed packages have installed Apache as a dependency without you knowing). If Apache2 is already installed on the system, stop it now...
systemctl stop apache2.service
... and remove Apache's system startup links:
systemctl disable apache2.service
Make sure that nginx is running:
systemctl restart nginx.service
(If you have both Apache and nginx installed, the installer asks you which one you want to use:Apache and nginx detected. Select server to use for ISPConfig:(apache,nginx) [apache]:
Type nginx. If only Apache or nginx are installed, this is automatically detected by the installer, and no question is asked.)
Download the current ISPConfig 3 version and install it. The ISPConfig installer will configure all services like Postfix, Dovecot, etc. for you. A manual setup as required for ISPConfig 2 is not necessary anymore.
You now also have the possibility to let the installer create an SSL vhost for the ISPConfig control panel, so that ISPConfig can be accessed using https:// instead of http://. To achieve this, just press ENTER when you see this question:Do you want a secure (SSL) connection to the ISPConfig web interface (y,n) [y]:.
cd /tmp
wget http://www.ispconfig.org/downloads/ISPConfig-3-stable.tar.gz
tar xfz ISPConfig-3-stable.tar.gz
cd ispconfig3_install/install/
Now start the installation process by executing:
php -q install.php
server1:/tmp/ispconfig3_install/install # php -q install.php
--------------------------------------------------------------------------------
_____ ___________ _____ __ _ ____
|_ _/ ___| ___ \ / __ \ / _(_) /__ \
| | \ `--.| |_/ / | / \/ ___ _ __ | |_ _ __ _ _/ /
| | `--. \ __/ | | / _ \| '_ \| _| |/ _` | |_ |
_| |_/\__/ / | | \__/\ (_) | | | | | | | (_| | ___\ \
\___/\____/\_| \____/\___/|_| |_|_| |_|\__, | \____/
__/ |
|___/
--------------------------------------------------------------------------------
>> Initial configuration
Operating System: openSUSE or compatible, unknown version.
Following will be a few questions for primary configuration so be careful.
Default values are in [brackets] and can be accepted with
Tap in "quit" (without the quotes) to stop the installer.
Select language (en,de) [en]: <-- ENTER
Installation mode (standard,expert) [standard]: <-- ENTER
Full qualified hostname (FQDN) of the server, eg server1.domain.tld [server1.example.com]: <-- ENTER
MySQL server hostname [localhost]: <-- ENTER
MySQL root username [root]: <-- ENTER
MySQL root password []: <-- yourrootsqlpassword
MySQL database to create [dbispconfig]: <-- ENTER
MySQL charset [utf8]: <-- ENTER
Apache and nginx detected. Select server to use for ISPConfig: (apache,nginx) [apache]: <-- nginx
Generating a 2048 bit RSA private key
...................................................................................+++
...+++
writing new private key to 'smtpd.key'
-----
You are about to be asked to enter information that will be incorporated
into your certificate request.
What you are about to enter is what is called a Distinguished Name or a DN.
There are quite a few fields but you can leave some blank
For some fields there will be a default value,
If you enter '.', the field will be left blank.
-----
Country Name (2 letter code) [AU]: <-- ENTER
State or Province Name (full name) [Some-State]: <-- ENTER
Locality Name (eg, city) []: <-- ENTER
Organization Name (eg, company) [Internet Widgits Pty Ltd]: <-- ENTER
Organizational Unit Name (eg, section) []: <-- ENTER
Common Name (eg, YOUR name) []: <-- ENTER
Emai l Address []: <-- ENTER
Configuring Jailkit
Configuring Dovecot
Configuring Spamassassin
Configuring Amavisd
Configuring Getmail
Configuring Pureftpd
Configuring BIND
Configuring nginx
Configuring Vlogger
Configuring Apps vhost
Configuring Bastille Firewall
Configuring Fail2ban
Installing ISPConfig
ISPConfig Port [8080]: <-- ENTER
Do you want a secure (SSL) connection to the ISPConfig web interface (y,n) [y]:<-- ENTER
Generating RSA private key, 4096 bit long modulus
.++
...............++
e is 65537 (0x10001)
You are about to be asked to enter information that will be incorporated
into your certificate request.
What you are about to enter is what is called a Distinguished Name or a DN.
There are quite a few fields but you can leave some blank
For some fields there will be a default value,
If you enter '.', the field will be left blank.
-----
Country Name (2 letter code) [AU]: <-- ENTER
State or Province Name (full name) [Some-State]: <-- ENTER
Locality Name (eg, city) []: <-- ENTER
Organization Name (eg, company) [Internet Widgits Pty Ltd]: <-- ENTER
Organizational Unit Name (eg, section) []: <-- ENTER
Common Name (eg, YOUR name) []: <-- ENTER
Email Address []: <-- ENTER
Please enter the following 'extra' attributes
to be sent with your certificate request
A challenge password []: <-- ENTER
An optional company name []: <-- ENTER
writing RSA key
Configuring DBServer
Installing ISPConfig crontab
no crontab for root
no crontab for getmail
Restarting services ...
redirecting to systemctl
redirecting to systemctl
redirecting to systemctl
redirecting to systemctl
redirecting to systemctl
redirecting to systemctl
redirecting to systemctl
redirecting to systemctl
redirecting to systemctl
Instal lation completed.
server1:/tmp/ispconfig3_install/install #
Clean up the /tmp directory:
cd /tmp
rm -rf /tmp/ispconfig3_install
rm -f /tmp/ISPConfig-3-stable.tar.gz
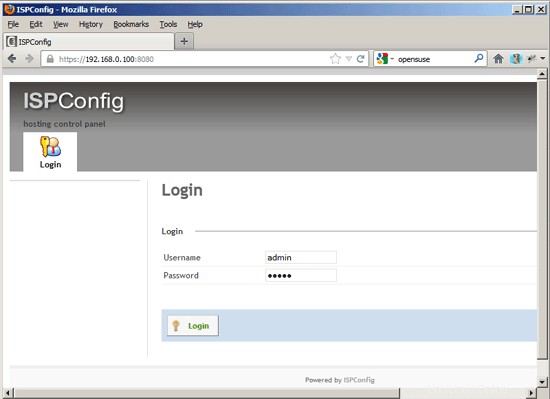
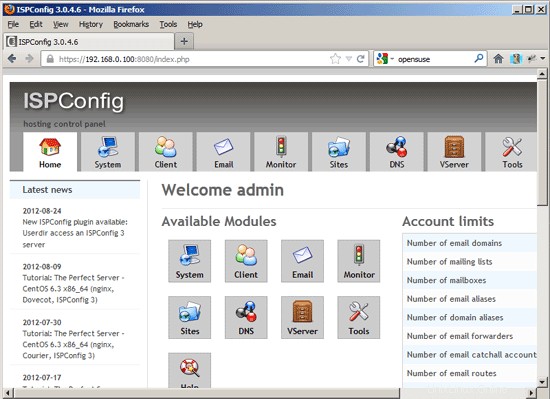
Afterwards you can access ISPConfig 3 under http(s)://server1.example.com:8080/ or http(s)://192.168.0.100:8080/ (http or https depends on what you chose during installation). Log in with the username admin and the password admin (you should change the default password after your first login):
19.1 ISPConfig 3 Manual
In order to learn how to use ISPConfig 3, I strongly recommend to download the ISPConfig 3 Manual.
On about 300 pages, it covers the concept behind ISPConfig (admin, resellers, clients), explains how to install and update ISPConfig 3, includes a reference for all forms and form fields in ISPConfig together with examples of valid inputs, and provides tutorials for the most common tasks in ISPConfig 3. It also lines out how to make your server more secure and comes with a troubleshooting section at the end.
19.2 ISPConfig Monitor App For Android
With the ISPConfig Monitor App, you can check your server status and find out if all services are running as expected. You can check TCP and UDP ports and ping your servers. In addition to that you can use this app to request details from servers that have ISPConfig installed (please note that the minimum installed ISPConfig 3 version with support for the ISPConfig Monitor App is 3.0.3.3! ); these details include everything you know from the Monitor module in the ISPConfig Control Panel (e.g. services, mail and system logs, mail queue, CPU and memory info, disk usage, quota, OS details, RKHunter log, etc.), and of course, as ISPConfig is multiserver-capable, you can check all servers that are controlled from your ISPConfig master server.
For download and usage instructions, please visit http://www.ispconfig.org/ispconfig-3/ispconfig-monitor-app-for-android/.
20 Links
- OpenSUSE:http://www.opensuse.org/
- ISPConfig:http://www.ispconfig.org/
About The Author

Falko Timme is the owner of  Timme Hosting (ultra-fast nginx web hosting). He is the lead maintainer of HowtoForge (since 2005) and one of the core developers of ISPConfig (since 2000). He has also contributed to the O'Reilly book "Linux System Administration".