このインストールガイドでは、UbuntuシステムにInvoicePlaneをインストールする方法を紹介します
InvoicePlane は、見積もり、請求書、クライアント、支払いを管理するための自己ホスト型のオープンソースアプリケーションです。
これは、ビジネスオーナーが請求書とクライアントの支払いを作成および管理するために特別に設計されています。
InvoicePlaneをインストールする
以下の手順に従ってください:
- LAMPサーバーをインストールします。
- phpモジュールをインストールします。
apt install php-gd php-json php-mbstring php-mysqli php-xmlrpc php libapache2-mod-php php-common php-mbstring php-xmlrpc php-soap php-gd php-xml php-intl php libapache2-mod-php php-mysql php-mysql wget unzip php-cli php-zip php-curl -y- 以下に示すように、ApacheWebサーバーとMariaデータベースをインストールします。
apt install apache2
apt install mariadb-server-10.3- apacheとmariadbを起動して有効にします。
systemctl start apache2 mariadb
systemctl enable apache2 mariadb
systemctl status apache2 mariadb- 次のようにMariaDBを構成して保護します。
mysql_secure_installation

NOTE: RUNNING ALL PARTS OF THIS SCRIPT IS RECOMMENDED FOR ALL MariaDB
      SERVERS IN PRODUCTION USE!  PLEASE READ EACH STEP CAREFULLY!

In order to log into MariaDB to secure it, we'll need the current
password for the root user.  If you've just installed MariaDB, and
you haven't set the root password yet, the password will be blank,
so you should just press enter here.

Enter current password for root (enter for none):
OK, successfully used password, moving on...

Setting the root password ensures that nobody can log into the MariaDB
root user without the proper authorisation.

Set root password? [Y/n] y
New password:
Re-enter new password:
Password updated successfully!
Reloading privilege tables..
 ... Success!


By default, a MariaDB installation has an anonymous user, allowing anyone
to log into MariaDB without having to have a user account created for
them.  This is intended only for testing, and to make the installation
go a bit smoother.  You should remove them before moving into a
production environment.

Remove anonymous users? [Y/n] y
 ... Success!

Normally, root should only be allowed to connect from 'localhost'.  This
ensures that someone cannot guess at the root password from the network.

Disallow root login remotely? [Y/n] y
 ... Success!

By default, MariaDB comes with a database named 'test' that anyone can
access.  This is also intended only for testing, and should be removed
before moving into a production environment.

Remove test database and access to it? [Y/n] y
 - Dropping test database...
 ... Success!
 - Removing privileges on test database...
 ... Success!

Reloading the privilege tables will ensure that all changes made so far
will take effect immediately.

Reload privilege tables now? [Y/n] y
 ... Success!

Cleaning up...

All done!  If you've completed all of the above steps, your MariaDB
installation should now be secure.

Thanks for using MariaDB!- MariaDBシェルにログインします:
mysql -u root -pCREATE DATABASE invplane_db;
CREATE USER 'invplane'@'localhost' IDENTIFIED BY 'password';
GRANT ALL PRIVILEGES ON invplane_db.* TO 'invplane'@'localhost';
FLUSH PRIVILEGES;
EXIT- 最新バージョンのInvoicePlaneをダウンロードします 次のコマンドを使用します:
wget -c -O v1.5.11.zip https://invoiceplane.com/download/v1.5.11- ダウンロードしたファイルを解凍します。
mkdir /var/www/html/invoiceplane
unzip v1.5.11.zip -d /var/www/html/invoiceplane- ディレクトリをinvoiceplaneに変更し、必要なファイルをApacheルートディレクトリにコピーします
cd /var/www/html/invoiceplane
sudo cp ipconfig.php.example ipconfig.php
sudo cp htaccess .htaccess- invoiceplaneに適切な権限を設定します ディレクトリ:
sudo chown -R www-data:www-data /var/www/html/invoiceplane/
sudo chmod -R 755 /var/www/html/invoiceplane/
find /var/www/html/invoiceplane/ -type f -exec chmod -v 0644 '{}' \;- InvoicePlane用のApache仮想ホストファイルを作成します
vim /etc/apache2/sites-available/invoiceplane.conf- 次に、以下を追加します
<VirtualHost *:80>
     ServerAdmin admin@example.com
     DocumentRoot /var/www/html/invoiceplane
     ServerName example.com

     <Directory /var/www/html/invoiceplane/>
          Options +FollowSymlinks
          AllowOverride All
          Require all granted
     </Directory>

     ErrorLog ${APACHE_LOG_DIR}/error.log
     CustomLog ${APACHE_LOG_DIR}/access.log combined

</VirtualHost>- Apache仮想ホストファイルを有効にしてモジュールを書き換えます
sudo a2ensite invoiceplane.conf
sudo a2enmod rewrite- Apacheサービスを再起動して、すべての変更を適用します
systemctl restart apache2- Webブラウザを開いてInvoicePlaneにアクセスし、URL http://example.comを入力します またはhttp://IP_Address/invoiceplane/index.php/welcome
次のように指示されます:
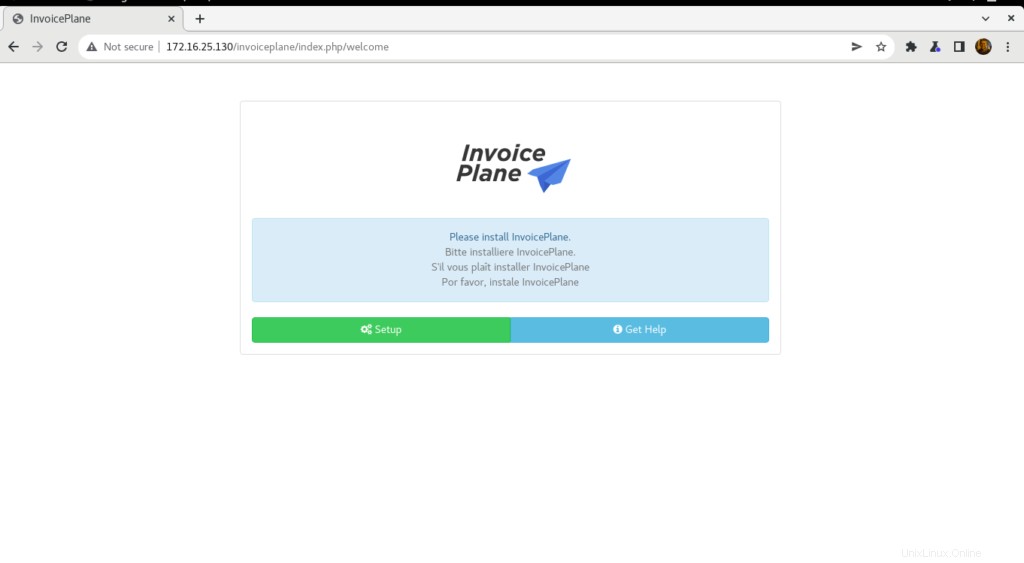
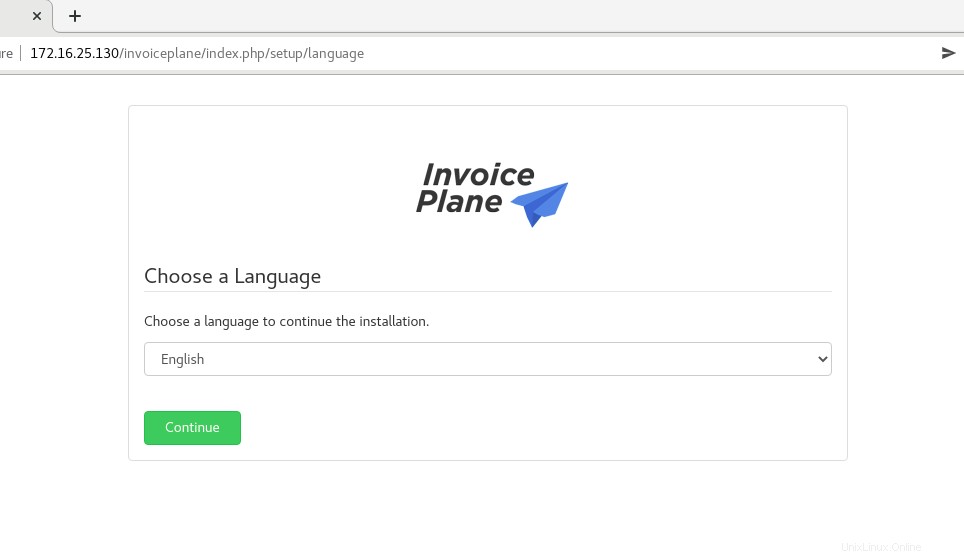
- セットアップをクリックします ボタンをクリックして言語を選択し、続行をクリックします
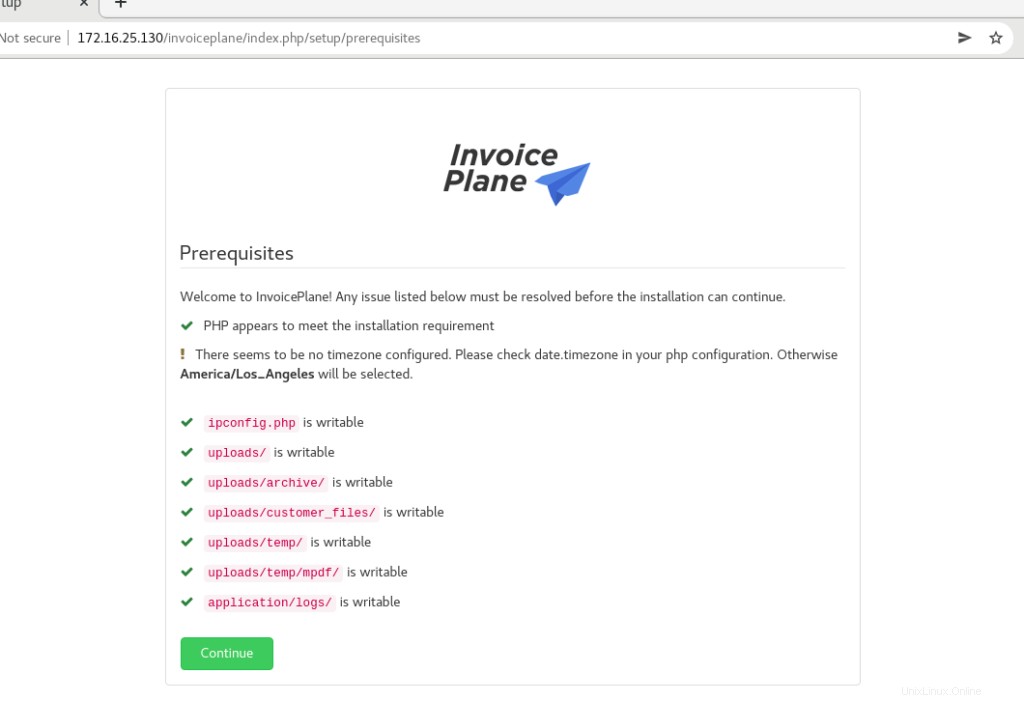
- 次に、[続行]をクリックします
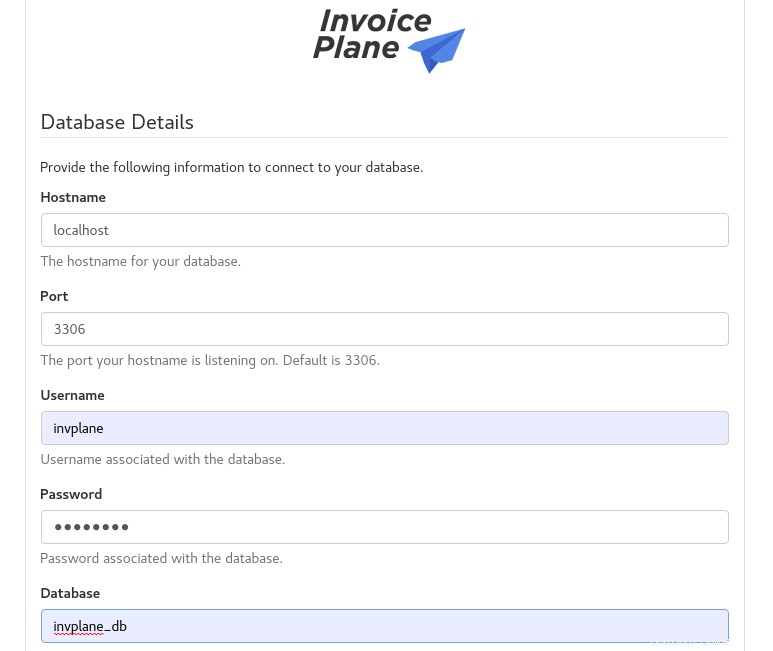
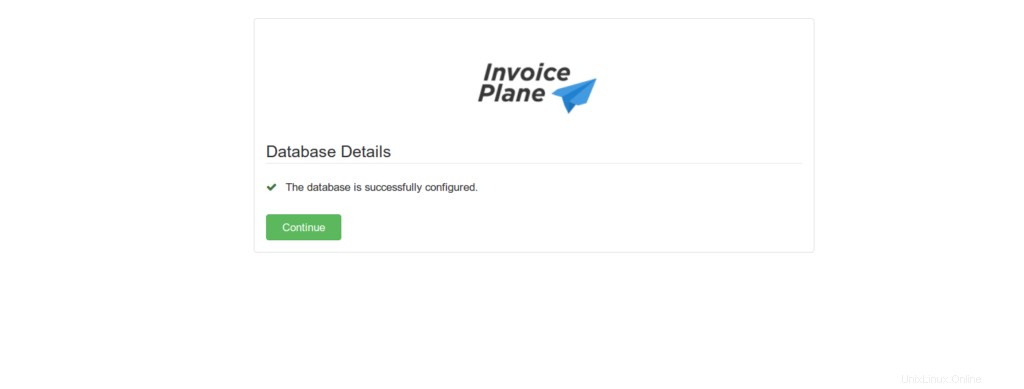
- データベースの詳細を入力し、再試行をクリックします
- データベースは次のように正常に構成されています。 続行をクリックします
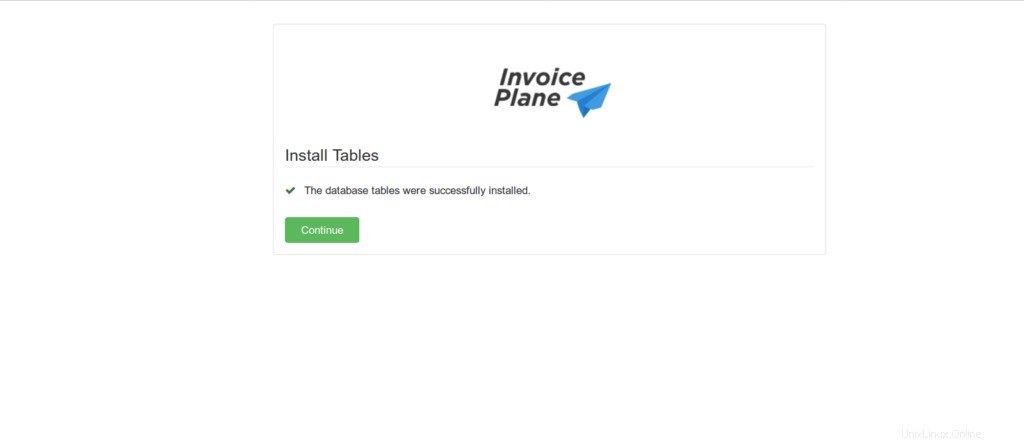
- また、[続行]をクリックします 。
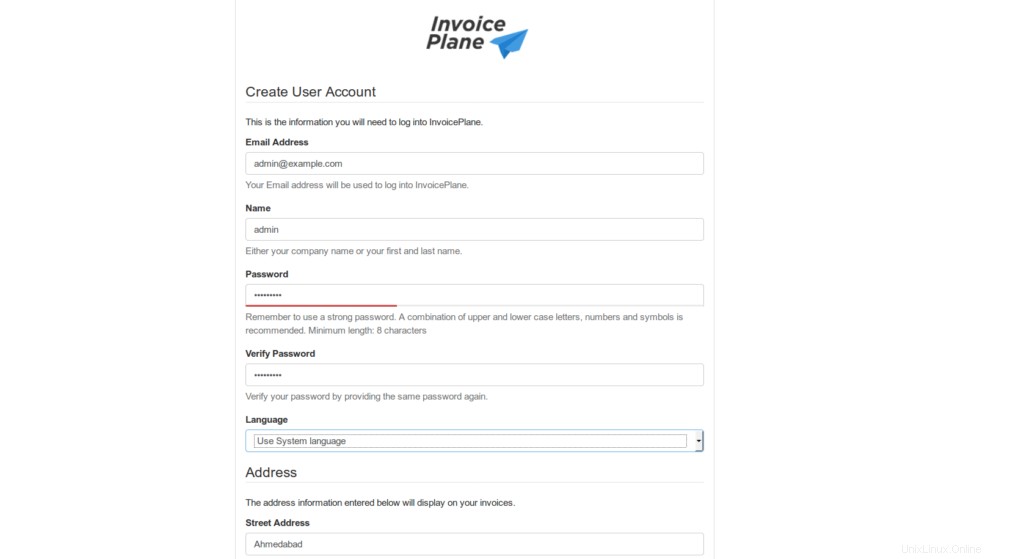
- 必要な詳細をすべて入力し、続行をクリックします 以下に示すように。
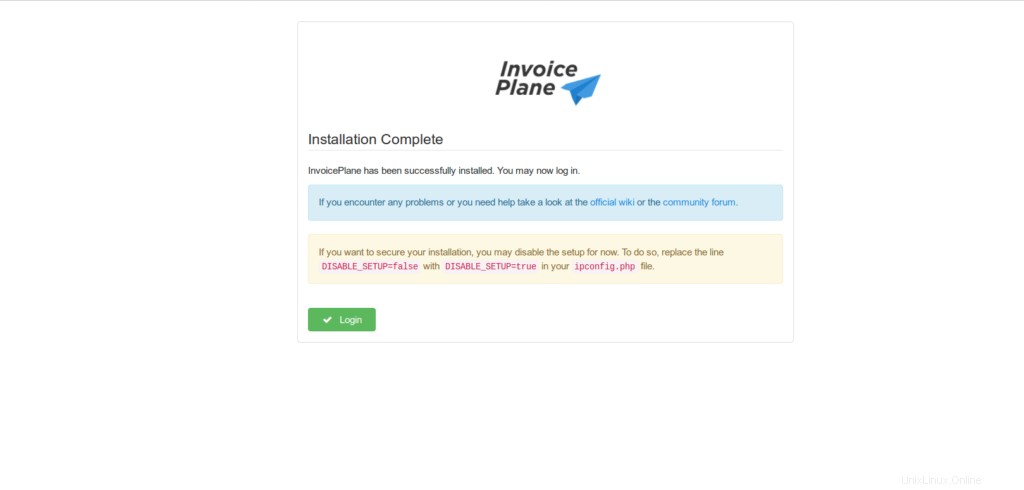
- インストールが完了したので、ログインをクリックします
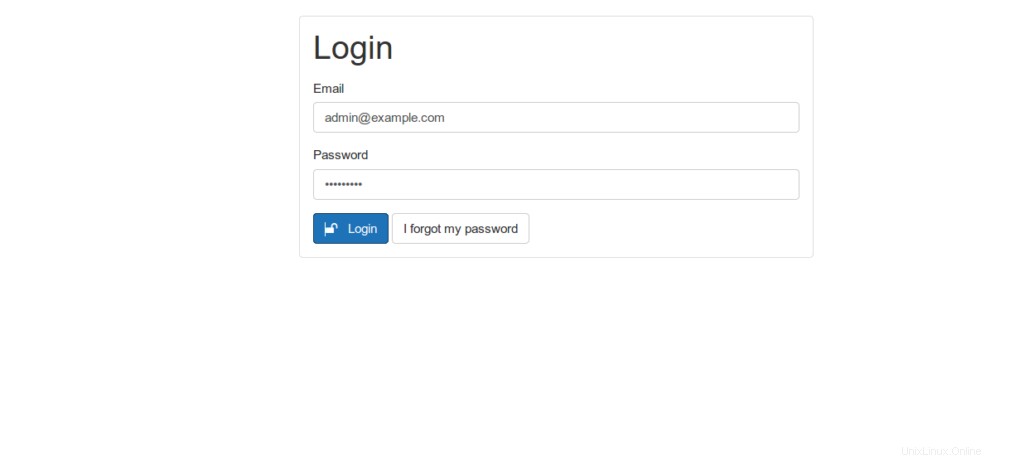
- 管理者のユーザー名とパスワードを入力し、ログインをクリックします
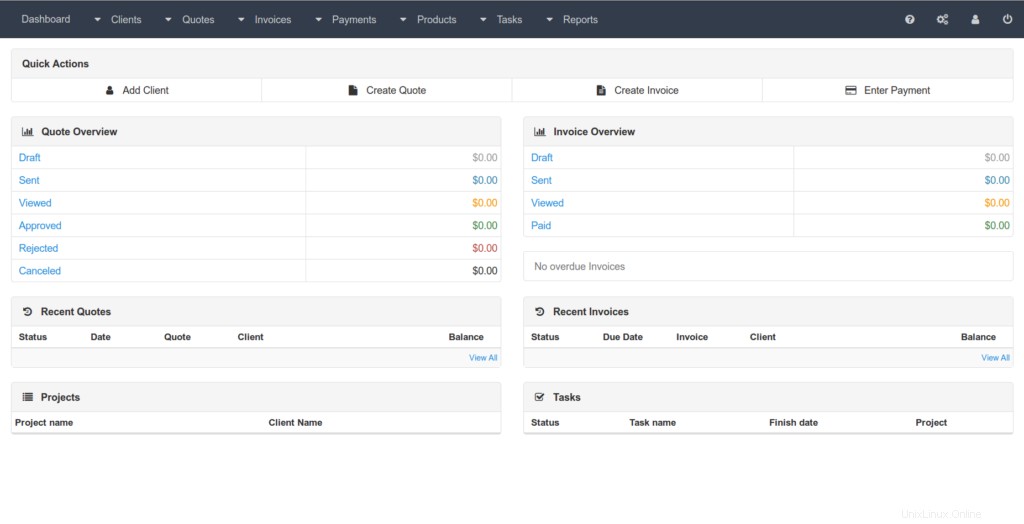
- 以下に示すように、InvoicePlaneダッシュボードにリダイレクトされます。
結論
以上です
この記事では、請求書プランをインストールして構成する方法を説明しました Ubuntu20.04で
ありがとう