Magentoは、PHP、Zendフレームワーク、およびMySQLデータベースに組み込まれた無料のオープンソースコンテンツ管理システムです。これは、Apache、MySQLなどの多くのオープンソースアプリケーション上で実行される非常に人気のあるeコマースWebアプリケーションです。 Magentoには、機能を追加するために使用される多くの組み込みモジュールが付属しています。
Varnish Cacheは、キャッシングHTTPリバースプロキシとも呼ばれる強力なオープンソースWebアプリケーションアクセラレータです。これは、ユーザーが最初にアクセスしたときにWebページのコピーをキャッシュすることにより、Webサイトを高速化するために使用されます。 MagentoとVarnishは、サイトのパフォーマンスを大幅に向上させる既知の組み合わせです。 VarnishはデフォルトでMagento2に統合されています。これを機能させるには、いくつかの構成変更を行うだけで済みます。
このチュートリアルでは、Ubuntu16.04サーバーにフルページキャッシュとしてVarnishを使用してMagento2をインストールする方法を学習します。
- Ubuntu16.04を実行しているサーバー。
- Apache、PHP、およびMariaDB。
- サーバーにsudo権限が設定されているroot以外のユーザー。
1はじめに
開始する前に、次のコマンドを実行して、システムを最新のパッケージで更新することをお勧めします。
sudo apt-get update -y
sudo apt-get upgrade -y
システムが最新の状態になったら、システムを再起動し、sudoユーザーでログインします。
2LAMPサーバーをインストールする
Magentoは、LAMPスタック(Apache、PHP、MariaDB)をインストールしないと機能しません。まず、次のコマンドを実行して、Apache Webサーバーをインストールし、ニスを塗ります。
sudo apt-get install apache2 varnish -y
Apacheをインストールした後、次のコマンドを実行して、Apacheサービスを開始し、起動時に開始できるようにします。
sudo systemctl start apache2
sudo systemctl enable apache2
MagentoはPHP言語で記述されているため、すべてのライブラリを含むPHPをシステムにインストールする必要もあります。次のコマンドを実行して、それらすべてをインストールできます。
sudo apt-get install php7.0 libapache2-mod-php7.0 php7.0-mbstring php7.0-mysql php7.0-mcrypt php7.0-xsl php-imagick php7.0-gd php7.0-cli php-pear php7.0-intl php7.0-curl php7.0-zip php7.0-gd php7.0-soap php7.0-xml -y
必要なすべてのライブラリとともにPHPをインストールした後、いくつかのデフォルトのPHP設定を変更する必要があります。これを行うには、php.iniファイルを編集します:
sudo nano /etc/php/7.0/cli/php.ini
次の行を変更します:
memory_limit = 512
upload_max_filesize = 128M
zlib.output_compression = on
max_execution_time = 15000
終了したら、ファイルを保存して閉じます。
3MariaDBのインストールと構成
MagentoはMariaDBをデータベースとして使用します。したがって、サーバーにインストールする必要があります。次のコマンドを実行するだけでインストールできます:
sudo apt-get install mariadb-server -y
MariaDBをインストールした後、MariaDBサービスを開始し、次のコマンドを実行して起動時に開始できるようにします。
sudo systemctl start mysql
sudo systemctl enable mysql
デフォルトでは、MariaDBは保護されていないため、保護する必要があります。次のコマンドを実行することで保護できます:
sudo mysql_secure_installation
以下に示すように、すべての質問に答えてください。
NOTE: RUNNING ALL PARTS OF THIS SCRIPT IS RECOMMENDED FOR ALL MariaDB
      SERVERS IN PRODUCTION USE!  PLEASE READ EACH STEP CAREFULLY!

In order to log into MariaDB to secure it, we'll need the current
password for the root user.  If you've just installed MariaDB, and
you haven't set the root password yet, the password will be blank,
so you should just press enter here.

Enter current password for root (enter for none):
OK, successfully used password, moving on...

Setting the root password ensures that nobody can log into the MariaDB
root user without the proper authorisation.

You already have a root password set, so you can safely answer 'n'.

Change the root password? [Y/n] n

 ... skipping.

By default, a MariaDB installation has an anonymous user, allowing anyone
to log into MariaDB without having to have a user account created for
them.  This is intended only for testing, and to make the installation
go a bit smoother.  You should remove them before moving into a
production environment.

Remove anonymous users? [Y/n] Y
 ... Success!

Normally, root should only be allowed to connect from 'localhost'.  This
ensures that someone cannot guess at the root password from the network.

Disallow root login remotely? [Y/n] Y
 ... Success!

By default, MariaDB comes with a database named 'test' that anyone can
access.  This is also intended only for testing, and should be removed
before moving into a production environment.

Remove test database and access to it? [Y/n] Y
 - Dropping test database...
 ... Success!
 - Removing privileges on test database...
 ... Success!

Reloading the privilege tables will ensure that all changes made so far
will take effect immediately.

Reload privilege tables now? [Y/n] Y
 ... Success!

Cleaning up...

All done!  If you've completed all of the above steps, your MariaDB
installation should now be secure.

Thanks for using MariaDB!
次に、次のコマンドを使用してMariaDBシェルにログインします。
mysql -u root -p
プロンプトが表示されたらrootパスワードを入力し、次のコマンドを使用してMagentoのデータベースを作成します。
MariaDB [(none)]>CREATE DATABASE magento_db;
Magentoのデータベースを作成したら、次のコマンドを使用してユーザー名とパスワードを作成します。
MariaDB [(none)]>CREATE USER 'magento'@'localhost' IDENTIFIED BY 'password';
次に、次のコマンドを使用してMagentoデータベースに特権を付与します。
MariaDB [(none)]>GRANT ALL PRIVILEGES ON magento_db.* TO 'magento'@'localhost';
次に、FLUSH PRIVILEGESコマンドを実行して、特権を再ロードします。
MariaDB [(none)]>FLUSH PRIVILEGES;
最後に、次のコマンドを使用してMariaDBコンソールを終了します。
MariaDB [(none)]>\q
4Magentoをダウンロード
まず、公式WebサイトからMagentoの最新バージョンをダウンロードする必要があります。
Magentoをダウンロードした後、次のコマンドを使用して、ダウンロードしたzipファイルをapacheWebルートディレクトリに抽出します。
sudo mkdir /var/www/html/magento/
sudo unzip magento2-develop.zip -d /var/www/html/magento
次に、magentoディレクトリの所有権を変更し、適切な権限を付与します。
sudo chown -R www-data:www-data /var/www/html/magento
sudo chmod -R 777 /var/www/html/magento
次に、Composerをシステムにインストールする必要があります。 Composerは、必要なすべてのPHP依存関係をインストールするために使用される依存関係マネージャーです。次のコマンドを使用して、Composerバイナリをダウンロードしてインストールできます。
curl -sS https://getcomposer.org/installer | php
sudo mv composer.phar /usr/bin/composer
次に、composerコマンドを実行して、Magentoに必要なすべての依存関係をインストールします。
cd /var/www/html/magento
sudo composer install
すべての依存関係がインストールされたら、ApacheforMagentoの構成に進むことができます。
5Magento用にApacheを構成する
次に、Magento用のApache仮想ホストファイルを作成する必要があります。次のコマンドを使用して、magento.confという名前の新しいApache構成ファイルを作成します。
sudo nano /etc/apache2/sites-available/magento.conf
次の行を追加します:
<VirtualHost *:8080>
ServerAdmin [email protected]
DocumentRoot /var/www/html/magento
ServerName 192.168.15.189
ServerAlias www.example.com
<Directory "/var/www/html/magento/">
Options FollowSymLinks
AllowOverride All
Order allow,deny
allow from all
</Directory>
ErrorLog /var/log/apache2/magento-error_log
CustomLog /var/log/apache2/magento-access_log common
</VirtualHost>
ファイルを保存し、次のコマンドでApacherewritemoduleを使用して仮想ホストを有効にします。
sudo a2ensite magento
sudo a2enmod rewrite
次に、Apacheリスニングポートを80から8080に変更する必要があります。ワニス用にポート80を予約するためです。これを行うには、ports.confファイルを開きます:
sudo nano /etc/apache2/ports.conf
以下に示すようにファイルを変更します:
Listen 8080
最後に、Apacheサービスを再起動して、次のコマンドでこの変更を適用します。
sudo systemctl restart apache2
6MagentoWebインストールウィザードにアクセス
これでMagentoがインストールされました。次に、WebブラウザからMagentoをインストールします。
これを行うには、Webブラウザーを開き、URL http://192.168.15.189:8080を入力すると、次のページが表示されます。
ここで、利用規約に同意し、[同意してMagentoをセットアップ]ボタンをクリックすると、次のページが表示されます。
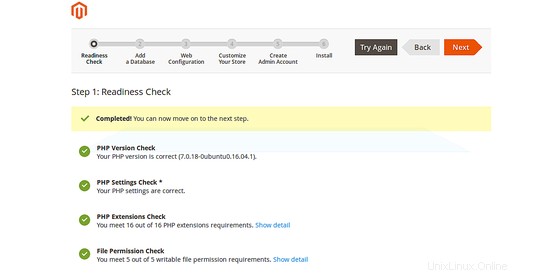
すべての準備ができていることを確認し、[次へ]ボタンをクリックすると、次のページが表示されます。
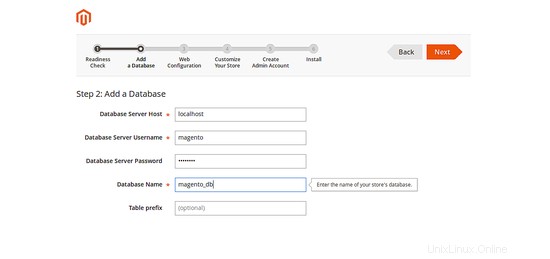
データベース名、データベースユーザー名、パスワードなどのデータベースの詳細を入力し、[次へ]ボタンをクリックすると、次のページが表示されます。
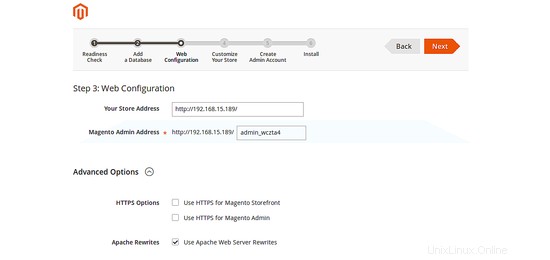
Webサイトの詳細を入力し、[次へ]ボタンをクリックすると、次のページが表示されます。
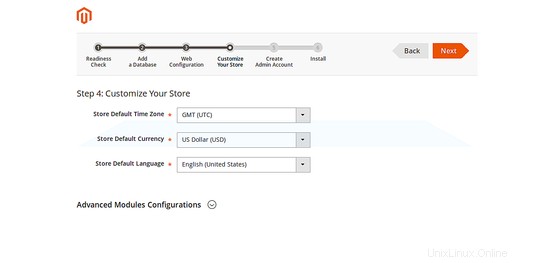
必要に応じてMagentoをカスタマイズし、[次へ]ボタンをクリックすると、次のページが表示されます。
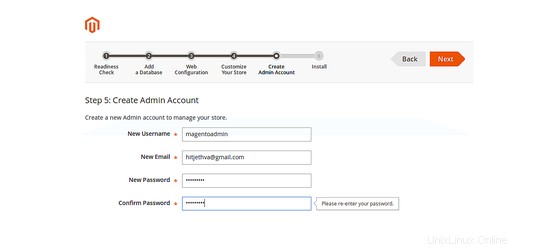
管理者ユーザーの詳細を入力し、[次へ]ボタンをクリックすると、次のページが表示されます。
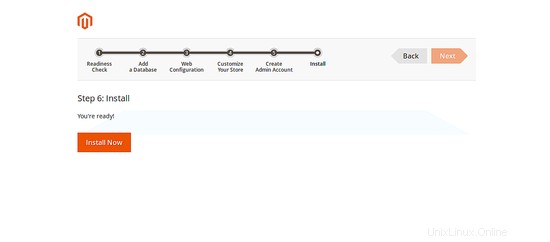
次に、[今すぐインストール]ボタンをクリックして、Magentoのインストールを開始します。インストールが完了すると、次のページが表示されます。
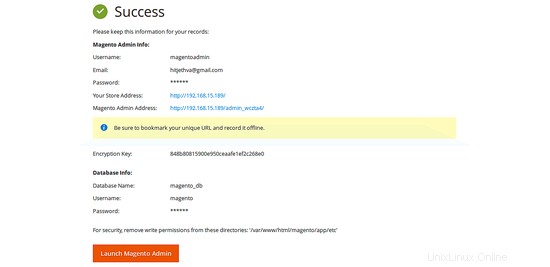
注:Magento管理URLを覚えておいてください:http://192.168.15.189/admin_wczta4。これは、Magento管理者にアクセスするために使用されます。
次に、[Launch Magento Admin]ボタンをクリックすると、以下のようなMagentoログインページが表示されます。
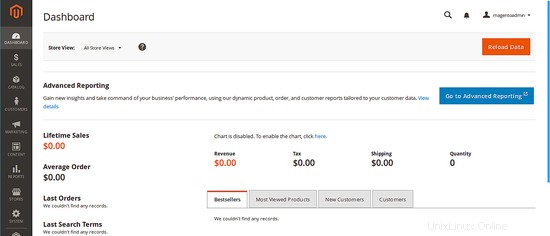
Magento管理者の資格情報を入力し、[サインイン]ボタンをクリックすると、以下のようにMagent-oダッシュボードが表示されます。
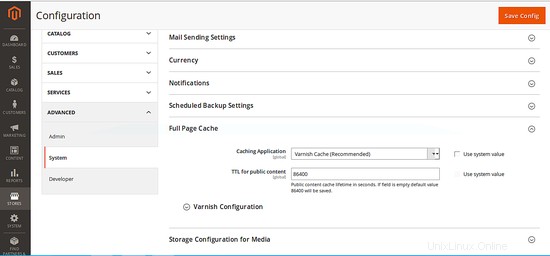
Magento管理ダッシュボードから[ストア]ボタン(左側)>[構成]>[詳細]>[システム]>[フルページキャッシュ]をクリックします 次に、[use system value]の選択を解除し、[CachingApplication]リストから[VarnishCache]を選択して構成を保存し、[Varnish Configuration]リンクをクリックして、[Export VCL for Varnish 4]ボタンをクリックします(これにより、varnish.vclファイルが/ var/wwwにエクスポートされます。 / html / magento / var directoy)以下に示すように:
最後に、次のコマンドを使用してMagentoキャッシュをフラッシュします。
cd /var/www/html/magento
sudo php bin/magento cache:flush
終了したら、ニスの構成に進むことができます。
6ワニスの構成
これでMagentoがインストールおよび構成されました。ニスを設定する時が来ました。
まず、/ etc / varnish / default.vclファイルを削除し、エクスポートされたワニス構成からシンボリックリンクを作成します。
sudo rm -rf /etc/varnish/default.vcl
sudo ln -s /var/www/html/magento/var/varnish.vcl /etc/varnish/default.vcl
次に、ニス用のsystemdサービスファイルを作成する必要があります。これを行うには、varnish.serviceを/ lib / systemd /system/から/etc/ systemd /system/ディレクトリにコピーします。
sudo cp /lib/systemd/system/varnish.service /etc/systemd/system/
このファイルをコピーした後、varnish.serviceファイルにいくつかの変更を加える必要があります:
sudo nano /etc/systemd/system/varnish.service
次の変更を行います:
[Unit]
Description=Varnish HTTP accelerator
Documentation=https://www.varnish-cache.org/docs/4.1/ man:varnishd

[Service]
Type=simple
LimitNOFILE=131072
LimitMEMLOCK=82000
ExecStart=/usr/sbin/varnishd -j unix,user=vcache -F -a :80 -T localhost:6082 -f /etc/varnish/default.vcl -S /etc/varnish/secret -s malloc,256m
ExecReload=/usr/share/varnish/reload-vcl
ProtectSystem=full
ProtectHome=true
PrivateTmp=true
PrivateDevices=true

[Install]
WantedBy=multi-user.target
終了したらファイルを保存し、次のコマンドを使用してニスサービスを再起動します。
sudo systemctl daemon-reload
sudo systemctl reload varnish.service
すべてが正常に機能している場合は、Webブラウザで次のURLを入力することにより、Magentoバックエンドにログインできるはずです。
http://192.168.15.189/admin_wczta4
次のコマンドを実行して、ニスが有効になっているかどうかを確認することもできます。
curl -I http://192.168.15.189/admin_wczta4
ワニスが有効になっていることを確認してください:
Date: Fri, 07 Jul 2017 17:10:01 GMT
Server: Apache/2.4.18 (Ubuntu)
Set-Cookie: store=default; expires=Sat, 07-Jul-2018 17:10:03 GMT; Max-Age=31536000; path=/; HttpOnly
Set-Cookie: PHPSESSID=irp2k8cmrhct0dfh18qk7ap0i4; expires=Fri, 07-Jul-2017 18:10:04 GMT; Max-Age=3600; path=/; domain=192.168.15.189; HttpOnly
Expires: Thu, 07 Jul 2016 17:10:04 GMT
Cache-Control: max-age=0, must-revalidate, no-cache, no-store
Pragma: no-cache
Location: http://192.168.15.189/admin_wczta4/?SID=irp2k8cmrhct0dfh18qk7ap0i4
X-Content-Type-Options: nosniff
X-XSS-Protection: 1; mode=block
X-Frame-Options: SAMEORIGIN
Content-Length: 0
Content-Type: text/html; charset=UTF-8
X-Varnish: 2
Age: 0
Via: 1.1 varnish-v4
Connection: keep-alive
おめでとう! Ubuntu16.04サーバーでVarnishを使用してMagentoを正常に構成しました。