Ampacheは、PHPで記述されたオープンソースのWebベースのパーソナルオーディオストリーミングアプリケーションです。サーバー上でデジタル音楽コレクションをホストおよび管理し、コンピューター、スマートフォン、タブレット、またはスマートTVにストリーミングすることができます。さまざまなAndroidおよびiOSアプリケーションを使用して、Ampacheミュージックサーバーから個人のデバイスに音楽をストリーミングできます。
このチュートリアルでは、AmpacheアプリケーションをFedora 33ベースのサーバーにインストールする方法と、ストリーミング用に音楽をアップロードする方法について説明します。
-
Fedora33を実行しているサーバー。
-
ルート以外のsudoユーザー。
-
すべてが更新されていることを確認してください。
$ sudo dnf upgrade -
システムに必要なパッケージはほとんどありません。
$ sudo dnf install wget curl nano zip -y -
SELinuxを無効にします。
$ sudo setenforce 0
最初のステップは、ファイアウォールを構成することです。 FedoraサーバーにはFirewalldがプリインストールされています。
ファイアウォールが実行されているかどうかを確認します。
$ sudo firewall-cmd --state
次の出力が得られるはずです。
running
ファイアウォールのデフォルトゾーンをパブリックに設定します。
$ sudo firewall-cmd --set-default-zone=public
現在許可されているサービス/ポートを確認してください。
$ sudo firewall-cmd --zone=public --permanent --list-services
次の出力が表示されます。
dhcpv6-client mdns ssh
HTTPおよびHTTPSポートを許可します。
$ sudo firewall-cmd --zone=public --permanent --add-service=http
$ sudo firewall-cmd --zone=public --permanent --add-service=https
ファイアウォールのステータスをもう一度確認してください。
$ sudo firewall-cmd --zone=public --permanent --list-services
同様の出力が表示されるはずです。
dhcpv6-client http https mdns ssh
ファイアウォールをリロードします。
$ sudo systemctl reload firewalld
先に進む前に、Gitをインストールする必要があります。
$ sudo dnf install git
次に、個人情報を使用してGitを構成します。
$ git config --global user.name "Your Name"
$ git config --global user.email "[email protected]"
MariaDBをインストール
MariaDBはMySQLのドロップイン代替品です。つまり、MariaDBを実行および操作するコマンドはMySQLのコマンドと同じです。
MariaDB10.5が最新の安定バージョンであるためFedora33はデフォルトでMariaDB10.4burに同梱されており、そのために公式のMariaDBリポジトリを使用します。
ファイル/etc/yum.repos.d/MariaDB.repoを作成します 開いて編集します。
$ sudo nano /etc/yum.repos.d/MariaDB.repo
次のコードを貼り付けます。
# MariaDB 10.5 Fedora repository list
# http://downloads.mariadb.org/mariadb/repositories/
[mariadb]
name = MariaDB
baseurl = http://yum.mariadb.org/10.5/fedora33-amd64
gpgkey=https://yum.mariadb.org/RPM-GPG-KEY-MariaDB
gpgcheck=1
Ctrl + X を押して、ファイルを保存して閉じます Yと入力します プロンプトが表示されたら。
MariaDBをインストールするには、次のコマンドを発行します。
$ sudo dnf install MariaDB-server -y
必ずMariaDB-serverと入力してください 上記のコマンドで、mariadb-serverではありません 前者は公式リポジトリからインストールし、後者のコマンドはFedoraのリポジトリから古いバージョンをインストールするためです。
MariaDBが正しくインストールされているかどうかを確認してください。
$ mysql --version
次の出力が表示されます。
mysql Ver 15.1 Distrib 10.5.9-MariaDB, for Linux (x86_64) using EditLine wrapper
MariaDBサービスを有効にして開始します。
$ sudo systemctl enable mariadb
$ sudo systemctl start mariadb
次のコマンドを実行して、rootパスワードの指定、匿名ユーザーの削除、rootログインのリモートでの禁止、テストテーブルの削除などのデフォルト設定を実行します。
$ sudo mysql_secure_installation
MariaDB 10.4では、ルートパスワードを使用するかunix_socketを使用するかを尋ねられます。 プラグイン。プラグインを使用すると、Linuxユーザーの資格情報を使用してMariaDBにログインできます。 phpMyAdminなどのサードパーティ製アプリを使用するには、従来のユーザー名/パスワードが必要ですが、より安全であると見なされます。このチュートリアルでは、プラグインの使用に固執します。データベース用に作成した特定のユーザーを介して、phpMyAdminを引き続き使用できます。
Enterキーを押すと、デフォルトのオプション(大文字のオプション、この場合はY)が選択されます。
NOTE: RUNNING ALL PARTS OF THIS SCRIPT IS RECOMMENDED FOR ALL MariaDB
      SERVERS IN PRODUCTION USE!  PLEASE READ EACH STEP CAREFULLY!

In order to log into MariaDB to secure it, we'll need the current
password for the root user. If you've just installed MariaDB, and
haven't set the root password yet, you should just press enter here.

Enter current password for root (enter for none): [PRESS ENTER]
OK, successfully used password, moving on...

Setting the root password or using the unix_socket ensures that nobody
can log into the MariaDB root user without the proper authorisation.

You already have your root account protected, so you can safely answer 'n'.

Switch to unix_socket authentication [Y/n] [PRESS ENTER]
Enabled successfully!
Reloading privilege tables..
 ... Success!

You already have your root account protected, so you can safely answer 'n'.

Change the root password? [Y/n] [ANSWER n]
... skipping.

By default, a MariaDB installation has an anonymous user, allowing anyone
to log into MariaDB without having to have a user account created for
them.  This is intended only for testing, and to make the installation
go a bit smoother.  You should remove them before moving into a
production environment.

Remove anonymous users? [Y/n] [PRESS ENTER]
 ... Success!

Normally, root should only be allowed to connect from 'localhost'.  This
ensures that someone cannot guess at the root password from the network.

Disallow root login remotely? [Y/n] [PRESS ENTER]
 ... Success!

By default, MariaDB comes with a database named 'test' that anyone can
access.  This is also intended only for testing, and should be removed
before moving into a production environment.

Remove test database and access to it? [Y/n] [PRESS ENTER]
 \- Dropping test database...
 ... Success!
 \- Removing privileges on test database...
 ... Success!

Reloading the privilege tables will ensure that all changes made so far
will take effect immediately.

Reload privilege tables now? [Y/n] [PRESS ENTER]
 ... Success!

Cleaning up...

All done!  If you've completed all of the above steps, your MariaDB
installation should now be secure.

Thanks for using MariaDB!
それでおしまい。次回MySQLにログインするときは、次のコマンドを使用します
$ sudo mysql
プロンプトが表示されたら、rootパスワードを入力します。
Ampache用にMariaDBを構成する
次に、Ampacheアプリケーションに使用するデータベースを設定する必要があります。これを行うには、MySQLプロンプトにログインします。
$ sudo mysql
プロンプトが表示されたら、次のコマンドを入力して、 ampacheという名前のデータベースをセットアップします。 およびampuserという名前のデータベースユーザー データベースへのアクセスを許可します。
mysql> CREATE DATABASE ampache;
mysql> CREATE USER 'ampuser'@'localhost' IDENTIFIED BY 'yourpassword';
mysql> GRANT ALL PRIVILEGES ON ampache.* TO 'ampuser'@'localhost';
mysql> exit
PHPをインストールする
Fedora33はデフォルトでPHP7.4に同梱されていますが、更新されたPHPリポジトリを使用するために、REMIリポジトリを追加します。
PHPパッケージをインストールするための公式FedoraリポジトリであるREMIリポジトリをインストールします。
$ sudo dnf -y install https://rpms.remirepo.net/fedora/remi-release-33.rpm
PHP7.4をモジュールとしてインストールします。
$ sudo dnf module install php:remi-7.4
PHPが正しく機能しているかどうかを確認します。
$ php --version
同様の出力が表示されるはずです。
PHP 7.4.16 (cli) (built: Mar  2 2021 10:35:17) ( NTS )
Copyright (c) The PHP Group
Zend Engine v3.4.0, Copyright (c) Zend Technologies
PHP拡張機能をインストールする
AmpacheはいくつかのPHP拡張機能を必要とします。次のコマンドを使用してインストールします。
sudo dnf install php-curl php-gd php-intl php-mysql
PHP-FPMを構成する
ファイル/etc/php-fpm.d/www.confを開きます 。
$ sudo nano /etc/php-fpm.d/www.conf
Unixユーザー/PHPプロセスのグループをnginxに設定する必要があります 。 user=apacheを見つけます およびgroup=apache ファイル内の行をnginxに変更します。
...
; Unix user/group of processes
; Note: The user is mandatory. If the group is not set, the default user's group
;       will be used.
; RPM: apache user chosen to provide access to the same directories as httpd
user = nginx
; RPM: Keep a group allowed to write in log dir.
group = nginx
...
Ctrl + Xを押してファイルを保存します Yと入力します プロンプトが表示されたら。
次に、/etc/php.iniで音楽をアップロードするためのファイルサイズを増やす必要があります ファイル。編集のためにファイルを開きます。
$ sudo nano /etc/php.ini
次の行を変更します
. . .
post_max_size = 8M
. . .
upload_max_filesize = 2M
に
. . .
post_max_size = 110M
. . .
upload_max_filesize = 100M
. . .
これで、最大100MBのサイズのファイルをアップロードできます。値は好きなように変更できます。念のため、post_max_size upload_max_filesizeより大きい 変数。
Ctrl + Xを押してファイルを保存します Yと入力します プロンプトが表示されたら。
PHP-fpmプロセスを再起動します。
$ sudo systemctl restart php-fpm
Nginxをインストール
Fedora 33には、デフォルトでNginxの最新のStableバージョンが付属しています。 (1.18.0)。
Nginxをインストールします。
$ sudo dnf install nginx -y
正しく機能しているかどうかを確認します。
$ nginx -v
インストールすることを選択したNginxのバージョンに応じて、次の出力が表示されます。
nginx version: nginx/1.18.0
Nginxを起動して有効にします。
$ sudo systemctl start nginx
$ sudo systemctl enable nginx
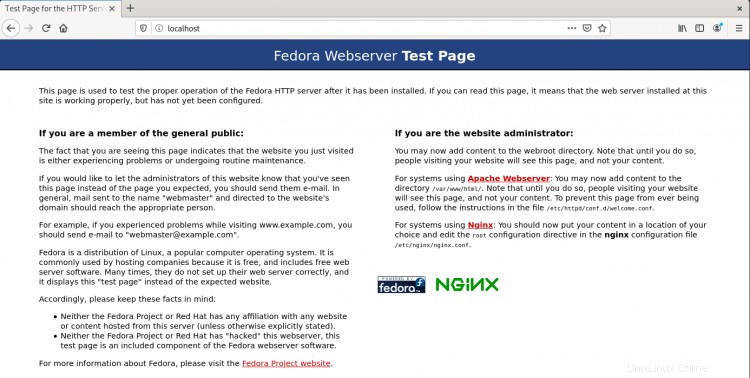
ブラウザでサーバーのIPアドレスを開き、次のページを表示します。 Nginxが正しく機能していることを意味します。
Nginxを構成する
サーバーブロックが存在するディレクトリを設定します。
$ sudo mkdir /etc/nginx/sites-available
$ sudo mkdir /etc/nginx/sites-enabled
/etc/nginx/nginx.confを開きます 編集用のファイル。
$ sudo nano /etc/nginx/nginx.conf
include /etc/nginx/conf.d/*.confの行の後に次の行を貼り付けます
include /etc/nginx/sites-enabled/*.conf;
server_names_hash_bucket_size 64;
Ctrl + Xを押します エディターを閉じてYを押します ファイルを保存するように求められたら。
次のコマンドを実行して、Ampacheの構成ファイルを追加します。
$ sudo nano /etc/nginx/sites-available/ampache.conf
次のコードをエディターに貼り付けます。
server {

    # listen to
    listen  [::]:80;
    listen       80;

    server_name ampache.example.com;
    charset utf-8;

    # Logging, error_log mode [notice] is necessary for rewrite_log on,
    # (very usefull if rewrite rules do not work as expected)

    error_log       /var/log/nginx/ampache.error.log; # notice;
    access_log      /var/log/nginx/ampache.access.log;
    # rewrite_log     on;

    # Use secure headers to avoid XSS and many other things
    add_header X-Content-Type-Options nosniff;
    add_header X-XSS-Protection "1; mode=block";
    add_header X-Robots-Tag none;
    add_header X-Download-Options noopen;
    add_header X-Permitted-Cross-Domain-Policies none;
    add_header X-Frame-Options "SAMEORIGIN" always;
    add_header Referrer-Policy "no-referrer";
    add_header Content-Security-Policy "script-src 'self' 'unsafe-inline' 'unsafe-eval'; frame-src 'self'; object-src 'self'";

    # Avoid information leak
    server_tokens off;
    fastcgi_hide_header X-Powered-By;

    root /var/www/html/ampache;
    index index.php;
    client_max_body_size 100m;

    # Somebody said this helps, in my setup it doesn't prevent temporary saving in files
    proxy_max_temp_file_size 0;

    # Rewrite rule for Subsonic backend
    if ( !-d $request_filename ) {
        rewrite ^/rest/(.*).view$ /rest/index.php?action=$1 last;
        rewrite ^/rest/fake/(.+)$ /play/$1 last;
    }

    # Rewrite rule for Channels
    if (!-d $request_filename){
      rewrite ^/channel/([0-9]+)/(.*)$ /channel/index.php?channel=$1&target=$2 last;
    }

    # Beautiful URL Rewriting
    rewrite ^/play/ssid/(\w+)/type/(\w+)/oid/([0-9]+)/uid/([0-9]+)/name/(.*)$ /play/index.php?ssid=$1&type=$2&oid=$3&uid=$4&name=$5 last;
    rewrite ^/play/ssid/(\w+)/type/(\w+)/oid/([0-9]+)/uid/([0-9]+)/client/(.*)/name/(.*)$ /play/index.php?ssid=$1&type=$2&oid=$3&uid=$4&client=$5&name=$6 last;
    rewrite ^/play/ssid/(\w+)/type/(\w+)/oid/([0-9]+)/uid/([0-9]+)/client/(.*)/player/(.*)/name/(.*)$ /play/index.php?ssid=$1&type=$2&oid=$3&uid=$4&client=$5&player=$6&name=$7 last;
    rewrite ^/play/ssid/(\w+)/type/(\w+)/oid/([0-9]+)/uid/([0-9]+)/client/(.*)/bitrate/([0-9]+)/player/(.*)/name/(.*)$ /play/index.php?ssid=$1&type=$2&oid=$3&uid=$4&client=$5&bitrate=$6player=$7&name=$8 last;
    rewrite ^/play/ssid/(\w+)/type/(\w+)/oid/([0-9]+)/uid/([0-9]+)/client/(.*)/transcode_to/(w+)/bitrate/([0-9]+)/player/(.*)/name/(.*)$ /play/index.php?ssid=$1&type=$2&oid=$3&uid=$4&client=$5&transcode_to=$6&bitrate=$7&player=$8&name=$9 last;
    rewrite ^/play/ssid/(\w+)/type/(\w+)/oid/([0-9]+)/uid/([0-9]+)/client/(.*)/noscrobble/([0-1])/name/(.*)$ /play/index.php?ssid=$1&type=$2&oid=$3&uid=$4&client=$5&noscrobble=$6&name=$7 last;
    rewrite ^/play/ssid/(\w+)/type/(\w+)/oid/([0-9]+)/uid/([0-9]+)/client/(.*)/noscrobble/([0-1])/player/(.*)/name/(.*)$ /play/index.php?ssid=$1&type=$2&oid=$3&uid=$4&client=$5&noscrobble=$6&player=$7&name=$8 last;
    rewrite ^/play/ssid/(\w+)/type/(\w+)/oid/([0-9]+)/uid/([0-9]+)/client/(.*)/noscrobble/([0-1])/bitrate/([0-9]+)/player/(.*)/name/(.*)$ /play/index.php?ssid=$1&type=$2&oid=$3&uid=$4&client=$5&noscrobble=$6&bitrate=$7player=$8&name=$9 last;
    rewrite ^/play/ssid/(\w+)/type/(\w+)/oid/([0-9]+)/uid/([0-9]+)/client/(.*)/noscrobble/([0-1])/transcode_to/(w+)/bitrate/([0-9]+)/player/(.*)/name/(.*)$ /play/index.php?ssid=$1&type=$2&oid=$3&uid=$4&client=$5&noscrobble=$6&transcode_to=$7&bitrate=$8&player=$9&name=$10 last;

    # the following line was needed for me to get downloads of single songs to work
    rewrite ^/play/ssid/(.*)/type/(.*)/oid/([0-9]+)/uid/([0-9]+)/action/(.*)/name/(.*)$ /play/index.php?ssid=$1&type=$2&oid=$3&uid=$4action=$5&name=$6 last;
    location /play {
        if (!-e $request_filename) {
			rewrite ^/play/art/([^/]+)/([^/]+)/([0-9]+)/thumb([0-9]*)\.([a-z]+)$ /image.php?object_type=$2&object_id=$3&auth=$1 last;
        }

		rewrite ^/([^/]+)/([^/]+)(/.*)?$ /play/$3?$1=$2;
		rewrite ^/(/[^/]+|[^/]+/|/?)$ /play/index.php last;
		break;
    }

   location /rest {
      limit_except GET POST {
         deny all;
      }
   }

   location ^~ /bin/ {
      deny all;
      return 403;
   }

   location ^~ /config/ {
      deny all;
      return 403;
   }

   location / {
      limit_except GET POST HEAD{
         deny all;
      }
   }

   location ~ ^/.*.php {
        fastcgi_index index.php;

        # sets the timeout for requests in [s] , 60s are normally enough
        fastcgi_read_timeout 600s;

        include fastcgi_params;
        fastcgi_param SCRIPT_FILENAME $document_root$fastcgi_script_name;

        # Mitigate HTTPOXY https://httpoxy.org/
        fastcgi_param HTTP_PROXY "";

        # has to be set to on if encryption (https) is used:
        fastcgi_param HTTPS on;

        fastcgi_split_path_info ^(.+?\.php)(/.*)$;

        # chose as your php-fpm is configured to listen on
        fastcgi_pass unix:/run/php-fpm/www.sock;
   }

   # Rewrite rule for WebSocket
   location /ws {
        rewrite ^/ws/(.*) /$1 break;
        proxy_http_version 1.1;
        proxy_set_header Upgrade $http_upgrade;
        proxy_set_header Connection "upgrade";
        proxy_set_header Host $host;
        proxy_pass http://127.0.0.1:8100/;
   }
}
このファイルは、Ampacheをドメインampache.example.comにインストールすることを前提としています。 およびディレクトリ/var/www/html/ampache 。 Ctrl + Xを押します エディターを閉じてYを押します ファイルを保存するように求められたら。
この構成ファイルをsites-enabledにリンクして、アクティブ化します。 ディレクトリ。
$ sudo ln -s /etc/nginx/sites-available/ampache.conf /etc/nginx/sites-enabled/
Nginx構成をテストします。
$ sudo nginx -t
構成が正しいことを示す次の出力が表示されます。
nginx: the configuration file /etc/nginx/nginx.conf syntax is ok
nginx: configuration file /etc/nginx/nginx.conf test is successful
Nginxサービスをリロードします。
$ sudo systemctl reload nginx
Let'sEncryptを使用したHTTPSの設定
Let's Encryptを使用するには、 Certbotをインストールする必要があります パッケージ。
Certbotをインストールします。
$ sudo dnf install certbot certbot-nginx -y
証明書をインストールします。
$ sudo certbot --nginx -d ampache.example.com
このサーバーでこのツールを初めて使用する場合は、利用規約に同意し、メールアドレスを入力する必要があります。 いいえと言います メールをEFF財団と共有するかどうか尋ねられたとき。
それが成功した場合は、certbot HTTPS設定をどのように構成するかを尋ねられます。
Please choose whether or not to redirect HTTP traffic to HTTPS, removing HTTP access.
-------------------------------------------------------------------------------
1: No redirect - Make no further changes to the webserver configuration.
2: Redirect - Make all requests redirect to secure HTTPS access. Choose this for
new sites, or if you're confident your site works on HTTPS. You can undo this
change by editing your web server's configuration.
-------------------------------------------------------------------------------
Select the appropriate number [1-2] then [enter] (press 'c' to cancel):
2を選択し、ENTERを押します 。これで、証明書がインストールされ、アクティブ化されました。
次のコマンドを実行して、自動更新を設定します。
$ echo "0 0,12 * * * root python -c 'import random; import time; time.sleep(random.random() * 3600)' && certbot renew" | sudo tee -a /etc/crontab > /dev/null
Ampacheをインストールする
Ampache用の空のドキュメントルートフォルダを作成します。
$ sudo mkdir -p /var/www/html/ampache
-p 引数は、親ディレクトリがvarであることを確認します およびwww 存在しない場合は自動的に作成されます。
次に、Ampacheの最新リリースのZIPアーカイブをダウンロードします。最新リリースへのリンクは、Githubリリースページから見つけることができます。このチュートリアルの執筆時点では、4.4.1が最新バージョンであるため、ダウンロードします。
$ wget https://github.com/ampache/ampache/releases/download/4.4.1/ampache-4.4.1_all.zip
次に、ZIPファイルを前に作成したディレクトリに解凍します。
$ sudo unzip ampache-4.4.1_all.zip -d /var/www/html/ampache/
次に、/var/www/html/ampacheに権限を設定します NginxWebサーバーのディレクトリ。
$ sudo chown --recursive nginx:nginx /var/www/html/ampache/
音楽を保存するための別のディレクトリを作成します。独自のユーザーディレクトリで作成しているため、ここではsudoは必要ありません。
$ sudo mkdir -p /data/Music
/home/user/musicの所有権を変更します nginxへ サーバーが音楽を保存するディレクトリから読み書きできるようにします。
$ sudo chown -R nginx:nginx /data/Music
Ampacheのセットアップを完了するには、オーディオファイルとビデオファイルをある形式から別の形式に変換するユーティリティであるFFmpegをインストールします。 AmpacheはFFmpegを使用して、オーディオファイルをアップロードされた形式からリスニングデバイスが再生できる形式にオンザフライで変換します。
FedoraはデフォルトでFFmpegに同梱されていないため、最初にRPMFusionリポジトリを追加する必要があります。
$ sudo dnf install https://mirrors.rpmfusion.org/free/fedora/rpmfusion-free-release-$(rpm -E %fedora).noarch.rpm https://mirrors.rpmfusion.org/nonfree/fedora/rpmfusion-nonfree-release-$(rpm -E %fedora).noarch.rpm
次に、FFmpegをインストールします。
$ sudo dnf install ffmpeg
Ampacheインストーラーの使用
Ampacheサイトはすぐに使用でき、ブラウザのhttps://example.comからアクセスできます。初めて開くと、AmpacheのWebインストーラーが表示されます。

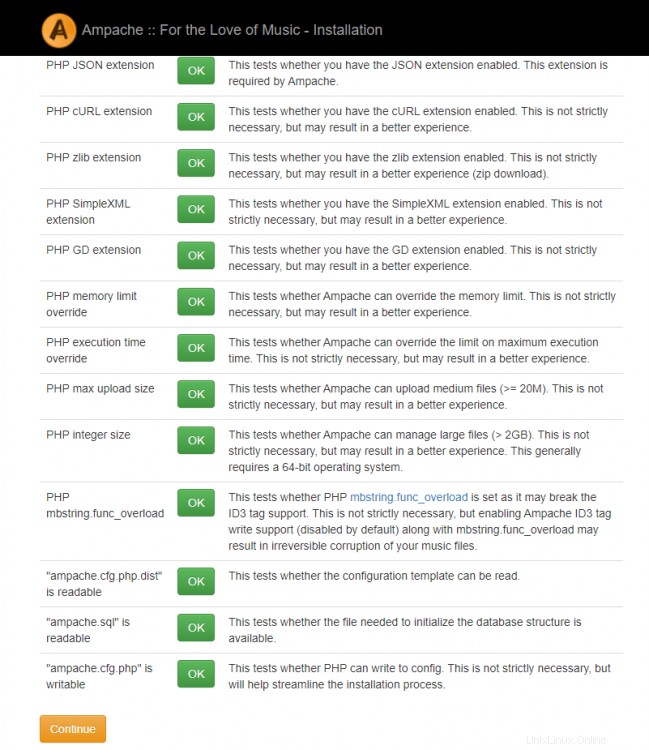
言語を選択し、サーバーがAmpacheの要件を満たしているかどうかが表示される次のページに進みます。
チュートリアルを正しく実行すると、データベースの詳細を入力するように求められる次のページに移動できるはずです。データベースはすでに作成されているので、チェックボックスをオフのままにしておくことができます。データベースユーザーについても同じことが言えます。作成したデータベース名、ユーザー、パスワードを入力して、次のページに進みます。

次に、Ampacheの構成オプションが表示されます。ほとんどの情報は事前に入力されており、変更する必要はありません。
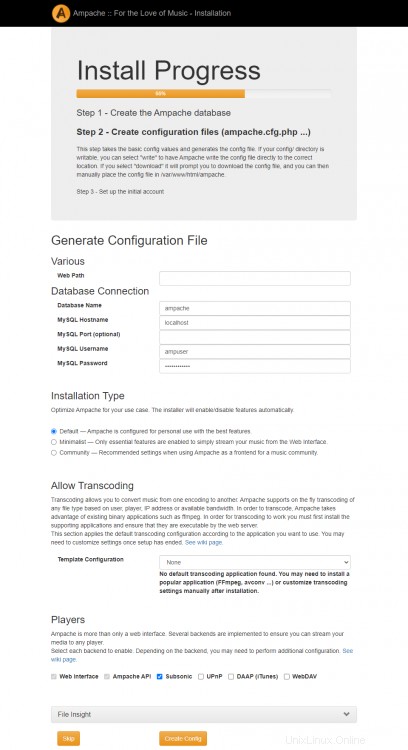
何らかの理由で、AmpacheWebインストーラーはFedoraにインストールされたFFmpegバイナリを検出しません。後で構成ファイルを手動で編集することで、これを有効にします。
次に、Ampacheの管理者アカウントの詳細を入力します。

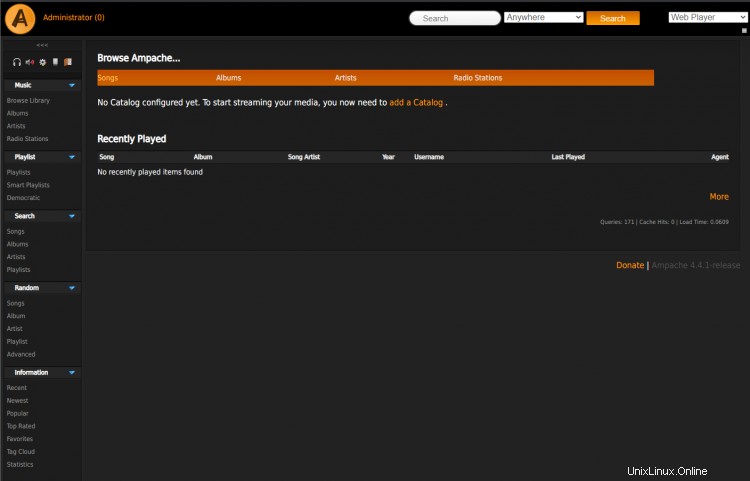
これで、Ampacheのログインページにリダイレクトされます。
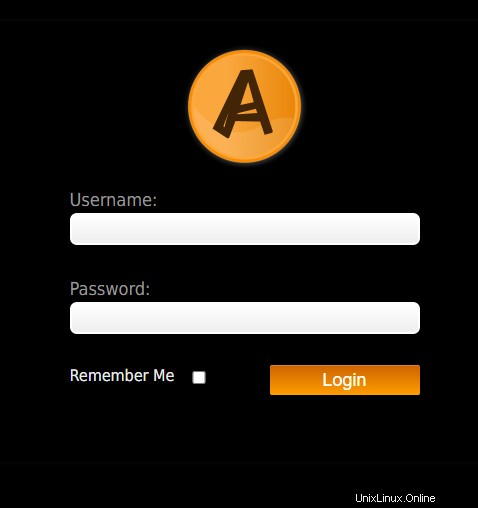
ユーザーの詳細を入力すると、Ampacheプレーヤーにアクセスできるようになります。
使用を開始する前に、トランスコーディングの目的でFFmpegを有効にする必要があります。これを有効にするには、/var/www/html/ampache/config/ampache.cfg.phpを開く必要があります 編集用のファイル。
$ sudo nano /var/www/html/ampache/config/ampache.cfg.php
次の行を置き換えます
;transcode_cmd = "ffmpeg"
次の行で、前のアンパサンド記号を削除します。
transcode_cmd = "ffmpeg"
Ctrl + Xを押します エディターを閉じてYを押します ファイルを保存するように求められたら。このファイルを使用して、さらに多くの変更を加えることができます。 Ampacheのインストールは準備ができていますが、機能させるには、最初に音楽を追加する必要があります。
Ampacheに音楽を追加するには、プレーヤーでカタログを作成してから、ウェブインターフェースからファイルをアップロードする必要があります。
まず、カタログの追加を使用します ホームページのオプション。

ローカルを選択します カタログのタイプとして、パス/home/user/musicを入力します 。プレイリストをインポートする場合は、[プレイリストファイルからプレイリストを作成する]オプションを選択できます。 。カタログに名前を付けて、[カタログの追加]をクリックします 続行します。
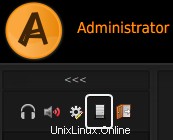
カタログが作成されたので、音楽ファイルをアップロードできるようにするオプションを有効にする必要があります。これを行うには、左上のツールバーの4番目のナビゲーションボタンをクリックして、管理者にアクセスします。 設定。
サーバー構成まで下にスクロールします セクションをクリックし、システムをクリックします 。

ユーザーのアップロードを許可するを見つけます 行を選択してオンを選択します ドロップダウンメニューから。ファイルの追加を許可するユーザーのタイプを選択することもできます。私たちの場合、それはカタログマネージャーです たまたま管理者でもあります。
また、ユーザーがアップロードしたファイルの宛先を設定する必要があります。これは、宛先カタログを使用して設定できます ライン。ドロップダウンメニューから作成したカタログを選択します。

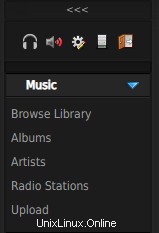
設定の更新をクリックします 終わったら。これで、Ampacheインストールに音楽を追加できます。そのためには、ヘッドフォンアイコンをクリックします 左上のナビゲーションメニューにあります。
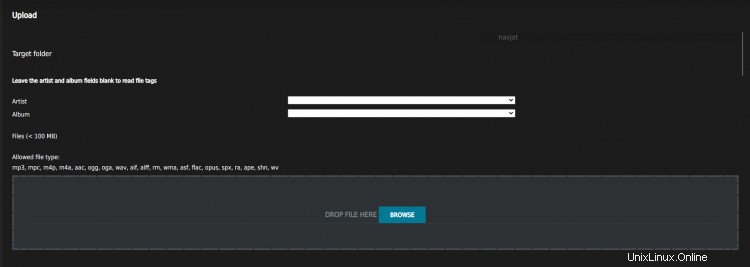
次に、アップロードをクリックします 音楽セクションのリンク。
アップロード ページをクリックし、ローカルPCから音楽ファイルを参照して選択し、アップロードします。 [アーティスト]フィールドと[アルバム]フィールドを空白のままにすると、Ampacheはファイル自体のID3タグを使用して自動的に識別を試みます。
完了すると、左側のペインの任意のセクションでファイルを見つけることができ、音楽をストリーミングできるようになります。
これで、Fedora33を搭載したAmpacheMusicストリーミングサーバーをインストールして使用する方法に関するチュートリアルは終了です。質問やフィードバックがある場合は、以下のコメントに投稿してください。