LEMPソフトウェアスタックは、サーバーがWebサイトやアプリをホストできるようにするために一緒にインストールされるオープンソースソフトウェアのグループです。 Lの頭字語です。 inux、 E Nginxサーバー、 M ySQL(ここではMariaDBを使用)、および P HP。
このガイドでは、LeMPスタックをFedora31ベースのサーバーにインストールします。 PHPMyAdmin、Redis、Opcacheもインストールします。
-
Fedora31を実行しているサーバー。
-
ルート以外のsudoユーザー。
-
すべてが更新されていることを確認してください。
$ sudo dnf upgrade -
システムに必要なパッケージはほとんどありません。
$ sudo dnf install wget curl nano -yこれらのパッケージの一部は、システムにすでにインストールされている可能性があります。
-
SELinuxを無効にします。
$ sudo setenforce 0
最初のステップは、ファイアウォールを構成することです。 Fedoraサーバーには、Firewalldファイアウォールがプリインストールされています。
ファイアウォールが実行されているかどうかを確認します。
$ sudo firewall-cmd --state
次の出力が得られるはずです。
running
ファイアウォールのデフォルトゾーンをパブリックに設定します。
$ sudo firewall-cmd --set-default-zone=public
現在許可されているサービス/ポートを確認してください。
$ sudo firewall-cmd --zone=public --permanent --list-services
次の出力が表示されます。
dhcpv6-client mdns ssh
HTTPおよびHTTPSポートを許可します。
$ sudo firewall-cmd --zone=public --permanent --add-service=http
$ sudo firewall-cmd --zone=public --permanent --add-service=https
ファイアウォールのステータスをもう一度確認してください。
$ sudo firewall-cmd --zone=public --permanent --list-services
同様の出力が表示されるはずです。
dhcpv6-client http https mdns ssh
ファイアウォールをリロードします。
$ sudo systemctl reload firewalld
PHPをインストールする
Fedora31はデフォルトでPHP7.3に同梱されています。ただし、REMIリポジトリを追加する必要があるPHP7.4をインストールしたいと思います。
PHPパッケージをインストールするための公式FedoraリポジトリであるREMIリポジトリをインストールします。
$ sudo dnf -y install https://rpms.remirepo.net/fedora/remi-release-31.rpm
remiを有効にします およびremi-php74 リポジトリを作成し、remi-modularを無効にします リポジトリ。これにより、PHP7.4パッケージのインストールに必要なリポジトリが有効になります。
$ sudo dnf config-manager --set-enabled remi
$ sudo dnf config-manager --set-enabled remi-php74
$ sudo dnf config-manager --set-disabled remi-modular
PHP7.4をいくつかの追加パッケージと一緒にインストールします。
$ sudo dnf install -y php-cli php-fpm php-mysqlnd
PHPが正しく機能しているかどうかを確認します。
$ php --version
同様の出力が表示されるはずです。
PHP 7.4.3 (cli) (built: Feb 18 2020 11:53:05) ( NTS )
Copyright (c) The PHP Group
Zend Engine v3.4.0, Copyright (c) Zend Technologies
MariaDBをインストール
MariaDBはMySQLのドロップイン代替品です。つまり、MariaDBを実行および操作するコマンドはMySQLのコマンドと同じです。
Fedora31はデフォルトでMariaDB10.3に同梱されていますが、最新の10.4(このチュートリアルの執筆時点で入手可能)もインストールできます。このためには、公式のMariaDBリポジトリを追加する必要があります。
MariaDB.repoを作成します /etc/yum.repos.d/にあります ディレクトリ。
$ sudo nano /etc/yum.repos.d/MariaDB.repo
次のコードを追加します。
# MariaDB 10.4 Fedora repository list
# http://downloads.mariadb.org/mariadb/repositories/
[mariadb]
name = MariaDB
baseurl = http://yum.mariadb.org/10.4/fedora31-amd64
gpgkey=https://yum.mariadb.org/RPM-GPG-KEY-MariaDB
gpgcheck=1
Ctrl + Xを押してファイルを保存します Yと入力します プロンプトが表示されたら。
MariaDBをインストールするには、次のコマンドを発行します
$ sudo dnf install MariaDB-server -y
コマンドに注意してください。コピー(10.3)をFedoraリポジトリにインストールする場合は、sudo dnf install mariadb-serverを使用する必要があります。 ただし、10.4バージョンでは、sudo dnf install MariaDB-serverを使用しています。 。
MariaDBが正しくインストールされているかどうかを確認してください。
$ mysql --version
次の出力が表示されます。
mysql Ver 15.1 Distrib 10.4.12-MariaDB, for Linux (x86_64) using EditLine wrapper
MariaDBサービスを有効にして開始します。
$ sudo systemctl enable mariadb
$ sudo systemctl start mariadb
次のコマンドを実行して、rootパスワードの指定、匿名ユーザーの削除、rootログインのリモートでの禁止、テストテーブルの削除などのデフォルト設定を実行します。
$ sudo mysql_secure_installation
MariaDB 10.4では、rootパスワードとunix_socketプラグインのどちらを使用するかを尋ねられます。 unix_socketプラグインを使用すると、Linuxユーザーの資格情報を使用してMariaDBにログインできます。 PhpMyAdminなどのサードパーティ製アプリを使用するには、従来のユーザー名/パスワードが必要ですが、より安全であると見なされます。このチュートリアルでは、unix_socketプラグインの使用に固執します。データベース用に作成した特定のユーザーを介して、引き続きPhpMyAdminを使用できます。
Enterキーを押すと、デフォルトのオプション(大文字のオプション、この場合はY)が選択されます。
NOTE: RUNNING ALL PARTS OF THIS SCRIPT IS RECOMMENDED FOR ALL MariaDB
      SERVERS IN PRODUCTION USE!  PLEASE READ EACH STEP CAREFULLY!

In order to log into MariaDB to secure it, we'll need the current
password for the root user. If you've just installed MariaDB, and
haven't set the root password yet, you should just press enter here.

Enter current password for root (enter for none): [PRESS ENTER]
OK, successfully used password, moving on...

Setting the root password or using the unix_socket ensures that nobody
can log into the MariaDB root user without the proper authorisation.

You already have your root account protected, so you can safely answer 'n'.

Switch to unix_socket authentication [Y/n] [PRESS ENTER]
Enabled successfully!
Reloading privilege tables..
 ... Success!

You already have your root account protected, so you can safely answer 'n'.

Change the root password? [Y/n] [ANSWER n]

By default, a MariaDB installation has an anonymous user, allowing anyone
to log into MariaDB without having to have a user account created for
them.  This is intended only for testing, and to make the installation
go a bit smoother.  You should remove them before moving into a
production environment.

Remove anonymous users? [Y/n] [PRESS ENTER]
 ... Success!

Normally, root should only be allowed to connect from 'localhost'.  This
ensures that someone cannot guess at the root password from the network.

Disallow root login remotely? [Y/n] [PRESS ENTER]
 ... Success!

By default, MariaDB comes with a database named 'test' that anyone can
access.  This is also intended only for testing, and should be removed
before moving into a production environment.

Remove test database and access to it? [Y/n] [PRESS ENTER]
 \- Dropping test database...
 ... Success!
 \- Removing privileges on test database...
 ... Success!

Reloading the privilege tables will ensure that all changes made so far
will take effect immediately.

Reload privilege tables now? [Y/n] [PRESS ENTER]
 ... Success!

Cleaning up...

All done!  If you've completed all of the above steps, your MariaDB
installation should now be secure.

Thanks for using MariaDB!
それでおしまい。次回MySQLにログインするときは、次のコマンドを使用します
$ sudo mysql
プロンプトが表示されたら、rootパスワードを入力します。
Nginxをインストール
Fedora 31には、デフォルトでNginxの安定バージョン(1.16.1)が付属しています。 Nginxのメインラインバージョンをインストールする場合は、ソースからNginxをビルドするためのガイドに従ってください。 Nginxの最新バージョンとチュートリアルに記載されている依存関係を必ず入手してください。残りの手順は同じままです(./configure中にパス名を適宜変更してください 指図)。このチュートリアルでは、安定バージョンのNginxを使用します。
Nginxサーバーをインストールします。
$ sudo dnf install nginx -y
正しく機能しているかどうかを確認します。
$ nginx -v
次の出力が表示されます。
nginx version: nginx/1.16.1
Nginxを起動して有効にします。
$ sudo systemctl start nginx
$ sudo systemctl enable nginx
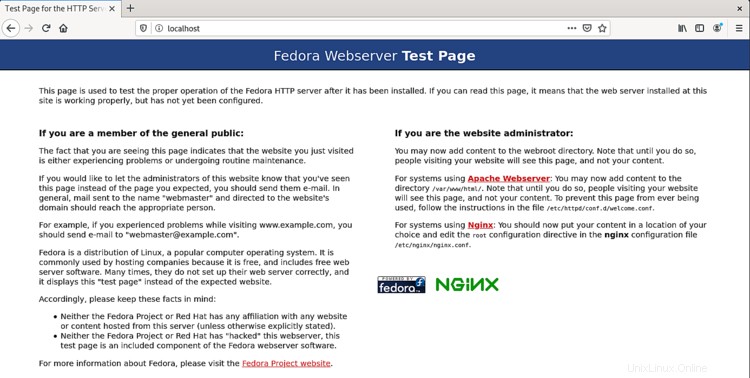
ブラウザでサーバーのIPアドレスを開き、次のページを表示します。 Nginxが正しく機能していることを意味します。

Nginxを構成する
サーバーブロックが存在するディレクトリを設定します。
$ sudo mkdir /etc/nginx/sites-available
$ sudo mkdir /etc/nginx/sites-enabled
サイトが存在するディレクトリを作成します。
$ sudo mkdir /var/www/example.com/html -p
-pを使用する ディレクティブは、以前は存在しなかった親ディレクトリを作成します。
次のコマンドを実行して、サイトの構成ファイルを追加します。
$ sudo nano /etc/nginx/sites-available/example.com.conf
次のコードをエディターに貼り付けます。
server {
  listen          *:80;
  server_name     example.com;
  root            /var/www/example.com/html;
  index           index.php index.html;

  location / {
    try_files   $uri $uri/ =404;
  }

  access_log /var/log/nginx/example.com.access.log;
  error_log /var/log/nginx/example.com.error.log;

  location ~ \.php$ {
    try_files $uri =404;
    fastcgi_pass  unix:/run/php-fpm/www.sock;
    fastcgi_param SCRIPT_FILENAME $document_root$fastcgi_script_name;
    fastcgi_index index.php;
    include  fastcgi_params;
  }
}
このファイルは、example.comをホストすることを前提としています ディレクトリ/var/www/html 。ドメインを使用せず、IPアドレス/ローカルホストからのみアクセスできるようにサーバーを構成する場合は、対応するサーバーブロック設定をnginx.confから削除する必要があります。 そうしないと、作成するサーバーブロックが混乱します。
この構成ファイルをsites-enabledにリンクして、アクティブ化します。 ディレクトリ。
$ sudo ln -s /etc/nginx/sites-available/example.com.conf /etc/nginx/sites-enabled/
/etc/nginx/nginx.confを開きます 編集用のファイル。
$ sudo nano /etc/nginx/nginx.conf
include /etc/nginx/conf.d/*.confの行の後に次の行を貼り付けます
include /etc/nginx/sites-enabled/*.conf;
server_names_hash_bucket_size 64;
types_hash_max_sizeの値を変更します 2048から4096まで。
types_hash_max_size 4096;
Ctrl + Xを押します エディターを閉じてYを押します ファイルを保存するように求められたら。 Nginx構成をテストします。
$ sudo nginx -t
構成が正しいことを示す次の出力が表示されます。
nginx: the configuration file /etc/nginx/nginx.conf syntax is ok
nginx: configuration file /etc/nginx/nginx.conf test is successful
Nginxサービスをリロードします。
$ sudo systemctl reload nginx
PHP-FPMを構成する
ファイル/etc/php-fpm.d/www.confを開きます 。
$ sudo nano /etc/php-fpm.d/www.conf
Unixユーザー/PHPプロセスのグループをnginxに設定する必要があります 。 user=apacheを見つけます およびgroup=apache ファイル内の行をnginxに変更します。
...
; Unix user/group of processes
; Note: The user is mandatory. If the group is not set, the default user's group
;       will be used.
; RPM: apache user chosen to provide access to the same directories as httpd
user = nginx
; RPM: Keep a group allowed to write in log dir.
group = nginx
...
また、UNIXソケットの所有権権限をnginxに設定し、;を削除します 彼らの前で。
listen.owner = nginx
listen.group = nginx
Ctrl + Xを押してファイルを保存します Yと入力します プロンプトが表示されたら。
PHP-fpmプロセスを再起動します。
$ sudo systemctl restart php-fpm
PHPセットアップをテストするには、ファイルtest.phpを作成します htmlで フォルダ。
$ sudo nano /var/www/example.com/html/test.php
次のコンテンツを追加し、 Ctrl + Xを押してファイルを保存します Yと入力します プロンプトが表示されたら。
<?php phpinfo();
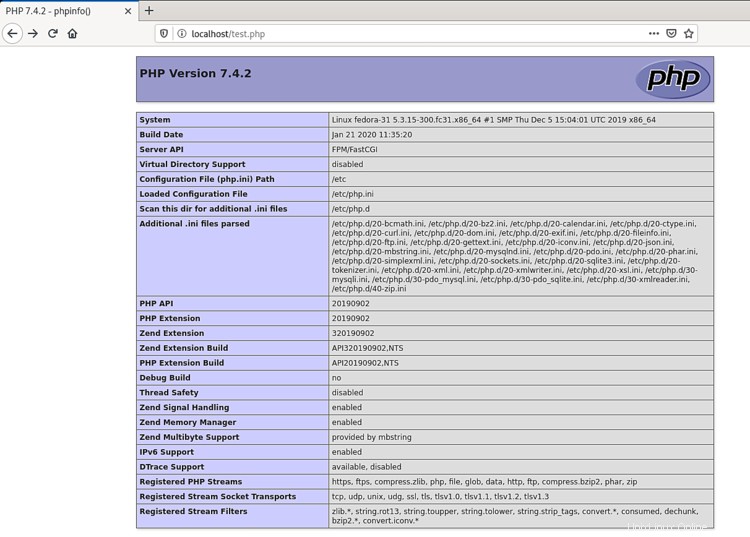
http://<yourserverip>/test.phpを起動します Webブラウザで、次のように表示されます。

このチュートリアルは以上です。 LEMPセットアップが完了し、Webサイトとアプリケーションの作成とホスティングを開始できます。