SPDY(「SPeeDY」と発音)は、Webを高速化することを目的とした新しいネットワークプロトコルです。これは、HTTPプロトコルに代わるGoogleの代替手段であり、HTTP/2.0の候補です。 SPDYは、ストリームの多重化やヘッダー圧縮など、速度に関連するいくつかの機能でHTTPを拡張します。 SPDYを使用するには、両方ともSPDYをサポートするWebサーバーとブラウザー(Google Chromeや今後のバージョンのFirefoxなど)が必要です。 mod_spdyは、ApacheHTTPDサーバーにSPDYプロトコルのサポートを追加するオープンソースのApacheモジュールです。このチュートリアルでは、OpenSUSE12.2のApache2でmod_spdyを使用する方法について説明します。
1予備メモ
SPDYはHTTPS上で実行されるため、SPDYをテストするにはHTTPS対応のWebサイトが必要です。ユーザーのブラウザがSPDYをサポートしていない場合、または問題が発生した場合、SPDYはHTTPSにフォールバックするため、mod_spdyをインストールしても既存の設定に影響はありません。
OpenSUSE 12.2(LAMP)でのPHP5およびMySQLサポートを使用したApache2のインストールで説明されているように、LAMPセットアップが機能していることを前提としています。
先に進む前に、ApacheでSSLを有効にする必要があります:
a2enmod ssl
a2enflag SSL
systemctl restart apache2.service
テストの目的で、OpenSUSEのApacheパッケージに付属しているデフォルトのSSL Webサイトを使用します(サーバーにSSL Webサイトが既にある場合は、これを行う必要はありません)。
デフォルトのSSL仮想ホストの自己署名証明書を作成します...
openssl genrsa -des3 -out /etc/apache2/ssl.key/server.key.org 4096
openssl req -new -key /etc/apache2/ssl.key/server.key.org -out /etc/apache2/ssl.crt/server.csr
openssl x509 -req -days 365 -in /etc/apache2/ssl.crt/server.csr -signkey /etc/apache2/ssl.key/server.key.org -out /etc/apache2/ssl.crt/server.crt
openssl rsa -in /etc/apache2/ssl.key/server.key.org -out /etc/apache2/ssl.key/server.key
chmod 400 /etc/apache2/ssl.key/server.key
...そしてデフォルトのSSL仮想ホストを有効にします:
cd /etc/apache2/vhosts.d
cp vhost-ssl.template vhost-ssl.conf
systemctl restart apache2.service
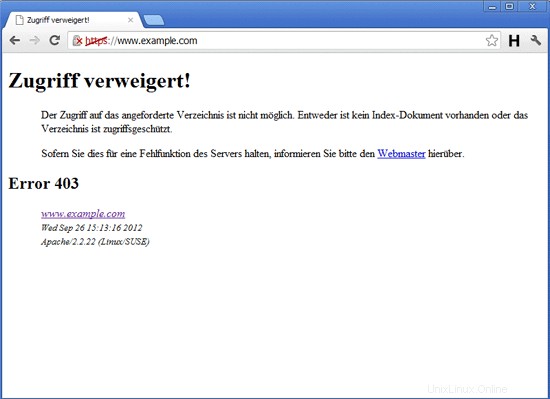
デフォルトのSSLWebサイトのURL(https://www.example.comなど)にアクセスして、機能するかどうかをテストします(ここではデフォルトの自己署名証明書を使用しているため、証明書の警告が表示されますが、これにはありません。 SPDYの使用への影響。また、403 Forbiddenエラーについても心配する必要はありません。これは、ドキュメントルートにインデックスファイルがないために発生します):

2mod_spdyのインストール
mod_spdyは次のようにインストールできます:
zypper install http://download.opensuse.org/repositories/Apache/openSUSE_12.2/x86_64/apache2-mod_spdy-0.9.1.5-1.1.x86_64.rpm
(残念ながら、この記事の執筆時点では、i386システム用のmod_spdyパッケージはないため、これはx86_64システムでのみ機能します。)
次に、mod_spdy構成ファイル/etc/apache2/conf.d/spdy.confを作成します:
vi /etc/apache2/conf.d/spdy.conf
LoadModule spdy_module /usr/lib64/apache2/libmod_spdy.so
<IfModule spdy_module>
    # Turn on mod_spdy. To completely disable mod_spdy, you can set
    # this to "off".
    SpdyEnabled on

    # In order to support concurrent multiplexing of requests over a
    # single connection, mod_spdy maintains its own thread pool in
    # each Apache child process for processing requests.  The default
    # size of this thread pool is very conservative; you can override
    # it with a larger value (as below) to increase concurrency, at
    # the possible cost of increased memory usage.
    #
    #SpdyMaxThreadsPerProcess 30

    # Memory usage can also be affected by the maximum number of
    # simultaneously open SPDY streams permitted for each client
    # connection.  Ideally, this limit should be set as high as
    # possible, but you can tweak it as necessary to limit memory
    # consumption.
    #
    #SpdyMaxStreamsPerConnection 100
</IfModule> |
構成オプションの詳細については、https://developers.google.com/speed/spdy/mod_spdy/installをご覧ください。
その後、Apacheを再起動します:
systemctl restart apache2.service
3テスト
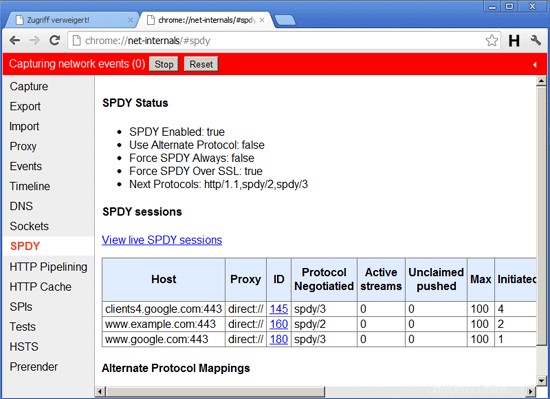
それでは、SPDYが機能しているかどうかをテストしてみましょう。 SPDYをサポートするブラウザが必要です。例えばグーグルクローム。 Chromeを開き、SSL Webサイト(https://www.example.comなど)をリロードします。SPDYを使用できるようにリロードすることが重要です(第1章で初めてロードしたときは通常のHTTPSを使用していました)。その後、新しいタブを開き、URLを入力します
chrome://net-internals/#spdy
すべてがうまくいけば、SSL仮想ホストが表に表示されます。これはSPDYサポートが機能していることを意味します。

(SPDYのHTTPSへのフォールバックメカニズムにより、SSL仮想ホストはSPDYをサポートしていない他のブラウザーでも引き続き機能します。)
4つのリンク
- SPDY:https://developers.google.com/speed/spdy/
- Apache mod_spdy:http://code.google.com/p/mod-spdy/
- mod_spdy構成:https://developers.google.com/speed/spdy/mod_spdy/install
- Apache:http://httpd.apache.org/
- OpenSUSE:http://www.opensuse.org/