EteSyncは、連絡先、カレンダー、タスク、メモを同期するために使用される、無料のオープンソースのエンドツーエンドツールです。既存のアプリと簡単に統合できます。ログインと暗号化に必要なパスワードは1つだけです。 EteSyncには、他のユーザーとデータを共有したり、複数のデバイス間で同期したりする機能があります。また、Mozilla Thunderbirdのアドオンと、Web、デスクトップ、Android、およびiOSのクライアントも提供します。
この投稿では、Ubuntu20.04サーバーにEteSyncをインストールする方法を紹介します。
前提条件
- Atlantic.Netクラウドプラットフォーム上の新しいUbuntu20.04サーバー
- サーバーで指定された有効なドメイン名
- サーバーで構成されているrootパスワード
ステップ1-Atlantic.Netクラウドサーバーを作成する
まず、Atlantic.Netクラウドサーバーにログインします。 2GB以上のRAMを搭載したオペレーティングシステムとしてUbuntu20.04を選択して、新しいサーバーを作成します。 SSH経由でクラウドサーバーに接続し、ページの上部で強調表示されているクレデンシャルを使用してログインします。
Ubuntu 20.04サーバーにログインしたら、次のコマンドを実行して、ベースシステムを最新の利用可能なパッケージで更新します。
apt-get update -y
ステップ2–MariaDBデータベースのインストールと構成
EteSyncはMariaDBをデータベースバックエンドとして使用するため、最新バージョンのMariaDBをサーバーにインストールする必要があります。
まず、次のコマンドを使用して必要な依存関係をインストールします。
apt-get install software-properties-common curl git gnupg2 -y
次に、次のコマンドを使用してGPGキーとリポジトリをダウンロードして追加します。
apt-key adv --recv-keys --keyserver hkp://keyserver.ubuntu.com:80 0xF1656F24C74CD1D8
add-apt-repository 'deb [arch=amd64,arm64,ppc64el] http://mirror.lstn.net/mariadb/repo/10.5/ubuntu focal main'
次に、次のコマンドを使用して最新バージョンのMariaDBサーバーをインストールします。
apt-get install mariadb-server -y
次に、MariaDBに接続し、データベースとユーザーを作成します。
mysql
接続したら、次のコマンドを使用してデータベースとユーザーを作成します。
create database etebase;
create user example@unixlinux.online identified by 'password';
次に、次のコマンドを使用して、etebaseデータベースにすべての権限を付与します。
grant all privileges on etebase.* to example@unixlinux.online;
次に、特権をフラッシュし、次のコマンドでMariaDBを終了します。
flush privileges;
exit;
ステップ3–EteSyncをインストールする
まず、すべてのPython依存関係をサーバーにインストールする必要があります。次のコマンドですべてをインストールできます:
apt-get install python3-virtualenv python3-pip gcc build-essential libmysqlclient-dev -y
すべての依存関係がインストールされたら、次のコマンドを使用して最新バージョンのEteSyncをダウンロードします。
git clone https://github.com/etesync/server.git etebase
次に、ディレクトリをダウンロードしたディレクトリに変更し、次のコマンドを使用してPython仮想環境を作成します。
cd etebase
virtualenv -p python3 .venv
次に、次のコマンドを使用して仮想環境をアクティブ化します。
source .venv/bin/activate
次に、次のコマンドを使用して、必要なすべての依存関係をインストールします。
pip install -r requirements.txt
次に、サンプル構成ファイルの名前を変更します。
cp etebase-server.ini.example etebase-server.ini
次に、次のコマンドを使用して構成ファイルを編集します。
nano etebase-server.ini
次の行を変更します:
media_root = /mnt
allowed_host1 = etebase.example.com
;engine = django.db.backends.sqlite3
;name = db.sqlite3
engine = django.db.backends.mysql
name = etebase
user = etebase
password = password
host = 127.0.0.1
port = 3306
ファイルを保存して閉じてから、次のコマンドを使用してDjangoWebソケットサーバーとMariaDBクライアントをインストールします。
pip3 install daphne mysqlclient aioredis
次に、次のコマンドを使用してDjangoの静的ファイルを作成します。
./manage.py collectstatic
次に、次のコマンドを使用してアプリケーションを初期化します。
./manage.py migrate
次に、次のコマンドを使用してEteSyncサーバーを起動します。
daphne -b 0.0.0.0 -p 8001 etebase_server.asgi:application
次の出力が得られるはずです:
2021-03-13 04:30:04,102 INFO     Starting server at tcp:port=8001:interface=0.0.0.0
2021-03-13 04:30:04,103 INFO     HTTP/2 support not enabled (install the http2 and tls Twisted extras)
2021-03-13 04:30:04,103 INFO     Configuring endpoint tcp:port=8001:interface=0.0.0.0
2021-03-13 04:30:04,104 INFO     Listening on TCP address 0.0.0.0:8001
CTRL+Cを押してサーバーを停止します。
ステップ4–EteSync用のSystemdサービスファイルを作成する
次に、EteSyncのsystemdサービスファイルを作成する必要があります。次のコマンドで作成できます:
nano /etc/systemd/system/etebase.service
次の行を追加します:
[Unit]
Description=EteSync: End-to-End Encryption to Sync Calendar, Contacts, Tasks and Notes.

[Service]
WorkingDirectory=/root/etebase/
ExecStart=/root/etebase/.venv/bin/daphne -b 127.0.0.1 -p 8001 -u /tmp/etebase_server.sock etebase_server.asgi:application
User=root
Group=root
Restart=always
RestartSec=5s

[Install]
WantedBy=multi-user.target
ファイルを保存して閉じてから、次のコマンドを使用してsystemdデーモンをリロードします。
systemctl daemon-reload
次に、EteSyncサービスを開始し、次のコマンドを使用してシステムの再起動時に開始できるようにします。
systemctl start etebase
systemctl enable etebase
次に、次のコマンドを使用してEteSyncサービスのステータスを確認します。
systemctl status etebase
次の出力が得られるはずです:
● etebase.service - EteSync: End-to-End Encryption to Sync Calender, Contacts, Tasks and Notes.
     Loaded: loaded (/etc/systemd/system/etebase.service; disabled; vendor preset: enabled)
     Active: active (running) since Sat 2021-03-13 04:30:57 UTC; 6s ago
   Main PID: 13641 (daphne)
      Tasks: 1 (limit: 2353)
     Memory: 48.5M
     CGroup: /system.slice/etebase.service
             └─13641 /root/etebase/.venv/bin/python /root/etebase/.venv/bin/daphne -b 127.0.0.1 -p 8001 -u /tmp/etebase_server.sock etebase_se>

Mar 13 04:30:57 ubuntu2004 systemd[1]: Started EteSync: End-to-End Encryption to Sync Calender, Contacts, Tasks and Notes..
Mar 13 04:30:58 ubuntu2004 daphne[13641]: 2021-03-13 04:30:58,437 INFO     Starting server at tcp:port=8001:interface=127.0.0.1, unix:/tmp/ete>
Mar 13 04:30:58 ubuntu2004 daphne[13641]: 2021-03-13 04:30:58,438 INFO     HTTP/2 support not enabled (install the http2 and tls Twisted extra>
Mar 13 04:30:58 ubuntu2004 daphne[13641]: 2021-03-13 04:30:58,439 INFO     Configuring endpoint tcp:port=8001:interface=127.0.0.1
Mar 13 04:30:58 ubuntu2004 daphne[13641]: 2021-03-13 04:30:58,441 INFO     Listening on TCP address 127.0.0.1:8001
Mar 13 04:30:58 ubuntu2004 daphne[13641]: 2021-03-13 04:30:58,441 INFO     Configuring endpoint unix:/tmp/etebase_server.sock
ステップ5–EteSync用にNginxを構成する
次に、次のコマンドを使用してNginxをインストールします。
apt-get install nginx -y
インストールしたら、次のコマンドを使用してNginx仮想ホスト構成ファイルを作成します。
nano /etc/nginx/conf.d/etebase.conf
次の行を追加します:
upstream etebase {
    server unix:/tmp/etebase_server.sock;
}

server {
    listen 80;
    server_name etebase.example.com;

    charset     utf-8;
    access_log /var/log/nginx/etebase.access;
    error_log /var/log/nginx/etebase.error;

    # max upload size
    client_max_body_size 75M;

    location /static/ {
        alias /root/etebase/static/;
    }

    location / {
        proxy_pass http://etebase;

        proxy_http_version 1.1;
        proxy_set_header Upgrade $http_upgrade;
        proxy_set_header Connection "upgrade";

        proxy_redirect of/f;
        proxy_set_header Host $host;
        proxy_set_header X-Real-IP $remote_addr;
        proxy_set_header X-Forwarded-For $proxy_add_x_forwarded_for;
        proxy_set_header X-Forwarded-Host $server_name;
    }
}
ファイルを保存して閉じてから、Nginxサービスを再起動して変更を適用します。
systemctl restart nginx
ステップ6–管理者ユーザーを作成する
次に、EteSyncの管理ユーザーを作成する必要があります。
まず、ディレクトリをetebaseに変更し、アクティブ化されていない場合は仮想環境をアクティブ化します。
cd etebase
source .venv/bin/activate
次に、次のコマンドを使用してスーパーユーザーを作成します。
./manage.py createsuperuser
以下に示すようにすべての情報を提供してください:
Username: admin
Email address: example@unixlinux.online
Password:
Password (again):
Superuser created successfully.
ステップ7–EteSyncにアクセスする
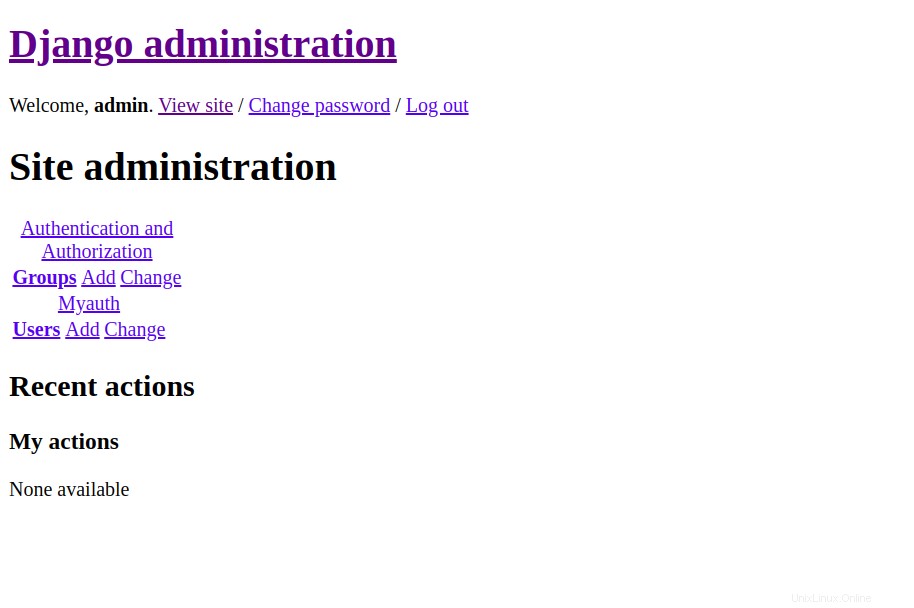
次に、Webブラウザーを開き、URL http://etebase.example.com/adminを使用してEteSyncWebインターフェースにアクセスします。 。次のページが表示されます:

ユーザー名とパスワードを入力し、ログインをクリックします ボタン。次のページにEteSyncダッシュボードが表示されます。
結論
おめでとう!これで、Ubuntu20.04サーバーにEteSyncが正常にインストールおよび構成されました。 Atlantic.NetのVPSホスティングを使用して、連絡先、カレンダー、タスク、メモを簡単に同期できるようになりました!