Passboltは、Webサイトのログイン資格情報を安全に保存および共有するために使用できる、オープンソースのセルフホストパスワードマネージャーです。ビジネスがチームに編成されている場合、Passboltは、それらのチーム間でパスワードを保存および共有するのに役立ちます。 Passboltにはシンプルでユーザーフレンドリーなインターフェースが付属しており、GnuPGを使用してユーザーを認証し、サーバー側のシークレットを検証します。
このチュートリアルでは、Ubuntu18.04にPassboltパスワードマネージャーをインストールする方法を説明します。
前提条件
- Atlantic.Netクラウドプラットフォーム上の新しいUbuntu18.04VPS
- サーバーで構成されているrootパスワード
ステップ1-Atlantic.Netクラウドサーバーを作成する
まず、Atlantic.Netクラウドサーバーにログインします。オペレーティングシステムとしてUbuntu18.04を選択し、少なくとも1GBのRAMを搭載した新しいサーバーを作成します。 SSH経由でクラウドサーバーに接続し、ページの上部で強調表示されているクレデンシャルを使用してログインします。
Ubuntu 18.04サーバーにログインしたら、次のコマンドを実行して、ベースシステムを最新の利用可能なパッケージで更新します。
apt-get update -y
ステップ2–Passboltインストールスクリプトをダウンロードする
Passboltインストールスクリプトを使用してPassboltをインストールする最も簡単な方法。インストールスクリプトをダウンロードするには、次のコマンドを実行します。
wget -O passbolt-ce-installer-ubuntu-18.04.tar.gz
https://www.passbolt.com/ce/download/installers/ubuntu/latest
次に、次のコマンドを使用してインストーラーのチェックサムを確認します。
wget -O passbolt-installer-checksum
https://www.passbolt.com/ce/download/installers/ubuntu/latest-checksum

sha512sum -c passbolt-installer-checksum
次の出力が表示されます。
passbolt-ce-installer-ubuntu-18.04.tar.gz: OK
次に、次のコマンドを使用して、ダウンロードしたインストーラーを抽出します。
tar -xzf passbolt-ce-installer-ubuntu-18.04.tar.gz
インストーラーが抽出されたら、インストールを続行できます。
ステップ3–Passboltをインストールする
次に、次のコマンドを実行して、システムにPassboltをインストールします。
./passbolt_ce_ubuntu_installer.sh
以下に示すように、システムにMariaDBをインストールするように求められます。
================================================================

____ __ ____
/ __ \____ _____ ____/ /_ ____ / / /_
/ /_/ / __ `/ ___/ ___/ __ \/ __ \/ / __/
/ ____/ /_/ (__ |__ ) /_/ / /_/ / / /_
/_/ \__,_/____/____/_,___/\____/_/\__/

The open source password manager for teams
(c) 2020 Passbolt SA
https://www.passbolt.com
================================================================
IMPORTANT NOTE: This installation scripts are for use only
on FRESH installed debian >= 9.0 | ubuntu 18.04 | CentOS >= 7.0
================================================================
==============================================================
Do you want to install a local mariadb server on this machine?
==============================================================
1) yes
2) no
#? 1
1と入力します Enterを押します 続ける。以下に示すように、MariaDBのrootパスワードを設定するように求められます。
=======================================================
Please enter a new password for the root database user:
=======================================================
MariaDB Root Password:
MariaDB Root Password (verify):
次に、以下に示すように、Passboltデータベースの名前、データベースのユーザー名、およびパスワードを入力するように求められます。
======================================================

Please enter a name for the passbolt database username
======================================================
Passbolt database user name:passbolt
=======================================================
Please enter a new password for the mysql passbolt user
=======================================================
MariaDB passbolt user password:
MariaDB passbolt user password (verify):
==============================================
Please enter a name for the passbolt database:
==============================================
Passbolt database name:passboltdb
次に、以下に示すようにGnuPGキーを作成するように求められます。
================================================================================
On virtualized environments GnuPG happen to find not enough entropy
to generate a key. Therefore, Passbolt will not run properly.
Do you want to install Haveged to speed up the entropy generation on
your system? Please check https://help.passbolt.com/faq/hosting/why-haveged-
virtual-env
==================================================================
==============
1) yes
2) no
#? 1
=================================================================
===============
1と入力します Enterを押します 続ける。以下に示すように、サーバーのドメイン名またはIPアドレスを入力するように求められます。
Setting hostname...
Please enter the domain name under which passbolt will run.
Note this hostname will be used as server_name for nginx
and as the domain name to register a SSL certificate with
let's encrypt.
If you don't have a domain name and you do not plan to use
let's encrypt please enter the ip address to access this machine
===============================================================
=================
Hostname:your-server-ip
===============================================================
=================
サーバーのIPアドレスまたはドメイン名を入力し、 Enterを押します 。以下に示すようにSSL証明書を設定するように求められます:
Setting up SSL...
Do you want to set up a SSL certificate and enable HTTPS now?
- manual: Prompts for the path of user uploaded ssl certificates and set up
nginx
- auto: Will issue a free SSL certificate with https://www.letsencrypt.org
and set up nginx
- none: Do not setup HTTPS at all
================================================================================
1) manual
2) auto
3) none
#? 3
3と入力します Enterを押します インストールを開始します。インストールが正常に完了すると、次の出力が表示されます。
Installation is almost complete. Please point your browser to
http://your-server-ip to complete the process
==============================================================
==================
>
この時点で、Passboltがサーバーにインストールされています。
ステップ4–パスボルト構成ウィザードへのアクセス
次に、Webブラウザを介してPassboltを設定する必要があります。
Webブラウザーを開き、URL http://your-server-ipを入力します。次のページにリダイレクトされます:
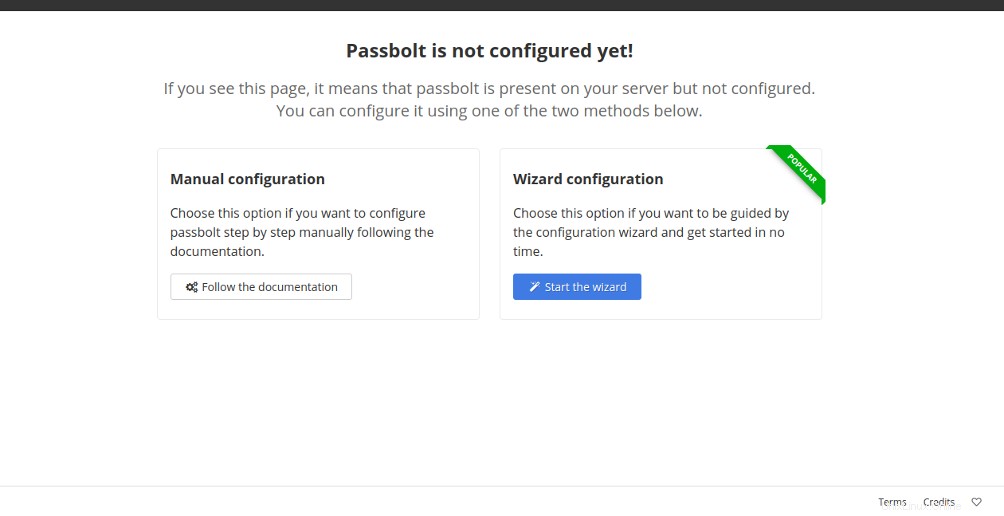
ウィザードの開始をクリックします ボタン。次のページが表示されます:
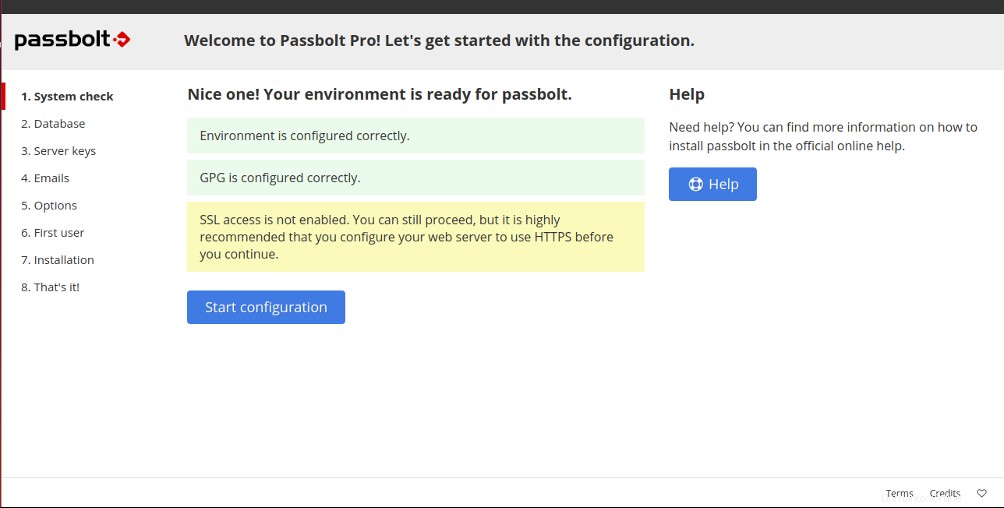
構成の開始をクリックします 以下に示すようにPassboltを構成するには:
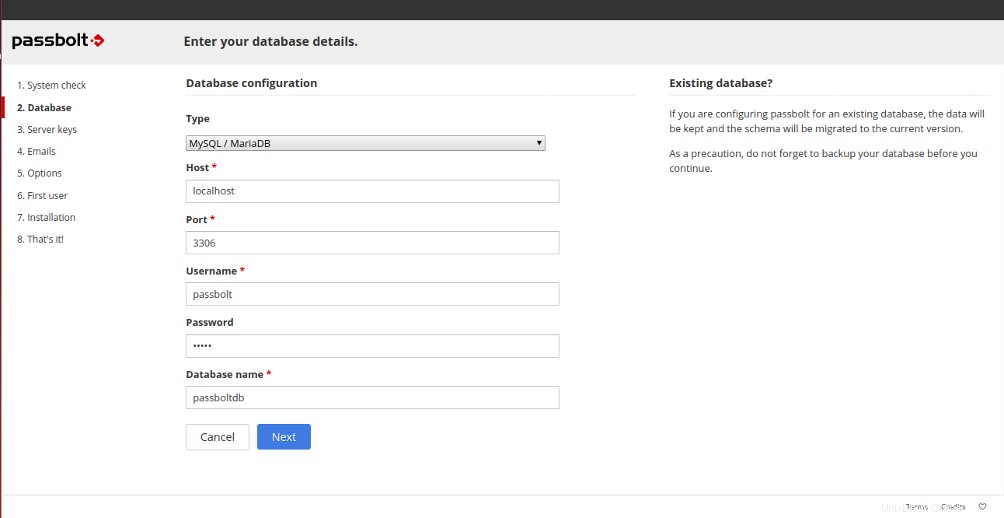
[データベースの構成]で、ホストをlocalhostとして設定します。
ポートを3306のままにします
以前に作成したデータベースの詳細を提供します 次へをクリックします ボタン。次のページが表示されます:
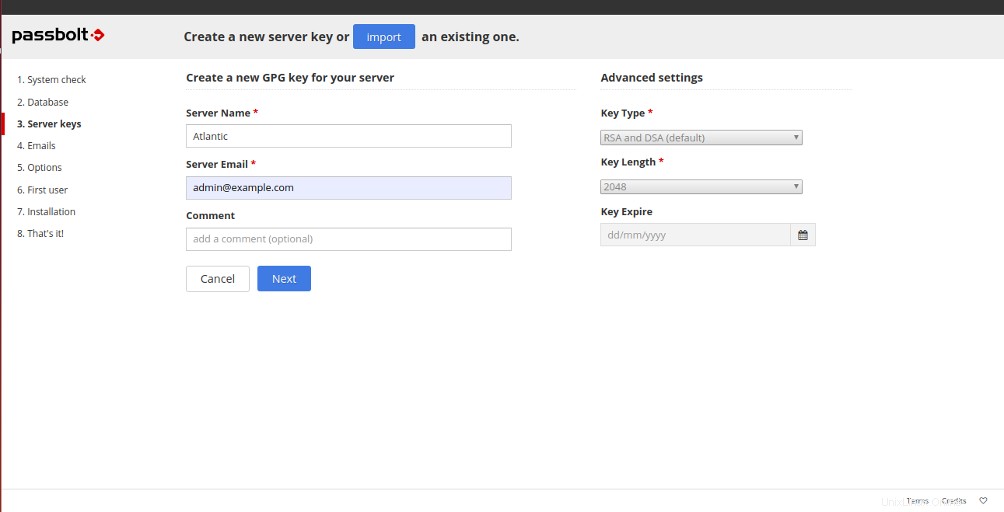
サーバーに名前を付けます 、メール 次へをクリックします ボタンをクリックして、新しいサーバーキーを作成します。次のページが表示されます:
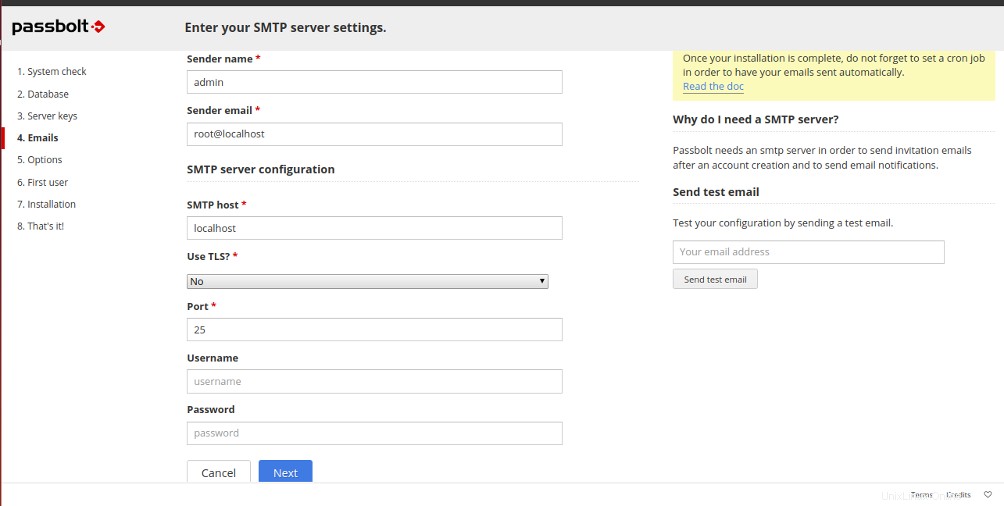
SMTPサーバーの設定を入力し、[次へ]をクリックします ボタン。次のページが表示されます:
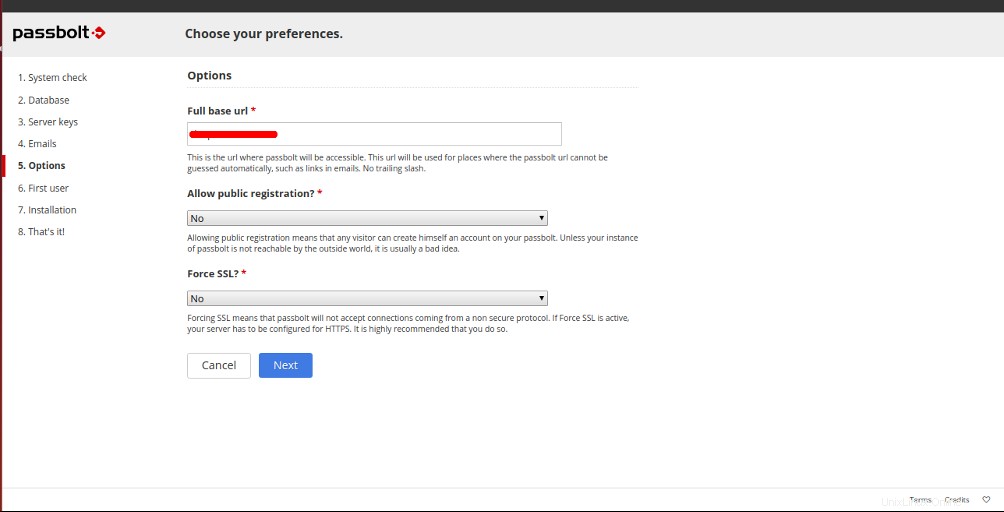
サーバーのURLを入力し、次へをクリックします ボタン。次のページが表示されます:
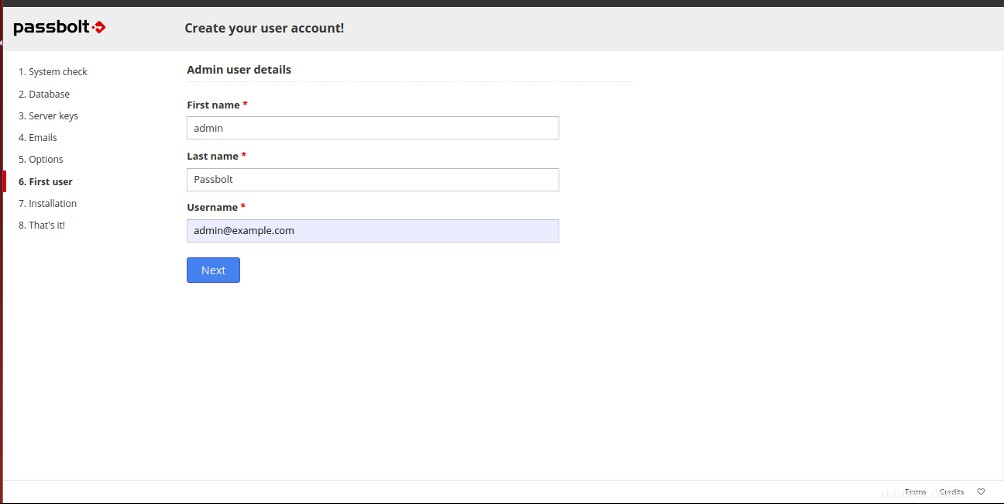
管理者ユーザーの詳細を入力し、次へをクリックします ボタン。次のページが表示されます:
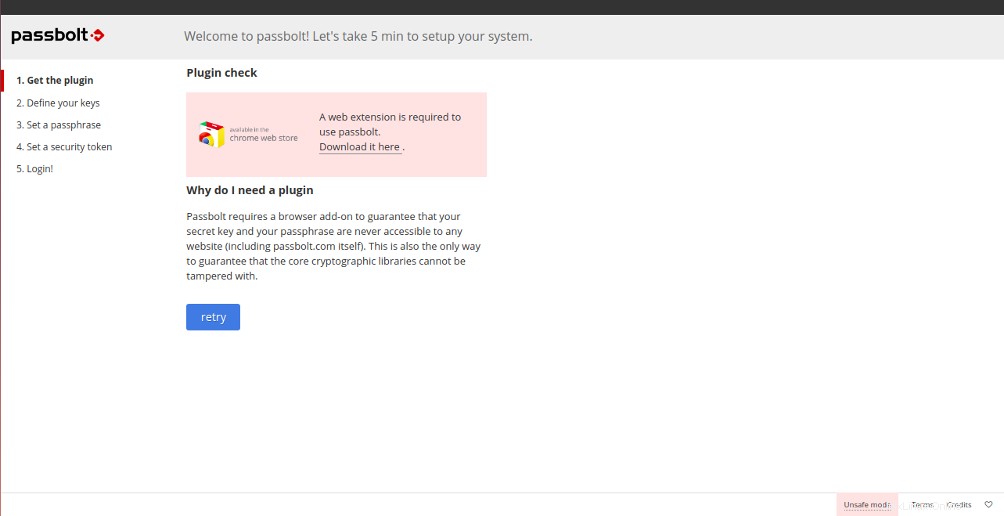
「ここからダウンロード」をクリックします Passbolt Chrome拡張機能をダウンロードして、再試行をクリックします ボタン。次のページが表示されます:
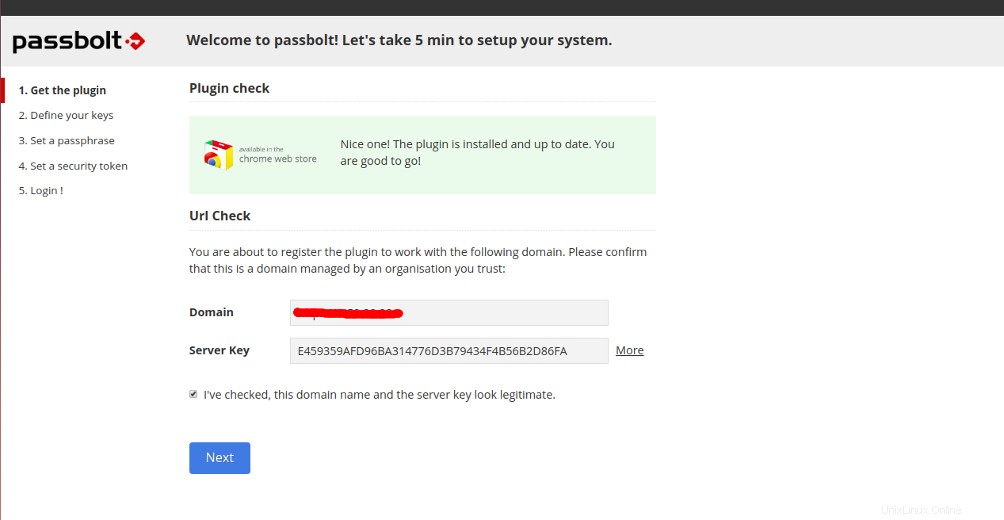
サーバーのIPを入力し、次へをクリックします ボタン。次のページが表示されます:
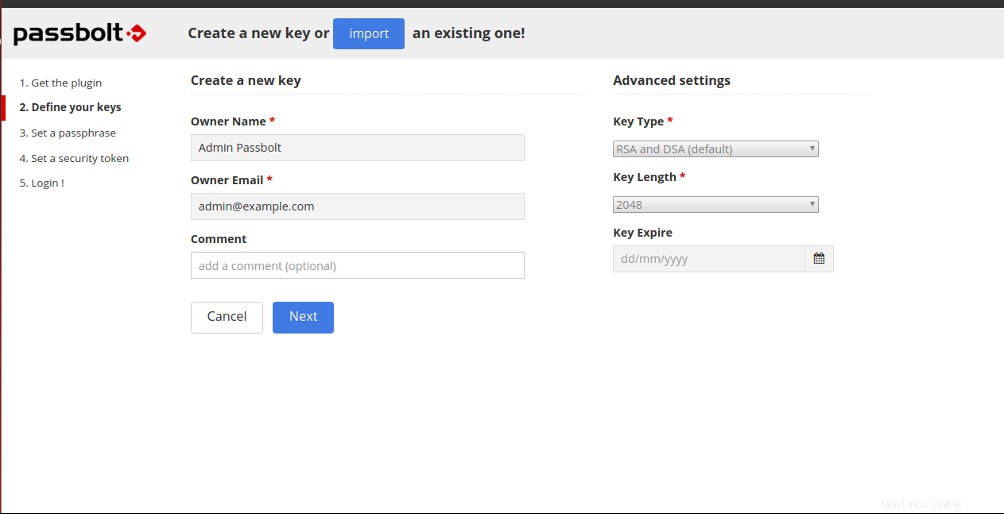
所有者の名前と所有者のメールアドレスを入力して、次へをクリックします ボタンをクリックして、新しいキーを作成します。次のページが表示されます:
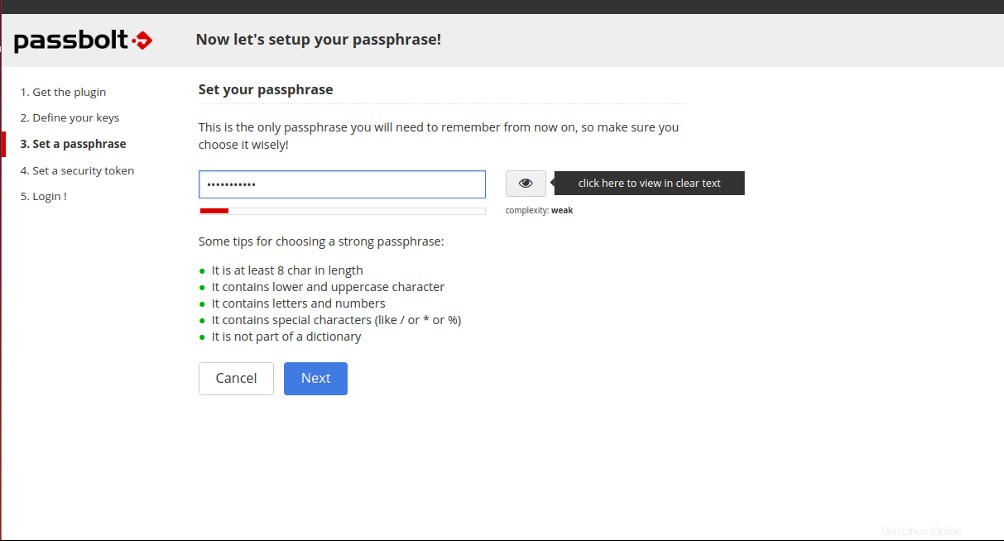
パスフレーズを設定し、次へをクリックします ボタン。次のページが表示されます:
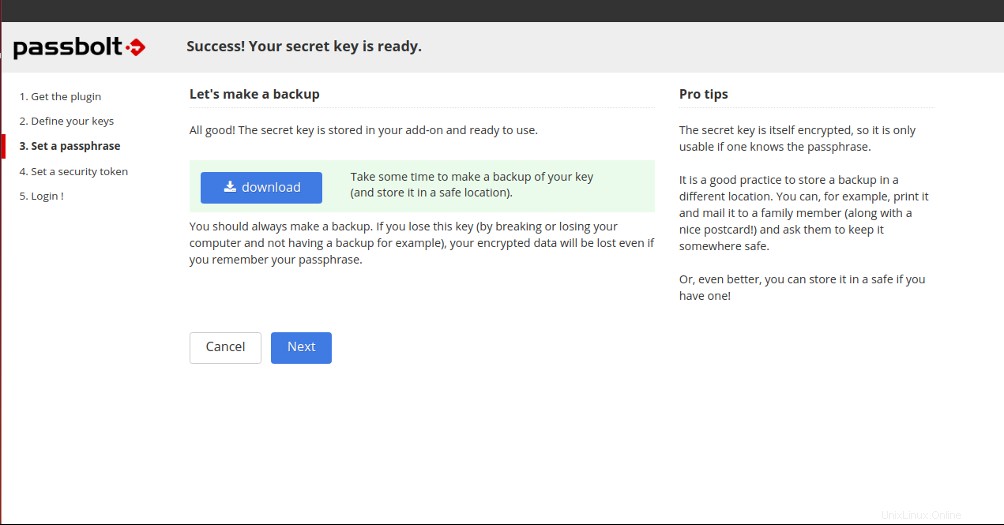
次へをクリックします ボタン。以下に示すように、Passboltログインページにリダイレクトされます。
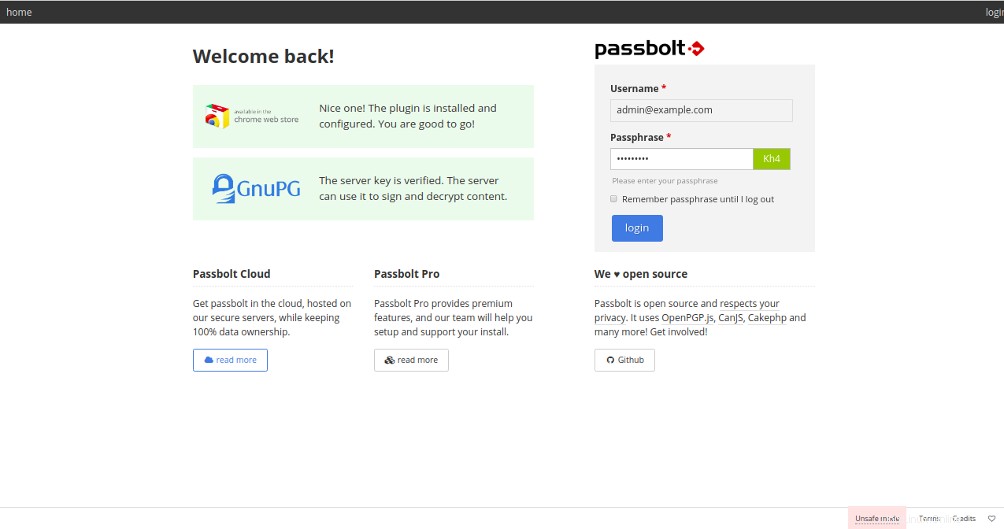
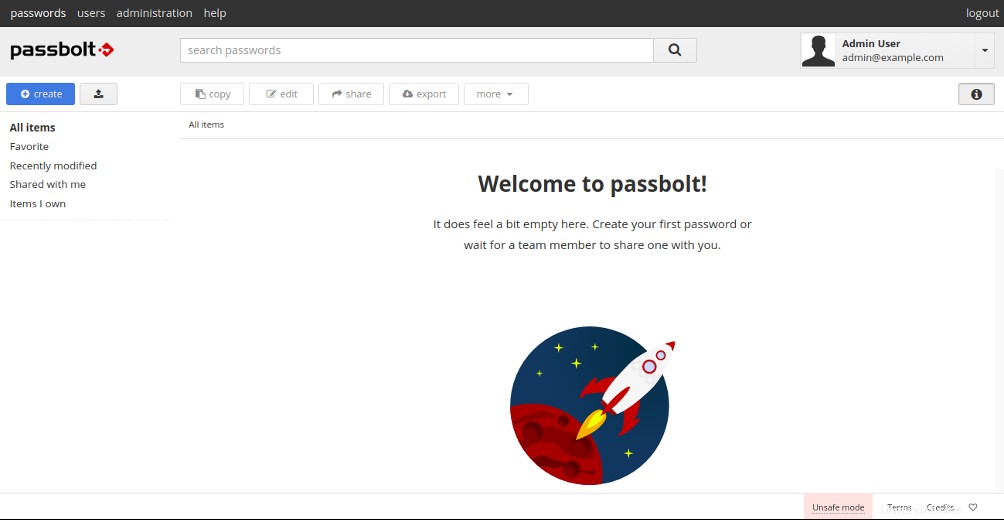
ユーザー名とパスワードを入力し、ログインをクリックします ボタン。次のページにPassboltダッシュボードが表示されます。
結論
おめでとう!これで、Ubuntu18.04にPassboltパスワードマネージャーが正常にインストールおよび構成されました。 Passboltを使用して、チーム全体でログイン資格情報を共有できるようになりました。今日Atlantic.NetからVPSホスティングにPassboltをセットアップしてください!