TeamPassは、パスワードを管理し、チームメンバー間でパスワードを共有するために使用される共同パスワードマネージャーです。 MySQL / MariaDBデータベースを使用して、パスワードを安全に保存します。これは、ユーザーの役割に応じてパスワードアクセスをカスタマイズするための強力なツールを提供します。これは無料のオープンソースソフトウェアであり、各ユーザーに定義されたアクセス権に関して、パスワードと関連データを整理された方法で管理できます。データ暗号化、個人用フォルダ、ツリー構造、ユーザー権限、役割の定義など、豊富な機能セットが付属しています。
このチュートリアルでは、Let'sEncryptSSLを使用してUbuntu20.04にTeamPassPasswordManagerソフトウェアをインストールする方法を紹介します。
- Ubuntu20.04を実行しているサーバー。
- 有効なドメイン名はサーバーのIPで示されます。
- ルートパスワードはサーバーで構成されています。
LAMPサーバーをインストールする
開始する前に、LAMPサーバーがサーバーにインストールされている必要があることを確認してください。インストールされていない場合は、次のコマンドを実行して他のパッケージと一緒にインストールできます。
apt-get install apache2 mariadb-server php7.4 php7.4-cli libapache2-mod-php7.4 php7.4-mysql php7.4-curl php7.4-mbstring php7.4-bcmath php7.4-common php7.4-gd php7.4-xml git wget -y
LAMPサーバーがインストールされたら、php.iniファイルを編集し、いくつかの設定を変更します。
nano /etc/php/7.4/apache2/php.ini
次の行を変更します:
memory_limit = 256M
upload_max_filesize = 100M
max_execution_time = 360
date.timezone = Asia/Kolkata
終了したら、次のステップに進むことができます。
TeamPassデータベースを作成する
次に、TeamPassのデータベースとユーザーを作成する必要があります。まず、次のコマンドを使用してMariaDBシェルにログインします。
mysql -u root
ログインしたら、次のコマンドを使用してTeamPassのデータベースとユーザーを作成します。
MariaDB [(none)]> create database teampass;
MariaDB [(none)]> grant all privileges on teampass.* to [email protected] identified by "password";
次に、特権をフラッシュし、次のコマンドでMariaDBを終了します。
MariaDB [(none)]> flush privileges;
MariaDB [(none)]> exit;
データベースが作成されたら、次のステップに進むことができます。
まず、Gitリポジトリから最新バージョンのTeamPassをダウンロードする必要があります。次のコマンドを使用して、ApacheWebルートディレクトリにダウンロードできます。
cd /var/www/html
git clone https://github.com/nilsteampassnet/TeamPass.git
ダウンロードが完了したら、所有権をwww-dataユーザーに変更し、次のコマンドで適切な権限を設定します。
chown -R www-data.www-data /var/www/html/TeamPass/
chmod -R 775 /var/www/html/TeamPass/
終了したら、次のステップに進むことができます。
ApacheWebサーバーを構成する
まず、次のコマンドを使用して、TeamPassのApache仮想ホスト構成ファイルを作成します。
nano /etc/apache2/sites-available/teampass.conf
次の行を追加します:
<VirtualHost *:80>
     ServerAdmin [email protected]
     DocumentRoot /var/www/html/TeamPass
     ServerName teampass.linuxbuz.com

     <Directory /var/www/html/TeamPass>
          Options FollowSymlinks
          AllowOverride All
          Require all granted
     </Directory>

     ErrorLog ${APACHE_LOG_DIR}/teampass_error.log
     CustomLog ${APACHE_LOG_DIR}/teampass_access.log combined

</VirtualHost>
終了したらファイルを保存します。次に、apache仮想ホストファイルを有効にし、apacheサービスを再起動して変更を適用します。
a2ensite teampass
systemctl restart apache2
Apache Webサーバーを構成したら、次のステップに進むことができます。
。まず、サーバーにCertbotLet'sEncryptクライアントをインストールする必要があります。ドメインのLet'sEncryptSSL証明書をインストールおよび管理するために使用されます。次のコマンドを実行して、Certbotをインストールします
apt-get install python3-certbot-apache -y
Certbotがインストールされたら、次のコマンドを実行して、Webサイト用のLet'sEncryptSSLをダウンロードしてインストールします。
certbot --apache -d teampass.linuxbuz.com
有効なメールアドレスを入力し、以下に示すように利用規約に同意する必要があります。
Saving debug log to /var/log/letsencrypt/letsencrypt.log
Plugins selected: Authenticator apache, Installer apache
Enter email address (used for urgent renewal and security notices) (Enter 'c' to
cancel): [email protected]

- - - - - - - - - - - - - - - - - - - - - - - - - - - - - - - - - - - - - - - -
Please read the Terms of Service at
https://letsencrypt.org/documents/LE-SA-v1.2-November-15-2017.pdf. You must
agree in order to register with the ACME server at
https://acme-v02.api.letsencrypt.org/directory
- - - - - - - - - - - - - - - - - - - - - - - - - - - - - - - - - - - - - - - -
(A)gree/(C)ancel: A

- - - - - - - - - - - - - - - - - - - - - - - - - - - - - - - - - - - - - - - -
Would you be willing to share your email address with the Electronic Frontier
Foundation, a founding partner of the Let's Encrypt project and the non-profit
organization that develops Certbot? We'd like to send you email about our work
encrypting the web, EFF news, campaigns, and ways to support digital freedom.
- - - - - - - - - - - - - - - - - - - - - - - - - - - - - - - - - - - - - - - -
(Y)es/(N)o: Y
Obtaining a new certificate
Performing the following challenges:
http-01 challenge for teampass.linuxbuz.com
Enabled Apache rewrite module
Waiting for verification...
Cleaning up challenges
Created an SSL vhost at /etc/apache2/sites-available/teampass-le-ssl.conf
Enabled Apache socache_shmcb module
Enabled Apache ssl module
Deploying Certificate to VirtualHost /etc/apache2/sites-available/teampass-le-ssl.conf
Enabling available site: /etc/apache2/sites-available/teampass-le-ssl.conf
次に、以下に示すように、HTTPトラフィックをHTTPSにリダイレクトするかどうかを選択する必要があります。
Please choose whether or not to redirect HTTP traffic to HTTPS, removing HTTP access.
- - - - - - - - - - - - - - - - - - - - - - - - - - - - - - - - - - - - - - - -
1: No redirect - Make no further changes to the webserver configuration.
2: Redirect - Make all requests redirect to secure HTTPS access. Choose this for
new sites, or if you're confident your site works on HTTPS. You can undo this
change by editing your web server's configuration.
- - - - - - - - - - - - - - - - - - - - - - - - - - - - - - - - - - - - - - - -
Select the appropriate number [1-2] then [enter] (press 'c' to cancel): 2
2と入力します すべてのリクエストを安全なHTTPSアクセスにリダイレクトし、 Enterを押します Let'sEncryptSSLをインストールします。インストールが正常に完了すると、次の出力が表示されます。
Enabled Apache rewrite module
Redirecting vhost in /etc/apache2/sites-enabled/teampass.conf to ssl vhost in /etc/apache2/sites-available/teampass-le-ssl.conf

- - - - - - - - - - - - - - - - - - - - - - - - - - - - - - - - - - - - - - - -
Congratulations! You have successfully enabled https://teampass.linuxbuz.com

You should test your configuration at:
https://www.ssllabs.com/ssltest/analyze.html?d=teampass.linuxbuz.com
- - - - - - - - - - - - - - - - - - - - - - - - - - - - - - - - - - - - - - - -

IMPORTANT NOTES:
 - Congratulations! Your certificate and chain have been saved at:
   /etc/letsencrypt/live/teampass.linuxbuz.com/fullchain.pem
   Your key file has been saved at:
   /etc/letsencrypt/live/teampass.linuxbuz.com/privkey.pem
   Your cert will expire on 2020-10-17. To obtain a new or tweaked
   version of this certificate in the future, simply run certbot again
   with the "certonly" option. To non-interactively renew *all* of
   your certificates, run "certbot renew"
 - Your account credentials have been saved in your Certbot
   configuration directory at /etc/letsencrypt. You should make a
   secure backup of this folder now. This configuration directory will
   also contain certificates and private keys obtained by Certbot so
   making regular backups of this folder is ideal.
 - If you like Certbot, please consider supporting our work by:

   Donating to ISRG / Let's Encrypt:   https://letsencrypt.org/donate
   Donating to EFF:                    https://eff.org/donate-le
この時点で、WebサイトはLet'sEncryptSSLで保護されています。これで、HTTPSプロトコルを使用して安全にアクセスできます。
TeamPassWebUIにアクセス
次に、URL https://teampass.linuxbuz.comにアクセスして、TeamPassWebインターフェイスにアクセスします。 TeamPassのウェルカム画面が表示されます:
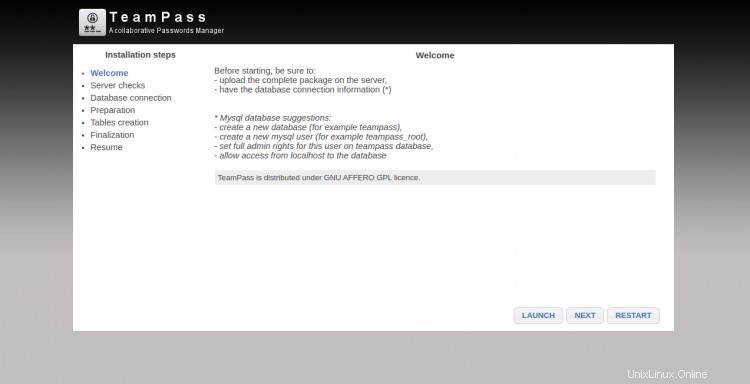
次へをクリックします ボタン。サーバーチェック画面が表示されます:
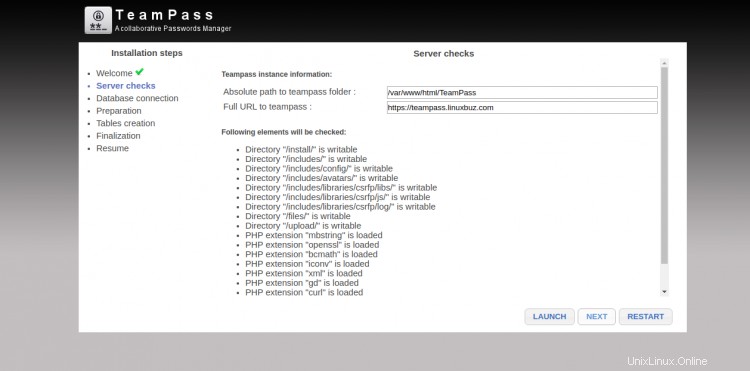
起動をクリックします および次へ ボタン。データベース接続画面が表示されます:
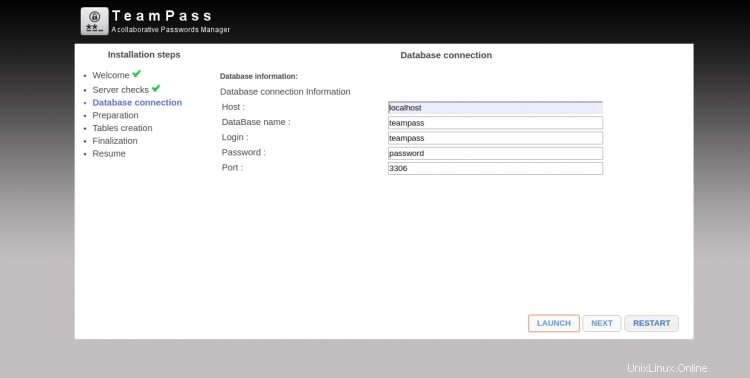
データベースの詳細を入力し、起動をクリックします および次へ ボタン。準備画面が表示されます:
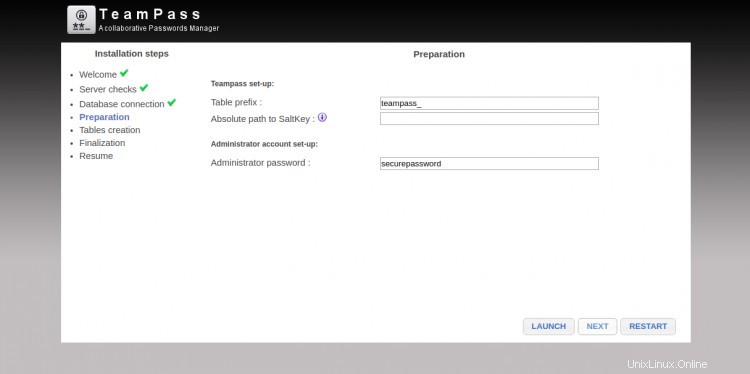
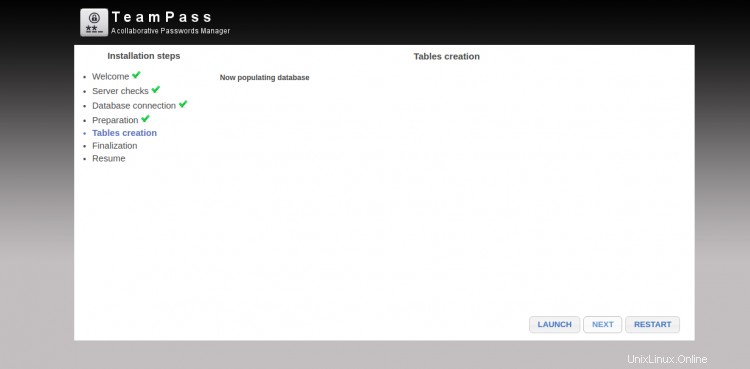
起動をクリックします および次へ ボタン。テーブル作成画面が表示されます:
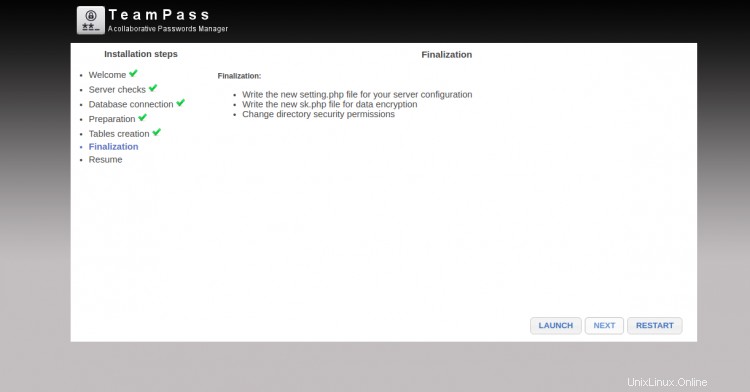
起動をクリックします および次へ ボタン。ファイナライズ画面が表示されます:
起動をクリックします および次へ ボタン。インストールが正常に完了すると、次の画面が表示されます。
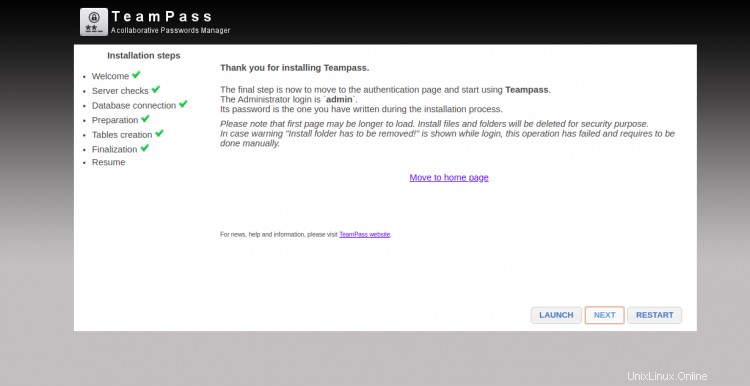
次に、ホームページに移動をクリックします。 ボタン。以下に示すように、TeamPassのログイン画面にリダイレクトされます。
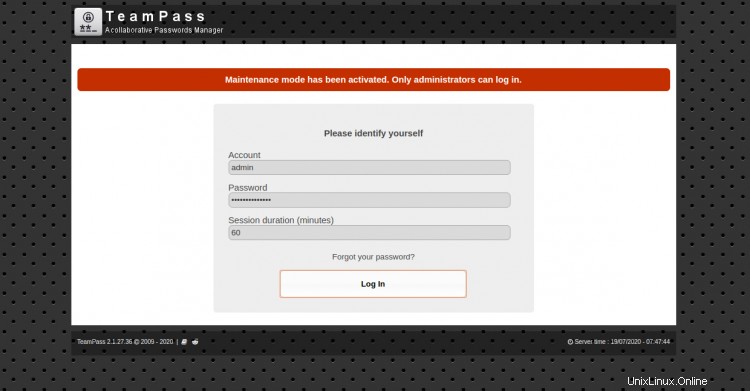
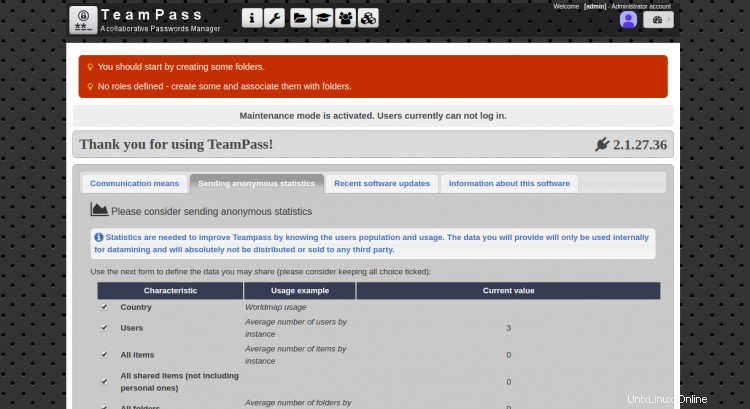
adminとしてのユーザー名と、インストールプロセス中に書き込んだパスワードを入力し、ログをクリックします。 で ボタン。次の画面にTeamPassダッシュボードが表示されます。
このガイドでは、Ubuntu 20.04にTeamPassパスワードマネージャーをインストールし、Let'sEncryptSSLで保護する方法を学びました。これで、TeamPassを探索して、実稼働環境にデプロイできます。詳細については、TeamPassの公式ドキュメントをご覧ください。