Syncthingは、ネットワーク上の2台以上のコンピューター間でファイルを同期するために使用されるオープンソースツールです。ピアツーピアアーキテクチャを使用し、デバイス間で直接データを交換します。複数のデバイス間で送信されるすべてのデータはTLSで暗号化されます。 1台のSyncthingマシンでデータを作成、変更、または削除するたびに、そのデータは他のサーバーに自動的に複製されます。 Linux、Windows、MacOSXなどを含むすべての主要なオペレーティングシステムにインストールできます。
このガイドでは、Ubuntu20.04にSyncthingサーバーをインストールしてセットアップする方法を説明します。
- Ubuntu20.04を実行している2台のサーバー。
- サーバーIPで指定された有効なドメイン名。
- ルートパスワードは両方のサーバーで構成されています。
まず、次のコマンドを実行して、システムパッケージを更新されたバージョンに更新します。
apt-get update -y
すべてのパッケージが更新されたら、次のステップに進むことができます。
デフォルトでは、SyncthingパッケージはUbuntu20.04のデフォルトリポジトリに含まれていません。そのため、SyncthingリポジトリをAPTに追加する必要があります。
まず、次のコマンドを使用して、両方のサーバーに必要なすべての依存関係をインストールします。
apt-get install gnupg2 curl apt-transport-https -y
次に、次のコマンドを使用してリリースキーをダウンロードして追加します。
curl -s https://syncthing.net/release-key.txt | apt-key add -
次に、次のコマンドを使用してSyncthingリポジトリをAPTに追加します。
echo "deb https://apt.syncthing.net/ syncthing release" > /etc/apt/sources.list.d/syncthing.list
次に、リポジトリを更新し、次のコマンドを使用してSyncthingサーバーをインストールします。
apt-get update -y
apt-get install syncthing -y
インストールが完了したら、次のコマンドを使用してSyncthingのバージョンを確認します。
syncthing --version
次の出力が得られるはずです:
syncthing v1.18.0 "Fermium Flea" (go1.16.5 linux-amd64) [email protected] 2021-06-21 20:53:50 UTC [noupgrade]
この時点で、Syncthingは両方のサーバーにインストールされています。これで、次のステップに進むことができます。
次に、Syncthingサービスを管理するためのsystemdユニットファイルを作成する必要があります。次のコマンドを使用して、両方のサーバーで作成できます。
nano /etc/systemd/system/[email protected]
次の行を追加します:
[Unit]
Description=Syncthing - Open Source Continuous File Synchronization for %I
Documentation=man:syncthing(1)
After=network.target

[Service]
User=%i
ExecStart=/usr/bin/syncthing -no-browser -gui-address="0.0.0.0:8384" -no-restart -logflags=0
Restart=on-failure
SuccessExitStatus=3 4
RestartForceExitStatus=3 4

[Install]
WantedBy=multi-user.target
終了したら、ファイルを保存して閉じます。次に、systemdデーモンをリロードして、構成を適用します。
systemctl daemon-reload
次に、次のコマンドを使用してSyncthingサービスを開始します。
systemctl start [email protected]
Syncthingサービスのステータスを確認するには、次のコマンドを実行します。
systemctl status [email protected]
次の出力が表示されます。
? [email protected] - Syncthing - Open Source Continuous File Synchronization for root
     Loaded: loaded (/etc/systemd/system/[email protected]; disabled; vendor preset: enabled)
     Active: active (running) since Fri 2021-07-09 04:40:12 UTC; 5s ago
       Docs: man:syncthing(1)
   Main PID: 2878 (syncthing)
      Tasks: 14 (limit: 2353)
     Memory: 44.2M
     CGroup: /system.slice/system-syncthing.slice/[email protected]
             ??2878 /usr/bin/syncthing -no-browser -gui-address=0.0.0.0:8384 -no-restart -logflags=0
             ??2889 /usr/bin/syncthing -no-browser -gui-address=0.0.0.0:8384 -no-restart -logflags=0

Jul 09 04:40:14 node1 syncthing[2878]: [WPOF6] INFO: QUIC listener ([::]:22000) starting
Jul 09 04:40:14 node1 syncthing[2878]: [WPOF6] INFO: Loading HTTPS certificate: open /root/.config/syncthing/https-cert.pem: no such file or d>
Jul 09 04:40:14 node1 syncthing[2878]: [WPOF6] INFO: Creating new HTTPS certificate
Jul 09 04:40:14 node1 syncthing[2878]: [WPOF6] INFO: Completed initial scan of sendreceive folder "Default Folder" (default)
Jul 09 04:40:14 node1 syncthing[2878]: [WPOF6] INFO: GUI and API listening on [::]:8384
Jul 09 04:40:14 node1 syncthing[2878]: [WPOF6] INFO: Access the GUI via the following URL: http://127.0.0.1:8384/
Jul 09 04:40:14 node1 syncthing[2878]: [WPOF6] INFO: My name is "node1"
Jul 09 04:40:14 node1 syncthing[2878]: [WPOF6] WARNING: Syncthing should not run as a privileged or system user. Please consider using a norma>
Jul 09 04:40:14 node1 syncthing[2878]: [WPOF6] INFO: quic://0.0.0.0:22000 detected NAT type: Not behind a NAT
Jul 09 04:40:14 node1 syncthing[2878]: [WPOF6] INFO: quic://0.0.0.0:22000 resolved external address quic://45.58.35.6:22000 (via stun.syncthin>
経由) この時点で、Syncthingサービスが開始され、ポート8384でリッスンしています。次のコマンドで確認できます。
ss -antpl | grep 8384
次の出力が表示されます。
LISTEN 0 4096 *:8384 *:* users:(("syncthing",pid=2889,fd=12))
次に、Webブラウザーを開き、URL http:// first-server-ip:8384およびhttp:// first-server-ip:8384を使用してSyncthingWebインターフェースにアクセスします。
次の画面が表示されます。
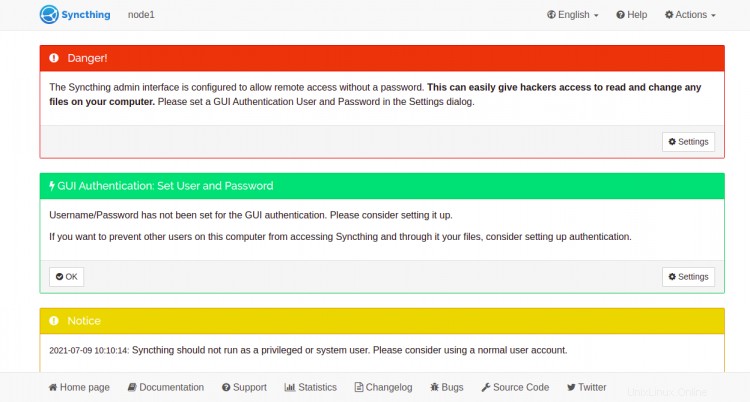
設定をクリックします 以下に示すように、管理者ユーザーとパスワードを定義します。

ユーザー名とパスワードを入力し、保存をクリックします ボタンをクリックして変更を適用します。 Syncthingログインページにリダイレクトされます:
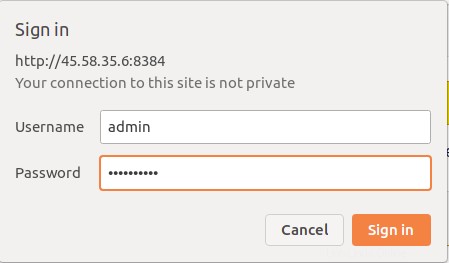
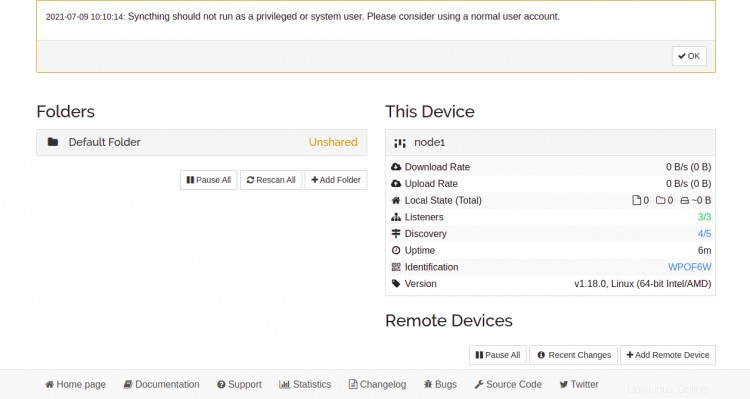
管理者のユーザー名とパスワードを入力し、ログインをクリックします ボタン。次の画面が表示されます。
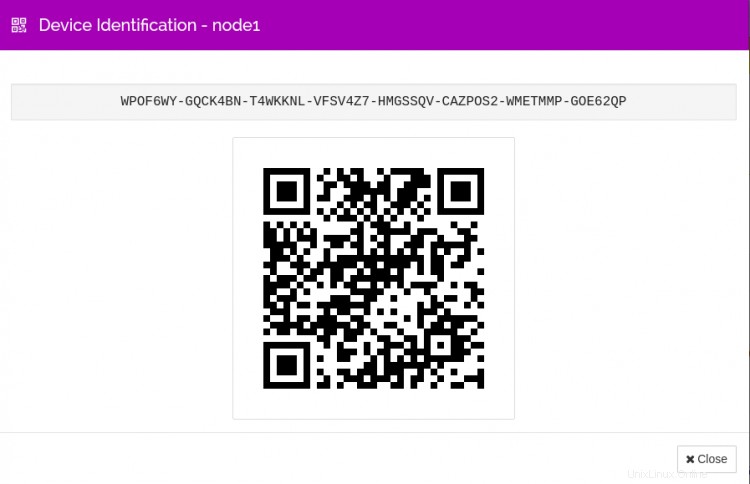
次に、両方のサーバー間でファイルを同期するために、各サーバーのデバイスIDを別のサーバーに追加する必要があります。これを行うには、アクション>IDの表示をクリックします 両方のサーバーのボタン。次の画面が表示されます。

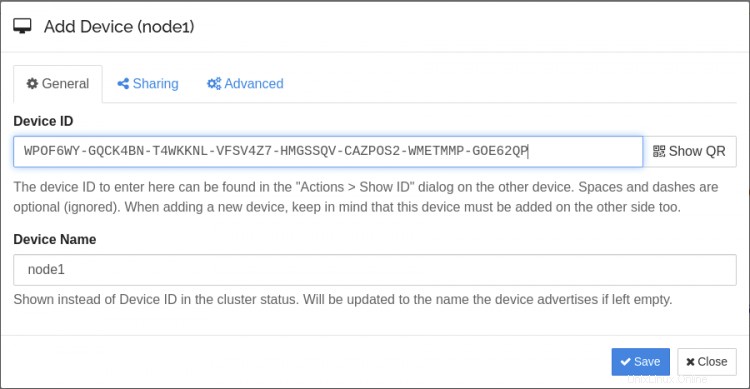
最初のサーバーで、リモートデバイスの追加をクリックします 。次の画面が表示されます。
2番目のサーバーのデバイスIDを入力し、保存をクリックします ボタン。
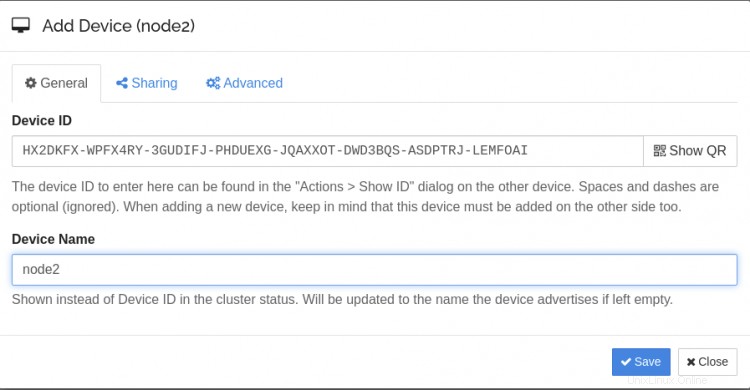
2番目のサーバーで、[リモートデバイスの追加]をクリックします 。次の画面が表示されます。
最初のサーバーのデバイスIDを入力し、保存をクリックします ボタン。次の画面が表示されます。

次に、2番目のサーバーと同期するフォルダーを追加して共有する必要があります。 フォルダの追加をクリックします ボタン。次の画面が表示されます。

フォルダラベルとフォルダパスを入力し、共有をクリックします タブ。次の画面が表示されます。
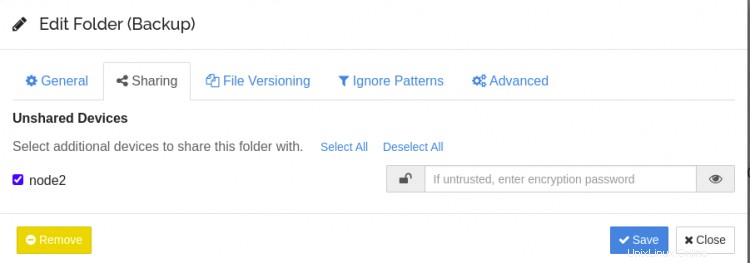
2番目のサーバーにチェックマークを付け、保存をクリックします ボタン。次の画面が表示されます。
次に、2番目のサーバーに移動し、再スキャンをクリックします。 すべて ボタン。次の画面が表示されます。
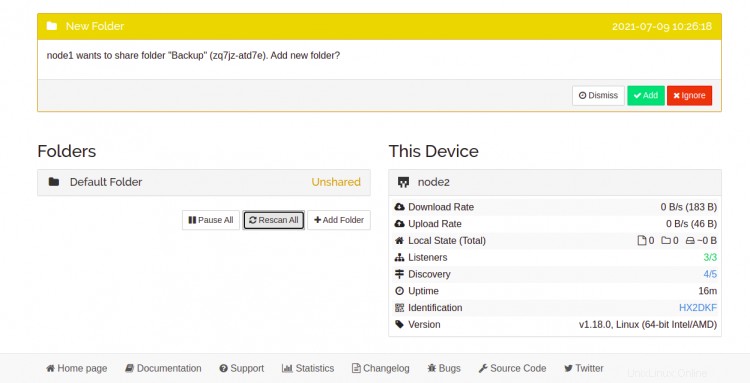
追加をクリックします 最初のサーバーで共有されるバックアップフォルダーを追加します。次の画面が表示されます。
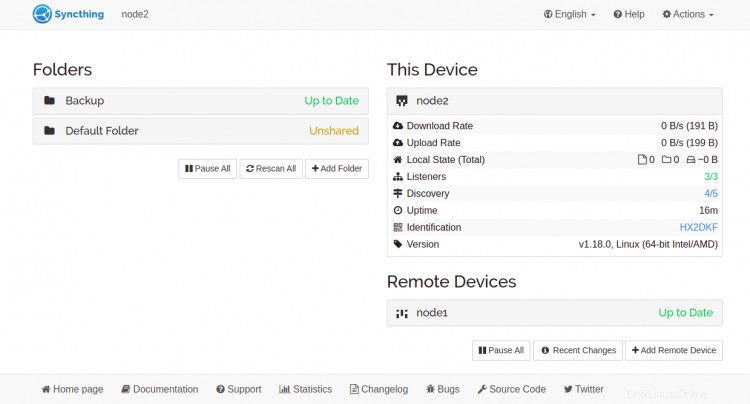
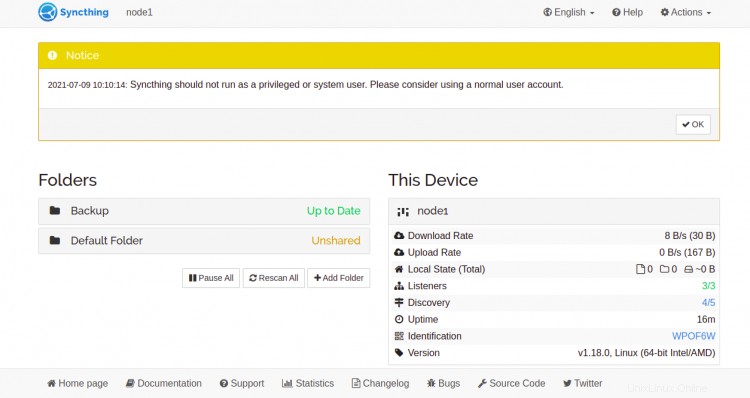
これで、最初のサーバーのバックアップフォルダでファイルを作成または変更するたびに、それらのファイルは2番目のサーバーに自動的に同期されます。
NginxをSyncthingのリバースプロキシとして構成する
Nginxをリバースプロキシとして設定して、ポート80を介してSyncthingサーバーにアクセスすることもできます。
まず、次のコマンドを使用してNginxサーバーをインストールします。
apt-get install nginx -y
次に、次のコマンドを使用してNginx仮想ホスト構成ファイルを作成します。
nano /etc/nginx/conf.d/syncthing.conf
次の行を追加します:
server {
  listen 80;
  server_name syncthing.example.com;

  access_log /var/log/nginx/syncthing.access.log;
  error_log /var/log/nginx/syncthing.error.log;
  location / {
    proxy_pass http://127.0.0.1:8384;
    proxy_set_header X-Real-IP $remote_addr;
    proxy_set_header X-Forwarded-For $proxy_add_x_forwarded_for;
    proxy_set_header X-Forwarded-Proto $scheme;
  }
}
ファイルを保存して閉じ、次のコマンドを使用して構文エラーがないかNginxを確認します。
nginx -t
次の出力が得られるはずです:
nginx: the configuration file /etc/nginx/nginx.conf syntax is ok
nginx: configuration file /etc/nginx/nginx.conf test is successful
次に、Nginxをリロードして変更を適用します。
systemctl reload nginx
次のコマンドを使用して、Nginxのステータスを確認することもできます。
systemctl status nginx
次の出力が表示されます。
? nginx.service - A high performance web server and a reverse proxy server
     Loaded: loaded (/lib/systemd/system/nginx.service; enabled; vendor preset: enabled)
     Active: active (running) since Fri 2021-07-09 05:01:36 UTC; 21s ago
       Docs: man:nginx(8)
   Main PID: 3394 (nginx)
      Tasks: 2 (limit: 2353)
     Memory: 6.2M
     CGroup: /system.slice/nginx.service
             ??3394 nginx: master process /usr/sbin/nginx -g daemon on; master_process on;
             ??3395 nginx: worker process

Jul 09 05:01:36 node1 systemd[1]: Starting A high performance web server and a reverse proxy server...
Jul 09 05:01:36 node1 systemd[1]: Started A high performance web server and a reverse proxy server.
これで、URLhttp://syncthing.example.comを使用してSyncthingサーバーにアクセスできます。
おめでとう!これで、2つのUbuntu 20.04サーバーにSyncthingが正常にインストールおよび構成され、両方のサーバー間の同期がセットアップされました。このチュートリアルがサーバーのバックアップに役立つことを願っています。