Bitwardenは、無料のオープンソースのパスワードマネージャーであり、あらゆるデバイスやブラウザーのパスワードを保存するために使用できます。 Bitwardenは、パスワードを作成および管理するだけでなく、すべてのデバイス間でパスワードを同期するのに役立ちます。モバイルアプリ、CLI、ウェブインターフェース、ブラウザ拡張機能、デスクトップアプリケーションなど、いくつかのクライアントアプリケーションを提供します。
このチュートリアルでは、Ubuntu20.04サーバーにBitwardenPasswordManagerをインストールする方法を紹介します。
前提条件
- Atlantic.Netクラウドプラットフォーム上の新しいUbuntu20.04VPS
- サーバーで構成されているrootパスワード
ステップ1-Atlantic.Netクラウドサーバーを作成する
まず、Atlantic.Netクラウドサーバーにログインします。少なくとも4GBのRAMを搭載したオペレーティングシステムとしてUbuntu20.04を選択して、新しいサーバーを作成します。 SSH経由でクラウドサーバーに接続し、ページの上部で強調表示されているクレデンシャルを使用してログインします。
Ubuntu 20.04サーバーにログインしたら、次のコマンドを実行して、ベースシステムを最新の利用可能なパッケージで更新します。
apt-get update -y
ステップ2–必要な依存関係をインストールする
まず、サーバーにいくつかの依存関係をインストールする必要があります。次のコマンドを実行して、それらすべてをインストールできます。
apt-get install apt-transport-https ca-certificates curl gnupg-agent software-properties-common -y
すべてのパッケージがインストールされたら、次のステップに進むことができます。
ステップ3–DockerとDockerComposeをインストールする
まず、次のコマンドを使用してGPGキーをダウンロードして追加します。
curl -fsSL https://download.docker.com/linux/ubuntu/gpg | apt-key add -
次に、次のコマンドを使用してDockerリポジトリを追加します。
add-apt-repository "deb [arch=amd64] https://download.docker.com/linux/ubuntu $(lsb_release -cs) stable"
リポジトリが追加されたら、次のコマンドを使用してDockerとDockerComposeをインストールできます。
apt-get install docker-ce docker-ce-cli containerd.io docker-compose -y
両方のパッケージをインストールした後、次のコマンドを使用して、インストールされているDockerのバージョンを確認します。
docker --version
次の出力が得られるはずです:
Docker version 19.03.12, build 48a66213fe
次のコマンドを使用して、DockerComposeのバージョンを確認することもできます。
docker-compose --version
次の出力が表示されます。
docker-compose version 1.25.0, build unknown
ステップ4–Bitwardenをインストールする
まず、公式WebサイトからBitwardenインストールスクリプトをダウンロードする必要があります。次のコマンドでダウンロードできます:
curl -Lso bitwarden.sh https://go.btwrdn.co/bw-sh
次に、ダウンロードしたスクリプトに実行権限を付与します。
chmod +x bitwarden.sh
Bitwardenをインストールする前に、BitwardenインストールIDとキーを生成する必要があります。それらはBitwardenWebサイトから生成できます。

メールアドレスを入力して、送信をクリックします ボタン。次の画面にインストールIDとキーが表示されます。
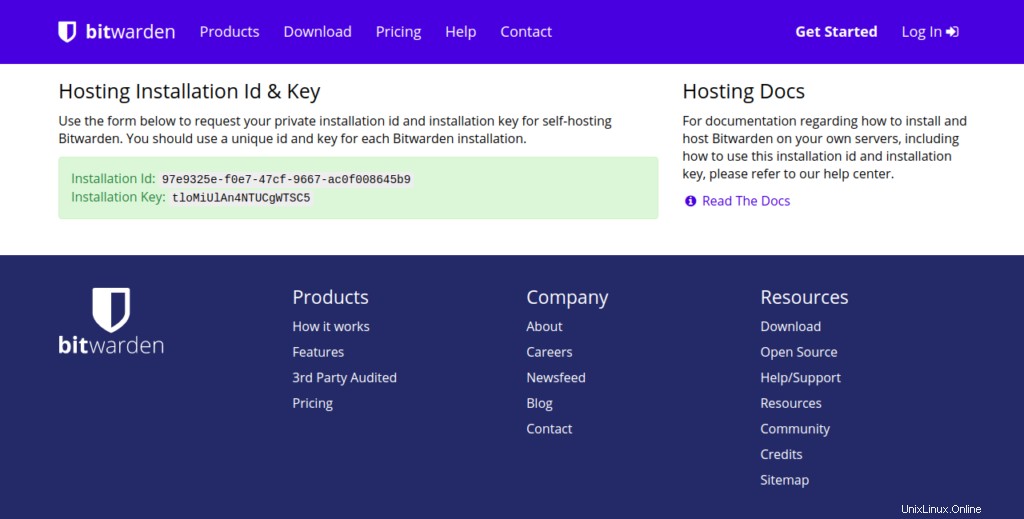
次に、次のコマンドを使用してBitwardenのインストールを開始します。
./bitwarden.sh install
インストール中に、以下に示すように、サーバーIP、インストールキー、およびインストールIDを提供するように求められます。
 _     _ _                         _
| |__ (_) |___      ____ _ _ __ __| | ___ _ __
| '_ \| | __\ \ /\ / / _` | '__/ _` |/ _ \ '_ \
| |_) | | |_ \ V  V / (_| | | | (_| |  __/ | | |
|_.__/|_|\__| \_/\_/ \__,_|_|  \__,_|\___|_| |_|
Open source password management solutions
Copyright 2015-2020, 8bit Solutions LLC
https://bitwarden.com, https://github.com/bitwarden
===================================================
Docker version 19.03.12, build 48a66213fe
docker-compose version 1.25.0, build unknown
(!) Enter the domain name for your Bitwarden instance (ex. bitwarden.example.com): 69.87.216.49
(!) Do you want to use Let's Encrypt to generate a free SSL certificate? (y/n): n
1.36.1: Pulling from bitwarden/setup
6ec8c9369e08: Pull complete
fe8522826504: Pull complete
658bf4619169: Pull complete
0392978bbc2e: Pull complete
33dd02257803: Pull complete
2a69859c8164: Pull complete
d68079cd71ee: Pull complete
7c08df4e94b0: Pull complete
653a8af878c4: Pull complete
d252f877c4a2: Pull complete
Digest: sha256:5b2c43b46c03da54aecc6d19098b0574b5fb205f0cd3046019725925cadfdf29
Status: Downloaded newer image for bitwarden/setup:1.36.1
docker.io/bitwarden/setup:1.36.1
(!) Enter your installation id (get at https://bitwarden.com/host): 97e9325e-f0e7-47cf-9667-ac0f008645b9
(!) Enter your installation key: tloMiUlAn4NTUCgWTSC5
(!) Do you have a SSL certificate to use? (y/n): n
(!) Do you want to generate a self-signed SSL certificate? (y/n): y
Generating self signed SSL certificate.
Generating a RSA private key
........................++++
..................++++
writing new private key to '/bitwarden/ssl/self/69.87.216.49/private.key'
-----
Generating key for IdentityServer.
Generating a RSA private key
.........++++
.......................++++
writing new private key to 'identity.key'
-----
!!!!!!!!!! WARNING !!!!!!!!!!
You are using an untrusted SSL certificate. This certificate will not be
trusted by Bitwarden client applications. You must add this certificate to
the trusted store on each device or else you will receive errors when trying
to connect to your installation.
Building nginx config.
Building docker environment files.
Building docker environment override files.
Building FIDO U2F app id.
Building docker-compose.yml.
Installation complete
If you need to make additional configuration changes, you can modify
the settings in `./bwdata/config.yml` and then run:
`./bitwarden.sh rebuild` or `./bitwarden.sh update`
Next steps, run:
`./bitwarden.sh start`
インストールが完了したら、次のコマンドでBitwardenサービスを開始します。
./bitwarden.sh start
次のコマンドですべてのコマンドラインオプションを表示できます:
./bitwarden.sh help
出力:
 _     _ _                         _
| |__ (_) |___      ____ _ _ __ __| | ___ _ __
| '_ \| | __\ \ /\ / / _` | '__/ _` |/ _ \ '_ \
| |_) | | |_ \ V  V / (_| | | | (_| |  __/ | | |
|_.__/|_|\__| \_/\_/ \__,_|_|  \__,_|\___|_| |_|
Open source password management solutions
Copyright 2015-2020, 8bit Solutions LLC
https://bitwarden.com, https://github.com/bitwarden
===================================================
Docker version 19.03.12, build 48a66213fe
docker-compose version 1.25.0, build unknown
Available commands:
install
start
restart
stop
update
updatedb
updaterun
updateself
updateconf
renewcert
rebuild
help
ステップ5:Bitwardenにアクセスする
次に、Webブラウザーを開き、URL http://your-server-ipを使用してBitwardenにアクセスします。 Bitwardenログイン画面が表示されます:
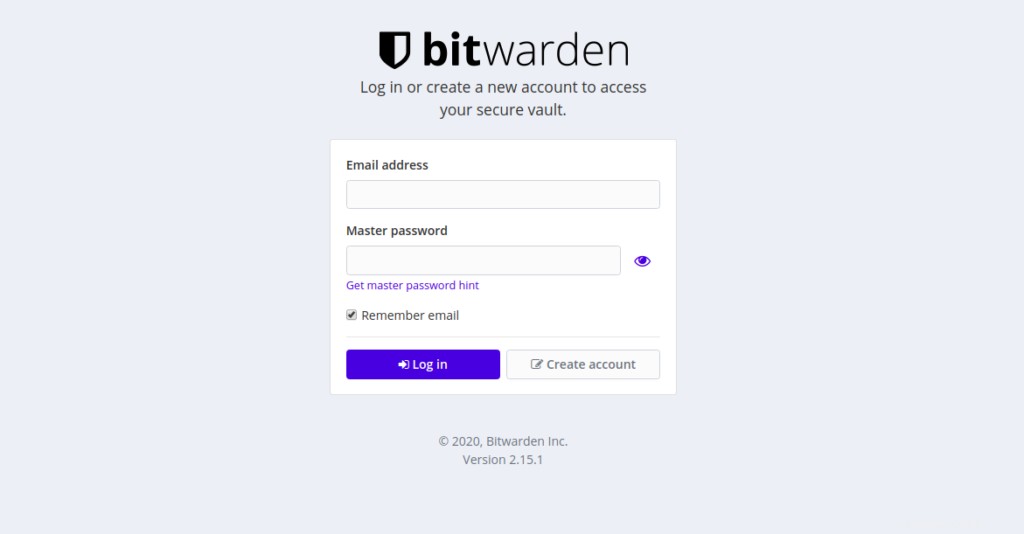
作成をクリックします アカウント ボタン。次の画面が表示されます。
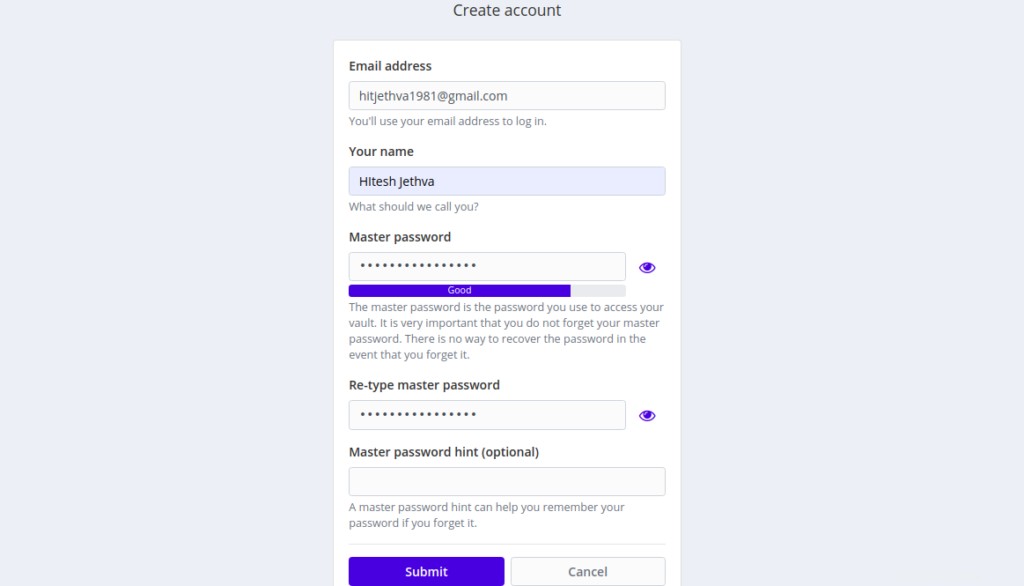
メールアドレス、名前、マスターパスワードを入力し、送信をクリックします ボタン。 Bitwardenログイン画面が表示されます:
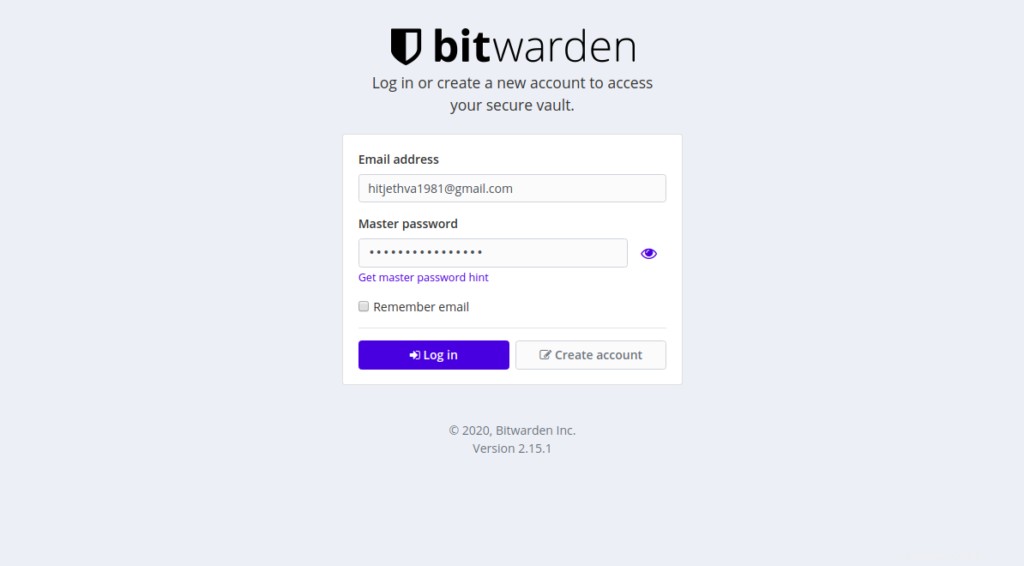
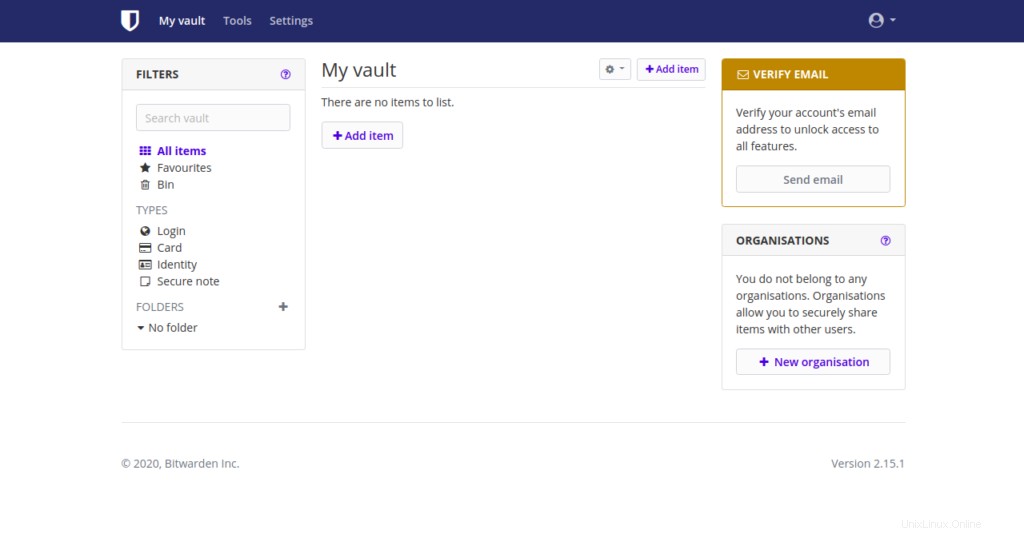
メールアドレスとパスワードを入力し、ログをクリックします で ボタン。次の画面にBitwardenダッシュボードが表示されます。
結論
おめでとう!これで、BitwardenパスワードマネージャーがUbuntu20.04サーバーに正常にインストールされました。これにより、すべてのデバイス間でパスワードを保存、管理、および同期できるようになることを願っています。 Atlantic.NetのVPSホスティングアカウントでBitwardenを使用してみてください。
VPSホスティングサービスと仮想プライベートサーバーの詳細をご覧ください。