LAMPはLの略です inux、 A pache、 M ySQL、 P HP。このチュートリアルでは、PHP5サポート(mod_php)とMySQLサポートを備えたCentOS6.4サーバーにApache2Webサーバーをインストールする方法を示します。
これがあなたのために働くという保証はありません!
1予備メモ
このチュートリアルでは、ホスト名server1.example.comとIPアドレス192.168.0.100を使用します。これらの設定はユーザーによって異なる場合があるため、必要に応じて置き換える必要があります。
2MySQL5のインストール
MySQLをインストールするには、次のようにします。
yum -y install mysql mysql-server
次に、MySQLのシステム起動リンクを作成し(システムが起動するたびにMySQLが自動的に起動するように)、MySQLサーバーを起動します。
chkconfig --levels 235 mysqld on
/etc/init.d/mysqld start
MySQLルートアカウントのパスワードを設定します:
mysql_secure_installation
[[email protected] ~]# mysql_secure_installation
NOTE: RUNNING ALL PARTS OF THIS SCRIPT IS RECOMMENDED FOR ALL MySQL
SERVERS IN PRODUCTION USE! PLEASE READ EACH STEP CAREFULLY!
In order to log into MySQL to secure it, we'll need the current
password for the root user. If you've just installed MySQL, and
you haven't set the root password yet, the password will be blank,
so you should just press enter here.
Enter current password for root (enter for none):
OK, successfully used password, moving on...
Setting the root password ensures that nobody can log into the MySQL
root user without the proper authorisation.
Set root password? [Y/n] <-- ENTER
New password: <-- yourrootsqlpassword
Re-enter new password: <-- yourrootsqlpassword
Password updated successfully!
Reloading privilege tables..
... Success!
By default, a MySQL installation has an anonymous user, allowing anyone
to log into MySQL without having to have a user account created for
them. This is intended only for testing, and to make the installation
go a bit smoother. You should remove them before moving into a
production environment.
Remove anonymous users? [Y/n] <-- ENTER
... Success!
Normally, root should only be allowed to connect from 'localhost'. This
ensures that someone cannot guess at the root password from the network.
Disallow root login remotely? [Y/n] <-- ENTER
... Success!
By default, MySQL comes with a database named 'test' that anyone can
access. This is also intended only for testing, and should be removed
before moving into a production environment.
Remove test database and access to it? [Y/n] <-- ENTER
- Dropping test database...
... Success!
- Removing privileges on test database...
... Success!
Reloading the privilege tables will ensure that all changes made so far
will take effect immediately.
Reload privilege tables now? [Y/n] <-- ENTER
... Success!
Cleaning up...
All done! If you've completed all of the above steps, your MySQL
installation should now be secure.
Thanks for using MySQL!
3Apache2のインストール
Apache2はCentOSパッケージとして利用できるため、次のようにインストールできます。
yum -y install httpd
次に、起動時にApacheを起動するようにシステムを構成します...
chkconfig --levels 235 httpd on
...そしてApacheを起動します:
/etc/init.d/httpd start
次に、ブラウザをhttp://192.168.0.100に移動すると、Apache2プレースホルダーページが表示されます。
ApacheのデフォルトのドキュメントルートはCentOSでは/var/ www / htmlであり、設定ファイルは/etc/httpd/conf/httpd.confです。追加の構成は/etc/httpd/conf.d/ディレクトリに保存されます。
4PHP5のインストール
PHP5とApachePHP5モジュールは次のようにインストールできます。
yum -y install php
その後、Apacheを再起動する必要があります:
/etc/init.d/httpd restart
5PHP5のテスト/PHP5インストールの詳細の取得
デフォルトのWebサイトのドキュメントルートは/var/ www/htmlです。次に、そのディレクトリに小さなPHPファイル(info.php)を作成し、ブラウザで呼び出します。このファイルには、インストールされているPHPのバージョンなど、PHPのインストールに関する多くの役立つ詳細が表示されます。
vi /var/www/html/info.php
<?php phpinfo(); ?> |
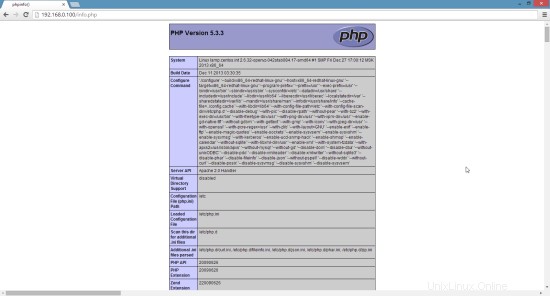
次に、そのファイルをブラウザ(http://192.168.0.100/info.phpなど)で呼び出します。
ご覧のとおり、PHP5は機能しており、サーバーAPI行に示されているように、Apache2.0ハンドラーを介して機能しています。さらに下にスクロールすると、PHP5ですでに有効になっているすべてのモジュールが表示されます。 MySQLはそこにリストされていません。つまり、PHP5ではMySQLがまだサポートされていません。
6PHP5でのMySQLサポートの取得
PHPでMySQLをサポートするには、php-mysqlパッケージをインストールします。他のPHP5モジュールをインストールすることをお勧めします。また、アプリケーションでそれらが必要になる場合もあります。次のような利用可能なPHP5モジュールを検索できます:
yum search php
必要なものを選び、次のようにインストールします:
yum -y install php-mysql
次のステップでは、Wordpress、Joomla、DrupalなどのCMSシステムに必要ないくつかの一般的なPHPモジュールをインストールします。
yum -y install php-gd php-imap php-ldap php-odbc php-pear php-xml php-xmlrpc php-mbstring php-mcrypt php-mssql php-snmp php-soap php-tidy curl curl-devel
APCは、PHP中間コードをキャッシュおよび最適化するための無料のオープンPHPオペコードキャッシャーです。これは、eAcceleratorやXcacheなどの他のPHPオペコードキャッシャーに似ています。 PHPページを高速化するために、これらのいずれかをインストールすることを強くお勧めします。
APCは次のようにインストールできます:
yum -y install php-pecl-apc
次に、Apache2を再起動します:
/etc/init.d/httpd restart
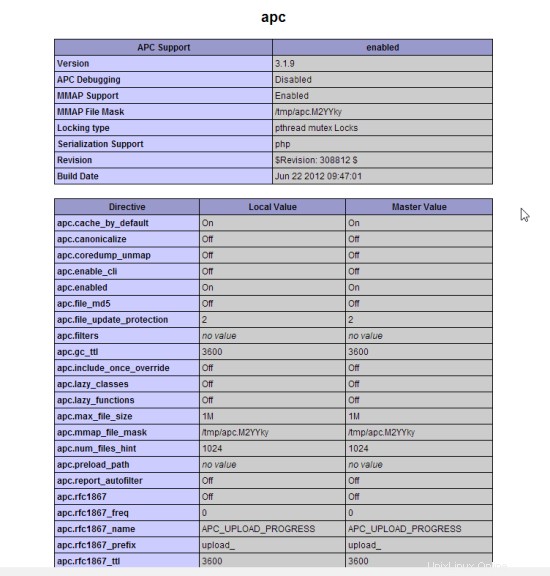
次に、ブラウザにhttp://192.168.0.100/info.phpをリロードし、モジュールセクションまでスクロールダウンします。これで、APCモジュールを含む多くの新しいモジュールが見つかるはずです:
7 phpMyAdmin
phpMyAdminは、MySQLデータベースを管理するためのWebインターフェイスです。
まず、公式のCentOS 6.5リポジトリではphpMyAdminを使用できないため、CentOSシステムでRPMforgeリポジトリを有効にします。
RPMforge GPGキーをインポートします:
rpm --import http://dag.wieers.com/rpm/packages/RPM-GPG-KEY.dag.txt
x86_64システムの場合:
yum -y install http://pkgs.repoforge.org/rpmforge-release/rpmforge-release-0.5.3-1.el6.rf.x86_64.rpm
i386システムの場合:
yum -y install http://pkgs.repoforge.org/rpmforge-release/rpmforge-release-0.5.3-1.el6.rf.i686.rpm
phpMyAdminは次のようにインストールできるようになりました:
yum -y install phpmyadmin
次に、phpMyAdminを設定します。 phpMyAdminがローカルホストからだけでなく接続を許可するようにApache構成を変更します(
vi /etc/httpd/conf.d/phpmyadmin.conf
# # Web application to manage MySQL # #<Directory "/usr/share/phpmyadmin"> # Order Deny,Allow # Deny from all # Allow from 127.0.0.1 #</Directory> Alias /phpmyadmin /usr/share/phpmyadmin Alias /phpMyAdmin /usr/share/phpmyadmin Alias /mysqladmin /usr/share/phpmyadmin |
次に、phpMyAdminの認証をcookieからhttp:
に変更します。vi /usr/share/phpmyadmin/config.inc.php
[...] /* Authentication type */ $cfg['Servers'][$i]['auth_type'] = 'http'; [...] |
Apacheを再起動します:
/etc/init.d/httpd restart
その後、http://192.168.0.100/phpmyadmin/からphpMyAdminにアクセスできます:

8リンク
- Apache:http://httpd.apache.org/
- PHP:http://www.php.net/
- MySQL:http://www.mysql.com/
- CentOS:http://www.centos.org/
- phpMyAdmin:http://www.phpmyadmin.net/