Shopwareは、オンラインビジネスを強化するために独自のeコマースWebサイトを開始するのに役立つ無料のオープンソースプラットフォームです。完全にレスポンシブなオンラインストアを構築およびカスタマイズするのに役立つ多くの便利なツールを提供します。 Magentoと非常によく似ています。 Magentoと比較すると、Shopwareは非常に強力で、使いやすく、柔軟なアプリケーションです。最新のユーザーインターフェイスを使用して、どのデバイスからでもコンテンツや製品を簡単に作成および管理できます。
このチュートリアルでは、Nginxを使用してShopwareをインストールし、CentOS8にSSLを暗号化する方法を示します。
- CentOS8を実行しているサーバー。
- サーバーIPで指定された有効なドメイン名。
- ルートパスワードはサーバーで構成されています。
LEMPサーバーをインストールする
ShopwareはWebサーバー上で実行され、SymfonyおよびZendコンポーネントを使用してPHP上に構築され、データベースバックエンドとしてMySQLまたはMariaDBを使用します。そのため、Nginx、MariaDB、PHP、およびその他の拡張機能をサーバーにインストールする必要があります。次のコマンドですべてをインストールできます:
dnf install nginx mariadb-server php php-cli php-intl php-fpm php-common php-mysqli php-curl php-json php-zip php-gd php-xml php-mbstring php-opcache unzip -y
すべてのパッケージがインストールされたら、Nginx、MariaDB、およびPHP-FPMサービスを開始し、次のコマンドを使用してシステムの再起動時にそれらを開始できるようにします。
systemctl start mariadb
systemctl enable mariadb
systemctl start nginx
systemctl start php-fpm
systemctl enable nginx
systemctl enable php-fpm
終了したら、次のステップに進むことができます。
PHP-FPMを構成する
デフォルトでは、PHP-FPMはapacheユーザーおよびグループとして実行するように構成されています。したがって、Nginxユーザーおよびグループとして実行するように構成する必要があります。ファイル/etc/php-fpm.d/www.confを編集することでそれを行うことができます:
nano /etc/php-fpm.d/www.conf
次の行を変更します:
user = nginx
group = nginx
ファイルを保存して閉じてから、セッションディレクトリを作成し、次のコマンドを使用して適切な所有権を設定します。
mkdir -p /var/lib/php/session
chown -R nginx:nginx /var/lib/php/session
次に、php.iniファイルを編集し、いくつかの推奨設定を微調整します。
nano /etc/php.ini
次の行を変更します:
memory_limit = 512M
upload_max_filesize = 20M
date.timezone = Asia/Kolkata
ファイルを保存して閉じてから、PHP-FPMサービスを再起動して変更を適用します。
systemctl restart php-fpm
次に、Shopwareのデータベースとユーザーを作成する必要があります。まず、次のコマンドを使用してMariaDBに接続します。
mysql
接続したら、次のコマンドを使用してデータベースとユーザーを作成します。
MariaDB [(none)]> CREATE DATABASE shopware;
MariaDB [(none)]> GRANT ALL ON shopware.* TO 'shopware' IDENTIFIED BY 'password';
次に、特権をフラッシュし、次のコマンドでMariaDBを終了します。
MariaDB [(none)]> FLUSH PRIVILEGES;
MariaDB [(none)]> EXIT;
終了したら、次のステップに進むことができます。
次に、公式Webサイト用に最新バージョンのShopwareをダウンロードする必要があります。まず、Nginxルートディレクトリ内にShopwareのディレクトリを作成します:
mkdir /var/www/html/shopware
次に、次のコマンドを使用してショップウェアをダウンロードします。
wget https://www.shopware.com/en/Download/redirect/version/sw6/file/install_v6.3.5.0_ba08dbfc07784b5cefe7837f2abbda69dbf5b8b7.zip -O shopware.zip
ダウンロードが完了したら、ダウンロードしたファイルをショップウェアディレクトリに解凍します。
unzip shopware.zip -d /var/www/html/shopware
次に、次のコマンドを使用して適切な権限と所有権を設定します。
chown -R nginx:nginx /var/www/html/shopware
chmod -R 775 /var/www/html/shopware
終了したら、次のステップに進むことができます。
次に、次のコマンドを使用して、Shopware用のNginx仮想ホスト構成ファイルを作成します。
nano /etc/nginx/conf.d/shopware.conf
次の行を追加します:
server {
    listen 80;

    # Handle / to index.php
    index index.php;

    # Our server name
    server_name shopware.example.com;

    # Where the code is located
    root /var/www/html/shopware/public;

    # Needed for Shopware install / update
    location /recovery/install {
        index index.php;
        try_files $uri /recovery/install/index.php$is_args$args;
    }

    location /recovery/update/ {
        if (!-e $request_filename){
            rewrite . /recovery/update/index.php last;
        }
    }

    # Forward any not found file to index.php. Also allows to have beautiful urls like /homemade-products/
    location / {
        try_files $uri /index.php$is_args$args;
    }

    # Let php-fpm handle .php files
    location ~ \.php$ {
        fastcgi_split_path_info ^(.+\.php)(/.+)$;
        include fastcgi.conf;
        fastcgi_param HTTP_PROXY "";
        fastcgi_buffers 8 16k;
        fastcgi_buffer_size 32k;
        fastcgi_read_timeout 300s;
        client_body_buffer_size 128k;
        fastcgi_pass unix:/run/php-fpm/www.sock;
        http2_push_preload on;
    }
}
ファイルを保存して閉じ、次のコマンドを使用して構文エラーがないかNginxを確認します。
nginx -t
次の出力が得られるはずです:
nginx: the configuration file /etc/nginx/nginx.conf syntax is ok
nginx: configuration file /etc/nginx/nginx.conf test is successful
次に、Nginxサービスを再起動して、変更を適用します。
systemctl restart nginx
以下のコマンドを使用して、Nginxのステータスを確認することもできます:
systemctl status nginx
次の出力が得られるはずです:
? nginx.service - The nginx HTTP and reverse proxy server
   Loaded: loaded (/usr/lib/systemd/system/nginx.service; disabled; vendor preset: disabled)
  Drop-In: /usr/lib/systemd/system/nginx.service.d
           ??php-fpm.conf
   Active: active (running) since Tue 2021-02-02 00:40:04 EST; 19s ago
  Process: 76059 ExecStart=/usr/sbin/nginx (code=exited, status=0/SUCCESS)
  Process: 76057 ExecStartPre=/usr/sbin/nginx -t (code=exited, status=0/SUCCESS)
  Process: 76054 ExecStartPre=/usr/bin/rm -f /run/nginx.pid (code=exited, status=0/SUCCESS)
 Main PID: 76060 (nginx)
    Tasks: 3 (limit: 12523)
   Memory: 5.5M
   CGroup: /system.slice/nginx.service
           ??76060 nginx: master process /usr/sbin/nginx
           ??76061 nginx: worker process
           ??76062 nginx: worker process

Feb 02 00:40:04 centos8 systemd[1]: Stopped The nginx HTTP and reverse proxy server.
Feb 02 00:40:04 centos8 systemd[1]: Starting The nginx HTTP and reverse proxy server...
Feb 02 00:40:04 centos8 nginx[76057]: nginx: the configuration file /etc/nginx/nginx.conf syntax is ok
Feb 02 00:40:04 centos8 nginx[76057]: nginx: configuration file /etc/nginx/nginx.conf test is successful
Feb 02 00:40:04 centos8 systemd[1]: Started The nginx HTTP and reverse proxy server.
デフォルトでは、SELinuxはCentOS 8で有効になっているため、ShopwareのSELinuxコンテキストを構成する必要があります。次のコマンドで構成できます:
setsebool httpd_can_network_connect on -P
chcon -R -u system_u -t httpd_sys_rw_content_t -r object_r /var/www/html/shopware
次に、次のコマンドを使用して、ポート80と443がfirewalldを通過できるようにします。
firewall-cmd --permanent --add-service=http
firewall-cmd --permanent --add-service=https
firewall-cmd --reload
終了したら、次のステップに進むことができます。
次に、Webブラウザーを開き、URL http://shopware.example.comを入力します。 。
言語を選択して、次へをクリックします ボタン。すべての要件が満たされていることを確認してから、次へをクリックします ボタン。次のページが表示されます:

GTCに同意し、次へをクリックします ボタン。次のページが表示されます:
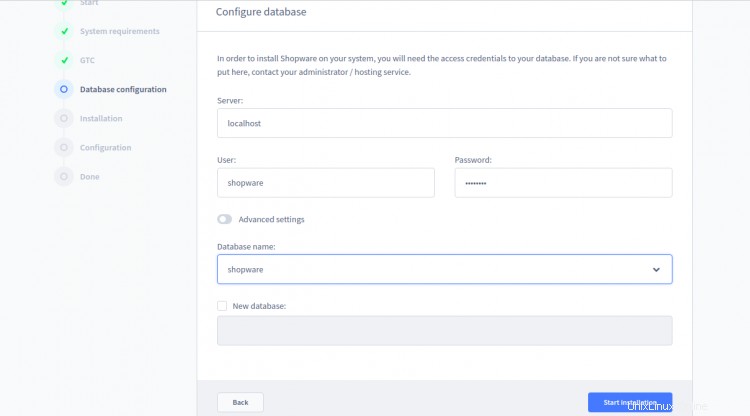
データベース、ユーザー名、パスワードを入力し、開始をクリックします インストール ボタン。インストールが完了すると、次のページが表示されます。
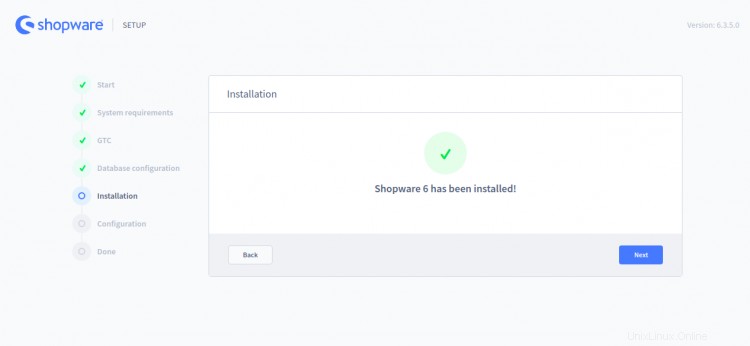
次のページをクリックします。ショップ名、メールアドレス、通貨、国、管理者ユーザー名、パスワードを入力して、次へをクリックするよう求められます。 ボタン。 Shopwareダッシュボードにリダイレクトされます:

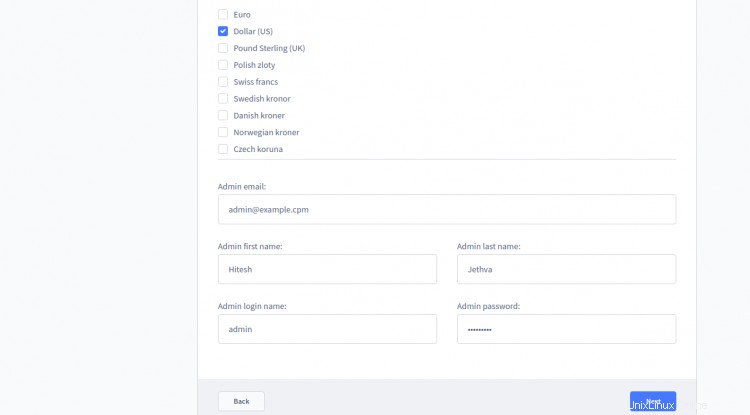
すべての情報を入力して、[次へ]ボタンをクリックします。次のページが表示されます:
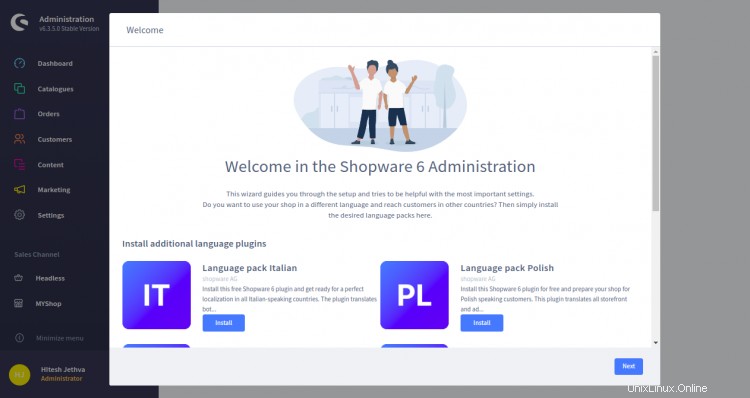
目的の言語プラグインをインストールして、次へをクリックします ボタン。次のページが表示されます:

デモデータをインストールするか、これをスキップして次へをクリックします ボタン。次のページが表示されます:
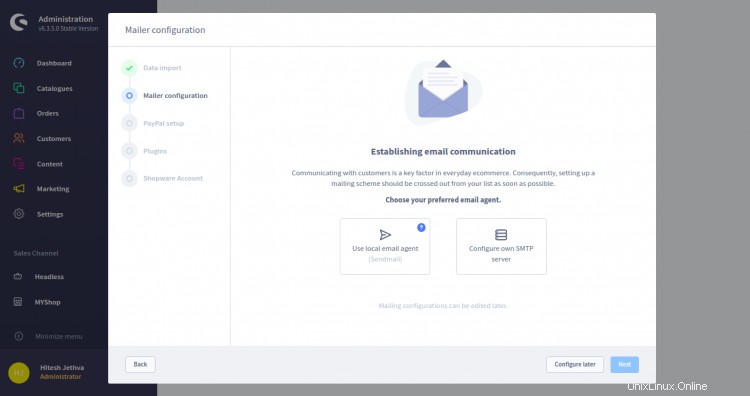
構成をクリックします 後で 。次のページが表示されます:

スキップをクリックします ボタン。次のページが表示されます:
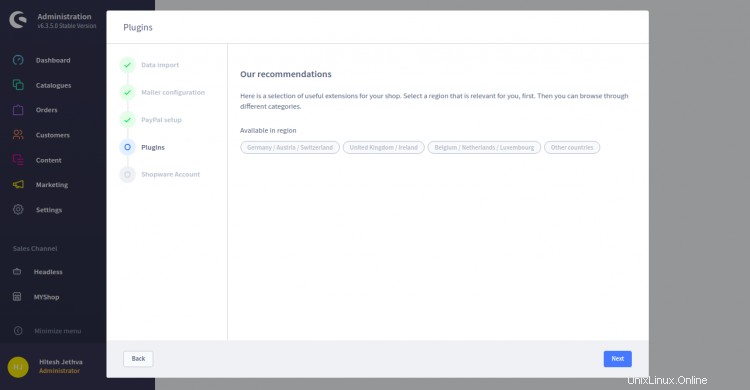
次へをクリックします ボタン。次のページが表示されます:
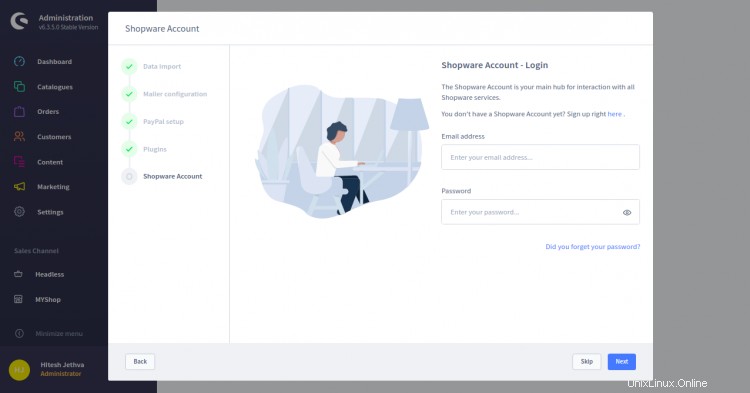
スキップをクリックします ボタン。次のページが表示されます:
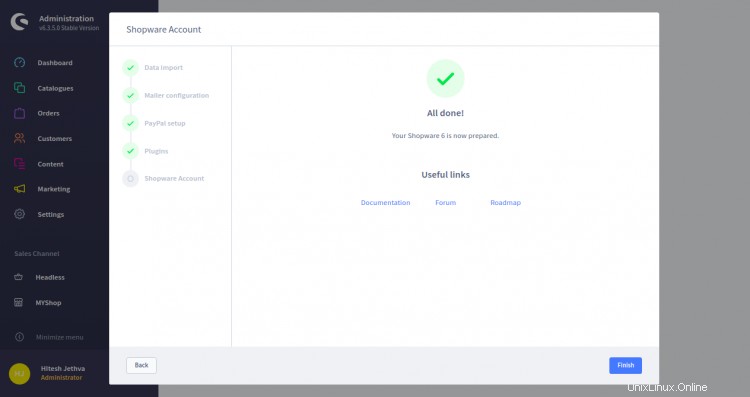
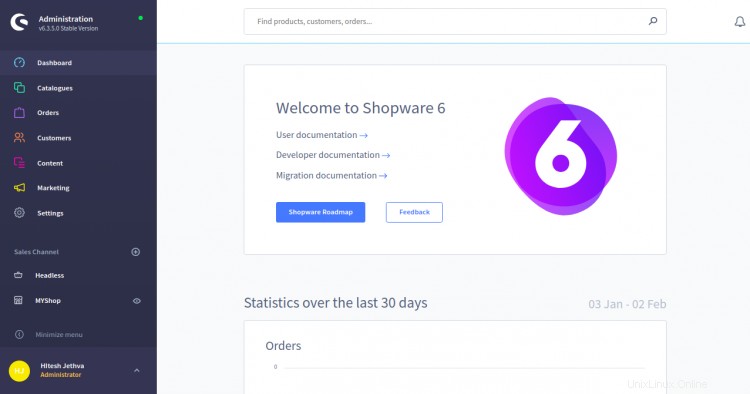
完了をクリックします ボタン。 Shopwareのウェルカムページが表示されます:
次に、システムにCertbotユーティリティをインストールして、Let'sChatドメインのLet'sEncryptSSLをダウンロードしてインストールする必要があります。
次のコマンドを使用して、Certbotクライアントをインストールできます。
wget https://dl.eff.org/certbot-auto
mv certbot-auto /usr/local/bin/certbot-auto
chown root /usr/local/bin/certbot-auto
chmod 0755 /usr/local/bin/certbot-auto
次に、次のコマンドを使用して、letsドメインのSSL証明書を取得してインストールします。
certbot-auto --nginx -d shopware.example.com
上記のコマンドは、最初に必要なすべての依存関係をサーバーにインストールします。インストールすると、以下に示すように、メールアドレスを入力して利用規約に同意するよう求められます。
Saving debug log to /var/log/letsencrypt/letsencrypt.log
Plugins selected: Authenticator nginx, Installer nginx
Enter email address (used for urgent renewal and security notices) (Enter 'c' to
cancel): [email protected]

- - - - - - - - - - - - - - - - - - - - - - - - - - - - - - - - - - - - - - - -
Please read the Terms of Service at
https://letsencrypt.org/documents/LE-SA-v1.2-November-15-2017.pdf. You must
agree in order to register with the ACME server at
https://acme-v02.api.letsencrypt.org/directory
- - - - - - - - - - - - - - - - - - - - - - - - - - - - - - - - - - - - - - - -
(A)gree/(C)ancel: A

- - - - - - - - - - - - - - - - - - - - - - - - - - - - - - - - - - - - - - - -
Would you be willing to share your email address with the Electronic Frontier
Foundation, a founding partner of the Let's Encrypt project and the non-profit
organization that develops Certbot? We'd like to send you email about our work
encrypting the web, EFF news, campaigns, and ways to support digital freedom.
- - - - - - - - - - - - - - - - - - - - - - - - - - - - - - - - - - - - - - - -
(Y)es/(N)o: Y

Obtaining a new certificate
Performing the following challenges:
http-01 challenge for shopware.example.com
Waiting for verification...
Cleaning up challenges
Deploying Certificate to VirtualHost /etc/nginx/conf.d/shopware.conf
次に、以下に示すように、HTTPトラフィックをHTTPSにリダイレクトするかどうかを選択します。
Please choose whether or not to redirect HTTP traffic to HTTPS, removing HTTP access.
- - - - - - - - - - - - - - - - - - - - - - - - - - - - - - - - - - - - - - - -
1: No redirect - Make no further changes to the webserver configuration.
2: Redirect - Make all requests redirect to secure HTTPS access. Choose this for
new sites, or if you're confident your site works on HTTPS. You can undo this
change by editing your web server's configuration.
- - - - - - - - - - - - - - - - - - - - - - - - - - - - - - - - - - - - - - - -
Select the appropriate number [1-2] then [enter] (press 'c' to cancel): 2
2と入力し、Enterキーを押して続行します。インストールが完了すると、次の出力が表示されます。
Redirecting all traffic on port 80 to ssl in /etc/nginx/conf.d/shopware.conf

- - - - - - - - - - - - - - - - - - - - - - - - - - - - - - - - - - - - - - - -
Congratulations! You have successfully enabled https://shopware.example.com

You should test your configuration at:
https://www.ssllabs.com/ssltest/analyze.html?d=shopware.example.com
- - - - - - - - - - - - - - - - - - - - - - - - - - - - - - - - - - - - - - - -

IMPORTANT NOTES:
 - Congratulations! Your certificate and chain have been saved at:
   /etc/letsencrypt/live/shopware.example.com/fullchain.pem
   Your key file has been saved at:
   /etc/letsencrypt/live/shopware.example.com/privkey.pem
   Your cert will expire on 2021-04-2. To obtain a new or tweaked
   version of this certificate in the future, simply run certbot-auto
   again with the "certonly" option. To non-interactively renew *all*
   of your certificates, run "certbot-auto renew"
 - If you like Certbot, please consider supporting our work by:

   Donating to ISRG / Let's Encrypt:   https://letsencrypt.org/donate
   Donating to EFF:                    https://eff.org/donate-le
これで、URLhttps://shopware.example.comを使用してShopwareに安全にアクセスできます。
おめでとう!これで、CentOS8にNginxとLet'sEncrypt SSLを使用してShopwareを正常にインストールおよび構成できました。これで、Shopwareを使用して独自のオンラインストアを簡単にホストできます。ご不明な点がございましたら、お気軽にお問い合わせください。