Drupalは、無料のオープンソースでスケーラブルなコンテンツ管理システムであり、個人があらゆる種類のWebサイトを作成および管理するために使用できます。 PHPで記述されており、MySQL/MariaDBを使用してデータを保存します。 Drupalは、何千ものアドオンによって拡張できる豊富な機能セットを提供します。 Drupalは、Apache、Nginx、IIS、Lighttpd、データベースMySQL、MariaDB、MongoDB、SQLite、PostgreSQL、MSSQLサーバーなどの多くのWebサーバーをサポートしています。 Drupalには、コーディングの知識がなくてもWebサイトを作成できるシンプルでユーザーフレンドリーなWebUIが付属しています。
このチュートリアルでは、CentOS8サーバーにDrupal8をインストールし、Let'sEncryptの無料SSLで保護する方法を紹介します。
- CentOS8を実行しているサーバー。
- サーバーIPで指定された有効なドメイン名
- ルートパスワードはサーバーで構成されています。
Nginx、MariaDB、PHPをインストール
開始する前に、サーバーにLEMPサーバーをインストールする必要があります。次のコマンドを実行してインストールできます:
dnf install nginx mariadb-server php php-fpm php-cli php-mbstring php-gd php-xml php-curl php-mysqlnd php-pdo php-json php-opcache -y
インストールしたら、Nginx、MariaDB、php-fpmサービスを起動し、次のコマンドを使用してシステムの再起動後に起動できるようにします。
systemctl start nginx
 systemctl start php-fpm
 systemctl start mariadb
 systemctl enable nginx
 systemctl enable php-fpm
 systemctl enable mariadb
デフォルトでは、MariaDBは保護されていないため、保護する必要があります。次のコマンドを実行することで保護できます:
mysql_secure_installation
以下に示すように、すべての質問に答えてください。
Enter current password for root (enter for none):
Set root password? [Y/n] Y
New password:
Re-enter new password:
Remove anonymous users? [Y/n] Y
Disallow root login remotely? [Y/n] Y
Remove test database and access to it? [Y/n] Y
Reload privilege tables now? [Y/n] Y
完了したら、次のコマンドを使用してMariaDBシェルにログインします。
mysql -u root -p
プロンプトが表示されたらrootパスワードを入力し、次のコマンドを使用してDrupalのデータベースとユーザーを作成します。
MariaDB [(none)]> CREATE DATABASE drupaldb CHARACTER SET utf8mb4 COLLATE utf8mb4_general_ci;
 MariaDB [(none)]> CREATE USER [email protected] IDENTIFIED BY "password";
次に、次のコマンドを使用してdrupaldbにすべての権限を付与します。
MariaDB [(none)]> GRANT ALL ON drupaldb.* TO [email protected] IDENTIFIED BY "password";
次に、特権をフラッシュし、次のコマンドを使用してMariaDBシェルを終了します。
MariaDB [(none)]> FLUSH PRIVILEGES;
 MariaDB [(none)]> EXIT;
まず、Drupalの最新バージョンを公式Webサイトからダウンロードする必要があります。次のコマンドでダウンロードできます:
wget https://ftp.drupal.org/files/projects/drupal-8.7.10.tar.gz
ダウンロードしたら、次のコマンドを使用してダウンロードしたファイルを抽出します。
tar -xvzf drupal-8.7.10.tar.gz
次に、次のコマンドを使用して、抽出したディレクトリをNginxWebルートディレクトリに移動します。
mv drupal-8.7.10 /var/www/html/drupal
次に、Webサイトファイルを保存するディレクトリを作成し、以下に示すようにdefault.settings.phpファイルの名前を変更します。
mkdir /var/www/html/drupal/sites/default/files
 cp /var/www/html/drupal/sites/default/default.settings.php /var/www/html/drupal/sites/default/settings.php
次に、以下に示すように、Drupalディレクトリの所有権をnginxに変更します。
chown -R nginx:nginx /var/www/html/drupal/
Drupal用にNginxを構成する
まず、次のコマンドを使用してDrupalのphp-fpm構成ファイルを作成します。
nano /etc/php-fpm.d/drupal.conf
次の行を追加します:
[drupal]
user = nginx
group = nginx
listen.owner = nginx
listen.group = nginx
listen = /run/php-fpm/drupal.sock
pm = ondemand
pm.max_children =  50
pm.process_idle_timeout = 10s
pm.max_requests = 500
chdir = /
終了したら、ファイルを保存して閉じます。次に、Drupal用のNginx仮想ホスト構成ファイルを作成します。
nano /etc/nginx/conf.d/drupal.conf
次の行を追加します:
server {
    listen 80;
    server_name example.com;

    root /var/www/html/drupal;

    access_log /var/log/nginx/example.com.access.log;
    error_log /var/log/nginx/example.com.error.log;

    location = /favicon.ico {
        log_not_found off;
        access_log off;
    }

    location = /robots.txt {
        allow all;
        log_not_found off;
        access_log off;
    }

    location ~ \..*/.*\.php$ {
        return 403;
    }

    location ~ ^/sites/.*/private/ {
        return 403;
    }

    # Block access to scripts in site files directory
    location ~ ^/sites/[^/]+/files/.*\.php$ {
        deny all;
    }
    location ~ (^|/)\. {
        return 403;
    }

    location / {
        try_files $uri /index.php?$query_string;
    }

    location @rewrite {
        rewrite ^/(.*)$ /index.php?q=$1;
    }
    location ~ /vendor/.*\.php$ {
        deny all;
        return 404;
    }


    location ~ '\.php$|^/update.php' {
        fastcgi_split_path_info ^(.+?\.php)(|/.*)$;
        include fastcgi_params;
       	# Block httpoxy attacks. See https://httpoxy.org/.
        fastcgi_param HTTP_PROXY "";
        fastcgi_param SCRIPT_FILENAME $document_root$fastcgi_script_name;
        fastcgi_param PATH_INFO $fastcgi_path_info;
        fastcgi_param QUERY_STRING $query_string;
        fastcgi_intercept_errors on;
        fastcgi_pass unix:/run/php-fpm/drupal.sock;
    }
    location ~ ^/sites/.*/files/styles/ { # For Drupal >= 7
        try_files $uri @rewrite;
    }

    # Handle private files through Drupal. Private file's path can come
    # with a language prefix.
    location ~ ^(/[a-z\-]+)?/system/files/ { # For Drupal >= 7
        try_files $uri /index.php?$query_string;
    }

    location ~* \.(js|css|png|jpg|jpeg|gif|ico|svg)$ {
        try_files $uri @rewrite;
        expires max;
        log_not_found off;
    }
}
ファイルを保存して閉じます。次に、php-fpmとNginxサービスを再起動して、変更を適用します。
systemctl restart php-fpm
 systemctl restart nginx
デフォルトでは、SELinuxはCentOS 8で有効になっているため、Drupalが正しく機能するようにSELinuxを構成する必要があります。
まず、次のコマンドを使用して、Drupalがパブリックファイルとプライベートファイルのディレクトリに書き込むことができるようにします。
semanage fcontext -a -t httpd_sys_rw_content_t "/var/www/html/drupal(/.*)?"
 semanage fcontext -a -t httpd_sys_rw_content_t '/var/www/html/drupal/sites/default/settings.php'
 semanage fcontext -a -t httpd_sys_rw_content_t '/var/www/html/drupal/sites/default/files'
 restorecon -Rv /var/www/html/drupal
 restorecon -v /var/www/html/drupal/sites/default/settings.php
 restorecon -Rv /var/www/html/drupal/sites/default/files
次に、Drupalが次のコマンドを使用して送信メールを送信できるようにします。
setsebool -P httpd_can_sendmail on
次に、外部ネットワークからのHTTPおよびHTTPSサービスを許可するファイアウォールルールを作成する必要があります。次のコマンドで許可できます:
firewall-cmd --permanent --add-service=http
firewall-cmd --permanent --add-service=https
 firewall-cmd --reload
これで、Drupalがインストールおよび構成されました。 Let'sEncryptの無料SSLで保護する時が来ました。
そのためには、サーバーにcertbotクライアントをダウンロードする必要があります。次のコマンドを実行して、正しい権限をダウンロードして設定できます。
wget https://dl.eff.org/certbot-auto
 mv certbot-auto /usr/local/bin/certbot-auto
 chown root /usr/local/bin/certbot-auto
 chmod 0755 /usr/local/bin/certbot-auto
次に、次のコマンドを実行して、DrupalWebサイトのSSL証明書を取得してインストールします。
certbot-auto --nginx -d example.com
上記のコマンドは、最初に必要なすべての依存関係をサーバーにインストールします。インストールすると、以下に示すように、メールアドレスを入力して利用規約に同意するよう求められます。
Saving debug log to /var/log/letsencrypt/letsencrypt.log
Plugins selected: Authenticator apache, Installer apache
Enter email address (used for urgent renewal and security notices) (Enter 'c' to
cancel): [email protected]

- - - - - - - - - - - - - - - - - - - - - - - - - - - - - - - - - - - - - - - -
Please read the Terms of Service at
https://letsencrypt.org/documents/LE-SA-v1.2-November-15-2017.pdf. You must
agree in order to register with the ACME server at
https://acme-v02.api.letsencrypt.org/directory
- - - - - - - - - - - - - - - - - - - - - - - - - - - - - - - - - - - - - - - -
(A)gree/(C)ancel: A

- - - - - - - - - - - - - - - - - - - - - - - - - - - - - - - - - - - - - - - -
Would you be willing to share your email address with the Electronic Frontier
Foundation, a founding partner of the Let's Encrypt project and the non-profit
organization that develops Certbot? We'd like to send you email about our work
encrypting the web, EFF news, campaigns, and ways to support digital freedom.
- - - - - - - - - - - - - - - - - - - - - - - - - - - - - - - - - - - - - - - -
(Y)es/(N)o: Y


Obtaining a new certificate
Performing the following challenges:
http-01 challenge for example.com
Waiting for verification...
Cleaning up challenges
Deploying Certificate to VirtualHost /etc/nginx/conf.d/drupal.conf
次に、以下に示すように、HTTPトラフィックをHTTPSにリダイレクトするかどうかを選択する必要があります。
Please choose whether or not to redirect HTTP traffic to HTTPS, removing HTTP access.
- - - - - - - - - - - - - - - - - - - - - - - - - - - - - - - - - - - - - - - -
1: No redirect - Make no further changes to the webserver configuration.
2: Redirect - Make all requests redirect to secure HTTPS access. Choose this for
new sites, or if you're confident your site works on HTTPS. You can undo this
change by editing your web server's configuration.
- - - - - - - - - - - - - - - - - - - - - - - - - - - - - - - - - - - - - - - -
Select the appropriate number [1-2] then [enter] (press 'c' to cancel): 2
2と入力し、Enterキーを押して続行します。インストールが完了すると、次の出力が表示されます。
Redirecting all traffic on port 80 to ssl in /etc/nginx/conf.d/drupal.conf

- - - - - - - - - - - - - - - - - - - - - - - - - - - - - - - - - - - - - - - -
Congratulations! You have successfully enabled https://example.com

You should test your configuration at:
https://www.ssllabs.com/ssltest/analyze.html?d=example.com
- - - - - - - - - - - - - - - - - - - - - - - - - - - - - - - - - - - - - - - -

IMPORTANT NOTES:
 - Congratulations! Your certificate and chain have been saved at:
   /etc/letsencrypt/live/example.com/fullchain.pem
   Your key file has been saved at:
   /etc/letsencrypt/live/example.com/privkey.pem
   Your cert will expire on 2020-03-23. To obtain a new or tweaked
   version of this certificate in the future, simply run certbot-auto
   again with the "certonly" option. To non-interactively renew *all*
   of your certificates, run "certbot-auto renew"
 - If you like Certbot, please consider supporting our work by:

   Donating to ISRG / Let's Encrypt:   https://letsencrypt.org/donate
   Donating to EFF:                    https://eff.org/donate-le
DrupalWebサイトにアクセス
次に、Webブラウザーを開き、URL https://example.comを入力します。 。次のページにリダイレクトされます:
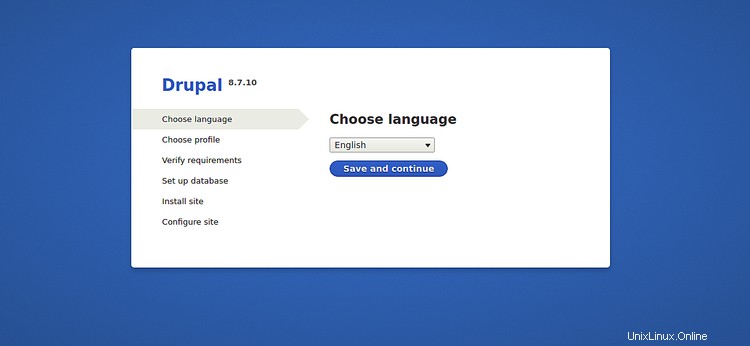
目的の言語を選択し、保存して続行をクリックします ボタン。次のページが表示されます:
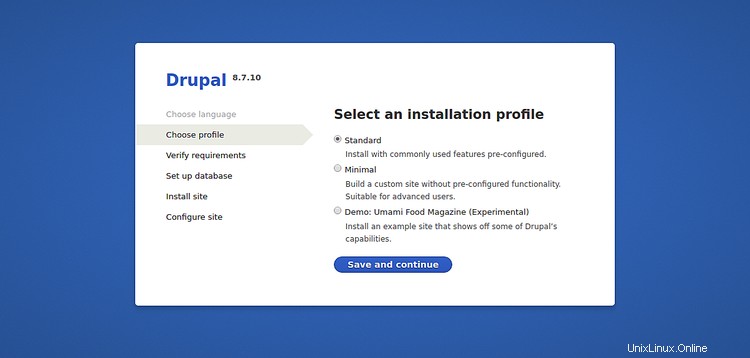
インストールプロファイルを選択し、保存して続行をクリックします ボタン。次のページが表示されます:
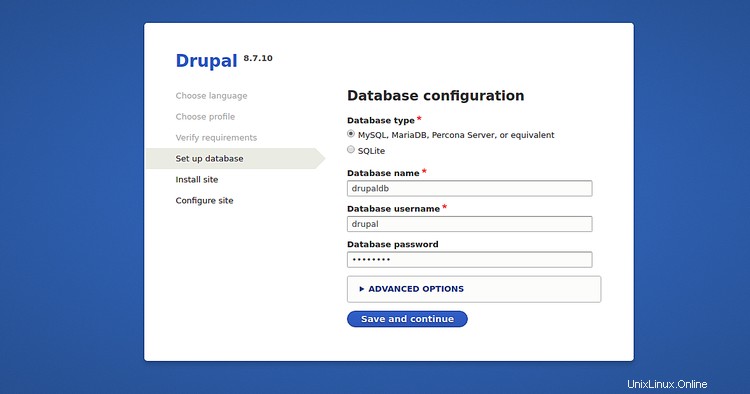
データベースの詳細を入力し、保存して続行をクリックします ボタン。次のページが表示されます:
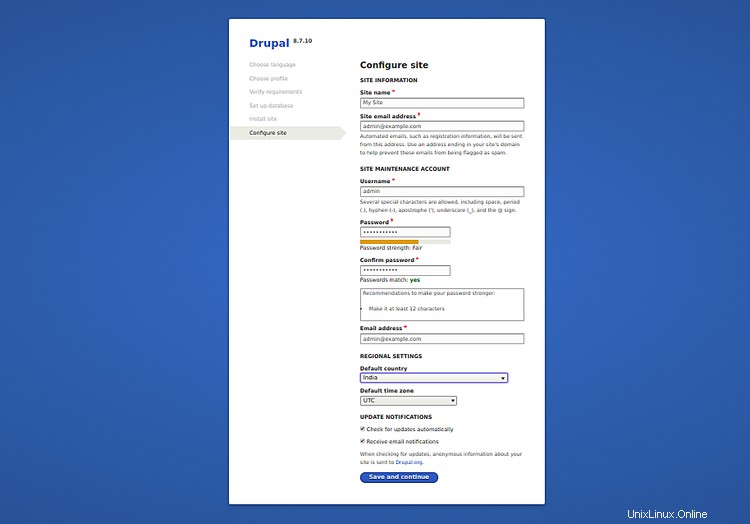
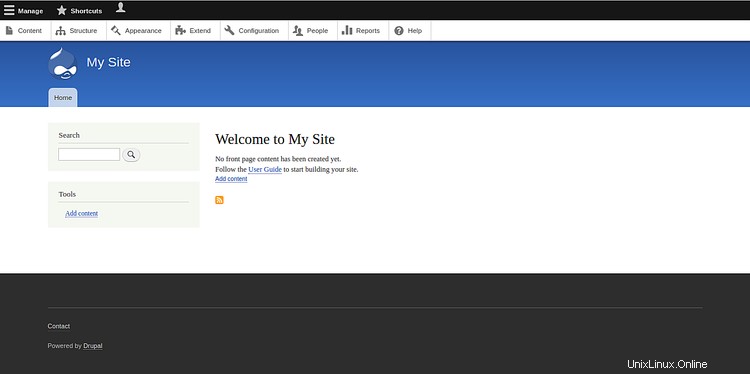
サイト名、管理者ユーザー名、パスワードを入力し、保存して続行をクリックします ボタン。次のページにDrupalダッシュボードが表示されます:
おめでとう!これで、CentOS8サーバーにDrupalが正常にインストールされて保護されました。