mod_ssl モジュールは、ApacheHTTPサーバーのSSLv3およびTLSv1.xサポートを提供します。この記事では、基本的なステップバイステップのmod_sslを提供します。 httpdを使用したRHEL8/ CentOS8Linuxサーバーでの構成 ApacheWebサーバー。
このチュートリアルでは、次のことを学びます。
-
mod_sslのインストール方法 -
mod_sslを有効にする方法 - 自己署名証明書を作成する方法
- 既存のSSL証明書を
httpdに含める方法 構成 - すべての非SSLHTTPトラフィックをHTTPSにリダイレクトする方法
 基本的な
基本的なmod_ssl ApacheWebサーバーを使用したRHEL8/CentOS8でのモジュール構成 使用されるソフトウェア要件と規則
| カテゴリ | 使用する要件、規則、またはソフトウェアバージョン |
|---|---|
| RHEL 8 / CentOS 8 | |
| mod_ssl-2.4.35-6.el8 | |
rootまたはsudoを介したLinuxシステムへの特権アクセス コマンド。 | |
# –指定されたLinuxコマンドは、rootユーザーとして直接、またはsudoを使用して、root権限で実行する必要があります。 コマンド$ –特定のLinuxコマンドを通常の非特権ユーザーとして実行する必要があります |
mod_sslをRHEL8/CentOS8にインストールする方法ステップバイステップの説明
この記事は、RHEL 8 /CentOS8サーバーでApacheWebサーバーの基本的なインストールと構成をすでに実行していることを前提としています。
-
mod_sslをインストールします モジュール。最初のステップは、mod_sslをインストールすることです。dnfを使用するモジュール コマンド:# dnf install mod_ssl
-
mod_sslを有効にする モジュール。mod_sslをインストールしたばかりの場合 、モジュールはまだ有効になっていない可能性があります。mod_sslかどうかをテストするには 有効になっていますexecute:# apachectl -M | grep ssl
上記のコマンドからの出力が表示されない場合は、
mod_ssl有効になっていません。mod_sslを有効にするには モジュールはhttpdを再起動します Apache Webサーバー:# systemctl restart httpd # apachectl -M | grep ssl ssl_module (shared)
- TCPポート443を開いて、
httpsで着信トラフィックを許可します プロトコル:# firewall-cmd --zone=public --permanent --add-service=https success # firewall-cmd --reload success
<中央>注
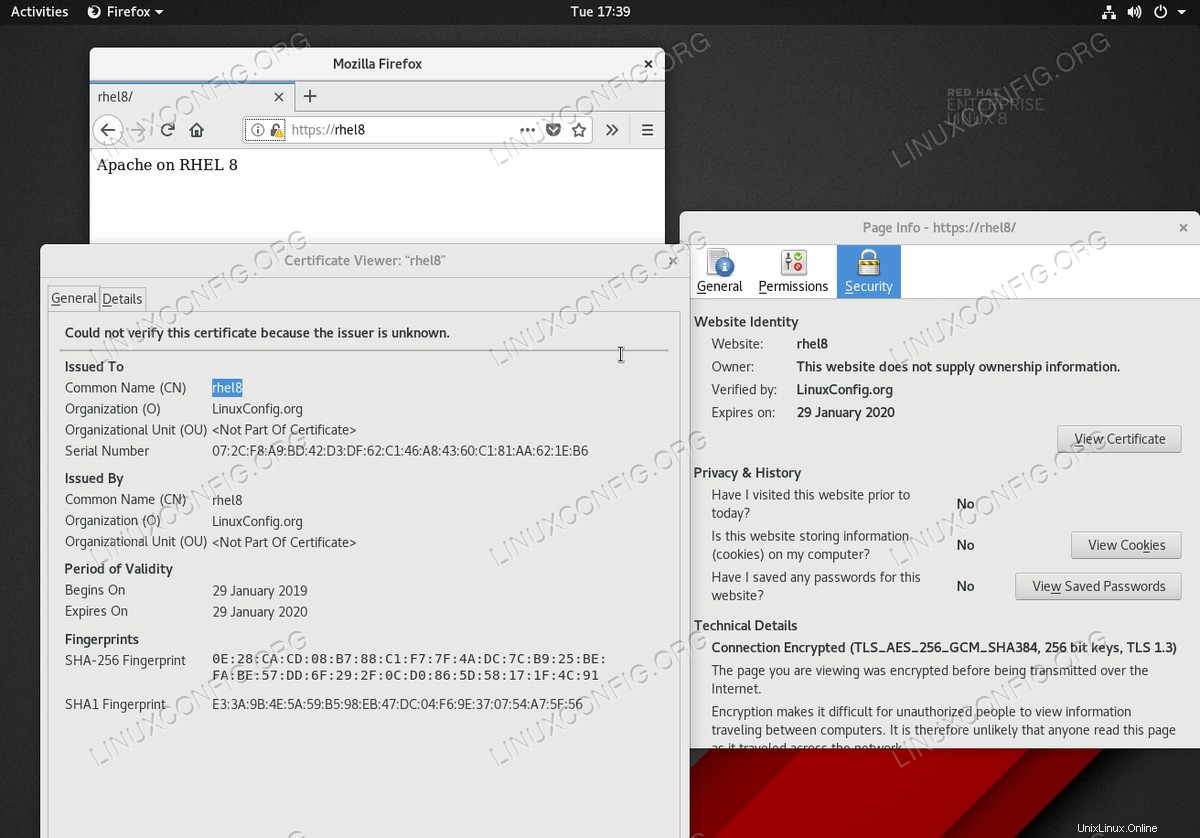
この時点で、HTTPSプロトコルを介してApacheWebサーバーにアクセスできるようになります。ブラウザをhttps://your-server-ipに移動します またはhttps://your-server-hostnamemod_sslを確認する 構成。 - SSL証明書を生成します。サーバーに適切なSSL証明書をまだ持っていない場合は、以下のコマンドを使用して新しい自己署名証明書を生成します。
たとえば、ホスト
rhel8の新しい自己署名証明書を生成してみましょう。 365日の有効期限:# openssl req -newkey rsa:2048 -nodes -keyout /etc/pki/tls/private/httpd.key -x509 -days 365 -out /etc/pki/tls/certs/httpd.crt Generating a RSA private key ................+++++ ..........+++++ writing new private key to '/etc/pki/tls/private/httpd.key' ----- You are about to be asked to enter information that will be incorporated into your certificate request. What you are about to enter is what is called a Distinguished Name or a DN. There are quite a few fields but you can leave some blank For some fields there will be a default value, If you enter '.', the field will be left blank. ----- Country Name (2 letter code) [XX]:AU State or Province Name (full name) []: Locality Name (eg, city) [Default City]: Organization Name (eg, company) [Default Company Ltd]:LinuxConfig.org Organizational Unit Name (eg, section) []: Common Name (eg, your name or your server's hostname) []:rhel8 Email Address []:
上記のコマンドが正常に実行されると、次の2つのSSLファイルが作成されます。
# ls -l /etc/pki/tls/private/httpd.key /etc/pki/tls/certs/httpd.crt
-rw-r--r--. 1 root root 1269 Jan 29 16:05 /etc/pki/tls/certs/httpd.crt
-rw-------. 1 root root 1704 Jan 29 16:05 /etc/pki/tls/private/httpd.key
- 新しいSSL証明書を使用してApacheWebサーバーを構成します。新しく作成したSSL証明書をApacheWebサーバー構成に含めるには、
/etc/httpd/conf.d/ssl.confを開きます。 管理者権限でファイルを作成し、次の行を変更します。FROM: SSLCertificateFile /etc/pki/tls/certs/localhost.crt SSLCertificateKeyFile /etc/pki/tls/private/localhost.key TO: SSLCertificateFile /etc/pki/tls/certs/httpd.crt SSLCertificateKeyFile /etc/pki/tls/private/httpd.key
準備ができたら、
httpdをリロードします Apache Webサーバー:# systemctl reload httpd
-
mod_sslをテストします Webブラウザをhttps://your-server-ipに移動して構成します。 またはhttps://your-server-hostnameURL。 - オプションの手順として、すべてのHTTPトラフィックをHTTPS.Tにリダイレクトします。これにより、新しいファイル
/etc/httpd/conf.d/redirect_http.confを作成します。 次の内容で:<VirtualHost _default_:80> Servername rhel8 Redirect permanent / https://rhel8/ </VirtualHost>変更を適用するには、
httpdをリロードします デーモン:# systemctl reload httpd
上記の設定は、
http://rhel8からの着信トラフィックをリダイレクトしますhttps://rhel8へ URL。 RHELLinuxサーバーでのTLS/SSL構成の詳細については、RedHatガイドでApachehttpdを使用してSSL/TLSをセットアップする方法を参照してください。