このチュートリアルでは、ISPConfig3をインストールするためにUbuntu11.10(Oneiric Ocelot)サーバーを準備する方法とISPConfig3をインストールする方法を示します。ISPConfig3は、Webブラウザーを介して次のサービスを構成できるWebホスティングコントロールパネルです。サーバー、Postfixメールサーバー、MySQL、BINDまたはMyDNSネームサーバー、PureFTPd、SpamAssassin、ClamAV、その他多数。
この設定はISPConfig2では機能しないことに注意してください ! ISPConfig 3でのみ有効です!
これがあなたのために働くという保証はありません!
ISPConfig3マニュアル
ISPConfig 3の使用方法を学ぶために、ISPConfig3マニュアルをダウンロードすることを強くお勧めします。
約300ページで、ISPConfig(管理者、再販業者、クライアント)の背後にある概念をカバーし、ISPConfig 3をインストールおよび更新する方法を説明し、有効な入力の例とともにISPConfigのすべてのフォームとフォームフィールドのリファレンスを含み、 ISPConfig 3で最も一般的なタスクです。また、サーバーをより安全にする方法を示し、最後にトラブルシューティングのセクションがあります。
Android用ISPConfigモニターアプリ
ISPConfig Monitor Appを使用すると、サーバーのステータスを確認し、すべてのサービスが期待どおりに実行されているかどうかを確認できます。 TCPおよびUDPポートを確認し、サーバーにpingを実行できます。さらに、このアプリを使用して、ISPConfigがインストールされているサーバーに詳細を要求できます(ISPConfigモニターアプリをサポートするインストール済みのISPConfig3の最小バージョンは3.0.3.3です! );これらの詳細には、ISPConfigコントロールパネルのモニターモジュールから知っているすべてのもの(サービス、メールとシステムのログ、メールキュー、CPUとメモリの情報、ディスク使用量、クォータ、OSの詳細、RKHunterログなど)が含まれます。 、ISPConfigはマルチサーバー対応であるため、ISPConfigマスターサーバーから制御されているすべてのサーバーを確認できます。
ダウンロードと使用方法については、http://www.ispconfig.org/ispconfig-3/ispconfig-monitor-app-for-android/にアクセスしてください。
1要件
このようなシステムをインストールするには、次のものが必要です。
- Ubuntu 11.10サーバーCD、ここで入手可能:http://releases.ubuntu.com/releases/11.10/ubuntu-11.10-server-i386.iso(i386)またはhttp://releases.ubuntu.com/releases /11.10/ubuntu-11.10-server-amd64.iso(x86_64)
- 高速インターネット接続。
2予備メモ
このチュートリアルでは、ホスト名server1.example.comとIPアドレス192.168.0.100およびゲートウェイ192.168.0.1を使用します。これらの設定はユーザーによって異なる場合があるため、必要に応じて置き換える必要があります。
3ベースシステム
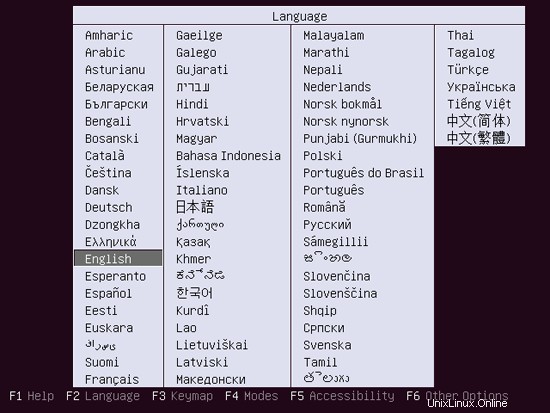
UbuntuインストールCDをシステムに挿入し、そこから起動します。言語を選択してください:
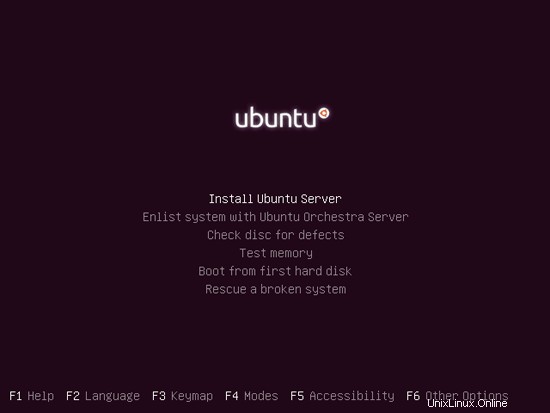
次に、[Ubuntuサーバーのインストール]を選択します:
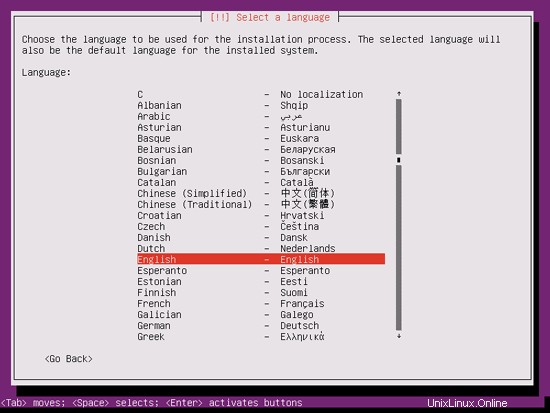
言語をもう一度選択してください(?):
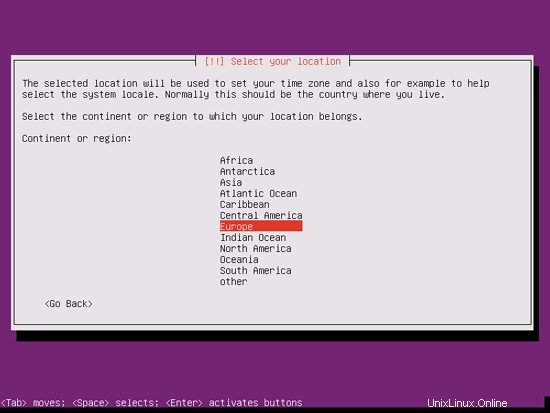
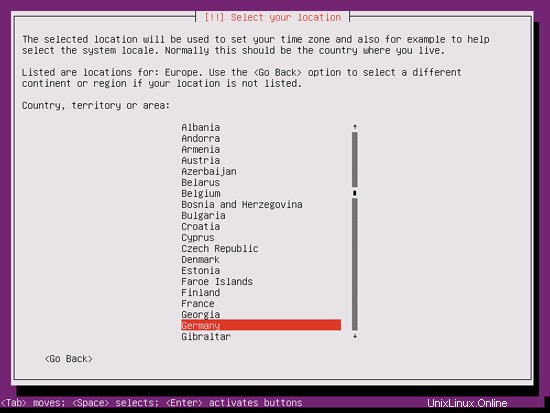
次に、場所を選択します:
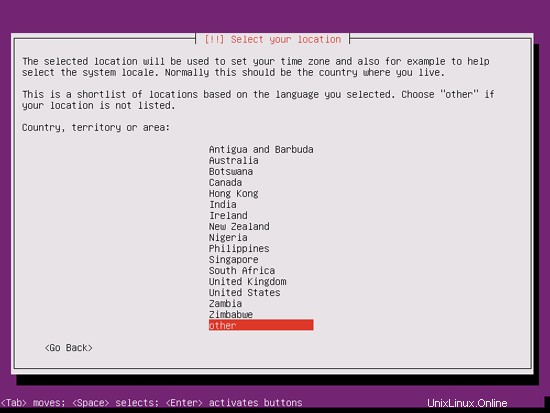
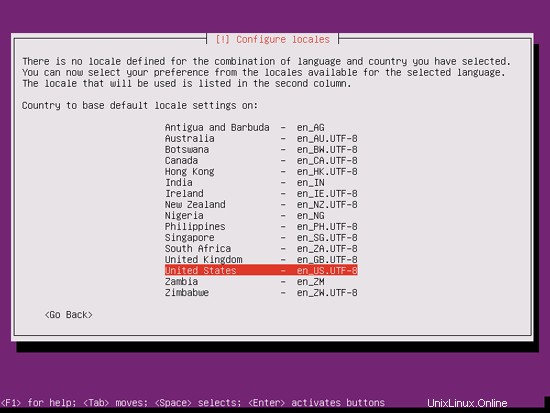
言語と場所の珍しい組み合わせ(私の場合のように、言語として英語、場所としてドイツなど)を選択した場合、インストーラーは、この組み合わせにロケールが定義されていないことを通知する場合があります。この場合、ロケールを手動で選択する必要があります。ここでen_US.UTF-8を選択します:
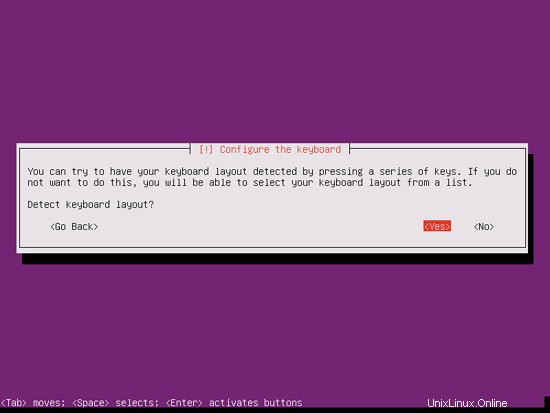
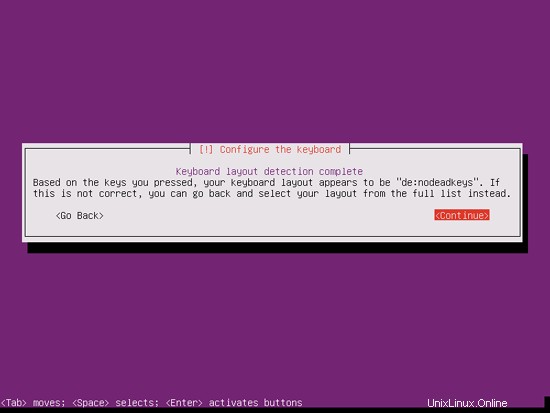
キーボードレイアウトを選択します(いくつかのキーを押すように求められ、インストーラーは押したキーに基づいてキーボードレイアウトを検出しようとします):
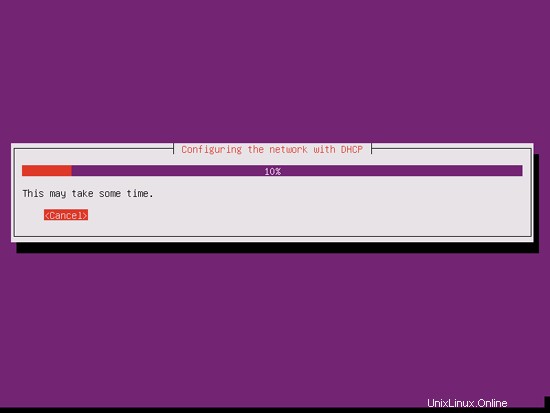
インストーラーはインストールCDとハードウェアをチェックし、ネットワークにDHCPサーバーがある場合はDHCPを使用してネットワークを構成します。
完璧なサーバー-Ubuntu11.10[ISPConfig3]-ページ2
21ISPConfig3をインストール
最新のリリースバージョンからISPConfig3をインストールするには、次のようにします。
 cd / tmp
 wget http://www.ispconfig.org/downloads/ISPConfig-3-stable.tar.gz
 tar xfz ISPConfig-3-stable.tar.gz
 cd ispconfig3_install / install /
次のステップは実行することです
php -q install.php
これにより、ISPConfig3インストーラーが起動します。インストーラーは、Postfix、SASL、Courierなどのすべてのサービスを構成します。 ISPConfig 2(完全なセットアップガイド)に必要な手動セットアップは必要ありません。
example@unixlinux.online:/tmp/ispconfig3_install/install# php -q install.php
------------------- -------------------------------------------------- -----------
_____ ___________ _____ __ _ ____
| _ _ / ___ | ___ \ / __ \ / _(_)/ __ \
| | \`-。| | _ / / | / \ / ___ _ __ | | _ _ __ _ _ / /
| | `-。 \ __ / | | / _ \ | '_ \ | _ | | / _` | | _ |
_ | | _ / \ __ / / | | \ __ / \(_)| | | | | | | (_ | | ___ \ \
\ ___ / \ ____ / \ _ | \ ____ / \ ___ / | _ | | _ | _ | | _ | \ __、| \ ____ /
_ |
| ___ /
-------------------------------------- ------------------------------------------
>>初期構成
オペレーティングシステム:Debianまたは互換性のある、不明なバージョン。
以下は、プライマリ構成に関するいくつかの質問になるため、注意が必要です。
デフォルト値は[括弧]内にあり、
「終了」(引用符なし)をタップして、インストーラーを停止します。
言語を選択します(en、de)[en]:<-ENTER
インストールモード(標準、エキスパート)[標準]:<-ENTER
完全修飾ホスト名(FQDN)サーバーの例:server1.domain.tld [server1.example.com]:<-ENTER
MySQLサーバーのホスト名[localhost]:<-ENTER
MySQLルートユーザー名[ルート]:<-ENTER
MySQLルートパスワード[]:<-yourrootsqlpassword
作成するMySQLデータベース[dbispconfig]:<-ENTER
MySQL文字セット[utf8]:<-ENTER
2048ビットのRSA秘密鍵を生成する
...+++
......................。 .......................................... +++
書き込み'smtpd.key'への新しい秘密鍵
-----
証明書のリクエストに組み込まれる情報を、
入力するように求められます。
何をしますか入力しようとしているのは、識別名またはDNと呼ばれるものです。
かなりの数のフィールドがありますが、空白のままにすることができます
一部のフィールドでは、デフォルト値になります。
「。」と入力すると、フィールドは空白のままになります。
-----
国名(2文字のコード)[AU]:<-ENTER
州名または州名(フルネーム)[Some-State]:<-ENTER
Locality Name(eg、city)[]:<-ENTER
Organization Name(eg、company)[Internet Widgits Pty Ltd]:<-ENTER
組織単位名(例:セクション)[]:<-ENTER
共通名(例:あなたの名前)[]:<-ENTER
メールアドレス[]:<-ENTER
Jailkitの設定
SASLの構成
PAMの構成
Courierの構成
Spamassassinの構成
Amavisdの構成
Getmailの構成
Pureftpdの構成
BINDの構成
Apacheの構成
Vloggerの構成
Appsvhostの構成
ファイアウォールの構成
ISPConfigのインストール
ISPConfigポート[8080]:<-ENTER
DBServerの構成
ISPConfigcrontabのインストール
root用のcrontabなし
getmail用のcrontabなし
サービスの再起動...
/ etc/initを介してinitスクリプトを呼び出すのではなく。 d、service(8)
ユーティリティを使用します。例: service mysql restart
呼び出そうとしているスクリプトは、
Upstartジョブに変換されているため、stop(8)ユーティリティとstart(8)ユーティリティを使用することもできます。
例: mysqlを停止します。 mysqlを起動します。 restart(8)ユーティリティも利用できます。
mysql stop / waiting
mysql start / running、process 2302
* Postfix Mail Transport Agent postfix
...done。
* Postfix MailTransportAgentのpostfixを開始します
...完了しました。
*SASL認証デーモンsaslauthdを停止します
...完了しました。
*SASL認証デーモンsaslを開始します/>...完了。
amavisdの停止:amavisd-new。
amavisdの開始:amavisd-new。
* ClamAVdaemonclamdの停止
...完了。
*ClamAVデーモンclamdを開始します
バイトコード:セキュリティモードを「TrustSigned」に設定します。
...完了しました。
*Courier認証サービスの認証を停止します
...完了しました。
*Courier認証サービスの認証サービスの開始
...完了。
*CourierIMAPサーバーのimapdの停止
...完了。
*CourierIMAPサーバーのimapdの開始
...完了。
*CourierIMAP-SSLサーバーの停止imapd-ssl
...完了。
*クーリエIMAP-SSLサーバーimapd-sslを開始しています
...完了しました。
*クーリエPOP3サーバーを停止しています...
...完了しました。
*クーリエPOP3サーバーを開始しています。 。
...完了。
*クーリエPOP3-SSLサーバーを停止しています...
...完了。
*クーリエPOP3-SSLサーバーを開始しています...
...done。
* webserverapache2を再起動しています
...waiting .......done。
ftp serverを再起動しています:実行中:/ usr / sbin / pure-ftpd -mysql-virtualchroot -l mysql:/etc/pure-ftpd/db/mysql.conf -l pam -8 UTF-8 -O clf:/var/log/pure-ftpd/transfer.log -D -H -b -A -E -u 1000 -Y 1 -B
インストールが完了しました。
example@unixlinux.online:/ tmp / ispconfig3_install / install#
インストーラーは基礎となるすべてのサービスを自動的に構成するため、手動で構成する必要はありません。
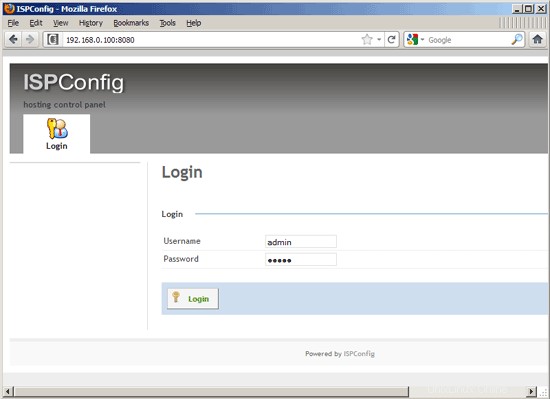
その後、http://server1.example.com:8080/またはhttp://192.168.0.100:8080/からISPConfig3にアクセスできます。ユーザー名adminとパスワードadminでログインします(最初のログイン後にデフォルトのパスワードを変更する必要があります):
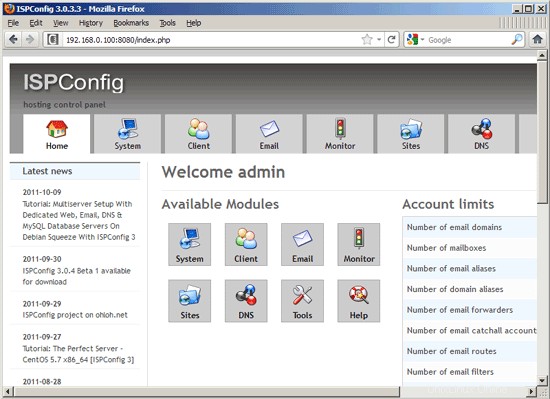
これで、システムを使用する準備が整いました。
21.1ISPConfig3マニュアル
ISPConfig 3の使用方法を学ぶために、ISPConfig3マニュアルをダウンロードすることを強くお勧めします。
約300ページで、ISPConfig(管理者、再販業者、クライアント)の背後にある概念をカバーし、ISPConfig 3をインストールおよび更新する方法を説明し、有効な入力の例とともにISPConfigのすべてのフォームとフォームフィールドのリファレンスを含み、 ISPConfig 3で最も一般的なタスクです。また、サーバーをより安全にする方法を示し、最後にトラブルシューティングのセクションがあります。
21.2Android用ISPConfigモニターアプリ
ISPConfig Monitor Appを使用すると、サーバーのステータスを確認し、すべてのサービスが期待どおりに実行されているかどうかを確認できます。 TCPおよびUDPポートを確認し、サーバーにpingを実行できます。さらに、このアプリを使用して、ISPConfigがインストールされているサーバーに詳細を要求できます(ISPConfigモニターアプリをサポートするインストール済みのISPConfig3の最小バージョンは3.0.3.3です! );これらの詳細には、ISPConfigコントロールパネルのモニターモジュールから知っているすべてのもの(サービス、メールとシステムのログ、メールキュー、CPUとメモリの情報、ディスク使用量、クォータ、OSの詳細、RKHunterログなど)が含まれます。 、ISPConfigはマルチサーバー対応であるため、ISPConfigマスターサーバーから制御されているすべてのサーバーを確認できます。
ダウンロードと使用方法については、http://www.ispconfig.org/ispconfig-3/ispconfig-monitor-app-for-android/にアクセスしてください。
22の追加の注意事項
22.1 OpenVZ
このチュートリアルでセットアップしたばかりのUbuntuサーバーがOpenVZコンテナー(仮想マシン)である場合は、ホストシステムでこれを行う必要があります(OpenVZコンテナーのIDは101であると想定しています-これをシステムの正しいVPSID):
 VPSID =101
 CHOWN DAC_READ_SEARCH SETGID SETUID NET_BIND_SERVICE NET_ADMIN SYS_CHROOT SYS_NICE CHOWN DAC_READ_SEARCH SETGID SETUID NET_BIND_SERVICE NET_ADMIN SYS_CHROOT SYS_NICE
 do
 vzctl set $ VPSID --save
完了
23リンク
- Ubuntu:http://www.ubuntu.com/
- ISPConfig:http://www.ispconfig.org/
完璧なサーバー-Ubuntu11.10[ISPConfig3]-ページ3
19fail2banをインストール
これはオプションですが、ISPConfigモニターがfail2banログを表示しようとするため推奨されます:
apt-get install fail2ban
fail2banでPureFTPd、SASL、およびCourierを監視するには、ファイル/etc/fail2ban/jail.local:
を作成します。vi /etc/fail2ban/jail.local
[pureftpd] enabled =trueport =ftpfilter =pureftpdlogpath =/ var / log / syslogmaxretry =3 [sasl] enabled =trueport =smtpfilter =sasllogpath =/ var / log / mail.logmaxretry =5 [courierpop3] enabled =trueport =pop3filter =courierpop3logpath =/var/log/mail.logmaxretry =5 [courierpop3s] enabled =trueport =pop3sfilter =courierpop3slogpath =/var/log/mail.logmaxretry =5 [courierimap] enabled =trueport =imap2filter =courierimaplogpath =/var/log/mail.logmaxretry =5 [courierimaps] enabled =trueport =imapsfilter =courierimapslogpath =/var/log/mail.logmaxretry =5 |
次に、次の5つのフィルターファイルを作成します。
vi /etc/fail2ban/filter.d/pureftpd.conf
[Definition] failregex=。*pure-ftpd:\(。* @ |
vi /etc/fail2ban/filter.d/courierpop3.conf
#Fail2Ban構成ファイル## $ Revision:100 $#[Definition]#オプション:failregex#注:次のパスワード失敗メッセージに一致する正規表現ログファイル。 #ホストは、「host」という名前のグループと一致する必要があります。タグ「 |
vi /etc/fail2ban/filter.d/courierpop3s.conf
#Fail2Ban構成ファイル## $ Revision:100 $#[Definition]#オプション:failregex#注:次のパスワード失敗メッセージに一致する正規表現ログファイル。 #ホストは、「host」という名前のグループと一致する必要があります。タグ「 |
vi /etc/fail2ban/filter.d/courierimap.conf
#Fail2Ban構成ファイル## $ Revision:100 $#[Definition]#オプション:failregex#注:次のパスワード失敗メッセージに一致する正規表現ログファイル。 #ホストは、「host」という名前のグループと一致する必要があります。タグ「 |
vi /etc/fail2ban/filter.d/courierimaps.conf
#Fail2Ban構成ファイル## $ Revision:100 $#[Definition]#オプション:failregex#注:次のパスワード失敗メッセージに一致する正規表現ログファイル。 #ホストは、「host」という名前のグループと一致する必要があります。タグ「 |
その後、fail2banを再起動します:
/etc/init.d/fail2ban再起動
20SquirrelMailをインストール
SquirrelMailウェブメールクライアントをインストールするには、
を実行しますapt-get install squirrelmail
次に、SquirrelMailを設定します:
squirrelmail-configure
Courier-IMAP / -POP3を使用していることをSquirrelMailに通知する必要があります:
SquirrelMailの構成:読み取り:config.php(1.4.0)
--------------------------------- ------------------------
メインメニュー-
1.組織の設定
2.サーバーの設定
3.フォルダのデフォルト
4.一般的なオプション
5.テーマ
6.アドレスブック
7.今日のメッセージ(MOTD)
8.プラグイン
9.データベース
10.言語
D.特定のIMAPサーバー用に事前定義された設定を設定します
C色をオンにします
S保存data
Q Quit
Command>> <-D
SquirrelMail Configuration:Read:config.php
---- -------------------------------------------------- ---
SquirrelMailを構築している間に、他のサーバーではうまく機能しない一部のサーバーでより効果的に機能する
いくつかの設定を発見しました。 IMAPサーバーを選択した場合、このオプションにより、そのサーバーに事前定義された設定が
設定されます。
引き続き、すべてを確認する必要があることに注意してください。
正しい。これによってすべてが変わるわけではありません。
これが変更される設定はごくわずかです。
IMAPサーバーを選択してください:
bincimap =BincIMAPサーバー
courier=CourierIMAPサーバー
cyrus =CyrusIMAPサーバー
dovecot=DovecotSecureIMAPサーバー
exchange=Microsoft Exchange IMAP server
hmailserver =hMailServer
hmailserver =hMailServer
/ 32
uw=ワシントン大学のIMAPサーバー
gmail=Googleメール(Gmail)アカウントへのIMAPアクセス
-courier
SquirrelMailの構成:読み取り:config.php
----------------------- ----------------------------------
SquirrelMailを構築している間に、いくつかの<を発見しました。 br />一部のサーバーではうまく機能し、他のサーバーではうまく機能しない
設定。 IMAPサーバーを選択した場合、このオプションにより、そのサーバーに事前定義された設定が
設定されます。
引き続き、すべてを確認する必要があることに注意してください。
正しい。これによってすべてが変わるわけではありません。
これが変更される設定はごくわずかです。
IMAPサーバーを選択してください:
bincimap =BincIMAPサーバー
courier=CourierIMAPサーバー
cyrus =CyrusIMAPサーバー
dovecot=DovecotSecureIMAPサーバー
exchange=Microsoft Exchange IMAP server
hmailserver =hMailServer
hmailserver =hMailServer
/ 32
uw=ワシントン大学のIMAPサーバー
終了=何も変更しないでください
コマンド>>courier
_ /> _ default_folder_prefix = INBOX.
trash_folder = Trash
sent_folder = Sent
draft_folder = Drafts
show_prefix_option = false
default_sub_of_inbox = false
show_contain_subfolders_option = false
optional_delimiter =。
delete_folder =true
続行するには任意のキーを押してください...<-ENTER
SquirrelMail構成:読み取り:config.php( 1.4.0)
------------------------------------------ ---------------
メインメニュー-
1.組織の設定
2.サーバーの設定
3.フォルダのデフォルト
4.一般的なオプション
5.テーマ
6.アドレスブック
7.今日のメッセージ(MOTD)
8.プラグイン
9.データベース
10.言語
D.特定のIMAPサーバー用に事前定義された設定を設定します
C色をオンにします
Sデータを保存します
Q終了します
コマンド>><-S
SquirrelMail Configuration:Read:config.php(1.4.0)
-------- -------------------------------------------------
メインメニュー-
1.組織の設定
2.サーバーの設定
3.フォルダのデフォルト
4.一般的なオプション
5.テーマ
6.アドレスブック
7.メッセージ当日(MOTD)
8.プラグイン
9.データベース
10.言語
D.特定のIMAPサーバー用に事前定義された設定を設定します
C色をオンにします
Sデータを保存します
Q終了します
コマンド>>S
config.phpに保存されたデータ
Enterキーを押して続行します...<-ENTER
SquirrelMail Configuration:Read:config.php(1.4.0)
---------- -----------------------------------------------
メインメニュー-
1.組織の設定
2.サーバーの設定
3.フォルダのデフォルト
4.一般的なオプション
5.テーマ
6。アドレスブック
7.今日のメッセージ(MOTD)
8.プラグイン
9.データベース
10.言語
D.事前定義済みのセット特定のIMAPサーバーの設定
C色をオンにします
Sデータを保存します
Q終了します
コマンド>><-Q
次に、/squirrelmailまたは/webmailエイリアスを使用して、(ISPConfigを介して作成された)Webサイト内からSquirrelMailを使用できるように構成します。したがって、Webサイトがwww.example.comの場合、www.example.com/squirrelmailまたはwww.example.com/webmailを使用してSquirrelMailにアクセスできます。
SquirrelMailのApache設定はファイル/etc/squirrelmail/apache.confにありますが、このファイルは/etc/apache2/conf.d/ディレクトリにないため、Apacheによってロードされません。したがって、/ etc / squirrelmail / apache.confを指す/etc/apache2/conf.d/ディレクトリにsquirrelmail.confというシンボリックリンクを作成し、後でApacheをリロードします。
cd /etc/apache2/conf.d/>
ln -s ../../squirrelmail/apache.conf squirrelmail.conf
/etc/init.d/apache2リロード
/etc/apache2/conf.d/squirrelmail.confを開きます...
vi /etc/apache2/conf.d/squirrelmail.conf
...そして次の行を
[...] |
ディレクトリ/var/ lib / squirrelmail / tmp ...
を作成しますmkdir / var / lib / squirrelmail / tmp
...そしてそれをユーザーが所有するようにするwww-data:
chown www-data / var / lib / squirrelmail / tmp
Apacheを再度リロードします:
/etc/init.d/apache2リロード
すでにそれだけです-/etc/apache2/conf.d/squirrelmail.confは、SquirrelMailのインストールディレクトリ/ usr / share/squirrelmailを指す/squirrelmailというエイリアスを定義しています。
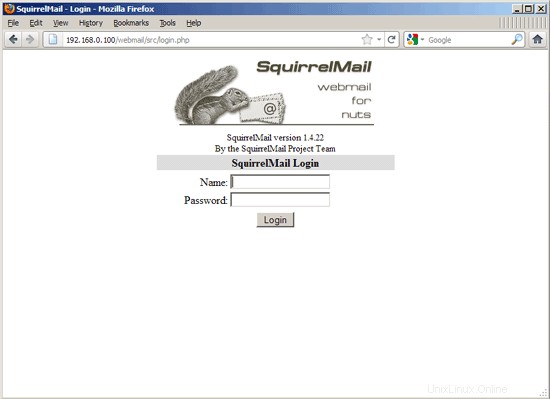
これで、次のようにWebサイトからSquirrelMailにアクセスできます。
 http://192.168.0.100/squirrelmail
 http://www.example.com/squirrelmail
次のように、ISPConfigコントロールパネルvhost(ISPConfigをインストールした後、次の章を参照)からアクセスすることもできます(これにはISPConfigでの構成は必要ありません):
http://server1.example.com:8080/squirrelmail
/squirrelmailの代わりにエイリアス/webmailを使用する場合は、/ etc / apache2 / conf.d / squirrelmail.conf ...
を開くだけです。vi /etc/apache2/conf.d/squirrelmail.conf
...そして、Alias / webmail / usr / share / squirrelmail:
という行を追加します。 Alias / squirrelmail / usr / share / squirrelmailAlias / webmail / usr / share / squirrelmail [...] |
次に、Apacheをリロードします:
/etc/init.d/apache2リロード
これで、次のようにSquirrelmailにアクセスできます。
http://192.168.0.100/webmail
http://www.example.com/webmail
http://server1.example.com:8080/webmail(ISPConfigをインストールした後、次の章)
ユーザーがSquirrelMailにアクセスできるwebmail.example.comのようなvhostを定義する場合は、次のvhost構成を/etc/apache2/conf.d/squirrelmail.confに追加する必要があります。
vi /etc/apache2/conf.d/squirrelmail.conf
[...] |
1.2.3.4をサーバーの正しいIPアドレスに置き換えてください。もちろん、vhost構成で使用するIPアドレスを指すwebmail.example.comのDNSレコードが必要です。また、vhost webmail.example.comがISPConfigに存在しないことを確認してください(存在しない場合、両方のvhostが相互に干渉します!)。
次に、Apacheをリロードします...
/etc/init.d/apache2リロード
...そしてhttp://webmail.example.comからSquirrelMailにアクセスできます!
完璧なサーバー-Ubuntu11.10[ISPConfig3]-4ページ
12 Postfix、Courier、Saslauthd、MySQL、rkhunter、binutilsをインストールします
Postfix、Courier、Saslauthd、MySQL、rkhunter、binutilsを1つのコマンドでインストールできます:
apt-get install postfix postfix-mysql postfix-doc mysql-client mysql-server courier-authdaemon courier-authlib-mysql courier-pop courier-pop-ssl courier-imap courier-imap-ssl libsasl2-2 libsasl2-modules libsasl2-modules-sql sasl2-bin libpam-mysql openssl getmail4 rkhunter binutils maildrop
次の質問があります:
MySQLの「root」ユーザーの新しいパスワード:<-yourrootsqlpassword
MySQLの「root」ユーザーのパスワードを繰り返します:<-yourrootsqlpassword
Webベースの管理用のディレクトリを作成しますか? <-いいえ
メール構成の一般的なタイプ:<-インターネットサイト
システムメール名:<-server1.example.com
SSL証明書が必要です<-OK
(後でISPConfigで最初の電子メールアカウントを構成した後で)電子メールを送信できず、/ var / log/mail.logで次のエラーが発生することがわかった場合...
SASL LOGIN認証に失敗しました:使用可能なメカニズムがありません
...問題の解決方法については、https://www.howtoforge.com/forums/showpost.php?p =265831&postcount=25にアクセスしてください。
MySQLがローカルホストだけでなくすべてのインターフェースでリッスンするようにしたいので、/ etc / mysql / my.cnfを編集して、bind-address =127.0.0.1:
の行をコメントアウトします。vi /etc/mysql/my.cnf
[...]#スキップネットワークの代わりに、デフォルトでは、互換性が高く安全性が低くないローカルホストでのみリッスンするようになりました。 #bind-address =127.0.0.1 [...] |
次に、MySQLを再起動します:
/etc/init.d/mysql restart
次に、ネットワーキングが有効になっていることを確認します。実行
netstat -tap | grep mysql
出力は次のようになります。
example@unixlinux.online:〜#netstat -tap | grep mysql
tcp 0 0 *:mysql *:* LISTEN 22355 / mysqld
example@unixlinux.online:インストール中に、IMAP-SSLおよびPOP3-SSLのSSL証明書がホスト名localhostで作成されます。これを正しいホスト名(このチュートリアルではserver1.example.com)に変更するには、証明書を削除します...
cd /etc/courier
rm -f /etc/courier/imapd.pem
rm -f /etc/courier/pop3d.pem...そして次の2つのファイルを変更します。 CN=localhostをCN=server1.example.comに置き換えます(必要に応じて他の値を変更することもできます):
vi /etc/courier/imapd.cnf
[...] CN =server1.example.com [...] |
vi /etc/courier/pop3d.cnf
[...] CN =server1.example.com [...] |
次に、証明書を再作成します...
 mkimapdcert
 mkpop3dcert
...そしてCourier-IMAP-SSLとCourier-POP3-SSLを再起動します:
 /etc/init.d/courier-imap-ssl restart
 /etc/init.d/courier-pop-ssl restart
13 Amavisd-new、SpamAssassin、およびClamavをインストールします
amavisd-new、SpamAssassin、およびClamAVをインストールするには、
を実行します。apt-get install amavisd-new spamassassin clamav clamav-daemon zoo unzip bzip2 arj nomarch lzop cabextract apt-listchanges libnet-ldap-perllibauthen-sasl-perlclamav-docsデーモンlibio-string-perllibio-socket-ssl- perl libnet-ident-perl zip libnet-dns-perl
ISPConfig 3のセットアップでは、SpamAssassinフィルターライブラリを内部的にロードするamavisdを使用するため、SpamAssassinを停止してRAMを解放できます。
 /etc/init.d/spamassassin stop
 update-rc.d -f spamassassin remove
14 Apache2、PHP5、phpMyAdmin、FCGI、suExec、Pear、およびmcryptをインストールします
Apache2、PHP5、phpMyAdmin、FCGI、suExec、Pear、およびmcryptは、次のようにインストールできます。
apt-get install apache2 apache2.2-common apache2-doc apache2-mpm-prefork apache2-utils libexpat1 ssl-cert libapache2-mod-php5 php5 php5-common php5-gd php5-mysql php5-imap phpmyadmin php5-cli php5-cgi libapache2-mod-fcgid apache2-suexec php-pear php-auth php5-mcrypt mcrypt php5-imagick imagemagick libapache2-mod-suphp libruby libapache2-mod-ruby
次の質問が表示されます:
自動的に再構成するWebサーバー:<-apache2
dbconfig-commonを使用してphpmyadminのデータベースを構成しますか? <-いいえ
次に、次のコマンドを実行して、Apacheモジュールのsuexec、rewrite、ssl、actions、およびinclude(さらに、WebDAVを使用する場合はdav、dav_fs、およびauth_digest)を有効にします。
a2enmod suexecrewritesslアクションには次のものが含まれます
a2enmod dav_fs dav auth_digest
その後、Apacheを再起動します:
/etc/init.d/apache2再起動
ISPConfigを介して作成されたWebサイトで拡張子.rbのRubyファイルをホストする場合は、/ etc/mime.typesのapplication/x-rubyrb行をコメントアウトする必要があります。
vi /etc/mime.types
[...]#application / x-ruby rb [...] |
(This is needed only for .rb files; Ruby files with the extension .rbx work out of the box.)
Restart Apache afterwards:
/etc/init.d/apache2再起動
15 Install PureFTPd And Quota
PureFTPd and quota can be installed with the following command:
apt-get install pure-ftpd-common pure-ftpd-mysql quota quotatool
Edit the file /etc/default/pure-ftpd-common...
vi /etc/default/pure-ftpd-common
... and make sure that the start mode is set to standalone and set VIRTUALCHROOT=true:
[...]STANDALONE_OR_INETD=standalone[...]VIRTUALCHROOT=true[...] |
次に、FTPおよびTLSセッションを許可するようにPureFTPdを構成します。 FTPは、すべてのパスワードとすべてのデータがクリアテキストで転送されるため、非常に安全でないプロトコルです。 TLSを使用することで、通信全体を暗号化できるため、FTPの安全性が大幅に向上します。
If you want to allow FTP and TLS sessions, run
echo 1> /etc/pure-ftpd/conf/TLS
TLSを使用するには、SSL証明書を作成する必要があります。 / etc / ssl / private /に作成するので、最初にそのディレクトリを作成します:
mkdir -p / etc / ssl / private /
その後、次のようにSSL証明書を生成できます。
openssl req -x509 -nodes -days 7300 -newkey rsa:2048 -keyout /etc/ssl/private/pure-ftpd.pem -out /etc/ssl/private/pure-ftpd.pem
Country Name (2 letter code) [AU]:<-- Enter your Country Name (e.g., "DE").
State or Province Name (full name) [Some-State]:<-- Enter your State or Province Name.
Locality Name (eg, city) []:<-- Enter your City.
Organization Name (eg, company) [Internet Widgits Pty Ltd]:<-- Enter your Organization Name (e.g., the name of your company).
Organizational Unit Name (eg, section) []:<-- Enter your Organizational Unit Name (e.g. "IT Department").
Common Name (eg, YOUR name) []:<-- Enter the Fully Qualified Domain Name of the system (e.g. "server1.example.com").
Email Address []:<-- Enter your Email Address.
Change the permissions of the SSL certificate:
chmod 600 /etc/ssl/private/pure-ftpd.pem
Then restart PureFTPd:
/etc/init.d/pure-ftpd-mysql restart
Edit /etc/fstab. Mine looks like this (I added ,usrjquota=quota.user,grpjquota=quota.group,jqfmt=vfsv0 to the partition with the mount point /):
vi / etc / fstab
# /etc/fstab:static file system information.## Use 'blkid' to print the universally unique identifier for a# device; this may be used with UUID=as a more robust way to name devices# that works even if disks are added and removed. See fstab(5).## |
To enable quota, run these commands:
mount -o remount /
quotacheck -avugm
 quotaon -avug
16 Install BIND DNS Server
BIND can be installed as follows:
apt-get install bind9 dnsutils
17 Install Vlogger, Webalizer, And AWstats
Vlogger, webalizer, and AWstats can be installed as follows:
apt-get install vlogger webalizer awstats geoip-database
Open /etc/cron.d/awstats afterwards...
vi /etc/cron.d/awstats
... and comment out both cron jobs in that file:
#*/10 * * * * www-data [ -x /usr/share/awstats/tools/update.sh ] &&/usr/share/awstats/tools/update.sh# Generate static reports:#10 03 * * * www-data [ -x /usr/share/awstats/tools/buildstatic.sh ] &&/usr/share/awstats/tools/buildstatic.sh |
18 Install Jailkit
Jailkitは、SSHユーザーをchrootする場合にのみ必要です。次のようにインストールできます(重要:JailkitはISPConfigの前にインストールする必要があります-後でインストールすることはできません!):
apt-get install build-essential autoconf automake1.9 libtool flex bison debhelper
cd /tmp
 wget http://olivier.sessink.nl/jailkit/jailkit-2.14.tar.gz
 tar xvfz jailkit-2.14.tar.gz
 cd jailkit-2.14
 ./debian/rules binary
If the last command gives you an error like...
x86_64-linux-gnu-gcc -lpthread -o jk_socketd jk_socketd.o jk_lib.o utils.o iniparser.o
 jk_socketd.o:In function `main':
 /tmp/jailkit-2.14/src/jk_socketd.c:474:undefined reference to `pthread_create'
 collect2:ld returned 1 exit status
 make[2]:*** [jk_socketd] Error 1
 make[2]:Leaving directory `/tmp/jailkit-2.14/src'
 make[1]:*** [all] Error 2
 make[1]:Leaving directory `/tmp/jailkit-2.14'
 make:*** [build-arch-stamp] Error 2
 example@unixlinux.online:/tmp/jailkit-2.14#
... please install gcc-4.4:
apt-get install gcc-4.4
Now take a look at /usr/bin/gcc:
ls -l /usr/bin/gcc*
/usr/bin/gcc should currently be a symlink to /usr/bin/gcc-4.6:
example@unixlinux.online:/tmp/jailkit-2.14# ls -l /usr/bin/gcc*
 lrwxrwxrwx 1 root root      7 2011-08-14 09:16 /usr/bin/gcc -> gcc-4.6
 -rwxr-xr-x 1 root root 259232 2011-10-05 23:56 /usr/bin/gcc-4.4
 -rwxr-xr-x 1 root root 349120 2011-09-16 16:31 /usr/bin/gcc-4.6
 example@unixlinux.online:/tmp/jailkit-2.14#
We change this now so that /usr/bin/gcc links to /usr/bin/gcc-4.4:
ln -sf /usr/bin/gcc-4.4 /usr/bin/gcc
Now build Jailkit as follows:
make clean
 ./configure
 make
 make clean
 ./debian/rules binary
If the ./debian/rules binary command doesn't give you an error this time, you can now install the Jailkit .deb package as follows:
cd ..
 dpkg -i jailkit_2.14-1_*.deb
 rm -rf jailkit-2.14*
Finally, we change the /usr/bin/gcc symlink so that it points to /usr/bin/gcc-4.6 again:
ln -sf /usr/bin/gcc-4.6 /usr/bin/gcc
The Perfect Server - Ubuntu 11.10 [ISPConfig 3] - Page 5
4 Get root Privileges
After the reboot you can login with your previously created username (e.g. administrator). Because we must run all the steps from this tutorial with root privileges, we can either prepend all commands in this tutorial with the string sudo, or we become root right now by typing
sudo su
(You can as well enable the root login by running
sudo passwd root
and giving root a password. You can then directly log in as root, but this is frowned upon by the Ubuntu developers and community for various reasons. See http://ubuntuforums.org/showthread.php?t=765414.)
5 Install The SSH Server (Optional)
If you did not install the OpenSSH server during the system installation, you can do it now:
apt-get install ssh openssh-server
From now on you can use an SSH client such as PuTTY and connect from your workstation to your Ubuntu 11.10 server and follow the remaining steps from this tutorial.
6 Install vim-nox (Optional)
I'll use vi as my text editor in this tutorial. The default vi program has some strange behaviour on Ubuntu and Debian; to fix this, we install vim-nox:
apt-get install vim-nox
(You don't have to do this if you use a different text editor such as joe or nano.)
7 Configure The Network
Because the Ubuntu installer has configured our system to get its network settings via DHCP, we have to change that now because a server should have a static IP address. Edit /etc/network/interfaces and adjust it to your needs (in this example setup I will use the IP address 192.168.0.100 ):
vi /etc/network/interfaces
# This file describes the network interfaces available on your system# and how to activate them. For more information, see interfaces(5).# The loopback network interfaceauto loiface lo inet loopback# The primary network interfaceauto eth0iface eth0 inet static address 192.168.0.100 netmask 255.255.255.0 network 192.168.0.0 broadcast 192.168.0.255 gateway 192.168.0.1 |
Then restart your network:
/etc/init.d/networking restart
Then edit /etc/hosts.次のようにします:
vi / etc / hosts
127.0.0.1 localhost.localdomain localhost192.168.0.100 server1.example.com server1# The following lines are desirable for IPv6 capable hosts::1 ip6-localhost ip6-loopbackfe00::0 ip6-localnetff00::0 ip6-mcastprefixff02::1 ip6-allnodesff02::2 ip6-allrouters |
Now run
echo server1.example.com> /etc/hostname
 /etc/init.d/hostname restart
Afterwards, run
hostname
 hostname -f
Both should show server1.example.com now.
8 Edit /etc/apt/sources.list And Update Your Linux Installation
Edit /etc/apt/sources.list. Comment out or remove the installation CD from the file and make sure that the universe and multiverse repositories are enabled.次のようになります:
vi /etc/apt/sources.list
## deb cdrom:[Ubuntu-Server 11.10 _Oneiric Ocelot_ - Release amd64 (20111011)]/ dists/oneiric/main/binary-i386/# deb cdrom:[Ubuntu-Server 11.10 _Oneiric Ocelot_ - Release amd64 (20111011)]/ dists/oneiric/restricted/binary-i386/# deb cdrom:[Ubuntu-Server 11.10 _Oneiric Ocelot_ - Release amd64 (20111011)]/ oneiric main restricted#deb cdrom:[Ubuntu-Server 11.10 _Oneiric Ocelot_ - Release amd64 (20111011)]/ dists/oneiric/main/binary-i386/#deb cdrom:[Ubuntu-Server 11.10 _Oneiric Ocelot_ - Release amd64 (20111011)]/ dists/oneiric/restricted/binary-i386/#deb cdrom:[Ubuntu-Server 11.10 _Oneiric Ocelot_ - Release amd64 (20111011)]/ oneiric main restricted# See http://help.ubuntu.com/community/UpgradeNotes for how to upgrade to# newer versions of the distribution.deb http://de.archive.ubuntu.com/ubuntu/ oneiric main restricteddeb-src http://de.archive.ubuntu.com/ubuntu/ oneiric main restricted## Major bug fix updates produced after the final release of the## distribution.deb http://de.archive.ubuntu.com/ubuntu/ oneiric-updates main restricteddeb-src http://de.archive.ubuntu.com/ubuntu/ oneiric-updates main restricted## N.B. software from this repository is ENTIRELY UNSUPPORTED by the Ubuntu## team. Also, please note that software in universe WILL NOT receive any## review or updates from the Ubuntu security team.deb http://de.archive.ubuntu.com/ubuntu/ oneiric universedeb-src http://de.archive.ubuntu.com/ubuntu/ oneiric universedeb http://de.archive.ubuntu.com/ubuntu/ oneiric-updates universedeb-src http://de.archive.ubuntu.com/ubuntu/ oneiric-updates universe## N.B. software from this repository is ENTIRELY UNSUPPORTED by the Ubuntu## team, and may not be under a free licence. Please satisfy yourself as to## your rights to use the software. Also, please note that software in## multiverse WILL NOT receive any review or updates from the Ubuntu## security team.deb http://de.archive.ubuntu.com/ubuntu/ oneiric multiversedeb-src http://de.archive.ubuntu.com/ubuntu/ oneiric multiversedeb http://de.archive.ubuntu.com/ubuntu/ oneiric-updates multiversedeb-src http://de.archive.ubuntu.com/ubuntu/ oneiric-updates multiverse## N.B. software from this repository may not have been tested as## extensively as that contained in the main release, although it includes## newer versions of some applications which may provide useful features.## Also, please note that software in backports WILL NOT receive any review## or updates from the Ubuntu security team.deb http://de.archive.ubuntu.com/ubuntu/ oneiric-backports main restricted universe multiversedeb-src http://de.archive.ubuntu.com/ubuntu/ oneiric-backports main restricted universe multiversedeb http://security.ubuntu.com/ubuntu oneiric-security main restricteddeb-src http://security.ubuntu.com/ubuntu oneiric-security main restricteddeb http://security.ubuntu.com/ubuntu oneiric-security universedeb-src http://security.ubuntu.com/ubuntu oneiric-security universedeb http://security.ubuntu.com/ubuntu oneiric-security multiversedeb-src http://security.ubuntu.com/ubuntu oneiric-security multiverse## Uncomment the following two lines to add software from Canonical's## 'partner' repository.## This software is not part of Ubuntu, but is offered by Canonical and the## respective vendors as a service to Ubuntu users.# deb http://archive.canonical.com/ubuntu oneiric partner# deb-src http://archive.canonical.com/ubuntu oneiric partner## Uncomment the following two lines to add software from Ubuntu's## 'extras' repository.## This software is not part of Ubuntu, but is offered by third-party## developers who want to ship their latest software.# deb http://extras.ubuntu.com/ubuntu oneiric main# deb-src http://extras.ubuntu.com/ubuntu oneiric main |
次に実行します
apt-get update
to update the apt package database and
apt-get upgrade
to install the latest updates (if there are any). If you see that a new kernel gets installed as part of the updates, you should reboot the system afterwards:
再起動
9 Change The Default Shell
/bin/sh is a symlink to /bin/dash, however we need /bin/bash, not /bin/dash. Therefore we do this:
dpkg-reconfigure dash
Use dash as the default system shell (/bin/sh)? <-- No
If you don't do this, the ISPConfig installation will fail.
10 Disable AppArmor
AppArmorは、拡張セキュリティを提供するセキュリティ拡張機能(SELinuxと同様)です。私の意見では、安全なシステムを構成するためにそれを必要とせず、通常、利点よりも多くの問題を引き起こします(一部のサービスが期待どおりに機能しなかったため、1週間のトラブルシューティングを行った後、それを考えてください。すべてが問題ないことを確認してください。AppArmorだけが問題を引き起こしていました)。したがって、無効にします(後でISPConfigをインストールする場合は必須です)。
次のように無効にできます:
/etc/init.d/apparmor stop
 update-rc.d -f apparmor remove
 apt-get remove apparmor apparmor-utils
11 Synchronize the System Clock
It is a good idea to synchronize the system clock with an NTP (n etwork t ime p rotocol) server over the Internet. Simply run
apt-get install ntp ntpdate
and your system time will always be in sync.
The Perfect Server - Ubuntu 11.10 [ISPConfig 3] - Page 6
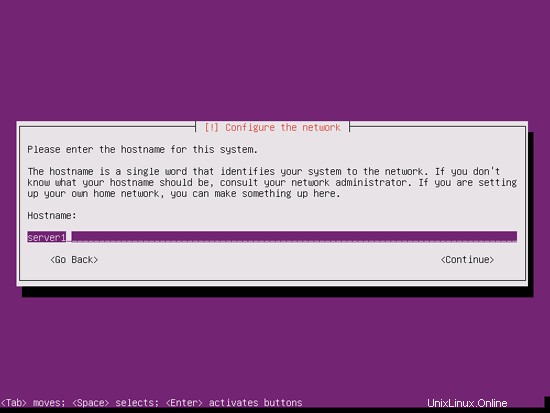
Enter the hostname. In this example, my system is called server1.example.com , so I enter server1 :
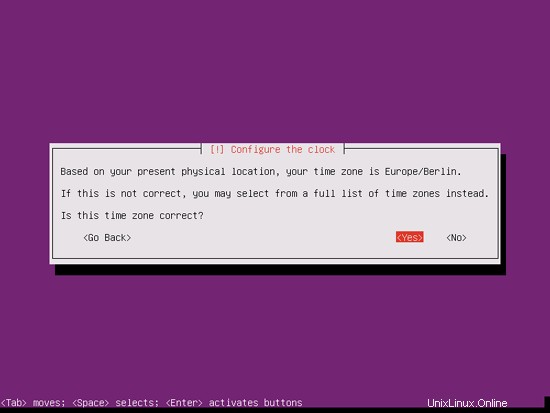
Please check if the installer detected your time zone correctly. If so, select Yes, otherwise No:
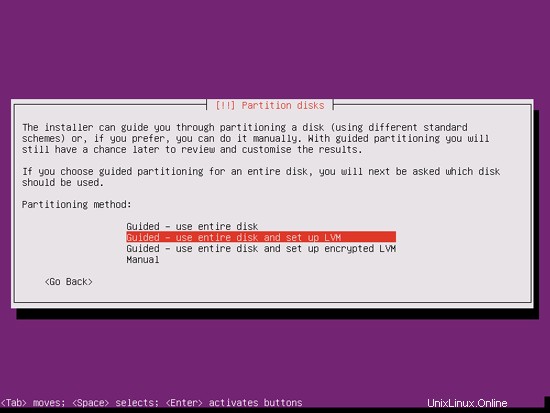
Now you have to partition your hard disk. For simplicity's sake I select Guided - use entire disk and set up LVM - this will create one volume group with two logical volumes, one for the / file system and another one for swap (of course, the partitioning is totally up to you - if you know what you're doing, you can also set up your partitions manually).
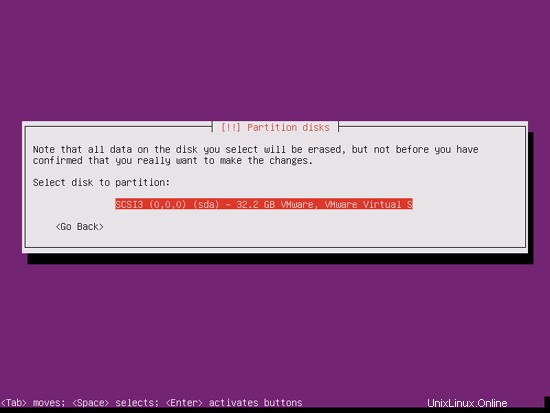
Select the disk that you want to partition:
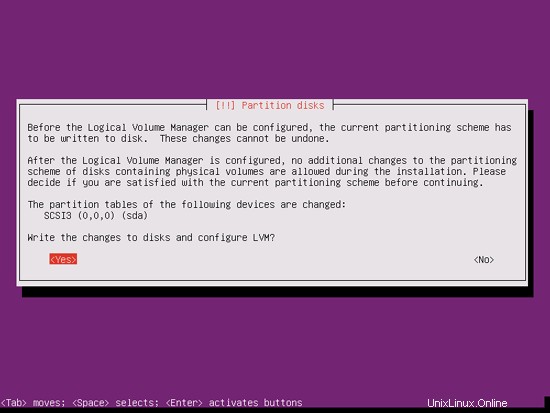
When you're asked Write the changes to disks and configure LVM?, select Yes:
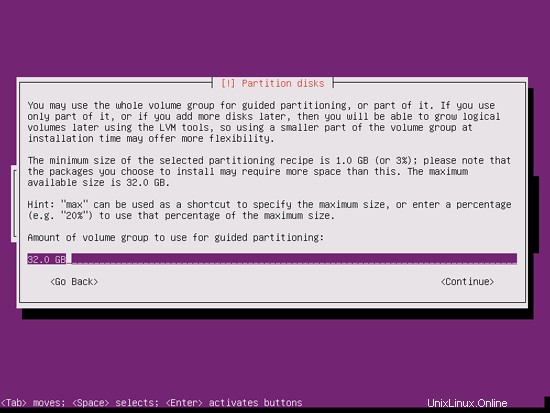
If you have selected Guided - use entire disk and set up LVM, the partitioner will create one big volume group that uses all the disk space. You can now specify how much of that disk space should be used by the logical volumes for / and swap. It makes sense to leave some space unused so that you can later on expand your existing logical volumes or create new ones - this gives you more flexibility.
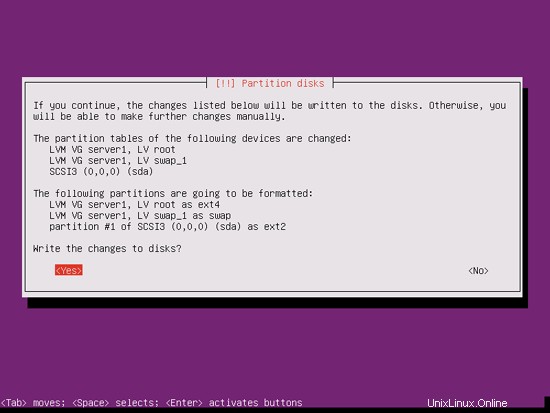
When you're finished, hit Yes when you're asked Write the changes to disks?:
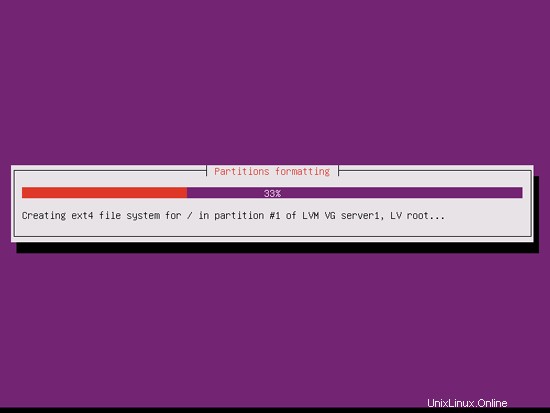
Afterwards, your new partitions are being created and formatted:
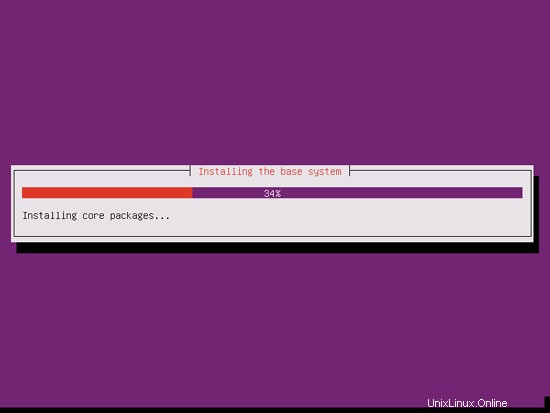
Now the base system is being installed:
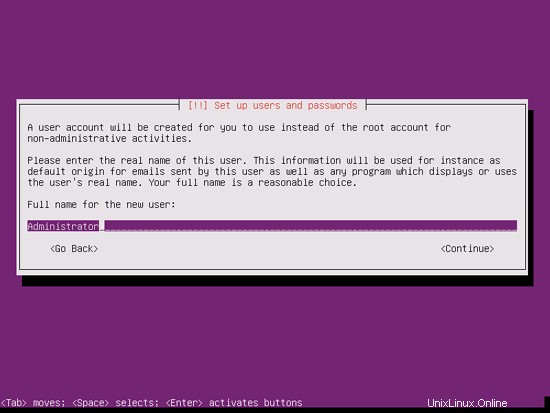
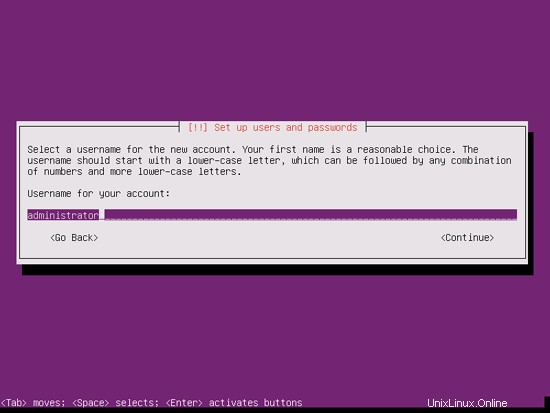
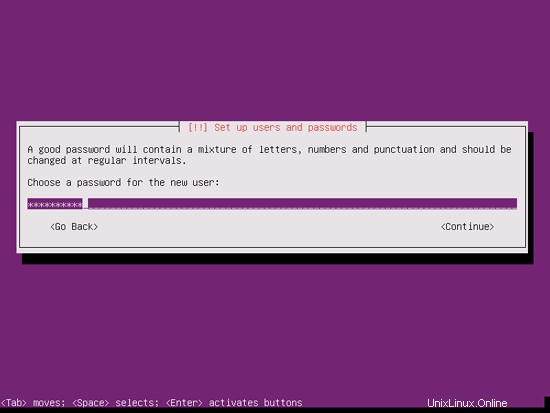
Create a user, for example the user Administrator with the user name administrator (don't use the user name admin as it is a reserved name on Ubuntu 11.10):
I don't need an encrypted private directory, so I choose No here:
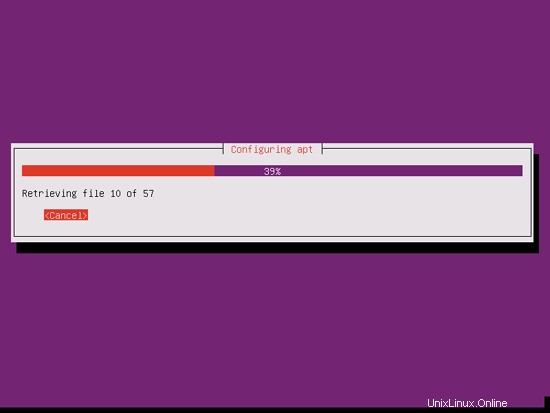
Next the package manager apt gets configured. Leave the HTTP proxy line empty unless you're using a proxy server to connect to the Internet:

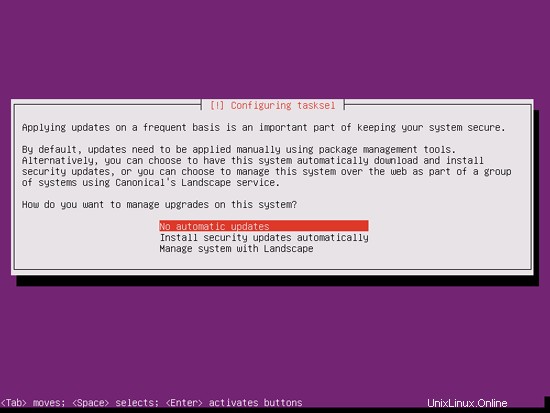
I'm a little bit old-fashioned and like to update my servers manually to have more control, therefore I select No automatic updates. Of course, it's up to you what you select here:
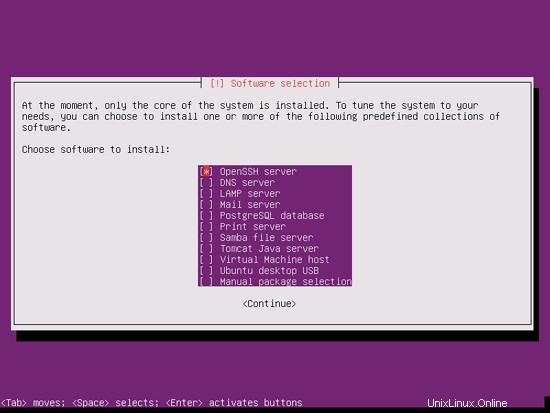
We need a DNS, mail, and LAMP server, but nevertheless I don't select any of them now because I like to have full control over what gets installed on my system. We will install the needed packages manually later on. The only item I select here is OpenSSH server so that I can immediately connect to the system with an SSH client such as PuTTY after the installation has finished:
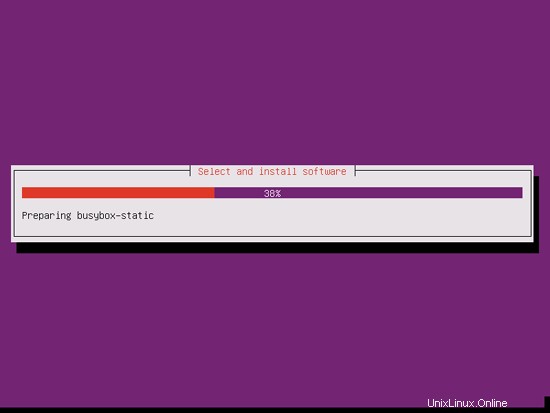
The installation continues:
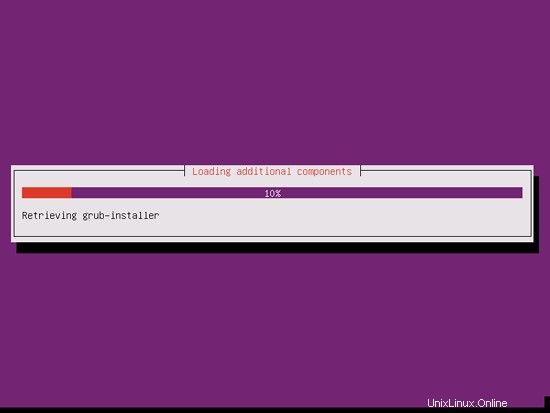
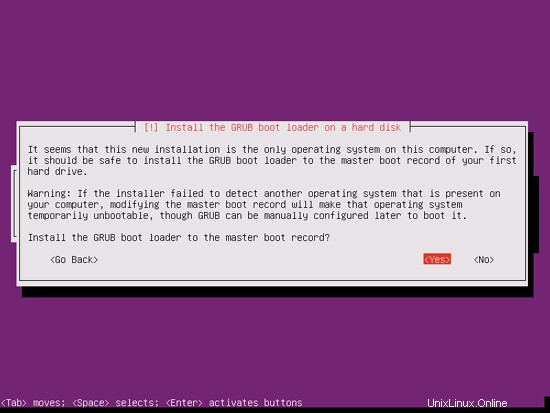
The GRUB boot loader gets installed:
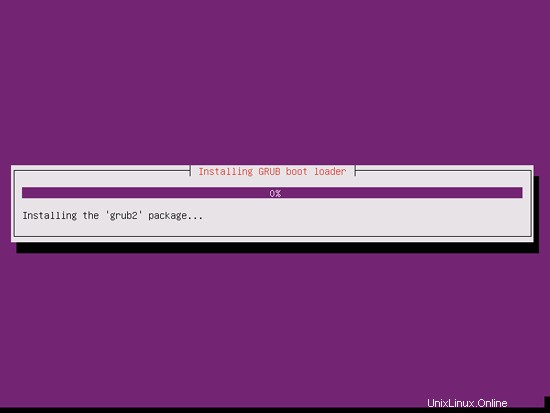
Select Yes when you are asked Install the GRUB boot loader to the master boot record?:
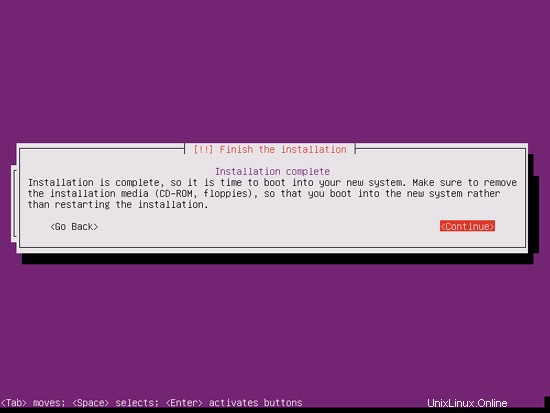
The base system installation is now finished. Remove the installation CD from the CD drive and hit Continue to reboot the system:
On to the next step...