完璧なサーバー-UbuntuNattyNarwhal(Ubuntu 11.04)[ISPConfig 2]
このチュートリアルでは、ISPとホスティング業者が必要とするすべてのサービスを提供するUbuntu Natty Narwhal(Ubuntu 11.04)サーバーをセットアップする方法を示します:Apache Webサーバー(SSL対応)、SMTP-AUTHおよびTLSを備えたPostfixメールサーバー、BIND DNSサーバー、Proftpd FTPサーバー、MySQLサーバー、Courier POP3 / IMAP、Quota、Firewallなど。最終的には、確実に機能するシステムが必要です。必要に応じて、無料のWebホスティングコントロールパネルISPConfig 2をインストールできます(つまり、ISPConfigが実行されます)。箱から出して)
次のソフトウェアを使用します:
- Webサーバー:PHP 5.3.5、Python、Ruby、およびWebDAVを搭載したApache 2.2.17
- データベースサーバー:MySQL 5.1.54
- メールサーバー:Postfix
- DNSサーバー:BIND9
- FTPサーバー:proftpd
- POP3 / IMAP:Maildir形式を使用するため、Courier-POP3/Courier-IMAPをインストールします。
- Webサイト統計用のWebalizer
この設定はISPConfig3では機能しないことに注意してください ! ISPConfig2でのみ有効です。
まず、このようなシステムを構築する方法はこれだけではありません。この目標を達成する方法はたくさんありますが、これが私のやり方です。これがあなたのために働くという保証はありません!
1要件
このようなシステムをインストールするには、次のものが必要です。
- Ubuntu 11.04サーバーCD、ここで入手可能:http://releases.ubuntu.com/releases/11.04/ubuntu-11.04-server-i386.iso(i386)またはhttp://releases.ubuntu.com/releases /11.04/ubuntu-11.04-server-amd64.iso(x86_64)
- 高速インターネット接続。
2予備メモ
このチュートリアルでは、ホスト名server1.example.comとIPアドレス192.168.0.100およびゲートウェイ192.168.0.1を使用します。これらの設定は異なる場合があるため、必要に応じて置き換える必要があります。
3ベースシステム
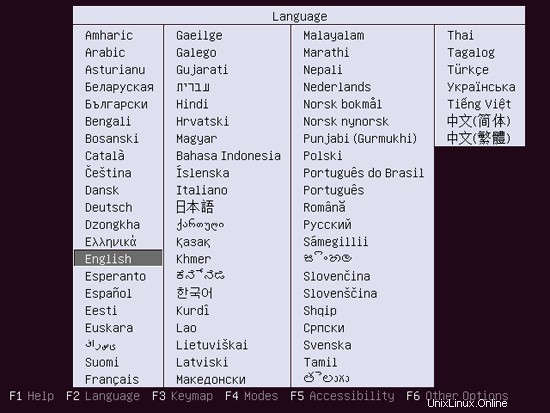
UbuntuインストールCDをシステムに挿入し、そこから起動します。言語を選択してください:
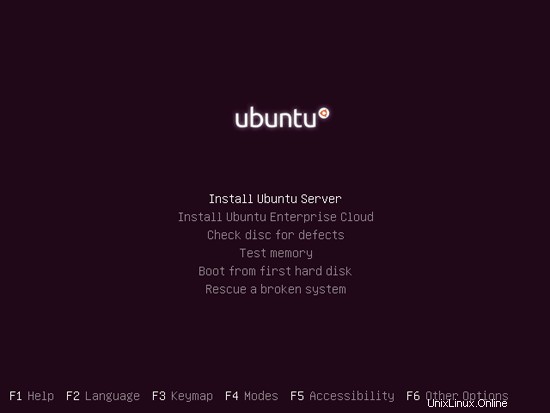
次に、[Ubuntuサーバーのインストール]を選択します。
言語をもう一度選択してください(?):

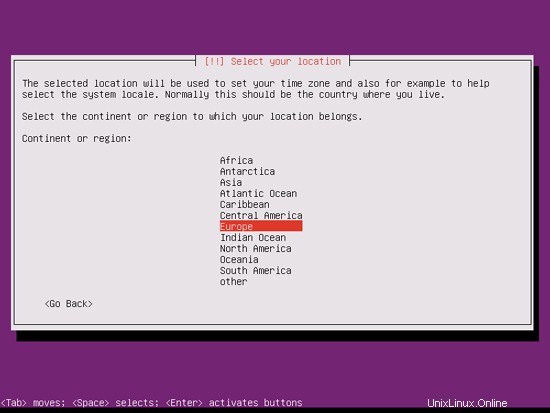
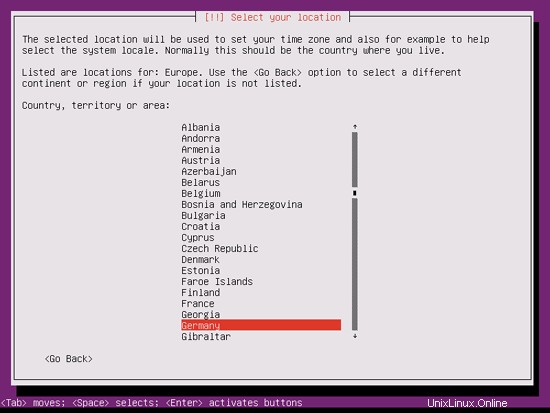
次に、場所を選択します:

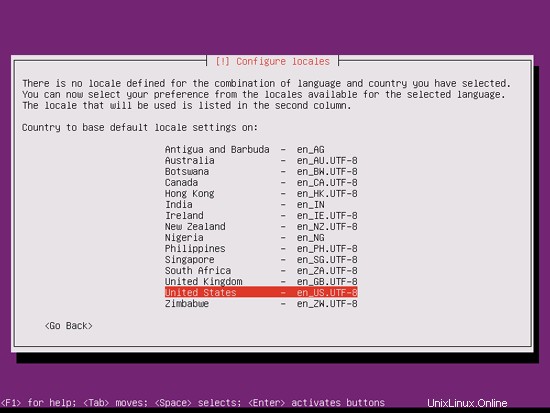
言語と場所の珍しい組み合わせ(私の場合のように、言語として英語、場所としてドイツなど)を選択した場合、インストーラーは、この組み合わせにロケールが定義されていないことを通知する場合があります。この場合、ロケールを手動で選択する必要があります。ここでen_US.UTF-8を選択します:
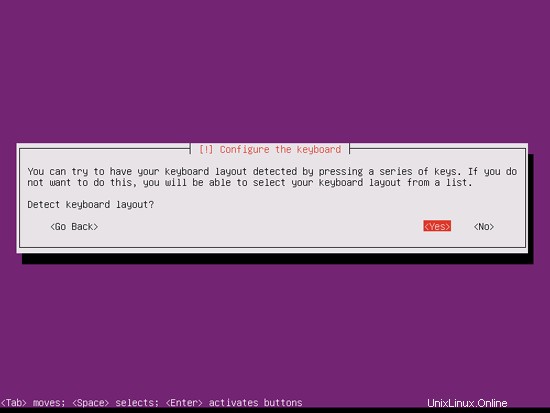
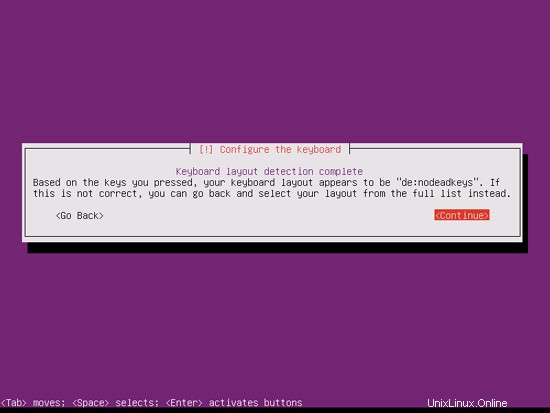
キーボードレイアウトを選択します(いくつかのキーを押すように求められ、インストーラーは押したキーに基づいてキーボードレイアウトを検出しようとします):
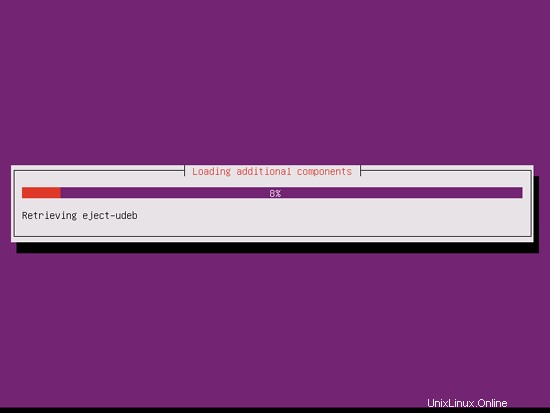
インストーラーはインストールCDとハードウェアをチェックし、ネットワークにDHCPサーバーがある場合はDHCPを使用してネットワークを構成します。
完璧なサーバー-UbuntuNattyNarwhal(Ubuntu 11.04)[ISPConfig2]-ページ2
4ルート権限を取得する
再起動後、以前に作成したユーザー名(管理者など)でログインできます。このチュートリアルのすべてのステップをroot権限で実行する必要があるため、このチュートリアルのすべてのコマンドの前に文字列sudoを付けるか、「
」と入力して今すぐrootになります。sudo su
(実行してルートログインを有効にすることもできます
sudo passwd root
ルートにパスワードを与えます。その後、rootとして直接ログインできますが、これはさまざまな理由でUbuntu開発者やコミュニティに嫌われています。 http://ubuntuforums.org/showthread.php?t=765414を参照してください。)
5 SSHサーバーのインストール(オプション)
システムのインストール中にOpenSSHサーバーをインストールしなかった場合は、今すぐインストールできます。
apt-get install ssh openssh-server
今後は、PuTTYなどのSSHクライアントを使用して、ワークステーションからUbuntu 11.04サーバーに接続し、このチュートリアルの残りの手順に従うことができます。
6 vim-noxをインストールします(オプション)
このチュートリアルでは、テキストエディタとしてviを使用します。デフォルトのviプログラムは、UbuntuとDebianで奇妙な動作をします。これを修正するには、vim-noxをインストールします:
apt-get install vim-nox
(joeやnanoなどの別のテキストエディタを使用する場合は、これを行う必要はありません。)
7ネットワークの構成
UbuntuインストーラーはDHCP経由でネットワーク設定を取得するようにシステムを構成しているため、サーバーには静的IPアドレスが必要であるため、ここで変更する必要があります。 / etc / network / interfacesを編集します 必要に応じて調整します(このセットアップ例では、IPアドレス 192.168.0.100を使用します ):
vi /etc/network/interfaces
# This file describes the network interfaces available on your system
# and how to activate them. For more information, see interfaces(5).

# The loopback network interface
auto lo
iface lo inet loopback

# The primary network interface
auto eth0
iface eth0 inet static
        address 192.168.0.100
        netmask 255.255.255.0
        network 192.168.0.0
        broadcast 192.168.0.255
gateway 192.168.0.1 |
次に、ネットワークを再起動します。
/etc/init.d/networking restart
次に、/ etc/hostsを編集します。次のようにします:
vi /etc/hosts
127.0.0.1 localhost.localdomain localhost 192.168.0.100 server1.example.com server1 # The following lines are desirable for IPv6 capable hosts ::1 ip6-localhost ip6-loopback fe00::0 ip6-localnet ff00::0 ip6-mcastprefix ff02::1 ip6-allnodes ff02::2 ip6-allrouters |
今すぐ実行
echo server1.example.com> /etc/hostname
/etc/init.d/hostname restart
その後、実行します
ホスト名
ホスト名-f
両方ともserver1.example.comが表示されるはずです。
8/etc/apt/sources.listを編集してLinuxインストールを更新する
/etc/apt/sources.listを編集します。コメントアウトするか、ファイルからインストールCDを削除し、ユニバースおよびマルチバースリポジトリが有効になっていることを確認します。次のようになります。
vi /etc/apt/sources.list
# # deb cdrom:[Ubuntu-Server 11.04 _Natty Narwhal_ - Release amd64 (20110426)]/ natty main restricted #deb cdrom:[Ubuntu-Server 11.04 _Natty Narwhal_ - Release amd64 (20110426)]/ natty main restricted # See http://help.ubuntu.com/community/UpgradeNotes for how to upgrade to # newer versions of the distribution. deb http://de.archive.ubuntu.com/ubuntu/ natty main restricted deb-src http://de.archive.ubuntu.com/ubuntu/ natty main restricted ## Major bug fix updates produced after the final release of the ## distribution. deb http://de.archive.ubuntu.com/ubuntu/ natty-updates main restricted deb-src http://de.archive.ubuntu.com/ubuntu/ natty-updates main restricted ## N.B. software from this repository is ENTIRELY UNSUPPORTED by the Ubuntu ## team. Also, please note that software in universe WILL NOT receive any ## review or updates from the Ubuntu security team. deb http://de.archive.ubuntu.com/ubuntu/ natty universe deb-src http://de.archive.ubuntu.com/ubuntu/ natty universe deb http://de.archive.ubuntu.com/ubuntu/ natty-updates universe deb-src http://de.archive.ubuntu.com/ubuntu/ natty-updates universe ## N.B. software from this repository is ENTIRELY UNSUPPORTED by the Ubuntu ## team, and may not be under a free licence. Please satisfy yourself as to ## your rights to use the software. Also, please note that software in ## multiverse WILL NOT receive any review or updates from the Ubuntu ## security team. deb http://de.archive.ubuntu.com/ubuntu/ natty multiverse deb-src http://de.archive.ubuntu.com/ubuntu/ natty multiverse deb http://de.archive.ubuntu.com/ubuntu/ natty-updates multiverse deb-src http://de.archive.ubuntu.com/ubuntu/ natty-updates multiverse ## Uncomment the following two lines to add software from the 'backports' ## repository. ## N.B. software from this repository may not have been tested as ## extensively as that contained in the main release, although it includes ## newer versions of some applications which may provide useful features. ## Also, please note that software in backports WILL NOT receive any review ## or updates from the Ubuntu security team. # deb http://de.archive.ubuntu.com/ubuntu/ natty-backports main restricted universe multiverse # deb-src http://de.archive.ubuntu.com/ubuntu/ natty-backports main restricted universe multiverse deb http://security.ubuntu.com/ubuntu natty-security main restricted deb-src http://security.ubuntu.com/ubuntu natty-security main restricted deb http://security.ubuntu.com/ubuntu natty-security universe deb-src http://security.ubuntu.com/ubuntu natty-security universe deb http://security.ubuntu.com/ubuntu natty-security multiverse deb-src http://security.ubuntu.com/ubuntu natty-security multiverse ## Uncomment the following two lines to add software from Canonical's ## 'partner' repository. ## This software is not part of Ubuntu, but is offered by Canonical and the ## respective vendors as a service to Ubuntu users. # deb http://archive.canonical.com/ubuntu natty partner # deb-src http://archive.canonical.com/ubuntu natty partner ## Uncomment the following two lines to add software from Ubuntu's ## 'extras' repository. ## This software is not part of Ubuntu, but is offered by third-party ## developers who want to ship their latest software. # deb http://extras.ubuntu.com/ubuntu natty main # deb-src http://extras.ubuntu.com/ubuntu natty main |
次に実行します
apt-get update
aptパッケージデータベースを更新し、
apt-get upgrade
最新のアップデートをインストールします(ある場合)。更新の一部として新しいカーネルがインストールされていることがわかった場合は、後でシステムを再起動する必要があります。
reboot
9デフォルトのシェルを変更する
/ bin/shは/bin/ dashへのシンボリックリンクですが、/ bin/dashではなく/bin/bashが必要です。したがって、これを行います:
dpkg-reconfigure dash
デフォルトのシステムシェル(/ bin / sh)としてダッシュを使用しますか? <-いいえ
これを行わないと、ISPConfigのインストールは失敗します。
10AppArmorを無効にする
AppArmorは、拡張セキュリティを提供するセキュリティ拡張機能(SELinuxと同様)です。私の意見では、安全なシステムを構成するためにそれを必要とせず、通常、利点よりも多くの問題を引き起こします(一部のサービスが期待どおりに機能しなかったため、1週間のトラブルシューティングを行った後、それを考えてください。すべてが問題ないことを確認してください。AppArmorだけが問題を引き起こしていました)。したがって、無効にします(後でISPConfigをインストールする場合は必須です)。
次のように無効にできます:
/etc/init.d/apparmor stop
update-rc.d -f apparmor remove
apt-get remove apparmor apparmor-utils
完璧なサーバー-UbuntuNattyNarwhal(Ubuntu 11.04)[ISPConfig2]-4ページ
11ソフトウェアのインストール
次に、後で必要になるいくつかのパッケージをインストールします。実行
apt-get install binutils cpp fetchmail flex gcc libarchive-zip-perl libc6-dev libcompress-zlib-perl libdb4.6-dev libpcre3 libpopt-dev lynx m4 make ncftp nmap openssl perl perl-modules unzip zip zlib1g-dev autoconf automake1.9 libtool bison autotools-dev g++ build-essential
(このコマンドは1行に入力する必要があります !)
12ジャーナルクォータ
(私が行ったのとは異なるパーティションスキームを選択した場合は、この章を調整して、必要なパーティションにクォータが適用されるようにする必要があります。)
クォータをインストールするには、
を実行しますapt-get install quota
/ etc/fstabを編集します。私の場合は次のようになります(マウントポイント/のあるパーティションに、usrjquota =quote.user、grpjquota =quote.group、jqfmt =vfsv0を追加しました):
vi /etc/fstab
# /etc/fstab: static file system information. # # Use 'blkid -o value -s UUID' to print the universally unique identifier # for a device; this may be used with UUID= as a more robust way to name # devices that works even if disks are added and removed. See fstab(5). # # <file system> <mount point> <type> <options> <dump> <pass> proc /proc proc nodev,noexec,nosuid 0 0 /dev/mapper/server1-root / ext4 errors=remount-ro,usrjquota=quota.user,grpjquota=quota.group,jqfmt=vfsv0 0 1 # /boot was on /dev/sda1 during installation UUID=deae7cd1-b106-47aa-9a7c-512f046d2ebf /boot ext2 defaults 0 2 /dev/mapper/server1-swap_1 none swap sw 0 0 /dev/fd0 /media/floppy0 auto rw,user,noauto,exec,utf8 0 0 |
クォータを有効にするには、次のコマンドを実行します。
mount -o remount /
quotacheck -avugm
quote-avug
13DNSサーバー
実行
apt-get install bind9
セキュリティ上の理由から、BINDをchrootして実行したいので、次の手順を実行する必要があります。
/etc/init.d/bind9 stop
ファイル/etc/ default / bind9を編集して、デーモンが/ var / lib/namedにchrootされた非特権ユーザーバインドとして実行されるようにします。次の行を変更します:OPTIONS ="-u bind"は、OPTIONS ="-u bind -t / var / lib / named":
と表示されます。vi /etc/default/bind9
# run resolvconf?
RESOLVCONF=yes

# startup options for the server
OPTIONS="-u bind -t /var/lib/named"
の起動オプション |
/ var/libの下に必要なディレクトリを作成します。
mkdir -p / var / lib / named / etc
mkdir / var / lib / named / dev
mkdir -p / var / lib / named / var / cache / bind
mkdir -p / var / lib / named / var / run / bind / run
次に、configディレクトリを/etcから/var / lib / named/etcに移動します。
mv /etc/bind /var/lib/named/etc
古い場所から新しい構成ディレクトリへのシンボリックリンクを作成します(バインドが将来更新されるときの問題を回避するため):
ln -s /var/lib/named/etc/bind /etc/bind
nullおよびランダムなデバイスを作成し、ディレクトリのアクセス許可を修正します。
mknod / var / lib / named / dev / null c 1 3
mknod / var / lib / named / dev / random c 1 8
chmod 666 / var / lib / named / dev / null / var / lib / named / dev / random
chown -R bind:bind / var / lib / named / var / *
chown -R bind:bind / var / lib / named / etc / bind
ファイル/etc/rsyslog.d/bind-chroot.conf...を作成する必要があります...
vi /etc/rsyslog.d/bind-chroot.conf
...そして、次の行を追加して、重要なメッセージをシステムログに記録できるようにします。
$AddUnixListenSocket /var/lib/named/dev/log |
ロギングデーモンを再起動します:
/etc/init.d/rsyslog restart
BINDを起動し、/ var / log/syslogでエラーを確認します。
/etc/init.d/bind9 start
14 MySQL
MySQLをインストールするには、
を実行します。apt-get install mysql-server mysql-client libmysqlclient-dev
MySQLルートユーザーのパスワードを入力するように求められます。このパスワードは、ユーザーexample@unixlinux.onlineとexample@unixlinux.onlineで有効であるため、後でMySQLルートパスワードを手動で指定する必要はありません。 :
MySQLの「root」ユーザーの新しいパスワード:<-yourrootsqlpassword
MySQLの「root」ユーザーのパスワードを繰り返します:<-yourrootsqlpassword
MySQLがローカルホストだけでなくすべてのインターフェースでリッスンするようにしたいので、/ etc / mysql / my.cnfを編集して、bind-address =127.0.0.1:
の行をコメントアウトします。vi /etc/mysql/my.cnf
[...] # Instead of skip-networking the default is now to listen only on # localhost which is more compatible and is not less secure. #bind-address = 127.0.0.1 [...] |
次に、MySQLを再起動します:
/etc/init.d/mysql restart
次に、ネットワーキングが有効になっていることを確認します。実行
netstat -tap | grep mysql
出力は次のようになります。
example@unixlinux.online:〜#netstat -tap | grep mysql
tcp 0 0 *:mysql *:* LISTEN 7220 / mysqld
example@unixlinux.online:〜
完璧なサーバー-UbuntuNattyNarwhal(Ubuntu 11.04)[ISPConfig2]-5ページ
15SMTP-AUTHおよびTLSを使用したPostfix
SMTP-AUTHとTLSを使用してPostfixをインストールするには、次の手順を実行します。
apt-get install postfix libsasl2-2 sasl2-bin libsasl2-modules procmail
2つの質問があります。次のように答えてください:
メール構成の一般的なタイプ:<-インターネットサイト
システムメール名:<-server1.example.com
次に実行します
dpkg-reconfigure postfix
繰り返しになりますが、いくつかの質問があります:
メール構成の一般的なタイプ:<-インターネットサイト
システムメール名:<-server1.example.com
ルートおよびポストマスターのメール受信者:<-[空白]
その他の宛先メールを受け入れる(なしの場合は空白):<-server1.example.com、localhost.example.com、localhost.localdomain、localhost
メールキューで同期更新を強制しますか? <-いいえ
ローカルネットワーク:<-127.0.0.0/8 [::ffff:127.0.0.0] / 104 [::1] / 128
ローカル配信にprocmailを使用しますか? <-はい
メールボックスのサイズ制限(バイト):<-0
ローカルアドレス拡張文字:<-+
使用するインターネットプロトコル:<-すべて
次に、これを行います:
postconf -e'smtpd_sasl_local_domain ='
postconf -e'smtpd_sasl_auth_enable =yes'
postconf -e'smtpd_sasl_security_options =noanonymous'
postconf -e'broken_sasl_auth_clients =yes'
post 'smtpd_sasl_authenticated_header =yes'
postconf -e'smtpd_recipient_restrictions =permit_sasl_authenticated、permit_mynetworks、reject_unauth_destination'
postconf -e'inet_interfaces =all'
echo'pwcheck_method:sasl sasl / smtpd.conf
echo'mech_list:プレーンログイン'>> /etc/postfix/sasl/smtpd.conf
その後、TLSの証明書を作成します:
mkdir / etc / postfix / ssl
cd / etc / postfix / ssl /
openssl genrsa -des3 -rand / etc / hosts -out smtpd.key 1024
chmod 600 smtpd.key
openssl req -new -key smtpd.key -out smtpd.csr
openssl x509 -req -days 3650 -in smtpd.csr -signkey smtpd.key -out smtpd.crt
openssl rsa -in smtpd.key -out smtpd.key.unencrypted
mv -f smtpd.key.unencrypted smtpd.key
openssl req -new -x509 -extensions v3_ca -keyout Cakey.pem -out cacert.pem -days 3650
次に、TLSのPostfixを設定します(myhostnameに正しいホスト名を使用していることを確認してください):
postconf -e 'myhostname = server1.example.com'
postconf -e'smtpd_tls_auth_only =no'
postconf -e'smtp_use_tls =yes'
postconf -e'smtpd_use_tls =yes'
postconf -e'smtp_tls_note_starttls_offer =yes'
postconf- e'smtpd_tls_key_file =/etc/postfix/ssl/smtpd.key'
postconf -e'smtpd_tls_cert_file =/etc/postfix/ssl/smtpd.crt'
postconf -e'smtpd_tls_CAfile =/ etc / postfix /ssl/cacert.pem'
postconf -e' smtpd_tls_loglevel =1'
postconf -e' smtpd_tls_received_header =yes'
postconf -e' smtpd_tls_session_cache_timeout =3600s'
postconf -e 'tls_random_source =dev:/ dev / urandom'
ファイル/etc/postfix/main.cfは次のようになります。
cat /etc/postfix/main.cf
# See /usr/share/postfix/main.cf.dist for a commented, more complete version


# Debian specific:  Specifying a file name will cause the first
# line of that file to be used as the name.  The Debian default
# is /etc/mailname.
#myorigin = /etc/mailname

smtpd_banner = $myhostname ESMTP $mail_name (Ubuntu)
biff = no

# appending .domain is the MUA's job.
append_dot_mydomain = no

# Uncomment the next line to generate "delayed mail" warnings
#delay_warning_time = 4h

readme_directory = no

# TLS parameters
smtpd_tls_cert_file = /etc/postfix/ssl/smtpd.crt
smtpd_tls_key_file = /etc/postfix/ssl/smtpd.key
smtpd_use_tls = yes
smtpd_tls_session_cache_database = btree:${data_directory}/smtpd_scache
smtp_tls_session_cache_database = btree:${data_directory}/smtp_scache

# See /usr/share/doc/postfix/TLS_README.gz in the postfix-doc package for
# information on enabling SSL in the smtp client.

myhostname = server1.example.com
alias_maps = hash:/etc/aliases
alias_database = hash:/etc/aliases
myorigin = /etc/mailname
mydestination = server1.example.com, localhost.example.com, localhost.localdomain, localhost
relayhost =
mynetworks = 127.0.0.0/8 [::ffff:127.0.0.0]/104 [::1]/128
mailbox_command = procmail -a "$EXTENSION"
mailbox_size_limit = 0
recipient_delimiter = +
inet_interfaces = all
inet_protocols = all
smtpd_sasl_local_domain =
smtpd_sasl_auth_enable = yes
smtpd_sasl_security_options = noanonymous
broken_sasl_auth_clients = yes
smtpd_sasl_authenticated_header = yes
smtpd_recipient_restrictions = permit_sasl_authenticated,permit_mynetworks,reject_unauth_destination
smtpd_tls_auth_only = no
smtp_use_tls = yes
smtp_tls_note_starttls_offer = yes
smtpd_tls_CAfile = /etc/postfix/ssl/cacert.pem
smtpd_tls_loglevel = 1
smtpd_tls_received_header = yes
smtpd_tls_session_cache_timeout = 3600s
tls_random_source = dev:/dev/urandom |
認証はsaslauthdによって行われます。正しく機能させるには、いくつか変更する必要があります。 Postfixは/var/ spool / postfixでchrootされて実行されるため、次のことを行う必要があります。
mkdir -p /var/spool/postfix/var/run/saslauthd
次に、saslauthdをアクティブ化するために、/ etc / default/saslauthdを編集する必要があります。 STARTをyesに設定し、行OPTIONS ="-c -m / var / run/saslauthd"をOPTIONS="-c -m / var / spool / postfix / var / run / saslauthd -r"に変更します:
vi /etc/default/saslauthd
# # Settings for saslauthd daemon # Please read /usr/share/doc/sasl2-bin/README.Debian for details. # # Should saslauthd run automatically on startup? (default: no) START=yes # Description of this saslauthd instance. Recommended. # (suggestion: SASL Authentication Daemon) DESC="SASL Authentication Daemon" # Short name of this saslauthd instance. Strongly recommended. # (suggestion: saslauthd) NAME="saslauthd" # Which authentication mechanisms should saslauthd use? (default: pam) # # Available options in this Debian package: # getpwent -- use the getpwent() library function # kerberos5 -- use Kerberos 5 # pam -- use PAM # rimap -- use a remote IMAP server # shadow -- use the local shadow password file # sasldb -- use the local sasldb database file # ldap -- use LDAP (configuration is in /etc/saslauthd.conf) # # Only one option may be used at a time. See the saslauthd man page # for more information. # # Example: MECHANISMS="pam" MECHANISMS="pam" # Additional options for this mechanism. (default: none) # See the saslauthd man page for information about mech-specific options. MECH_OPTIONS="" # How many saslauthd processes should we run? (default: 5) # A value of 0 will fork a new process for each connection. THREADS=5 # Other options (default: -c -m /var/run/saslauthd) # Note: You MUST specify the -m option or saslauthd won't run! # # WARNING: DO NOT SPECIFY THE -d OPTION. # The -d option will cause saslauthd to run in the foreground instead of as # a daemon. This will PREVENT YOUR SYSTEM FROM BOOTING PROPERLY. If you wish # to run saslauthd in debug mode, please run it by hand to be safe. # # See /usr/share/doc/sasl2-bin/README.Debian for Debian-specific information. # See the saslauthd man page and the output of 'saslauthd -h' for general # information about these options. # # Example for postfix users: "-c -m /var/spool/postfix/var/run/saslauthd" #OPTIONS="-c -m /var/run/saslauthd" OPTIONS="-c -m /var/spool/postfix/var/run/saslauthd -r" |
次に、postfixユーザーをsaslグループに追加します(これにより、Postfixにsaslauthdへのアクセス許可が付与されます):
adduser postfix sasl
ここでPostfixを再起動し、saslauthdを開始します:
/etc/init.d/postfix restart
/etc/init.d/saslauthd start
SMTP-AUTHとTLSが正しく機能するかどうかを確認するには、次のコマンドを実行します。
telnet localhost 25
Postfixメールサーバータイプへの接続を確立した後
ehlo localhost
線が表示されている場合
250-STARTTLS
および
250-AUTH PLAIN LOGIN
すべて順調。
私のシステムの出力は次のようになります:
example@unixlinux.online:/ etc / postfix / ssl#telnet localhost 25
127.0.0.1を試しています...
localhost.localdomainに接続しています。
エスケープ文字は'^]'です。
220 server1.example.com ESMTP Postfix(Ubuntu)
ehlo localhost
250-server1.example.com
250-PIPELINING
250-SIZE 10240000
250-VRFY
250-ETRN
250-STARTTLS
250-AUTH PLAIN LOGIN
250-AUTH =PLAIN LOGIN
250-ENHANCEDSTATUSCODES
250-8BITMIME
250 DSN
quit
2212.0.0さようなら
外部ホストによって接続が閉じられました。
example@unixlinux.online:/ etc / postfix / ssl#
タイプ
quit
システムのシェルに戻ります。
16 Courier-IMAP / Courier-POP3
これを実行して、Courier-IMAP / Courier-IMAP-SSL(ポート993のIMAPの場合)およびCourier-POP3 / Courier-POP3-SSL(ポート995のPOP3の場合)をインストールします。
apt-get install courier-authdaemon courier-base courier-imap courier-imap-ssl courier-pop courier-pop-ssl courier-ssl gamin libgamin0 libglib2.0-0
2つの質問があります:
Webベースの管理用のディレクトリを作成しますか? <-いいえ
SSL証明書は必要ありません<-わかりました
インストール中に、IMAP-SSLおよびPOP3-SSLのSSL証明書がホスト名localhostで作成されます。これを正しいホスト名(このチュートリアルではserver1.example.com)に変更するには、証明書を削除します...
cd /etc/courier
rm -f /etc/courier/imapd.pem
rm -f /etc/courier/pop3d.pem
...そして次の2つのファイルを変更します。 CN=localhostをCN=server1.example.comに置き換えます(必要に応じて他の値を変更することもできます):
vi /etc/courier/imapd.cnf
[...] CN=server1.example.com [...] |
vi /etc/courier/pop3d.cnf
[...] CN=server1.example.com [...] |
次に、証明書を再作成します...
mkimapdcert
mkpop3dcert
...そしてCourier-IMAP-SSLとCourier-POP3-SSLを再起動します:
/etc/init.d/courier-imap-ssl restart
/etc/init.d/courier-pop-ssl restart
ISPConfigを使用したくない場合は、ユーザーのMaildir*にメールを配信するようにPostfixを設定します。
postconf -e'home_mailbox =Maildir /'
postconf -e'mailbox_command ='
/etc/init.d/postfix restart
*注意: ISPConfigはprocmailレシピを使用して必要な構成を行うため、システムでISPConfigを使用する場合は、これを行う必要はありません。ただし、ISPConfigWebインターフェイスの[管理]->[サーバー]->[設定]->[電子メール]でMaildirを有効にしてください。
完璧なサーバー-UbuntuNattyNarwhal(Ubuntu 11.04)[ISPConfig2]-6ページ
17 Apache / PHP5 / Ruby / Python / WebDAV
次に、Apacheをインストールします:
apt-get install apache2 apache2-doc apache2-mpm-prefork apache2-utils apache2-suexec libexpat1 ssl-cert
次に、PHP5、Ruby、Python(3つすべてをApacheモジュールとして)をインストールします。
apt-get install libapache2-mod-php5 libapache2-mod-ruby libapache2-mod-python php5 php5-common php5-curl php5-dev php5-gd php5-idn php-pear php5-imagick php5-imap php5-mcrypt php5-memcache php5-ming php5-mysql php5-pspell php5-recode php5-snmp php5-sqlite php5-tidy php5-xmlrpc php5-xsl
次に、/ etc / apache2 / mods-available / dir.confを編集します:
vi /etc/apache2/mods-available/dir.conf
DirectoryIndex行を変更します:
<IfModule mod_dir.c>

          #DirectoryIndex index.html index.cgi index.pl index.php index.xhtml index.htm
          DirectoryIndex index.html index.htm index.shtml index.cgi index.php index.php3 index.pl index.xhtml

</IfModule> |
次に、いくつかのApacheモジュール(SSL、rewrite、suexec、include、およびWebDAV)を有効にする必要があります。
a2enmod ssl
a2enmod rewrite
a2enmod suexec
a2enmod include
a2enmod dav_fs
a2enmod dav
Apacheを再起動します:
/etc/init.d/apache2 restart
Rubyの小さな問題を修正する必要があります。 ISPConfigをインストールしてWebサイトでRubyを有効にすると、.rbxファイルは正常に実行され、ブラウザーに表示されますが、これは.rbファイルでは機能しません-.rbファイルをダウンロードするように求められます-同じことがvhost用にRubyを手動で構成します(つまり、ISPConfigとは関係ありません)。これを修正するには、/ etc / mime.types ...
を開きます。vi /etc/mime.types
...そしてapplication/x-ruby行をコメントアウトします:
[...] #application/x-ruby rb [...] |
Apacheを再起動します:
/etc/init.d/apache2 restart
これで、.rbxファイルと同じように、.rbファイルが実行され、ブラウザに表示されます。
次の章(17.1)では、PHPを無効にします(これは、このサーバーにISPConfigをインストールする場合にのみ必要です)。 PHPとは異なり、RubyとPythonはデフォルトで無効になっているため、これを行う必要はありません。
17.1PHPをグローバルに無効にする
(このサーバーにISPConfigをインストールする予定がない場合は、このセクションをスキップしてください!)
ISPConfigでは、WebサイトごとにPHPを構成します。つまり、PHPスクリプトを実行できるWebサイトと実行できないWebサイトを指定できます。これは、PHPがグローバルに無効になっている場合にのみ機能します。無効にしないと、ISPConfigで何を指定しても、すべてのWebサイトでPHPスクリプトを実行できるためです。
PHPをグローバルに無効にするには、/ etc / mime.typesを編集し、application/x-httpd-php行をコメントアウトします。
vi /etc/mime.types
[...] #application/x-httpd-php phtml pht php #application/x-httpd-php-source phps #application/x-httpd-php3 php3 #application/x-httpd-php3-preprocessed php3p #application/x-httpd-php4 php4 #application/x-httpd-php5 php5 [...] |
/etc/apache2/mods-enabled/php5.confを編集し、SetHandler行をコメントアウトします。
vi /etc/apache2/mods-enabled/php5.conf
<IfModule mod_php5.c>
    <FilesMatch "\.ph(p3?|tml)$">
        #SetHandler application/x-httpd-php
    </FilesMatch>
    <FilesMatch "\.phps$">
        #SetHandler application/x-httpd-php-source
    </FilesMatch>
    # To re-enable php in user directories comment the following lines
    # (from <IfModule ...> to </IfModule>.) Do NOT set it to On as it
    # prevents .htaccess files from disabling it.
    <IfModule mod_userdir.c>
        <Directory /home/*/public_html>
            php_admin_value engine Off
        </Directory>
    </IfModule>
</IfModule> |
Then restart Apache:
/etc/init.d/apache2 restart
18 Proftpd
In order to install Proftpd, run
apt-get install proftpd ucf
You will be asked a question:
Run proftpd:<-- standalone
For security reasons add the following lines to /etc/proftpd/proftpd.conf (thanks to Reinaldo Carvalho; more information can be found here:http://proftpd.org/localsite/Userguide/linked/userguide.html):
vi /etc/proftpd/proftpd.conf
[...] DefaultRoot ~ ServerIdent on "FTP Server ready." [...] |
ISPConfig expects the configuration to be in /etc/proftpd.conf instead of /etc/proftpd/proftpd.conf, therefore we create a symlink (you can skip this command if you don't want to install ISPConfig):
ln -s /etc/proftpd/proftpd.conf /etc/proftpd.conf
Then restart Proftpd:
/etc/init.d/proftpd restart
The Perfect Server - Ubuntu Natty Narwhal (Ubuntu 11.04) [ISPConfig 2] - Page 7
19 Webalizer
To install webalizer, just run
apt-get install webalizer geoip-database
20 Synchronize the System Clock
It is a good idea to synchronize the system clock with an NTP (n etwork t ime p rotocol) server over the internet. Simply run
apt-get install ntp ntpdate
and your system time will always be in sync.
21 Install Some Perl Modules Needed By SpamAssassin (Comes With ISPConfig)
Run
apt-get install libhtml-parser-perl libdb-file-lock-perl libnet-dns-perl libnetaddr-ip-perl perl-modules
22 ISPConfig
The configuration of the server is now finished, and if you wish you can now install ISPConfig on it. Please check out the ISPConfig installation manual:http://www.ispconfig.org/manual_installation.htm
Before you install ISPConfig, there's one important thing you must do. Open /usr/include/stdio.h and replace getline with parseline in line 671:
vi /usr/include/stdio.h
[...]
   This function is not part of POSIX and therefore no official
   cancellation point.  But due to similarity with an POSIX interface
   or due to the implementation it is a cancellation point and
   therefore not marked with __THROW.  */
extern _IO_ssize_t parseline (char **__restrict __lineptr,
                            size_t *__restrict __n,
                            FILE *__restrict __stream) __wur;
#endif
[...] |
If you don't do this, the installation will fail because of the following error:
htpasswd.c:101:error:conflicting types for 'getline'
/usr/include/stdio.h:671:note:previous declaration of 'getline' was here
make[2]:*** [htpasswd.o] Error 1
make[2]:Leaving directory `/home/ISPConfig-2.2.stable/install_ispconfig/compile_aps/apache_1.3.41/src/support'
make[1]:*** [build-support] Error 1
make[1]:Leaving directory `/home/ISPConfig-2.2.stable/install_ispconfig/compile_aps/apache_1.3.41'
make:*** [build] Error 2
ERROR:Could not make Apache
You can undo the change to /usr/include/stdio.h after the successful ISPConfig installation (but don't forget to change it back whenever you want to update ISPConfig!).
22.1 A Note On SuExec
If you want to run CGI scripts under suExec, you should specify /var/www as the home directory for websites created by ISPConfig as Ubuntu's suExec is compiled with /var/www as Doc_Root. Run
/usr/lib/apache2/suexec -V
and the output should look like this:
example@unixlinux.online:~# /usr/lib/apache2/suexec -V
-D AP_DOC_ROOT="/var/www"
-D AP_GID_MIN=100
-D AP_HTTPD_USER="www-data"
-D AP_LOG_EXEC="/var/log/apache2/suexec.log"
-D AP_SAFE_PATH="/usr/local/bin:/usr/bin:/bin"
-D AP_UID_MIN=100
-D AP_USERDIR_SUFFIX="public_html"
example@unixlinux.online:~#
So if you want to use suExec with ISPConfig, don't change the default web root (which is /var/www) if you use expert mode during the ISPConfig installation (in standard mode you can't change the web root anyway so you'll be able to use suExec in any case).
23 Links
- Ubuntu:http://www.ubuntu.com/
- ISPConfig:http://www.ispconfig.org/