fdroidサーバーのインストール手順は次のとおりです。 debianユーザーですべてのコマンドを実行し、必要に応じてsudoを使用します
F-DROIDのインストール
apt-get install software-properties-common
add-apt-repository "http://deb.debian.org/debian buster-backports main"
apt update
apt-get install fdroidserver/buster-backports
mkdir ~/android-sdk-linux
cd ~/android-sdk-linux
wget https://dl.google.com/android/repository/commandlinetools-linux-6858069_latest.zip
echo "87f6dcf41d4e642e37ba03cb2e387a542aa0bd73cb689a9e7152aad40a6e7a08 commandlinetools-linux-6858069_latest.zip" | sha256sum -c
commandlinetools-linux-6858069_latest.zip: OK
unzip commandlinetools-linux-6858069_latest.zip
export ANDROID_HOME="$HOME/android-sdk-linux"
./cmdline-tools/bin/sdkmanager --sdk_root="$ANDROID_HOME" platform-tools "build-tools;30.0.3"
echo export ANDROID_HOME=$ANDROID_HOME >> .bashrc
NGINXを使用したF-DROIDリポジトリの構成
sudo apt-get install nginx
sudo mkdir /usr/share/nginx/www
sudo mkdir /usr/share/nginx/www/fdroid
sudo chown -R $USER /usr/share/nginx/www/fdroid
cd /usr/share/nginx/www/fdroid
fdroid init
nano /etc/nginx/sites-enabled/default
(次のことを行います):
次の行を追加してルートディレクトリを変更しました:
root /usr/share/nginx/www;
/ var / www / html
を削除またはコメントします
sudo service ngnix restart
cd /usr/share/nginx/www/fdroid
次に、apkファイルをリポジトリディレクトリに配置します
cp /path/to/*.apk /usr/share/nginx/www/fdroid/repo/
fdroid update --create-metadata
fdroid update
adduser android
Password set: android
nano /usr/share/nginx/www/fdroid/config.yml
(次の行を追加)
serverwebroot: android@localhost:/usr/share/nginx/www/fdroid
I2Pのインストールと構成の手順(IPTABLESのルールとシステムサービスとしてのI2Pを含む)
I2Pのインストール:
sudo apt-get update
sudo apt-get install apt-transport-https curl
sudo apt-get install i2p
I2PのIPTABLES構成:
iptables -I INPUT -p tcp -m tcp --dport 7657 -j ACCEPT
iptables -I INPUT -p tcp -m tcp --dport 7658 -j ACCEPT
vi /etc/sysctl.conf
(sysctl.confの下部に次の行を追加します)
net.ipv4.conf.eth0.route_localnet=1
(保存して終了)
(次のコマンドを実行):
sysctl –p
iptables -t nat -I PREROUTING -p tcp -d 0.0.0.0/0 --dport 7657 -j DNAT --to-destination 127.0.0.1:7657
iptables -t nat -I PREROUTING -p tcp -d 0.0.0.0/0 --dport 7658 -j DNAT --to-destination 127.0.0.1:7658
iptables-save > /etc/iptables.rules
crontab -e
@reboot sudo iptables-restore -n </etc/iptables.rules
再起動時に開始するようにI2Pサービスを設定します:
systemctl enable i2p
systemctl start i2p
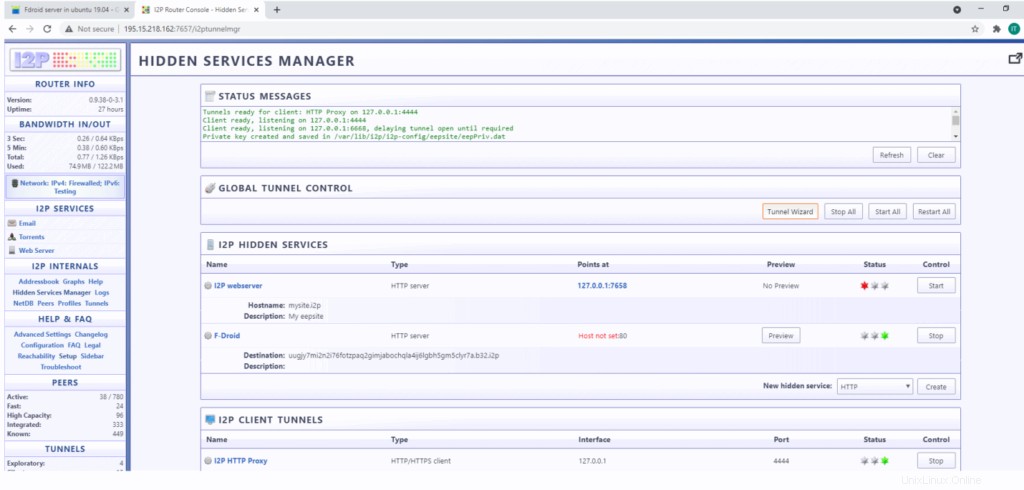
ブラウザでのアクセス http://195.15.218.162:7657/config そしてHiddenServiceManagerをクリックします

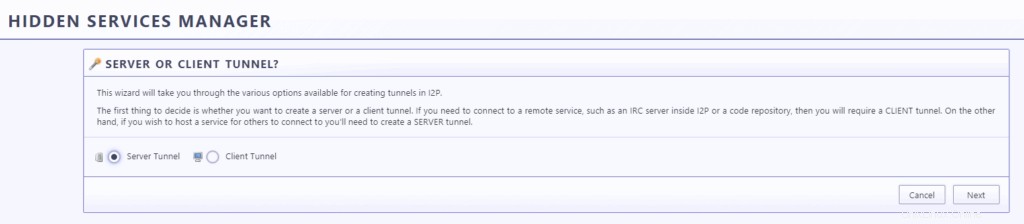
トンネルウィザードをクリック
サーバートンネルを選択し、[次へ]をクリックします
トンネルHTTPを選択し、[次へ]をクリックします
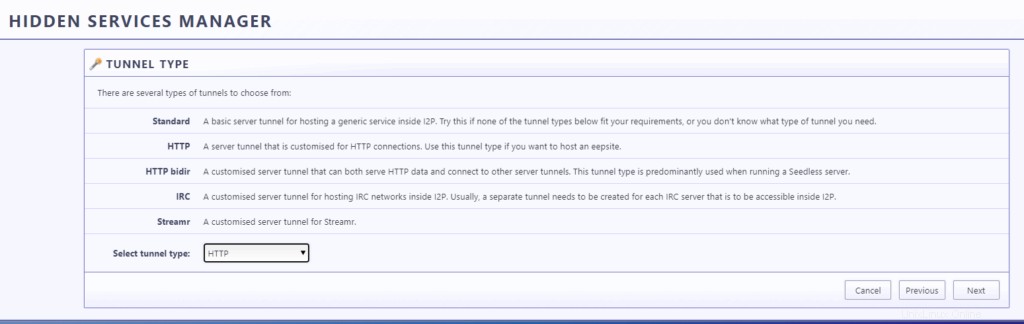
この場合は「F-DROID」のトンネル名を入力します

タイプホスト:127.0.0.1、ポート:80

チェックを入れてください ルーターの起動時にトンネルを自動的に開始し、[完了]をクリックします

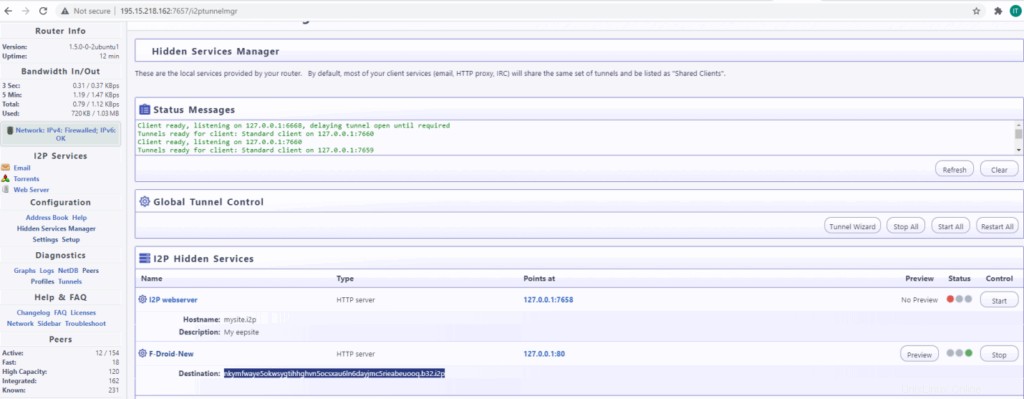
これで、下の図に示すようにトンネルが利用可能になり、宛先としてF-Droidトンネルを使用してi2pリンクを利用できるようになります:nkymfwaye5okwsygtihhghvn5ocsxau6ln6dayjmc5rieabeuooq.b32.i2p
アクセス可能:
http://nkymfwaye5okwsygtihhghvn5ocsxau6ln6dayjmc5rieabeuooq.b32.i2p/fdroid/repo
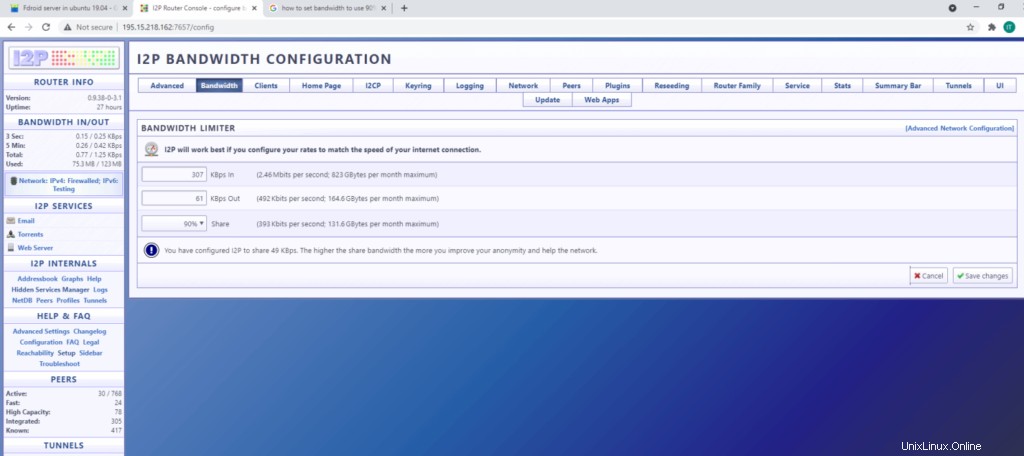
帯域幅の90%を使用するようにI2Pを構成する
ブラウザでのアクセス http://195.15.218.162:7657/config をクリックし、帯域幅をクリックして、以下に示すように90%を選択します
I2PのNGINX構成
I2Pのインストール中にすでにiptablesを設定しているので、nginxで次の構成を行う必要があります。
cd /etc/nginx/sites-enabled
nano default
「listen80default_server;」とコメントアウトします。および「listen[::]:80default_server;」次の行を追加します
listen 127.0.0.1:80;
server_name 127.0.0.1;
次のようにnginxサービスを保存して終了し、再起動します
systemctl restart nginx
I2PURLを使用したF-DROIDリポジトリへのアクセス方法
ステップ1:
次のリンクからF-Droid.apkをダウンロードして携帯電話にインストールします
https://f-droid.org/F-Droid.apk
ステップ2:
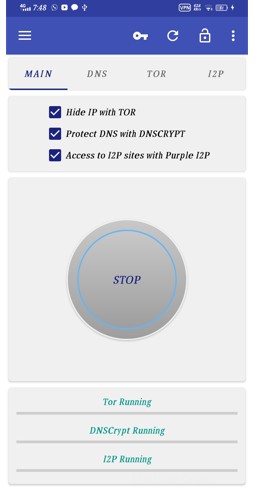
I2P URLを使用しているため、i2p URLにアクセスするには、Googleストアからinvizibleproアプリをインストールする必要があります。

invizible proアプリを開き、3つのチェックボックスをすべてオンにして、[開始]をクリックします
ステップ3:
次に、ステップ1にインストールされているF-droidアプリを開き、以下に示す設定に移動します
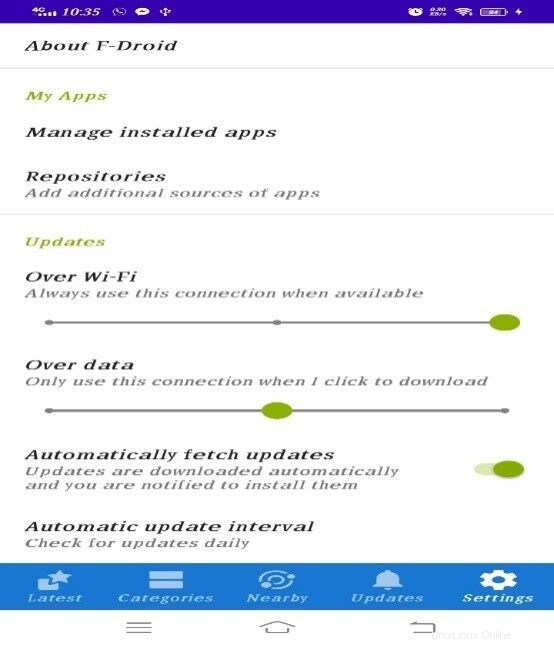
次に、リポジトリをクリックし、リポジトリが開いている場合はすべてオフにします
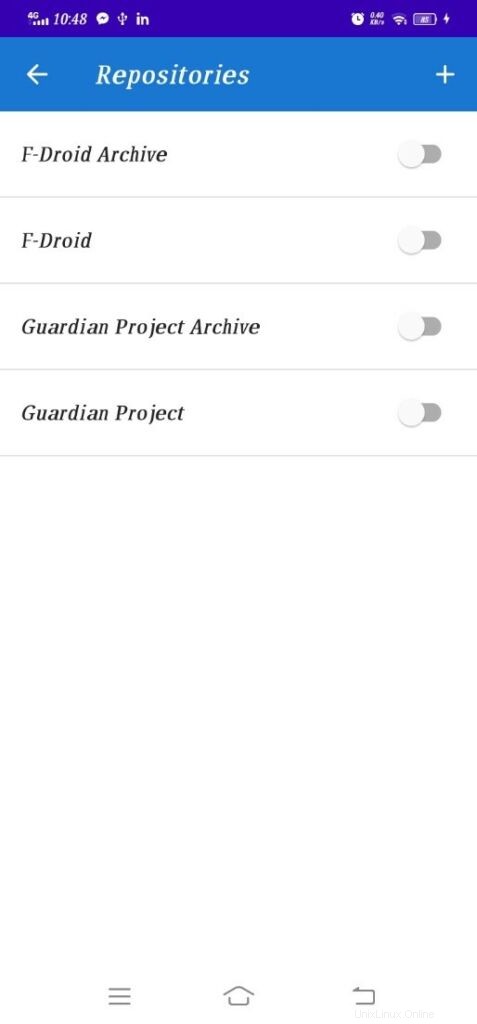
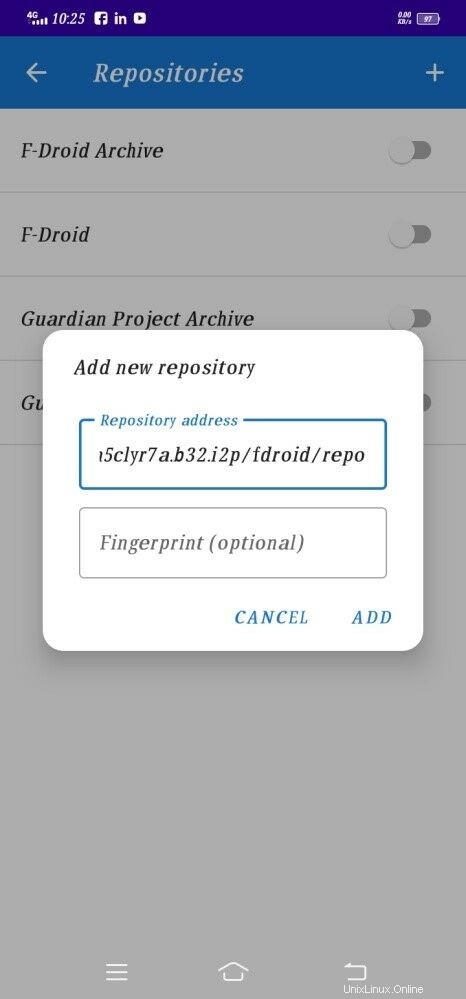
次に、+記号をクリックして、独自のリポジトリを追加します
リポジトリアドレスに次のアドレスを入力しますI2Pアドレス
http://nkymfwaye5okwsygtihhghvn5ocsxau6ln6dayjmc5rieabeuooq.b32.i2p/fdroid/repo
新しく追加されたリポジトリをオンにします。同期には時間がかかります
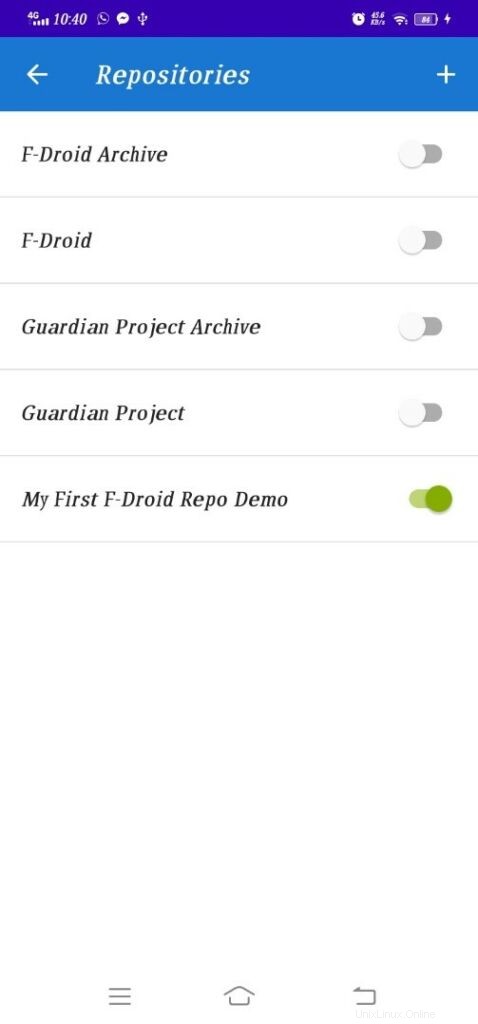
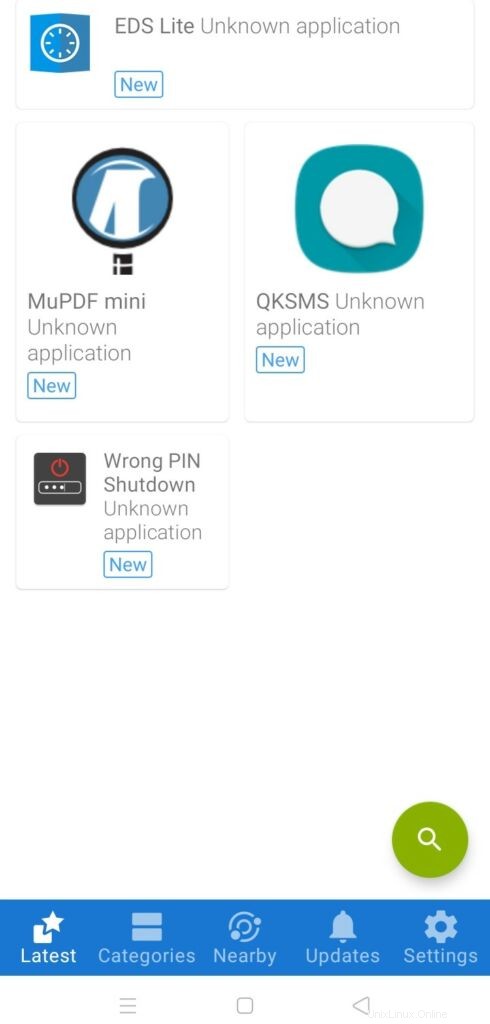
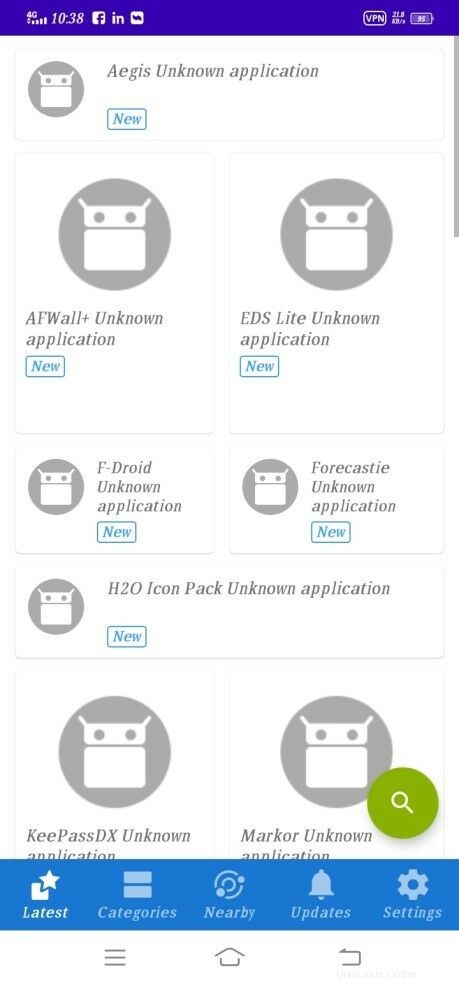
これで完了です。APKをダウンロードしてAndroidデバイスにインストールできます。
APKファイルをF-DROIDREPOにアップロードおよび更新する手順
ローカルシステムにAPKをダウンロードする
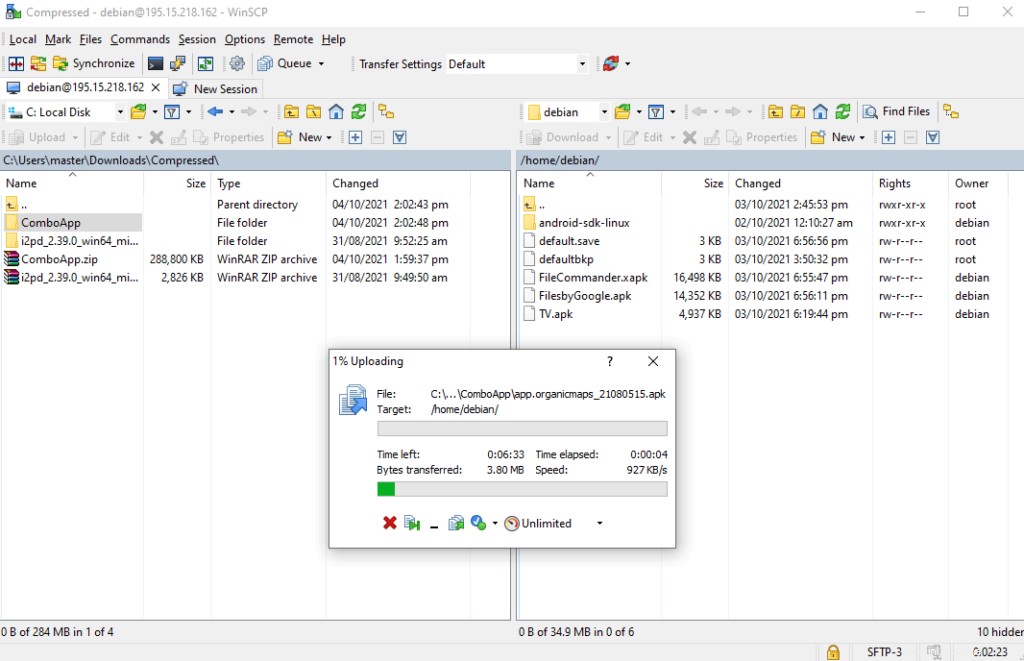
以下に示すように、WinSCPを使用してサーバーに接続します
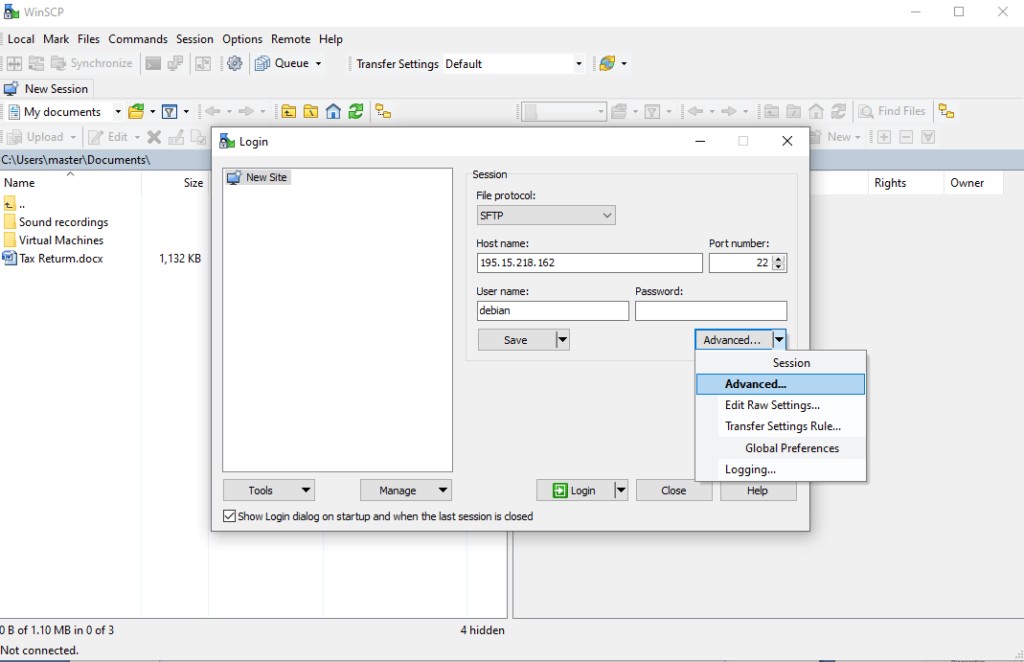
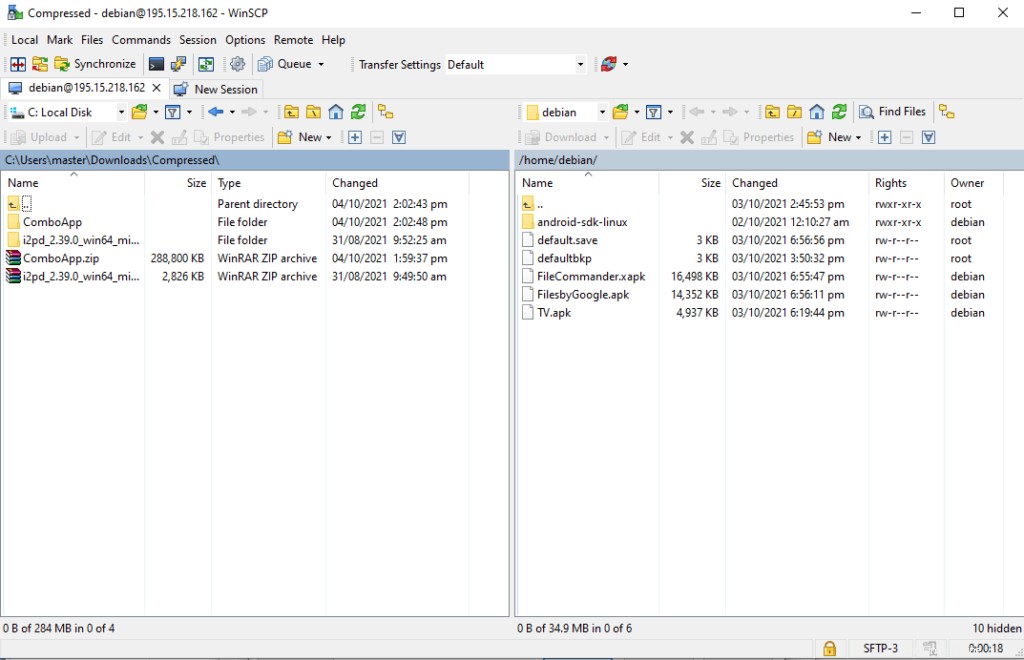
ComboApp(アプリケーションフォルダ)をdebianホームディレクトリにドラッグアンドドロップします
次に、通常どおりにdebianユーザーでSSHを使用してF-Droidサーバーシェルにアクセスし、次のコマンドを実行します
cd /usr/share/nginx/www/fdroid
cp ~/ComboApp/*.apk repo/
sudo fdroid update –c
sudo fdroid update
それでおしまい。 AndroidデバイスでF-Droidクライアントアプリを開くと、アップロード/更新したすべてのアプリがそこに表示されます。
SSHを構成し、それを保護してFDROIDDEPLOY-Vコマンドを受け入れます
nano /etc/ssh/sshd_config
(sshd_configの最後に次の行を追加して、Androidユーザーがリモートの場所からsshを実行できないようにします)
AllowUsers android@127.0.0.1 debian
(保存して終了)
service sshd restart
fdroid deploy –v
サーバーを保護するために通常のFAIL2BANシステムセキュリティを構成する
apt install fail2ban -y
vi /etc/fail2ban/jail.d/jail-debian.local
[sshd]
port = 22
maxretry = 3
service fail2ban restart
CONFIGURE AUTOMATIC SECURITY UPDATES
sudo apt install unattended-upgrades
nano /etc/apt/apt.conf.d/50unattended-upgrades
(Uncomment following lines by removing forward slashes)
"origin=Debian,codename=${distro_codename}-updates";
"origin=Debian,codename=${distro_codename},label=Debian";
"origin=Debian,codename=${distro_codename},label=Debian-Security";
SET I2P HOSTNAME FDROID.DEV.I2P
vi /etc/hostname
(既存のホスト名を次のように置き換えます)
fdroid.dev.i2p
(保存して終了)
Nano /etc/hosts
(次の行を追加)
127.0.0.1 fdroid.dev.i2p
セキュリティ、サーバーのメンテナンス、バックアップに関する推奨事項 :
私はすでにすべてのセキュリティパッチ/修正などを監査して適用しており、サーバーは完全に安全になっていますが、以下はいくつかの有用な推奨事項です
–既存の秘密鍵は後の段階で変更される可能性があります
–データ/アプリなどのオフサイト/リモートバックアップを構成する必要があります
– VPSの毎週のスナップショットは、ホスティングプロバイダーを通じて取得されます。
-cp abc.confからabc.confなどの構成ファイルに変更を加える前に、構成ファイルのバックアップを作成する必要があります-バックアップ–サーバーのヘルスチェックは、すべてが正常に実行され、サーバーが正常に動作していることを確認するために、3〜4か月ごとに実行できます。健康です