Lighttpdは、スピードが重要な環境向けに特別に設計された、無料のオープンソースの高速Webサーバーです。 ApacheやNginxなどの他のWebサーバーと比較して、必要なメモリフットプリントは低く、AJAXアプリケーションの実行には特に高速です。 Lighttpdを使用すると、FastCGI、SCGI、およびCGIインターフェイスを使用して他のプログラミング言語で記述されたWebアプリケーションをホストすることもできます。サーバーで負荷の問題が発生している場合は、Lighttpdが最適です。
このチュートリアルでは、PHP-FPMとMariaDBをサポートするDebian 10にlighttpdをインストールする方法を学び、Let'sEncryptSSL証明書を使用してWebサーバーを保護します。
- Debian10を実行しているサーバー。
- サーバーにルートパスワードが設定されています。
このチュートリアルでは、ドメイン名example.comを使用します。すべてのファイル名と構成設定のexample.comを、以下の独自のドメイン名に置き換えてください。
開始する前に、システムを最新バージョンに更新する必要があります。これを行うには、次のコマンドを実行します。
apt-get update -y
 apt-get upgrade -y
サーバーが更新されたら、サーバーを再起動して変更を適用します。
Lighttpdをインストール
デフォルトでは、LighttpdはDebian10のデフォルトリポジトリで利用できます。次のコマンドを実行するだけでインストールできます:
apt-get install lighttpd -y
インストールが完了したら、次のコマンドを使用してLighttpdサービスを開始し、システムの再起動後に開始できるようにします。
systemctl start lighttpd
 systemctl enable lighttpd
次のコマンドを使用して、Lighttpdのステータスを確認することもできます。
systemctl status lighttpd
次の出力が得られるはずです:
? lighttpd.service - Lighttpd Daemon
   Loaded: loaded (/lib/systemd/system/lighttpd.service; enabled; vendor preset: enabled)
   Active: active (running) since Fri 2019-09-06 02:09:35 EDT; 29s ago
 Main PID: 4445 (lighttpd)
    Tasks: 1 (limit: 1138)
   Memory: 1.4M
   CGroup: /system.slice/lighttpd.service
           ??4445 /usr/sbin/lighttpd -D -f /etc/lighttpd/lighttpd.conf

Sep 06 02:09:35 debian systemd[1]: Starting Lighttpd Daemon...
Sep 06 02:09:35 debian systemd[1]: Started Lighttpd Daemon.
Sep 06 02:09:36 debian systemd[1]: /lib/systemd/system/lighttpd.service:6: PIDFile= references path below legacy directory /var/run/, updating
lines 1-12/12 (END)
終了したら、次のステップに進むことができます。
MariaDBサーバーをインストールする
次のコマンドを実行して、MariaDBサーバーをインストールできます。
apt-get install mariadb-server mariadb-client -y
インストールしたら、MariaDBのインストールを保護する必要があります。次のスクリプトを実行することで保護できます:
mysql_secure_installation
Answer all the questions as shown below:
Change the root password? [Y/n] n
Remove anonymous users? [Y/n] Y
Disallow root login remotely? [Y/n] Y
Remove test database and access to it? [Y/n] Y
Reload privilege tables now? [Y/n] Y
終了したら、次のステップに進むことができます。
PHPとPHP-FPMをインストールする
次に、PHP、PHP-FPM、およびFastCGIをシステムにインストールする必要があります。デフォルトでは、Debian10にはPHPバージョン7.3が付属しています。次のコマンドを実行するだけでインストールできます:
apt-get install php php-cgi php-fpm php-mysql -y
すべてのパッケージがインストールされたら、php.iniファイルを編集し、cgi.fix_pathinfoを1に設定する必要があります。次のコマンドで実行できます。
nano /etc/php/7.3/fpm/php.ini
次の行を変更します:
cgi.fix_pathinfo=1
終了したら、ファイルを保存して閉じます。
デフォルトでは、PHPはUNIXソケット/var/run/php/php7.3-fpm.sockを指します。したがって、PHPがTCPソケットをリッスンするようにPHP-FPMプールを構成する必要があります。
これを行うには、/ etc / php / 7.3 / fpm / pool.d/www.confファイルを編集します。
nano /etc/php/7.3/fpm/pool.d/www.conf
次の行を見つけます:
listen = /run/php/php7.3-fpm.sock
そして、それを次の行に置き換えます:
listen = 127.0.0.1:9000
終了したら、ファイルを保存して閉じます。次に、PHP-FPMサービスを再起動して、構成の変更を適用します。
systemctl restart php7.3-fpm
次に、15-fastcgi-php.confファイルを変更する必要があります:
nano /etc/lighttpd/conf-available/15-fastcgi-php.conf
次の行を見つけます:
"bin-path" => "/usr/bin/php-cgi",
"socket" => "/var/run/lighttpd/php.socket",
そして、それらを次のものに置き換えます:
"host" => "127.0.0.1",
"port" => "9000",
終了したら、ファイルを保存して閉じます。次に、次のコマンドを使用してFastCGIモジュールとFastCHI-PHPモジュールの両方を有効にします。
lighty-enable-mod fastcgi
 lighty-enable-mod fastcgi-php
最後に、Lighttpdサービスを再起動して、変更を適用します。
systemctl restart lighttpd
Lighttpd仮想ホストを作成
次に、LighttpdでPHPをテストするために、新しい仮想ホストファイルを作成する必要があります。次のコマンドで作成できます:
nano /etc/lighttpd/conf-available/example.com.conf
次の行を追加します:
$HTTP["host"] == "www.example.com" {
    server.document-root = "/var/www/html/"
    server.errorlog      = "/var/log/lighttpd/example.com-error.log"
}
終了したら、ファイルを保存して閉じます。次に、次のコマンドを使用して仮想ホストを有効にします。
ln -s /etc/lighttpd/conf-available/example.com.conf /etc/lighttpd/conf-enabled/
次に、次のコマンドを使用して、Lighttpdドキュメントのルートディレクトリにサンプルのindex.phpファイルを作成します。
nano /var/www/html/index.php
次の行を追加します:
<?php phpinfo(); ?>
ファイルを保存して閉じます。次に、次のコマンドを使用して、Lighttpdドキュメントのルートディレクトリの所有権をwww-dataに変更します。
chown -R www-data:www-data /var/www/html/
最後に、Lighttpdサービスを再起動して、すべての構成変更を適用します。
systemctl restart lighttpd
Let'sEncryptの無料SSLでLighttpdを保護
まず、Certbotツールをインストールして、Let’sEncryptでWebサーバーを保護する必要があります。デフォルトでは、Certbotの最新バージョンはDebian10のデフォルトリポジトリでは利用できません。
次のコマンドを使用して、Certbotリポジトリを追加できます。
apt-get install software-properties-common
 add-apt-repository ppa:certbot/certbot
次に、リポジトリを更新し、次のコマンドを使用してCertbotをインストールします。
apt-get update -y
 apt-get install certbot -y
次に、次のコマンドを使用してLet’sEncrypt証明書を作成します。
certbot certonly --webroot -w /var/www/html/ -d www.example.com
以下に示すように、メールアドレスを入力し、ライセンス期間に同意するよう求められます。
Saving debug log to /var/log/letsencrypt/letsencrypt.log
Plugins selected: Authenticator webroot, Installer None
Enter email address (used for urgent renewal and security notices) (Enter 'c' to
cancel): [email protected]

- - - - - - - - - - - - - - - - - - - - - - - - - - - - - - - - - - - - - - - -
Please read the Terms of Service at
https://letsencrypt.org/documents/LE-SA-v1.2-November-15-2017.pdf. You must
agree in order to register with the ACME server at
https://acme-v02.api.letsencrypt.org/directory
- - - - - - - - - - - - - - - - - - - - - - - - - - - - - - - - - - - - - - - -
(A)gree/(C)ancel: A

- - - - - - - - - - - - - - - - - - - - - - - - - - - - - - - - - - - - - - - -
Would you be willing to share your email address with the Electronic Frontier
Foundation, a founding partner of the Let's Encrypt project and the non-profit
organization that develops Certbot? We'd like to send you email about our work
encrypting the web, EFF news, campaigns, and ways to support digital freedom.
- - - - - - - - - - - - - - - - - - - - - - - - - - - - - - - - - - - - - - - -
(Y)es/(N)o: Y
証明書が正常にダウンロードされると、次の出力が表示されます。
IMPORTANT NOTES:
 - Congratulations! Your certificate and chain have been saved at:
   /etc/letsencrypt/live/example.com/fullchain.pem
   Your key file has been saved at:
   /etc/letsencrypt/live/example.com/privkey.pem
   Your cert will expire on 2019-12-06. To obtain a new or tweaked
   version of this certificate in the future, simply run certbot
   again. To non-interactively renew *all* of your certificates, run
   "certbot renew"
 - If you like Certbot, please consider supporting our work by:

   Donating to ISRG / Let's Encrypt:   https://letsencrypt.org/donate
   Donating to EFF:                    https://eff.org/donate-le
次に、証明書と秘密鍵の両方を1つのファイルに結合する必要があります。次のコマンドで実行できます:
cat /etc/letsencrypt/live/example.com/cert.pem /etc/letsencrypt/live/example.com/privkey.pem > /etc/letsencrypt/live/example.com/web.pem>
次に、Lighttpd仮想ホストファイルを編集し、Let'sEncryptSSL証明書パスを定義する必要があります。
次のコマンドで実行できます:
nano /etc/lighttpd/conf-enabled/example.com.conf
以下に示すようにファイルを変更します:
$HTTP["host"] == "www.example.com" {
    server.document-root = "/var/www/html/"
}

$SERVER["socket"] == ":443" {
ssl.engine = "enable"
ssl.pemfile = "/etc/letsencrypt/live/example.com/web.pem" # Combined Certificate
ssl.ca-file = "/etc/letsencrypt/live/example.com/chain.pem" # Root CA
server.name = "www.example.com" # Domain Name OR Virtual Host Name
server.document-root = "/var/www/html/" # Document Root
server.errorlog = "/var/log/lighttpd/example.com_error.log"
accesslog.filename = "/var/log/lighttpd/example.com_access.log"
}

$HTTP["scheme"] == "http" {
$HTTP["host"] == "www.example.com" { # HTTP URL
url.redirect = ("/.*" => "https://www.example.com$0") # Redirection HTTPS URL
}
}
ファイルを保存して閉じます。次に、Lighttpdサービスを再起動して、構成の変更を適用します。
systemctl restart lighttpd
LighttpdWebインターフェイスにアクセス
Lighttpdは、PHPおよびPHP-FPMをサポートするようにインストールおよび構成されています。それでは、テストしてみましょう。
Webブラウザーを開き、URLhttps://www.example.comを入力します。次のページにリダイレクトされます:
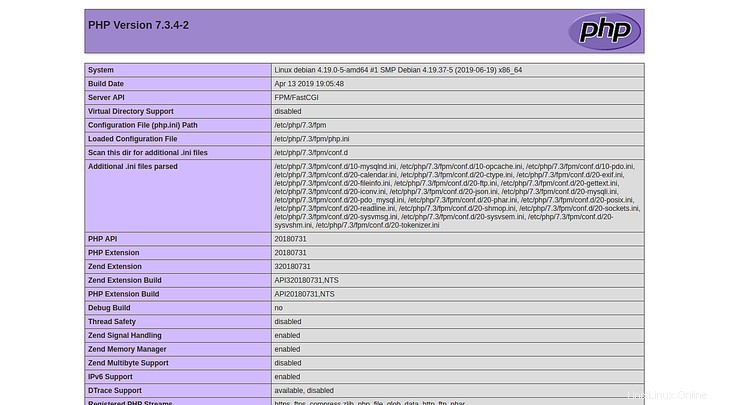
上記のページは、PHPがFastCGIでうまく機能していることを示しています。
おめでとう!これで、Debian10にPHP-FPMとFastCGIをサポートするLighttpdWebサーバーが正常にインストールおよび構成されました。これで、独自のWebサーバーを簡単にホストできます。詳細については、LighttpdDocのLighttpd公式ドキュメントページをご覧ください。