このチュートリアルでは、ISPConfig3.1をインストールするためにDebianJessieサーバー(Apache2、BIND、Dovecotを使用)を準備する方法と、ISPConfigをインストールする方法を示します。 WebホスティングコントロールパネルISPConfig3を使用すると、Webブラウザを介して次のサービスを構成できます:Apacheまたはnginx Webサーバー、Postfixメールサーバー、CourierまたはDovecot IMAP / POP3サーバー、MySQL、BINDまたはMyDNSネームサーバー、PureFTPd、SpamAssassin、ClamAV、などなど。このセットアップは、Apache(nginxの代わりに)、BIND、およびDovecot(Courierの代わりに)を対象としています。
1予備的注意
このチュートリアルでは、ホスト名server1.example.comとIPアドレス192.168.1.100およびゲートウェイ192.168.1.1を使用します。これらの設定は異なる場合があるため、必要に応じて置き換える必要があります。先に進む前に、Debian 8の最小インストールが必要です。これは、ホスティングプロバイダーからのDebian最小イメージであるか、最小Debianサーバーチュートリアルを使用してベースシステムをセットアップしている可能性があります。
このバージョンのチュートリアルの新機能
- 新しいISPConfig3.1機能のサポート。
- Let'sEncryptSSL証明書のサポート。
- PHPスクリプトを実行するためのHHVM(HipHop仮想マシン)のサポート。
- XMPP(メトロノーム)のサポート。
- Postgreyを使用したEメールグレイリストのサポート。
- バスティーユに代わるファイアウォールとしてのUFW。
- Squirrelmailの代わりにRoundCubeWebメール。
2 SSHサーバーをインストールします(オプション)
システムのインストール中にOpenSSHサーバーをインストールしなかった場合は、今すぐインストールできます。
apt-get install ssh openssh-server
今後は、PuTTYなどのSSHクライアントを使用して、ワークステーションからDebian Jessieサーバーに接続し、このチュートリアルの残りの手順に従うことができます。
3シェルテキストエディタをインストールします(オプション)
nanoを使用します このチュートリアルのテキストエディタ。一部のユーザーはクラシックviエディターを好むため、ここで両方のエディターをインストールします。デフォルトのviプログラムは、DebianとUbuntuで奇妙な動作をします。これを修正するには、vim-noxをインストールします:
apt-get install nano vim-nox
viがお気に入りのエディタである場合は、次のコマンドでnanoをviに置き換えてファイルを編集します。
4ホスト名を構成します
サーバーのホスト名は、「server1.example.com」のようなサブドメインである必要があります。 「example.com」のようなサブドメイン部分のないドメイン名をホスト名として使用しないでください。後でメールの設定で問題が発生する可能性があります。まず、/ etc / hostsでホスト名を確認し、必要に応じて変更する必要があります。行は次のようになります:「IPアドレス-スペース-ドメインを含む完全なホスト名-スペース-サブドメイン部分」。ホスト名server1.example.comの場合、ファイルは次のようになります。
nano /etc/hosts
127.0.0.1       localhost.localdomain   localhost
192.168.1.100   server1.example.com     server1

# The following lines are desirable for IPv6 capable hosts
::1     localhost ip6-localhost ip6-loopback
ff02::1 ip6-allnodes
ff02::2 ip6-allrouters
次に、/ etc / hostnameファイルを編集します:
nano /etc/hostname
この場合、サブドメイン部分のみが含まれます:
server1
最後に、サーバーを再起動して変更を適用します。
reboot
もう一度ログインし、次のコマンドを使用してホスト名が正しいかどうかを確認します。
hostname
hostname -f
出力は次のようになります:
[email protected]:/tmp# hostname
server1
[email protected]:/tmp# hostname -f
server1.example.com
5Debianインストールを更新する
まず、/ etc / apt /sources.listにjessie/updatesリポジトリが含まれていること(これにより、常に最新のセキュリティ更新を取得できるようになります)、およびcontribリポジトリとnon-freeリポジトリが有効になっていることを確認します(libapache2-などの一部のパッケージ)。 mod-fastcgiはメインリポジトリにありません)。
nano /etc/apt/sources.list
#deb cdrom:[Debian GNU/Linux 8.0.0 _Jessie_ - Official amd64 NETINST Binary-1 20150425-12:50]/ jessie main

deb http://ftp.us.debian.org/debian/ jessie main contrib non-free
deb-src http://ftp.us.debian.org/debian/ jessie main contrib non-free

deb http://security.debian.org/ jessie/updates main contrib non-free
deb-src http://security.debian.org/ jessie/updates main contrib non-free
実行:
apt-get update
aptパッケージデータベースを更新するには
apt-get upgrade
最新のアップデートがある場合はそれをインストールします。
6デフォルトのシェルを変更する
/ bin/shは/bin/ dashへのシンボリックリンクですが、/ bin/dashではなく/bin/bashが必要です。したがって、これを行います:
dpkg-reconfigure dash
デフォルトのシステムシェル(/ bin / sh)としてダッシュを使用しますか? <-いいえ
これを行わないと、ISPConfigのインストールが失敗します。
7システム時計を同期する
システムクロックをNTPと同期することをお勧めします( n etwork t ime p rotocol)インターネット上のサーバー。実行するだけです
apt-get install ntp
システム時刻は常に同期されます。
8 Postfix、Dovecot、MySQL、rkhunter、およびBinutilsをインストールします
Postfix、Dovecot、MySQL、rkhunter、binutilsを1つのコマンドでインストールできます:
apt-get install postfix postfix-mysql postfix-doc mariadb-client mariadb-server openssl getmail4 rkhunter binutils dovecot-imapd dovecot-pop3d dovecot-mysql dovecot-sieve dovecot-lmtpd sudo
MariaDBよりもMySQLを使用する場合は、上記のコマンドのパッケージ「mariadb-clientmariadb-server」を「mysql-clientmysql-server」に置き換えてください。
次の質問があります:
メール構成の一般的なタイプ:<-インターネットサイト
システムメール名:<-server1.example.com
MariaDB「root」ユーザーの新しいパスワード:<-yourrootsqlpassword
繰り返しますMariaDBの「root」ユーザーのパスワード:<-yourrootsqlpassword
MariaDB / MySQLのインストールを保護し、テストデータベースを無効にするには、次のコマンドを実行します。
mysql_secure_installation
インストール中に新しいパスワードを設定するだけなので、MySQLのrootパスワードを変更する必要はありません。次のように質問に答えてください:
Change the root password? [Y/n] <-- n
Remove anonymous users? [Y/n] <-- y
Disallow root login remotely? [Y/n] <-- y
Remove test database and access to it? [Y/n] <-- y
Reload privilege tables now? [Y/n] <-- y
次に、PostfixでTLS / SSLと送信ポートを開きます:
nano /etc/postfix/master.cf
次のようにsubmissionセクションとsmtpsセクションのコメントを解除し、必要に応じて行を追加して、master.cfファイルのこのセクションが以下のセクションとまったく同じになるようにします。
[...]
submission inet n - - - - smtpd
 -o syslog_name=postfix/submission
 -o smtpd_tls_security_level=encrypt
 -o smtpd_sasl_auth_enable=yes
 -o smtpd_client_restrictions=permit_sasl_authenticated,reject
# -o smtpd_reject_unlisted_recipient=no
# -o smtpd_client_restrictions=$mua_client_restrictions
# -o smtpd_helo_restrictions=$mua_helo_restrictions
# -o smtpd_sender_restrictions=$mua_sender_restrictions
# -o smtpd_recipient_restrictions=
# -o smtpd_relay_restrictions=permit_sasl_authenticated,reject
# -o milter_macro_daemon_name=ORIGINATING
smtps inet n - - - - smtpd
 -o syslog_name=postfix/smtps
 -o smtpd_tls_wrappermode=yes
 -o smtpd_sasl_auth_enable=yes
 -o smtpd_client_restrictions=permit_sasl_authenticated,reject
# -o smtpd_reject_unlisted_recipient=no
# -o smtpd_client_restrictions=$mua_client_restrictions
# -o smtpd_helo_restrictions=$mua_helo_restrictions
# -o smtpd_sender_restrictions=$mua_sender_restrictions
# -o smtpd_recipient_restrictions=
# -o smtpd_relay_restrictions=permit_sasl_authenticated,reject
# -o milter_macro_daemon_name=ORIGINATING
[...]
その後、Postfixを再起動します:
service postfix restart
MariaDBがローカルホストだけでなくすべてのインターフェースでリッスンするようにしたいので、/ etc / mysql / my.cnfを編集して、bind-address =127.0.0.1:
の行をコメントアウトします。nano /etc/mysql/my.cnf
[...]
# Instead of skip-networking the default is now to listen only on
# localhost which is more compatible and is not less secure.
#bind-address           = 127.0.0.1
[...]
>
次に、MySQLを再起動します:
service mysql restart
次に、ネットワークが有効になっていることを確認します。実行
netstat -tap | grep mysql
出力は次のようになります。
[email protected]:/# netstat -tap | grep mysql
tcp6 0 0 [::]:mysql [::]:* LISTEN 16806/mysqld
9 Amavisd-new、SpamAssassin、およびClamAVをインストールします
amavisd-new、SpamAssassin、ClamAVをインストールするには、
を実行します。apt-get install amavisd-new spamassassin clamav clamav-daemon zoo unzip bzip2 arj nomarch lzop cabextract apt-listchanges libnet-ldap-perl libauthen-sasl-perl clamav-docs daemon libio-string-perl libio-socket-ssl-perl libnet-ident-perl zip libnet-dns-perl postgrey
ISPConfig 3のセットアップでは、SpamAssassinフィルターライブラリを内部的にロードするamavisdを使用するため、SpamAssassinを停止してRAMを解放できます。
service spamassassin stop
systemctl disable spamassassin
9.1 Metronome XMPPサーバーのインストール(オプション)
この手順では、XMPPプロトコルと互換性のあるチャットサーバーを提供するMetronomeXMPPサーバーをインストールします。この手順はオプションです。チャットサーバーが必要ない場合は、この手順をスキップできます。他のISPConfig機能はこのソフトウェアに依存していません。
DebianにProsodyパッケージリポジトリを追加します。
echo "deb http://packages.prosody.im/debian jessie main" > /etc/apt/sources.list.d/metronome.list
wget http://prosody.im/files/prosody-debian-packages.key -O - | sudo apt-key add -
パッケージリストを更新します:
apt-get update
aptを使用してパッケージをインストールします。
apt-get install git lua5.1 liblua5.1-0-dev lua-filesystem libidn11-dev libssl-dev lua-zlib lua-expat lua-event lua-bitop lua-socket lua-sec luarocks luarocks>
luarocks install lpc
Metronomeのシェルユーザーを追加します。
adduser --no-create-home --disabled-login --gecos 'Metronome' metronome
Metronomeを/optディレクトリにダウンロードしてコンパイルします。
cd /opt; git clone https://github.com/maranda/metronome.git metronome
cd ./metronome; ./configure --ostype=debian --prefix=/usr
make
make install
メトロノームが/opt/metronomeにインストールされました。
10 Apache2、PHP、FCGI、suExec、Pear、phpMyAdmin、およびmcryptをインストールします
Apache2、PHP5、phpMyAdmin、FCGI、suExec、Pear、およびmcryptは、次のようにインストールできます。
apt-get install apache2 apache2.2-common apache2-doc apache2-mpm-prefork apache2-utils libexpat1 ssl-cert libapache2-mod-php5 php5 php5-common php5-gd php5-mysql php5-imap phpmyadmin php5-cli php5-cgi libapache2-mod-fcgid apache2-suexec php-pear php-auth php5-mcrypt mcrypt php5-imagick imagemagick libruby libapache2-mod-python php5-curl php5-intl php5-memcache php5-memcached php5-pspell php5-recode php5-sqlite php5-tidy php5-xmlrpc php5-xsl memcached libapache2-mod-passenger
次の質問が表示されます:
Web server to reconfigure automatically: <- apache2
 Configure database for phpmyadmin with dbconfig-common? <- yes
Enter the password of the administrative user? <- yourrootmysqlpassword
Enter the phpmyadmin application password? <-  Just press enter
次に、次のコマンドを実行して、Apacheモジュールのsuexec、rewrite、ssl、actions、およびinclude(さらに、WebDAVを使用する場合はdav、dav_fs、およびauth_digest)を有効にします。
a2enmod suexec rewrite ssl actions include dav_fs dav auth_digest cgi headers
サーバーがHTTPOXYの脆弱性を介して攻撃されないようにするために、構成ファイル/etc/apache2/conf-available/httpoxy.confを追加して、apacheのHTTP_PROXYヘッダーをグローバルに無効にします。
sudo nano /etc/apache2/conf-available/httpoxy.conf
次のコンテンツをファイルに貼り付けます:
<IfModule mod_headers.c>
    RequestHeader unset Proxy early
</IfModule>
そして、以下を実行してモジュールを有効にします:
a2enconf httpoxy
service apache2 restart
10.1 HHVM(HipHop仮想マシン)のインストール
このステップでは、公式のDebianリポジトリからHHVMをインストールします。 HHVMリポジトリを追加し、キーをインポートします。
sudo apt-key adv --recv-keys --keyserver hkp://keyserver.ubuntu.com:80 0x5a16e7281be7a449
echo deb http://dl.hhvm.com/debian jessie main | sudo tee /etc/apt/sources.list.d/hhvm.list
パッケージリストを更新します:
sudo apt-get update
HHVMをインストールします:
sudo apt-get install hhvm
10.2 SuPHPのインストール(オプションですが、推奨されません)
更新された注:SuPHPはもうインストールしないでください。手順11に進んでください
SuPHPはDebianJessieでは利用できなくなりました。 php-fpmやphp-fcgiなどのより優れたPHPモードが利用可能であるため、supphpモードはISPConfigで使用しないでください。従来の理由で本当にsuphpが必要な場合は、この章の手順に従って手動でコンパイルしてください。ただし、インストールはお勧めしません。
apt-get install apache2-dev build-essential autoconf automake libtool flex bison debhelper binutils
cd /usr/local/src
wget http://suphp.org/download/suphp-0.7.2.tar.gz
tar zxvf suphp-0.7.2.tar.gz
wget -O suphp.patch https://lists.marsching.com/pipermail/suphp/attachments/20130520/74f3ac02/attachment.patch
patch -Np1 -d suphp-0.7.2 < suphp.patch
cd suphp-0.7.2
autoreconf -if
./configure --prefix=/usr/ --sysconfdir=/etc/suphp/ --with-apr=/usr/bin/apr-1-config --with-apache-user=www-data --with-setid-mode=owner --with-logfile=/var/log/suphp/suphp.log
make
make install
suphp構成ディレクトリとsuphp.confファイルを作成します:
mkdir /var/log/suphp
mkdir /etc/suphp
nano /etc/suphp/suphp.conf
[global]
;Path to logfile
logfile=/var/log/suphp/suphp.log

;Loglevel
loglevel=info

;User Apache is running as
webserver_user=www-data

;Path all scripts have to be in
docroot=/var/www

;Path to chroot() to before executing script
;chroot=/mychroot

; Security options
allow_file_group_writeable=false
allow_file_others_writeable=false
allow_directory_group_writeable=false
allow_directory_others_writeable=false

;Check wheter script is within DOCUMENT_ROOT
check_vhost_docroot=true

;Send minor error messages to browser
errors_to_browser=false

;PATH environment variable
env_path=/bin:/usr/bin

;Umask to set, specify in octal notation
umask=0022

; Minimum UID
min_uid=100

; Minimum GID
min_gid=100


[handlers]
;Handler for php-scripts
x-httpd-suphp="php:/usr/bin/php-cgi"

;Handler for CGI-scripts
x-suphp-cgi=execute:!self
umask=0022
次に、設定ファイルを追加して、apacheにsuphpモジュールをロードします。
echo "LoadModule suphp_module /usr/lib/apache2/modules/mod_suphp.so" > /etc/apache2/mods-available/suphp.load
次に、/ etc / apache2 / mods-available / suphp.conf ...
を開きます。nano /etc/apache2/mods-available/suphp.conf
...そして次のコンテンツを追加します:
<IfModule mod_suphp.c>
        AddType application/x-httpd-suphp .php .php3 .php4 .php5 .phtml
        suPHP_AddHandler application/x-httpd-suphp

    <Directory />
        suPHP_Engine on
    </Directory>

    # By default, disable suPHP for debian packaged web applications as files
    # are owned by root and cannot be executed by suPHP because of min_uid.
    <Directory /usr/share>
        suPHP_Engine off
    </Directory>

# # Use a specific php config file (a dir which contains a php.ini file)
#       suPHP_ConfigPath /etc/php5/cgi/suphp/
# # Tells mod_suphp NOT to handle requests with the type <mime-type>.
#       suPHP_RemoveHandler <mime-type>
</IfModule>
のリクエスト apacheでsuphpモジュールを有効にします:
a2enmod suphp
その後、Apacheを再起動します:
service apache2 restart
11Let'sEncryptをインストール
ISPConfig 3.1は、無料のSSL認証局Let'sEncryptをサポートしています。 Let's Encrypt機能を使用すると、ISPConfig内からWebサイト用の無料のSSL証明書を作成できます。
次に、Let'sEncryptのサポートを追加します。
mkdir /opt/certbot
cd /opt/certbot
wget https://dl.eff.org/certbot-auto
chmod a+x ./certbot-auto
次に、ソフトウェアとその依存関係をダウンロードしてインストールするcertboot-autoコマンドを実行します。
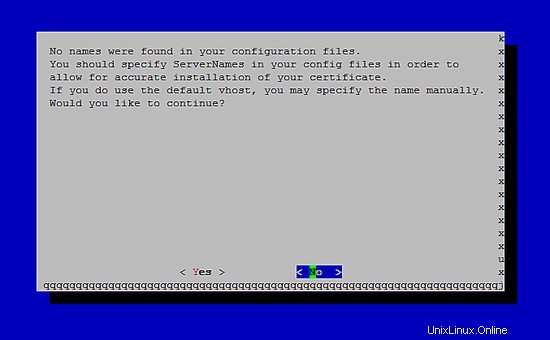
./certbot-auto
このコマンドは、「構成ファイルに名前が見つかりませんでした」と表示し、続行するかどうかを尋ねます。証明書はISPConfigによって作成されるため、ここで「いいえ」を選択してください。
12PHP-FPMとXCacheをインストールします
XCacheは、PHP中間コードをキャッシュおよび最適化するための無料のオープンPHPオペコードキャッシャーです。これは、eAcceleratorやAPCなどの他のPHPオペコードキャッシャーに似ています。 PHPページを高速化するために、これらのいずれかをインストールすることを強くお勧めします。
12.1 PHP-FPM(推奨)
ISPConfig 3.0.5以降、Apacheで使用するために選択できる追加のPHPモードがあります:PHP-FPM。
PHP-FPMをApacheで使用するには、mod_fastcgi Apacheモジュールが必要です(これをmod_fcgidと混同しないでください。これらは非常に似ていますが、PHP-FPMをmod_fcgidで使用することはできません)。 PHP-FPMとmod_fastcgiは次のようにインストールできます:
apt-get install libapache2-mod-fastcgi php5-fpm
モジュールを有効にして、Apacheを再起動してください:
a2enmod actions fastcgi alias
service apache2 restart
12.2XCacheのインストール
XCacheは次のようにインストールできます:
apt-get install php5-xcache
次にApacheを再起動します:
service apache2 restart
13Mailmanのインストール
ISPConfigを使用すると、Mailmanメーリングリストを管理(作成/変更/削除)できます。この機能を利用する場合は、次のようにMailmanをインストールします。
apt-get install mailman
少なくとも1つの言語を選択してください。例:
Languages to support: <-- en (English)
 Missing site list <-- Ok
Mailmanを開始する前に、mailmanという最初のメーリングリストを作成する必要があります。
newlist mailman
[email protected]:~# newlist mailman
Enter the email of the person running the list: <-- admin email address, e.g. [email protected]
Initial mailman password: <-- admin password for the mailman list
To finish creating your mailing list, you must edit your /etc/aliases (or
equivalent) file by adding the following lines, and possibly running the
`newaliases' program:

## mailman mailing list
mailman:              "|/var/lib/mailman/mail/mailman post mailman"
mailman-admin:        "|/var/lib/mailman/mail/mailman admin mailman"
mailman-bounces:      "|/var/lib/mailman/mail/mailman bounces mailman"
mailman-confirm:      "|/var/lib/mailman/mail/mailman confirm mailman"
mailman-join:         "|/var/lib/mailman/mail/mailman join mailman"
mailman-leave:        "|/var/lib/mailman/mail/mailman leave mailman"
mailman-owner:        "|/var/lib/mailman/mail/mailman owner mailman"
mailman-request:      "|/var/lib/mailman/mail/mailman request mailman"
mailman-subscribe:    "|/var/lib/mailman/mail/mailman subscribe mailman"
mailman-unsubscribe:  "|/var/lib/mailman/mail/mailman unsubscribe mailman"

Hit enter to notify mailman owner... <-- ENTER

[email protected]:~#
後で/etc/aliasesを開きます...
nano /etc/aliases
...そして次の行を追加します:
[...]
## mailman mailing list
mailman:              "|/var/lib/mailman/mail/mailman post mailman"
mailman-admin:        "|/var/lib/mailman/mail/mailman admin mailman"
mailman-bounces:      "|/var/lib/mailman/mail/mailman bounces mailman"
mailman-confirm:      "|/var/lib/mailman/mail/mailman confirm mailman"
mailman-join:         "|/var/lib/mailman/mail/mailman join mailman"
mailman-leave:        "|/var/lib/mailman/mail/mailman leave mailman"
mailman-owner:        "|/var/lib/mailman/mail/mailman owner mailman"
mailman-request:      "|/var/lib/mailman/mail/mailman request mailman"
mailman-subscribe:    "|/var/lib/mailman/mail/mailman subscribe mailman"
mailman-unsubscribe:  "|/var/lib/mailman/mail/mailman unsubscribe mailman"
実行:
newaliases
Postfixを再起動します:
service postfix restart
最後に、MailmanApache構成を有効にする必要があります。
ln -s /etc/mailman/apache.conf /etc/apache2/conf-enabled/mailman.conf
これにより、すべてのApachevhostのエイリアス/cgi-bin / mailman /が定義されます。つまり、http://server1.example.com/cgi-bin/mailman/admin/にあるリストのMailman管理インターフェイスにアクセスできます。メーリングリストのユーザー向けのWebページは、http://server1.example.com/cgi-bin/mailman/listinfo/にあります。
http://server1.example.com/pipermailの下に、メーリングリストのアーカイブがあります。
その後、Apacheを再起動します:
service apache2 restart
次に、Mailmanデーモンを起動します:
service mailman start
14PureFTPdとクォータをインストールする
PureFTPdとquotaは、次のコマンドでインストールできます:
apt-get install pure-ftpd-common pure-ftpd-mysql quota quotatool
ファイル/etc/ default / pure-ftpd-common ...
を編集しますnano /etc/default/pure-ftpd-common
...そして、開始モードがスタンドアロンに設定されていることを確認し、VIRTUALCHROOT =trueを設定します:
[...]
STANDALONE_OR_INETD=standalone
[...]
VIRTUALCHROOT=true
[...]
次に、FTPおよびTLSセッションを許可するようにPureFTPdを構成します。 FTPは、すべてのパスワードとすべてのデータがクリアテキストで転送されるため、非常に安全でないプロトコルです。 TLSを使用することで、通信全体を暗号化できるため、FTPの安全性が大幅に向上します。
FTPおよびTLSセッションを許可する場合は、
を実行します。echo 1 > /etc/pure-ftpd/conf/TLS
TLSを使用するには、SSL証明書を作成する必要があります。 / etc / ssl / private /に作成するので、最初にそのディレクトリを作成します:
mkdir -p /etc/ssl/private/
その後、次のようにSSL証明書を生成できます。
openssl req -x509 -nodes -days 7300 -newkey rsa:2048 -keyout /etc/ssl/private/pure-ftpd.pem -out /etc/ssl/private/pure-ftpd.pem
Country Name (2 letter code) [AU]: <-- Enter your Country Name (e.g., "DE").
State or Province Name (full name) [Some-State]: <-- Enter your State or Province Name.
Locality Name (eg, city) []: <-- Enter your City.
Organization Name (eg, company) [Internet Widgits Pty Ltd]: <-- Enter your Organization Name (e.g., the name of your company).
Organizational Unit Name (eg, section) []: <-- Enter your Organizational Unit Name (e.g. "IT Department").
Common Name (eg, YOUR name) []: <-- Enter the Fully Qualified Domain Name of the system (e.g. "server1.example.com").
Email Address []: <-- Enter your Email Address.
SSL証明書の権限を変更します:
chmod 600 /etc/ssl/private/pure-ftpd.pem
次に、PureFTPdを再起動します:
service pure-ftpd-mysql restart
/ etc/fstabを編集します。私の場合は次のようになります(マウントポイントのあるパーティションに、usrjquota =quote.user、grpjquota =quote.group、jqfmt =vfsv0を追加しました/):
nano /etc/fstab
# /etc/fstab: static file system information.
#
# Use 'blkid' to print the universally unique identifier for a
# device; this may be used with UUID= as a more robust way to name devices
# that works even if disks are added and removed. See fstab(5).
#
# <file system> <mount point> <type> <options> <dump> <pass>
# / was on /dev/sda1 during installation
UUID=3dc3b58d-97e5-497b-8254-a913fdfc5408 / ext4 errors=remount-ro,usrjquota=quota.user,grpjquota=quota.group,jqfmt=vfsv0 0 1
# swap was on /dev/sda5 during installation
UUID=36bf486e-8f76-492d-89af-5a8eb3ce8a02 none swap sw 0 0
/dev/sr0 /media/cdrom0 udf,iso9660 user,noauto 0 0
クォータを有効にするには、次のコマンドを実行します。
mount -o remount /
quotacheck -avugm
quotaon -avug
15BINDDNSサーバーのインストール
BINDは次のようにインストールできます:
apt-get install bind9 dnsutils
サーバーが仮想マシンの場合は、DNSSEC署名のエントロピーを高くするために、havegedデーモンをインストールすることを強くお勧めします。非仮想サーバーにもhagedをインストールできますが、問題はありません。
apt-get install haveged
そのトピックの説明はここにあります。
16WebalizerとAWStatsをインストールする
WebalizerとAWStatsは次のようにインストールできます:
apt-get install webalizer awstats geoip-database libclass-dbi-mysql-perl libtimedate-perl
その後、/ etc / cron.d/awstatsを開きます...
nano /etc/cron.d/awstats
...そしてそのファイルのすべてをコメントアウトします:
#MAILTO=root

#*/10 * * * * www-data [ -x /usr/share/awstats/tools/update.sh ] && /usr/share/awstats/tools/update.sh

# Generate static reports:
#10 03 * * * www-data [ -x /usr/share/awstats/tools/buildstatic.sh ] && /usr/share/awstats/tools/buildstatic.sh
17Jailkitをインストールする
Jailkitは、SSHユーザーをchrootする場合にのみ必要です。次のようにインストールできます(重要:JailkitはISPConfigの前にインストールする必要があります-後でインストールすることはできません!):
apt-get install build-essential autoconf automake libtool flex bison debhelper binutils
cd /tmp
wget http://olivier.sessink.nl/jailkit/jailkit-2.19.tar.gz
tar xvfz jailkit-2.19.tar.gz
cd jailkit-2.19
./debian/rules binary
これで、次のようにJailkit.debパッケージをインストールできます。
cd ..
dpkg -i jailkit_2.19-1_*.deb
rm -rf jailkit-2.19*
18fail2banとUFWファイアウォールをインストールする
これはオプションですが、ISPConfigモニターがログを表示しようとするため、推奨されます:
apt-get install fail2ban
fail2banでPureFTPdとDovecotを監視するには、ファイル/etc/fail2ban/jail.local:
を作成します。nano /etc/fail2ban/jail.local
[pureftpd]
enabled  = true
port     = ftp
filter   = pureftpd
logpath  = /var/log/syslog
maxretry = 3

[dovecot-pop3imap]
enabled = true
filter = dovecot-pop3imap
action = iptables-multiport[name=dovecot-pop3imap, port="pop3,pop3s,imap,imaps", protocol=tcp]
logpath = /var/log/mail.log
maxretry = 5

[postfix-sasl]
enabled  = true
port     = smtp
filter   = postfix-sasl
logpath  = /var/log/mail.log
maxretry = 3
次に、次の2つのフィルターファイルを作成します。
nano /etc/fail2ban/filter.d/pureftpd.conf
[Definition]
failregex = .*pure-ftpd: \(.*@<HOST>\) \[WARNING\] Authentication failed for user.*
ignoreregex =
nano /etc/fail2ban/filter.d/dovecot-pop3imap.conf
[Definition]
failregex = (?: pop3-login|imap-login): .*(?:Authentication failure|Aborted login \(auth failed|Aborted login \(tried to use disabled|Disconnected \(auth failed|Aborted login \(\d+ authentication attempts).*rip=(?P<host>\S*),.*
ignoreregex =
次に、postfix-saslフィルターファイルにignoreregex行を追加するには、次のコマンドを実行します。
echo "ignoreregex =" >> /etc/fail2ban/filter.d/postfix-sasl.conf
その後、fail2banを再起動します:
service fail2ban restart
UFWファイアウォールをインストールするには、次のaptコマンドを実行します:
apt-get install ufw
19RoundCubeをインストール
RoundcubeはDebian8メインリポジトリでは利用できませんが、バックポートから取得できます。
バックポートリポジトリを/etc/apt/sources.listファイルに追加します:
echo "deb http://ftp.debian.org/debian jessie-backports main" >> /etc/apt/sources.list
apt-getupdateを実行します。
apt-get update
次に、次のコマンドを使用してRoundCubeをインストールします。
apt-get install roundcube roundcube-core roundcube-mysql roundcube-plugins
インストーラーは次の質問をします:
Configure database for roundcube with dbconfig.common? <-- yes
Select the database type: <-- mysql
Password of the databases administrative user: <-- enter the MySQL root password here.
MySQL application password for roundcube: <-- press enter
次に、RoundCube /etc/roundcube/config.inc.phpファイルを編集し、いくつかの設定を調整します。
nano /etc/roundcube/config.inc.php
default_hostとsmtp_serverをlocalhostに設定します。
$config['default_host'] = 'localhost';
$config['smtp_server'] = 'localhost';
次に、ApacheRoundcube構成ファイル/etc/apache2/conf-enabled/roundcube.confを編集します。
nano /etc/apache2/conf-enabled/roundcube.conf
また、apache/webmailエイリアスのエイリアス行を追加します。ファイルの先頭にその行を追加できます。注:/mailをエイリアスとして使用しないでください。使用するとispconfigメールモジュールが機能しなくなります。
Alias /webmail /var/lib/roundcube
次に、Apacheをリロードします:
service apache2 reload
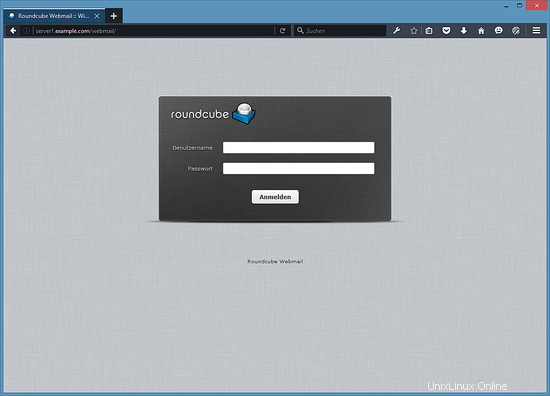
これで、次のようにRoundCubeにアクセスできます。
http://192.168.1.100/webmail
http://www.example.com/webmail
http://server1.example.com:8080/webmail(ISPConfigをインストールした後、次の章)
20ISPConfig3をダウンロード
20.1安定版リリースをダウンロードする(推奨)
最新のリリースバージョンからISPConfig3をインストールするには、次のようにします。
cd /tmp
wget http://www.ispconfig.org/downloads/ISPConfig-3-stable.tar.gz
tar xfz ISPConfig-3-stable.tar.gz
cd ispconfig3_install/install/
20.2 3.1リリースのベータ版をダウンロードします(テストセットアップにのみ推奨されます)
本日(2016年4月12日)現在、ISPConfig3.1のファイナルはまだダウンロードできません。今後の3.1バージョンのプレリリースを試してみたい場合は、次のコマンドでダウンロードしてください。
cd /tmp
wget -O ISPConfig-3.1-beta.tar.gz  https://git.ispconfig.org/ispconfig/ispconfig3/repository/archive.tar.gz?ref=stable-3.1
tar xfz ISPConfig-3.1-beta.tar.gz
cd ispconfig3-stable-3.1*
cd install
21ISPConfigのインストール
次のステップは、ISPConfigインストーラーを実行することです。
php -q install.php
これにより、ISPConfig3インストーラーが起動します。インストーラーは、Postfix、Dovecotなどのすべてのサービスを構成します。 ISPConfig 2(完全なセットアップガイド)に必要な手動セットアップは必要ありません。
注:ISPConfig3インストーラーがDebianJessieを不明なバージョンとして識別することを心配しないでください。これは機能に干渉することはなく、次のISPConfigアップデートで修正される予定です。
# php -q install.php
--------------------------------------------------------------------------------
_____ ___________ _____ __ _ ____
|_ _/ ___| ___ \ / __ \ / _(_) /__ \
| | \ `--.| |_/ / | / \/ ___ _ __ | |_ _ __ _ _/ /
| | `--. \ __/ | | / _ \| '_ \| _| |/ _` | |_ |
_| |_/\__/ / | | \__/\ (_) | | | | | | | (_| | ___\ \
\___/\____/\_| \____/\___/|_| |_|_| |_|\__, | \____/
__/ |
|___/
--------------------------------------------------------------------------------
>> Initial configuration
Operating System: Debian 8.0 (Jessie) or compatible
Following will be a few questions for primary configuration so be careful.
Default values are in [brackets] and can be accepted with <ENTER>.
Tap in "quit" (without the quotes) to stop the installer.
Select language (en,de) [en]: <-- Hit Enter
Installation mode (standard,expert) [standard]: <-- Hit Enter
Full qualified hostname (FQDN) of the server, eg server1.domain.tld [server1.canomi.com]: <-- Hit Enter
MySQL server hostname [localhost]: <-- Hit Enter
MySQL server port [3306]: <-- Hit Enter
MySQL root username [root]: <-- Hit Enter
MySQL root password []: <-- Enter your MySQL root password
MySQL database to create [dbispconfig]: <-- Hit Enter
MySQL charset [utf8]: <-- Hit Enter
Configuring Postgrey
Configuring Postfix
Generating a 4096 bit RSA private key
.......................................................................++
........................................................................................................................................++
writing new private key to 'smtpd.key'
-----
You are about to be asked to enter information that will be incorporated
into your certificate request.
What you are about to enter is what is called a Distinguished Name or a DN.
There are quite a few fields but you can leave some blank
For some fields there will be a default value,
If you enter '.', the field will be left blank.
-----
Country Name (2 letter code) [AU]: <-- Enter 2 letter country code
State or Province Name (full name) [Some-State]: <-- Enter the name of the  state
Locality Name (eg, city) []: <-- Enter your city
Organization Name (eg, company) [Internet Widgits Pty Ltd]: <-- Enter company name or press enter
Organizational Unit Name (eg, section) []: <-- Hit Enter
Common Name (e.g. server FQDN or YOUR name) []: <-- Enter the server hostname, in my case: server1.example.com
Email Address []: <-- Hit Enter
Configuring Mailman
Configuring Dovecot
Configuring Spamassassin
Configuring Amavisd
Configuring Getmail
Configuring BIND
Configuring Jailkit
Configuring Pureftpd
Configuring Apache
Configuring vlogger
Configuring Metronome XMPP Server
writing new private key to 'localhost.key'
-----
Country Name (2 letter code) [AU]: <-- Enter 2 letter country code
Locality Name (eg, city) []: <-- Enter your city
Organization Name (eg, company) [Internet Widgits Pty Ltd]: <-- Enter company name or press enter
Organizational Unit Name (eg, section) []: <-- Hit Enter
Common Name (e.g. server FQDN or YOUR name) [server1.canomi.com]: <-- Enter the server hostname, in my case: server1.example.com
Email Address []: <-- Hit Enter
Configuring Ubuntu Firewall
Configuring Fail2ban
[INFO] service OpenVZ not detected
Configuring Apps vhost
Installing ISPConfig
ISPConfig Port [8080]:
Admin password [admin]:
Do you want a secure (SSL) connection to the ISPConfig web interface (y,n) [y]: <-- Hit Enter
Generating RSA private key, 4096 bit long modulus
.......................++
................................................................................................................................++
e is 65537 (0x10001)
You are about to be asked to enter information that will be incorporated
into your certificate request.
What you are about to enter is what is called a Distinguished Name or a DN.
There are quite a few fields but you can leave some blank
For some fields there will be a default value,
If you enter '.', the field will be left blank.
-----
Country Name (2 letter code) [AU]: <-- Enter 2 letter country code
State or Province Name (full name) [Some-State]: <-- Enter the name of the  state
Locality Name (eg, city) []: <-- Enter your city
Organization Name (eg, company) [Internet Widgits Pty Ltd]: <-- Enter company name or press enter
Organizational Unit Name (eg, section) []: <-- Hit Enter
Common Name (e.g. server FQDN or YOUR name) []: <-- Enter the server hostname, in my case: server1.example.com
Email Address []: <-- Hit Enter
Please enter the following 'extra' attributes
to be sent with your certificate request
A challenge password []: <-- Hit Enter
An optional company name []: <-- Hit Enter
writing RSA key
Configuring DBServer
Installing ISPConfig crontab
no crontab for root
no crontab for getmail
Detect IP addresses
Restarting services ...
Installation completed.
インストーラーは基礎となるすべてのサービスを自動的に構成するため、手動で構成する必要はありません。
その後、http(s)://server1.example.com:8080 /またはhttp(s)://192.168.1.100:8080 /でISPConfig3にアクセスできます(httpまたはhttpsは、インストール時に選択した内容によって異なります)。ユーザー名adminとパスワードadminでログインします(最初のログイン後にデフォルトのパスワードを変更する必要があります):

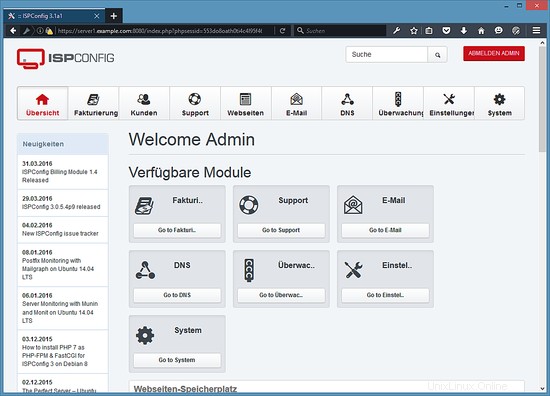
これで、システムを使用する準備が整いました。
21.1ISPConfig3マニュアル
ISPConfig 3の使用方法を学ぶために、ISPConfig3マニュアルをダウンロードすることを強くお勧めします。
300ページ以上で、ISPConfig(管理者、再販業者、クライアント)の背後にある概念をカバーし、ISPConfig 3をインストールおよび更新する方法を説明し、有効な入力の例とともにISPConfigのすべてのフォームとフォームフィールドのリファレンスを含み、チュートリアルを提供しますISPConfig 3の最も一般的なタスクについても説明します。また、サーバーをより安全にする方法を示し、最後にトラブルシューティングのセクションがあります。
22の追加の注意事項
22.1 OpenVZ
このチュートリアルでセットアップしたばかりのDebianサーバーがOpenVZコンテナー(仮想マシン)である場合は、ホストシステムでこれを行う必要があります(OpenVZコンテナーのIDは101であると想定しています-これをシステムの正しいVPSID):
VPSID=101
for CAP in CHOWN DAC_READ_SEARCH SETGID SETUID NET_BIND_SERVICE NET_ADMIN SYS_CHROOT SYS_NICE CHOWN DAC_READ_SEARCH SETGID SETUID NET_BIND_SERVICE NET_ADMIN SYS_CHROOT SYS_NICE
do
  vzctl set $VPSID --capability ${CAP}:on --save
done
23リンク
- Debian:http://www.debian.org/
- ISPConfig:http://www.ispconfig.org/