これは「コピー&ペースト」です ハウツー! このチュートリアルに従う最も簡単な方法は、コマンドラインクライアント/ SSHクライアント(PuTTY for Windowsなど)を使用し、コマンドをコピーして貼り付けることです(IPアドレス、ホスト名、パスワードなどの独自の情報を提供する必要がある場合を除く)。 )。これはタイプミスを回避するのに役立ちます。
PerfectSetup-Debian Woody(3.0)
バージョン1.6
作成者:Falko Timme
これは、 Debianをセットアップするために実行する手順の詳細な説明です。 ベースサーバー(DebianWoodyエイリアスDebian3.0)は、ISPおよびホスティング業者(Webサーバー(SSL対応)、メールサーバー(SMTP-AUTHおよびTLSを使用)、DNSサーバー、FTPサーバー、MySQLサーバー、POP3 / IMAP)に必要なすべてのサービスを提供します。クォータ、ファイアウォールなど)。
次のソフトウェアを使用します:
- Webサーバー:Apache1.3.x
- Mail Server:Postfix(sendmailよりも構成が簡単、sendmailよりもセキュリティホールの履歴が短い)
- DNSサーバー:BIND9
- FTPサーバー:proftpd(vsftpdも使用できます)
- POP3 / IMAP:この例では、従来のUNIXメールボックス形式(qpopper / uw-imapdを使用)またはMaildir形式(この場合はCourier-POP3 / Courier-IMAPを使用します)。
- Webサイト統計用のWebalizer
最終的には、確実に動作し、無料のwebhostingコントロールパネルISPConfigの準備ができているシステムが必要です(つまり、ISPConfigはその上で実行されます。ボックス)。
最初に、このようなシステムを設定する方法はこれだけではないことをお伝えしたいと思います。この目標を達成する方法はたくさんありますが、これが私のやり方です。これがあなたのために働くという保証はありません!
要件
このようなシステムをインストールするには、次のものが必要です。
- theDebian Woody(Debian 3.0)リリースのCD 1(http://www.debian.orgから入手可能)>
- Mandrake Linuxの最新リリースのCD1(この記事の執筆時点では9.2)(http://www.mandrakeから入手可能) -linux.com)(ハードドライブにパーティションを作成する必要がない場合は必要ありません)
- このドキュメントでネットワークのインストールについて説明するので、インターネット接続
1TheBaseシステム
未使用のハードドライブがある場合は、最初にその上にパーティションを作成する必要があります(ハードドライブに既にパーティションがある場合は、この手順をスキップできます) )。これを行うにはDebianインストーラーを使用できますが、使用するのは難しいと思います(特に初心者の場合)。ここで少しごまかします。MandrakeCDをCD-ROMに挿入し、Mandrakeインストーラーを実行します( Linuxの世界で最高だと思うMandrakeのパーティショニングツールを使用せずにパーティションが作成されました。
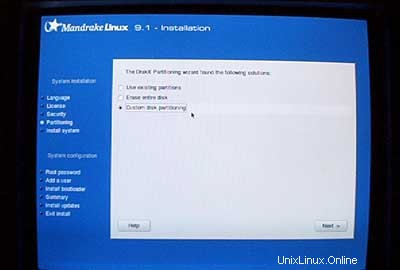
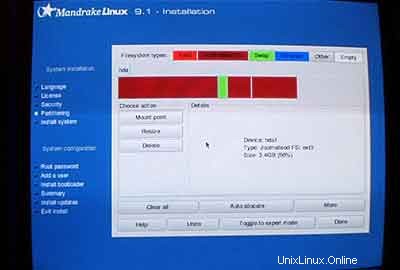
2つのパーティションを作成します:
パーティションが作成されたら、Mandrakeのインストールを停止し、Debian CDを挿入して、システムを再起動します。
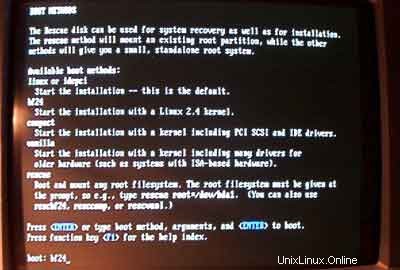
起動プロンプトで、 bf24と入力します。 2.4 LinuxカーネルでDebianをインストールするには:
次に、言語を選択します:
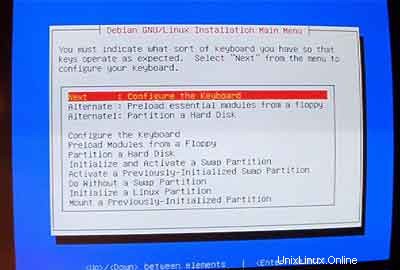
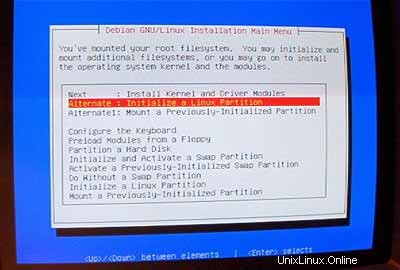
その後、Debianインストーラのメインメニューに入ります。キーボードを構成します:
スワップパーティションを初期化してアクティブ化します:
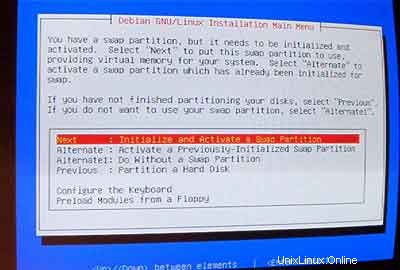
質問された場合
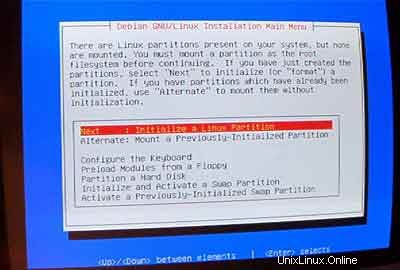
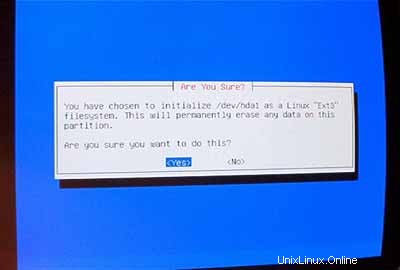
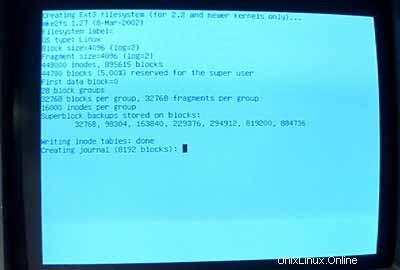
次に、Linuxパーティションを初期化します:
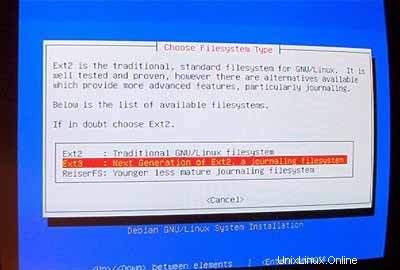
必要なファイルシステムを選択します。 ext3を使用します ここ。
/ dev / hda1を選択します 初期化するパーティションとして:
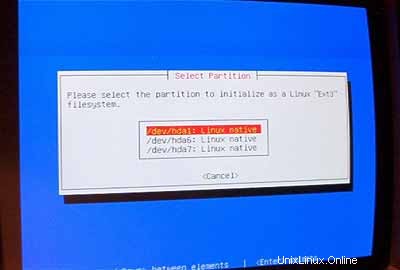
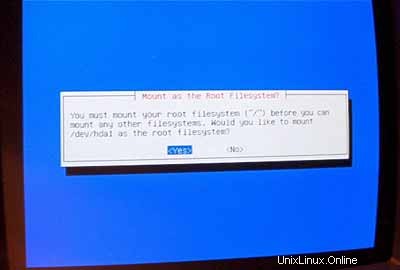
質問された場合
/ bootを選択します / dev / hda1のマウントポイントとして :
次に、2番目のLinuxパーティションを初期化する必要があります:
お好みのファイルシステムを選択します(ここでも、 ext3 ここ)。次に、 / dev / hda6を選択します。 初期化するパーティションとして:
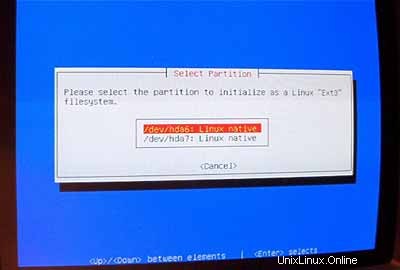
質問された場合
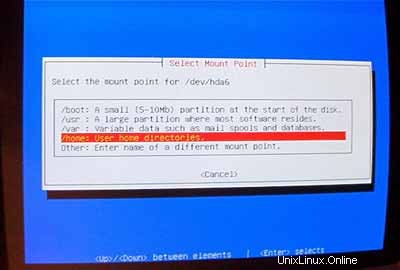
/を選択します / dev / hda6のマウントポイントとして :
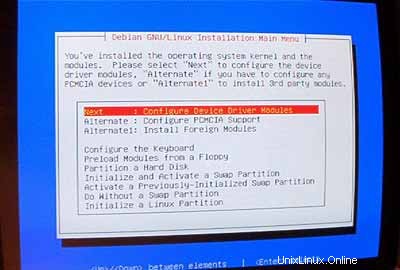
パーティションのフォーマットと初期化が完了したら、 InstallKernelおよびDriverModules<を選択します。 / font> メインメニューから。これ以上の説明は必要ないと思います。
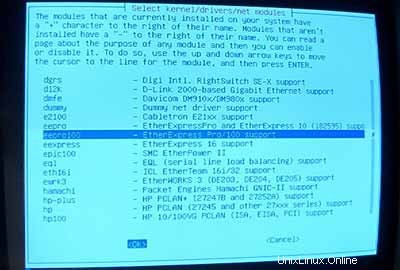
DeviceDriverモジュールの構成:
ネットワークカード用のドライバーを必ずインストールしてください(正しいドライバーがわからない場合は、複数のドライバーをインストールしても安全です):
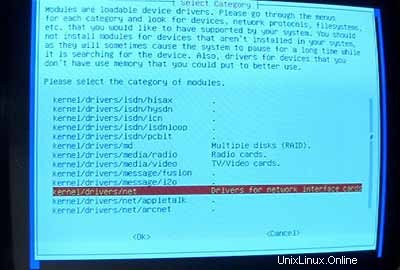
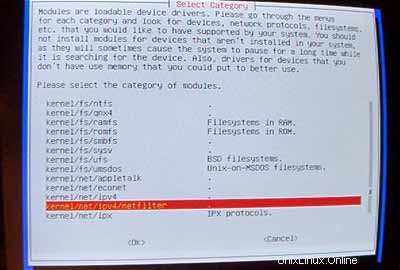
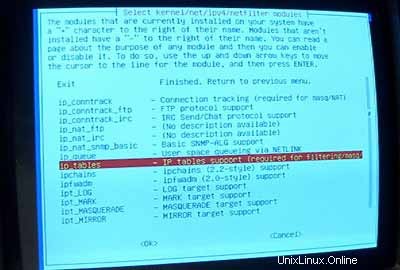
カーネルにiptablesサポート(ファイアウォール!)を含めるようにしてください:
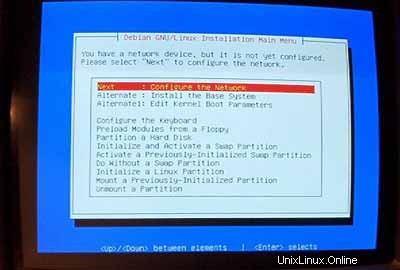
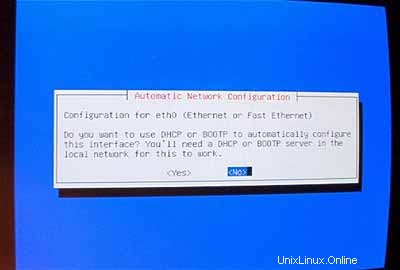
ドライバーモジュールメニューを終了したら、ネットワークを構成する必要があります:
ホストホストについては、後でそのサーバーの仮想サイトに使用されないサブドメインを強くお勧めします。 server1のようなもの 、 server2 、... 複数のサーバーを実行している場合にサーバーを区別できるため、非常に便利です。したがって、ドメインが example.comの場合 (実際のドメインをお勧めします!) server1.example.comでサーバーにアクセスできます。 ( example.comのDNSレコードを更新することを忘れないでください !)。
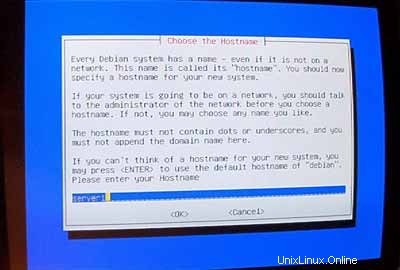
プロンプトが表示されたら
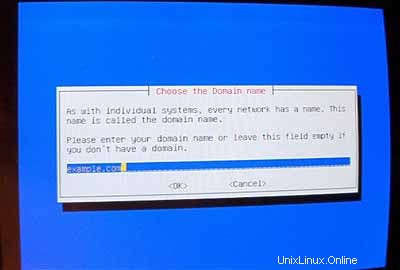
次に、システムのメインIPアドレス、そのネットワークマスク、ゲートウェイアドレス、およびシステムのドメインを入力します(ここでは example.com 。
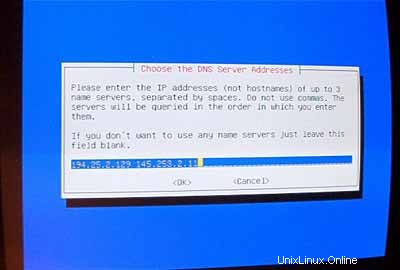
システムが使用するDNSサーバーを指定します(例: 193.174.32.18 および
ベースシステムをインストールします:

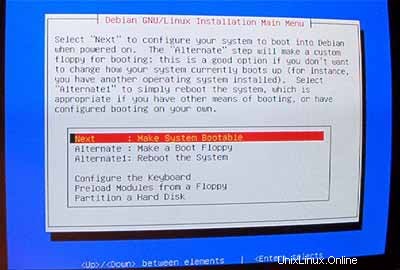
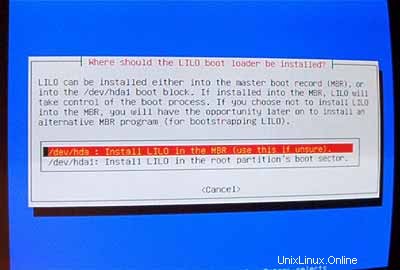
システムを起動可能にする:
MBRで
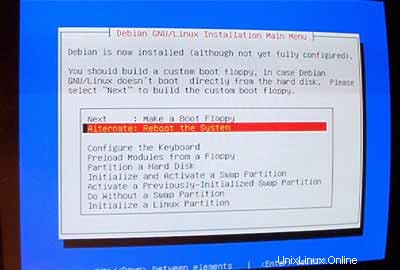
次に、システムを再起動します。必ずCD-ROMからDebianCDを取り出してください:
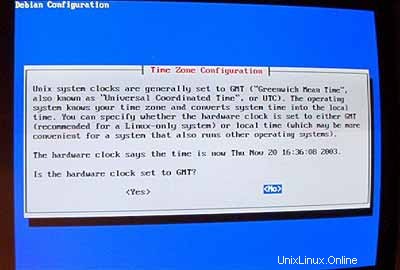
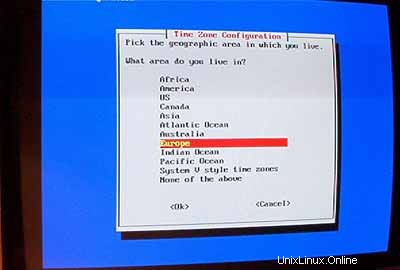
再起動後、タイムゾーンを構成します:

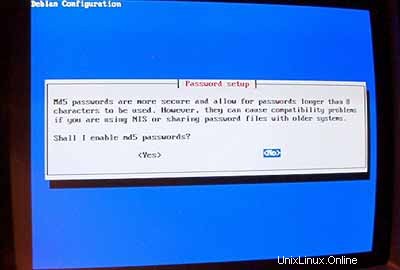
md5passwordsを有効にしないでください:
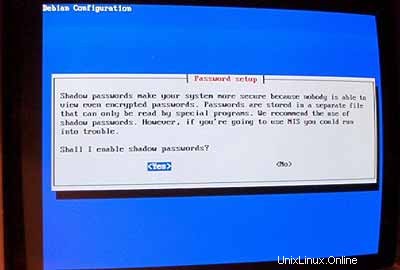
シャドウパスワードを有効にする:
次に、 rootpasswordを設定します。 、追加のユーザーを作成します admin 彼のパスワードを入力します。
pcmciaパッケージが必要ない場合は、それらを削除してください。
システムのインストールにPPP接続を使用しないでください(サーバーにはインターネットへの永続的な接続が必要です):
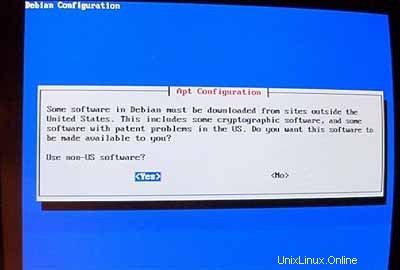
ネットワークインストールを実行したい(そのため、7つのDebian CD-ROMのうちディスク1のみが必要です)。したがって、

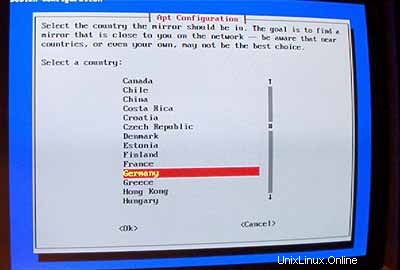
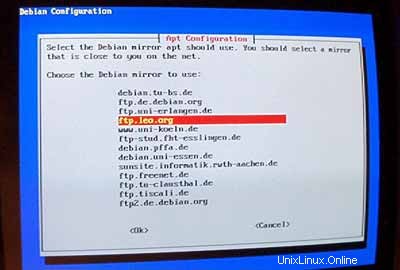
お近くのミラーを選択してください:
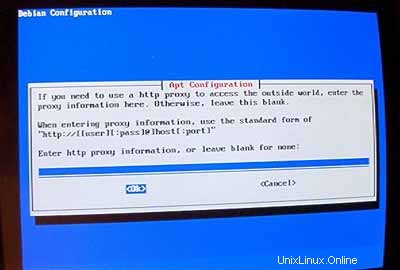
通常、プロキシは使用しないため、フィールドは空のままにします:
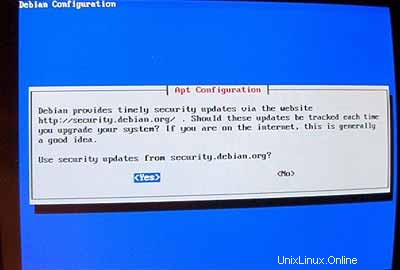
質問された場合
重要: 2005年6月以降、Debian Sarge(3.1)はDebianの安定リリースです。 Sargeの代わりにDebianWoody(3.0)をここにインストールしたいので、ファイルを変更する必要があります /etc/apt/sources.list 先に進む前に! Woodyインストーラーは、Woodyがstablereleaseであるとまだ考えています。 Ctrl + Alt + F2を押します キーボードで。これでシェルになりました。 rootとしてログインします 。次に、 /etc/apt/sources.listを編集します。 テキストエディタを使用する(例: vi ) 安定を置き換えます with woody 表示される場所。その後、実行
apt-getupdate
そして、 Ctrl + Alt + F1を押します。 インストール画面に戻ります。
次に、 タスクセルを実行します。 :
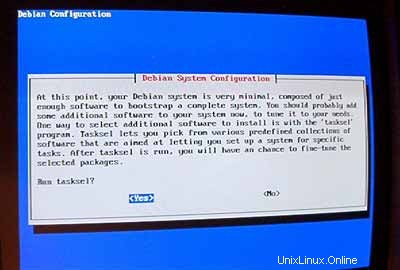
最初は最小限のシステムにしたいので、 のみを選択します。メールサーバー および
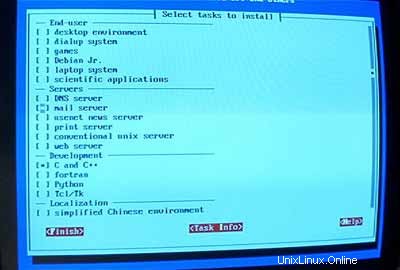
実行しないでください
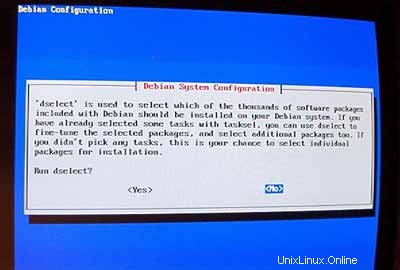
次の手順では、デフォルト値を受け入れることができます。
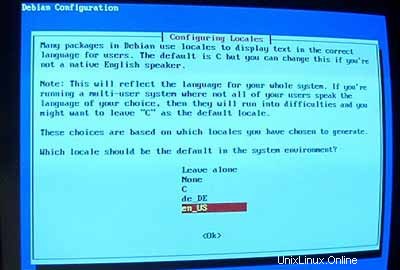
次に、ロケールを構成します。少なくとも
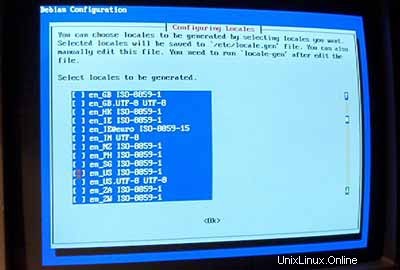
デフォルトのロケールとして、 en_USを選択します。 :
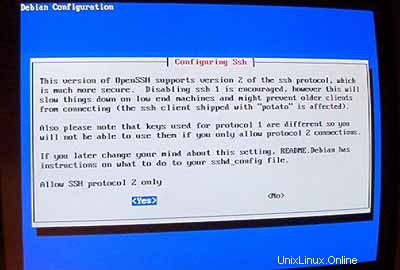
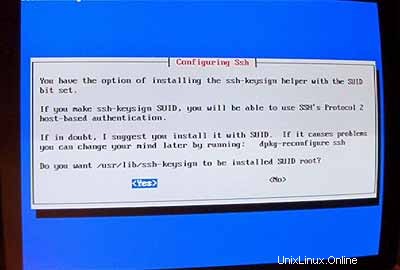
次に、yoursshサーバーをセットアップします:
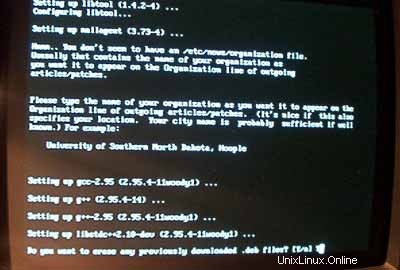
インストールが開始されます。最後に、以前にダウンロードした.debファイルを削除するかどうかを尋ねられます。 Yと答えることができます ここ。
インストーラーが
これでベースシステムの準備が整いました:
2システムの残りの部分のインストールと構成
追加のIPアドレスを構成する
複数のIPアドレスがある場合は、 / etc / network / interfaces 。次のようになります:
# /etc/network/interfaces -- configuration file for ifup(8), ifdown(8) |
IPアドレスを追加する場合
# /etc/network/interfaces -- configuration file for ifup(8), ifdown(8) |
次に、ネットワークを再起動します:
/etc/init.d/networkingrestart
ホスト名の設定
echo server1.example.com> / etc / hostname
/ bin / hostname -F / etc / hostname
ソフトウェアのインストール/削除
追加
deb http://backports.debian.skynet.be woody cyrus-sasl2
から
apt-getupdate
apt-get install wgetbzip2 rdate fetchmail libdb3 ++-dev unzip zip ncftp xlispstat libarchive-zip-perlzlib1g-dev libpopt -dev nmap openssl (1行!)
apt-get remove lpr nfs-commonportmap pidentd pcmcia-cs pppoe pppoeconf ppp pppconfig
update-rc.d -f exim remove
update-inetd --removedaytime
update-inetd --remove telnet
update-inetd- -時間の削除
update-inetd--remove finger
update-inetd --remove talk
update-inetd --remove ntalk
update-inetd --remove ftp
update-inetd --remove destroy
<-はい[y]
/etc/init.d/inetdリロード
割り当て
apt-get installquotaquotatool
編集
# /etc/fstab: static file system information. |
次に実行:
/quota.user/quota.groupをタッチ
chmod 600/quota.*
mount -o remount /
quotecheck -avugm
quote-avug
DNSサーバー
apt-getinstall bind9
セキュリティ上の理由から、BINDをchrootして実行したいので、次の手順を実行する必要があります。
/etc/init.d/bind9 stop
スタートアップスクリプトを編集 /etc/init.d/bind9 デーモンが非特権ユーザーとして実行されるように、' 誰も '、chrooted to / var / lib / named 。行を変更します: OPTS ="" OPTS ="-u nobody-t / var / lib / named"と表示されます。 :
#!/bin/sh |
/ var / libの下に必要なディレクトリを作成します :
mkdir -p / var / lib / named / etc
mkdir / var / lib / named / dev
mkdir -p / var / lib / named / var / cache / bind
mkdir / var / lib / named / var / run
次に、configdirectoryをから移動します / etc から / var / lib / named / etc :
mv / etc / bind / var / lib / named / etc
古い場所から新しい構成ディレクトリへのシンボリックリンクを作成します(将来、bindisがアップグレードされる際の問題を回避するため):
ln -s / var / lib / named / etc / bind / etc / bind
nullおよびrandomdevicesを作成し、ディレクトリの権限を修正します:
mknod / var / lib / named / dev / nullc 1 3
mknod / var / lib / named / dev / random c 1 8
chmod 666 / var / lib / named / dev / null / var / lib / named / dev / random
chown -R nobody:nogroup / var / lib / named / var / *
chown -R nobody:nogroup / var / lib / named / etc / bind
起動スクリプトを変更する必要があります
#! /bin/sh |
ロギングデーモンを再起動します:
/etc/init.d/sysklogd再起動
BINDを起動し、 / var / log /syslog<を確認します。 / font> エラーの場合:
/etc/init.d/bind9 start
MySQL
apt-getinstall mysql-server mysql-client libmysqlclient10-dev
<-いいえ
<-はい
mysqladmin -u root passwordyourrootsqlpassword
mysqladmin -h server1.example.com -u root password yourrootsqlpassword
/etc/mysql/my.cnf 次の行をコメントアウトします:
スキップネットワーキング
これで、次のようになります。
# You can copy this to one of: |
MySQLを再起動します:
/etc/init.d/mysqlrestart
ポート3306でMySQLにアクセスできるようにします( で確認できます) netstat-tap 。
Postfix / Qpopper
addgroup sasl
apt-get install postfix-tlsqpopper sasl-bin libsasl-modules-plain libsasl2 libsasl-gssapi-mit libsasl -digestmd5-dessasl2-bin libsasl2-modules (1line!)
<-Kerberos:デフォルト値を受け入れます(Kerberosを使用したくないので、あまり気にしません)
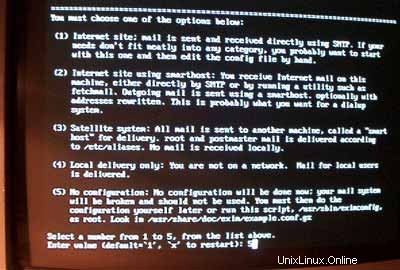
<-インターネットサイト
<-ドメイン名
<-いいえ
<-デフォルト値を受け入れる
<-Kerberos:デフォルト値を受け入れる
<-なし
cd /etc/init.d/
wget http://hanselan.de/postfix/pwcheck
アクセスできない場合
#! /bin/sh |
chmod 755 /etc/init.d/ pwcheck
update-rc.d pwcheck defaults
mkdir -p /var/spool/postfix/var/run/pwcheck
chown postfix.root / var / spool / postfix / var / run / pwcheck /
chmod 700 / var / spool / postfix / var / run / pwcheck /
ln -s / var / spool / postfix / var / run / pwcheck / var / run / pwcheck
postconf -e'smtpd_sasl_local_domain =$ myhostname'
postconf -e'smtpd_sasl_auth_enable =yes'
postconf -e ' smtpd_sasl_security_options =noanonymous'
postconf -e 'broken_sasl_auth_clients =yes'
postconf -e 'smtpd_recipient_restrictions =permit_sasl_authenticated,permit_mynetworks,check_relay_domains'
postconf -e 'inet_interfaces =all'
echo ' pwcheck_method:pwcheck'>> /etc/postfix/sasl/smtpd.conf
mkdir / etc / postfix / ssl
cd / etc / postfix / ssl /
openssl genrsa- des3 -rand / etc / hosts -out smtpd.key 1024
chmod 600 smtpd.key
openssl req -new -key smtpd.key -out smtpd.csr
openssl x509 -req -days 3650 -in smtpd.csr -signkey smtpd.key -out smtpd.crt
openssl rsa -in smtpd.key -out smtpd.key.unencrypted
mv -f smtpd.key.unencrypted smtpd.key
openssl req -new -x509 -extensions v3_ca -keyoutcakey.pem -out cacert.pem -days3650
postconf -e'smtpd_tls_auth_only =no'
postconf -e'smtp_use_tls =yes'
postconf- e'smtpd_use_tls =yes'
postconf -e'smtp_tls_note_starttls_offer =yes'
postconf -e'smtpd_tls_key_file =/etc/postfix/ssl/smtpd.key'
postconf -e'smtpd_tls_cert_file =/ etc / postfix / ssl / smtpd.crt'
postconf -e' smtpd_tls_CAfile =/etc/postfix/ssl/cacert.pem'
postconf -e' smtpd_tls_loglevel =1'
postconf -e 'smtpd_tls_received_header =yes'
postconf -e'smtpd_tls_session_cache_timeout =3600s'
postconf -e'tls_random_source =dev:/ dev / urandom'
ファイル
# see /usr/share/postfix/main.cf.dist for a commented, fuller |
/etc/init.d/pwcheckstart
/etc/init.d/postfix restart
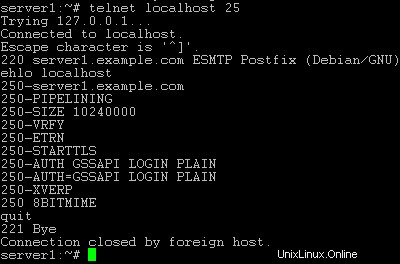
To see if SMTP-AUTHand TLS work properly now run the following command:
telnetlocalhost 25
After you haveestablished the connection to your postfix mail server type
ehlolocalhost
If you see thelines
250-STARTTLS
and
250-AUTH
everything is fine.
Type
quit
to return to thesystem's shell.
Courier-IMAP/Courier-POP3
If you want touse a POP3/IMAP daemon that has Maildir support (if you do not want to use thetraditional Unix mailbox format) you can install Courier-IMAP and Courier-POP3.Otherwise you can proceed with the Apache configuration.
apt-get install courier-imapcourier-pop
qpopper and UW-IMAPwill then be replaced.
Then configurePostfix to deliver emails to a user's Maildir*:
postconf -e 'home_mailbox=Maildir/'
postconf -e 'mailbox_command ='
/etc/init.d/postfix restart
*Please note:Youdo not have to do this if you intend to use ISPConfigon your system as ISPConfig does the necessary configuration using procmailrecipes. But please go sure to enable Maildir under Management -> Settings ->EMail in the ISPConfig web interface.
Apache
Add
deb http://packages.dotdeb.org ./
to /etc/apt/sources.list and run
apt-getupdate
apt-getinstall apache apache-doc libapache-mod-ssl libapache-mod-ssl-doc
apt-get install libapache-mod-php4php4 php4-cli php4-common php4-curl php4-dev php4-domxml php4-gd php4-gmp php4-imapphp4-ldap php4-mcal php4-mcrypt php4-mhash php4-ming php4-mysql php4-odbc php4-pearphp4-xslt curl libwww-perl imagemagick (1 line!)
Edit /etc/apache/httpd.conf .Under LoadModules add:
LoadModulephp4_module /usr/lib/apache/1.3/libphp4.so
LoadModule ssl_module /usr/lib/apache/1.3/mod_ssl.so
Under Listen add:
Listen80
Listen 443
Under "Addtypeapplication" insert:
AddType application/x-x509-ca-cert .crt
AddType application/x-pkcs7-crl .crl
Before "Section3 :Virtual Hosts" add:
SSLCACertificateFile /etc/apache/ssl.crt/ca-bundle.crt
SSLPassPhraseDialog builtin
SSLSessionCache dbm:/var/run/ssl_scache
SSLSessionCacheTimeout 300
SSLMutex file:/var/run/ssl_mutex
SSLRandomSeed startup builtin
SSLRandomSeed connect builtin
Change
DirectoryIndexindex.html index.htm index.shtml index.cgi
から
DirectoryIndexindex.html index.htm index.shtml index.cgi index.php index.php3 index.pl
Save /etc/apache/httpd.conf and run
/etc/init.d/apacherestart
Proftpd
apt-getinstall proftpd
<- No
For security reasonsyou can add the following lines to /etc/proftpd.conf (thanks to Reinaldo Carvalho; more information can be found here:http://proftpd.linux.co.uk/localsite/Userguide/linked/userguide.html):
DefaultRoot ~
IdentLookups off
ServerIdent on "FTP Server ready."
and restart Proftpd:
/etc/init.d/proftpd restart
Webalizer
apt-getinstall webalizer
<- accept default values
Synchronizethe System Clock
If you want tohave the system clock synchronized with an NTP server you can add the followinglines to /var/spool/cron/crontabs/root (if the file does not exist, create it by running
touch/var/spool/cron/crontabs/root ):
#update time with ntp server
0 3,9,15,21 * * * /usr/sbin/rdate time.nist.gov | logger -t NTP
Then run
chmod600 /var/spool/cron/crontabs/root
/etc/init.d/cronrestart
Install somePerl Modules needed by SpamAssassin (comes with ISPConfig)
Installationusing the Perl Shell
Login to your commandline as root and run the following command to start the Perl shell:
perl -MCPAN -e shell
If you run thePerl shell for the first time you will be asked some questions. In most casesthe default answers are ok.
Please note:Ifyou run a firewall on your system you might have to turn it off while workingon the Perl shell in order for the Perl shell to be able to fetch the neededmodules without a big delay. You can switch it on afterwards.
The big advantageof the Perl shell compared to the two other methods described here is that itcares about dependencies when installing new modules. I.e., if it turns outthat a prerequisite Perl module is missing when you install another module thePerl shell asks you if it should install the prerequisite module for you. Youshould answer that question with "Yes".
Run the followingcommands to install the modules needed by SpamAssassin:
install HTML::Parser
install DB_File
install Net::DNS (when prompted to enable tests, choose no)
install Digest::SHA1
q (to leave the Perl shell)
If a module isalready installed on your system you will get a message similar to this one:
HTML::Parseris up to date.
Successful installationof a module looks like this:
/usr/bin/makeinstall -- OK
Compile a CustomKernel
If you need tocompile a new kernel for some reason (e.g. because you want to use the latestbleeding-edge kernel or need a feature that the standard Debian kernel doesnot offer), you can find more information here:Debian-Kernel-Compile-Howto.
The End
The configurationof the server is now finished, and if you wish you can now install ISPConfigon it.
A Note On SuExec
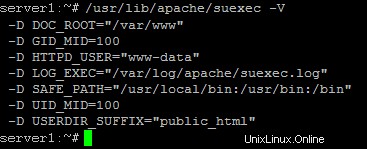
If you want torun CGI scripts under suExec, you should specify /var/www as the home directory for websites created by ISPConfig as Debian's suExec iscompiled with /var/www as Doc_Root .Run /usr/lib/apache/suexec -V ,and the output should look like this:
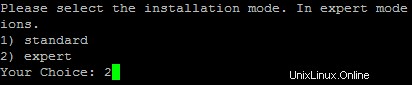
To select /var/www as the home directory for websites during the installation of ISPConfig do thefollowing:When you are asked for the installation mode, select the expertmode .
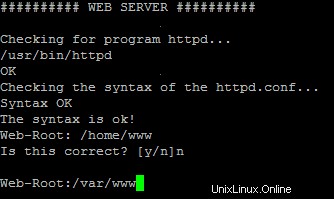
Later during theinstallation you are asked if the default directory /home/www should be the directory where ISPConfig will create websites in. Answer n and enter /var/www asthe home directory for websites.
Links
- http://www.debian.org
- http://www.debianplanet.org
- http://www.debianforum.de(German)
- http://www.debianhowto.de(German/English)
- http://www.ispconfig.org