これは「コピー&ペースト」です ハウツー! このチュートリアルに従う最も簡単な方法は、コマンドラインクライアント/ SSHクライアント(PuTTY for Windowsなど)を使用し、コマンドをコピーして貼り付けることです(IPアドレス、ホスト名、パスワードなどの独自の情報を提供する必要がある場合を除く)。 )。これはタイプミスを回避するのに役立ちます。
PerfectSetup-Debian Sarge(3.1)
バージョン1.9
作成者:Falko Timme
これは、 Debianをセットアップするために実行する手順の詳細な説明です。 ベースサーバー(DebianSargeエイリアスDebian3.1)は、ISPおよびホスティング業者(Webサーバー(SSL対応)、メールサーバー(SMTP-AUTHおよびTLSを使用)、DNSサーバー、FTPサーバー、MySQLサーバー、POP3 / POP3s /)に必要なすべてのサービスを提供します。 IMAP / IMAP、クォータ、ファイアウォールなど)。
次のソフトウェアを使用します:
- Webサーバー:Apache2.0.x
- Mail Server:Postfix(sendmailよりも構成が簡単、sendmailよりもセキュリティホールの履歴が短い)
- DNSサーバー:BIND9
- FTPサーバー:proftpd
- POP3 / POP3s / IMAP / IMAPs:この例では、従来のUNIXメールボックス形式から選択できます(次にipopd /を使用します)。 uw-imapd)またはMaildir形式(この場合はCourier-POP3 / Courier-IMAPを使用します)。
- Webサイト統計用のWebalizer
最終的には、確実に動作し、無料のwebhostingコントロールパネルISPConfigの準備ができているシステムが必要です(つまり、ISPConfigはその上で実行されます。ボックス)。
最初に、このようなシステムを設定する方法はこれだけではないことをお伝えしたいと思います。この目標を達成する方法はたくさんありますが、これが私のやり方です。これがあなたのために働くという保証はありません!
要件
このようなシステムをインストールするには、次のものが必要です。
- Debian SargeNetinstall CD(ここで入手可能:http://ftp.de.debian.org/debian-cd/3.1_r0a /i386/iso-cd/debian-31r0a-i386-netinst.iso)
- このドキュメントでネットワークのインストールについて説明するので、インターネット接続
1TheBaseシステム
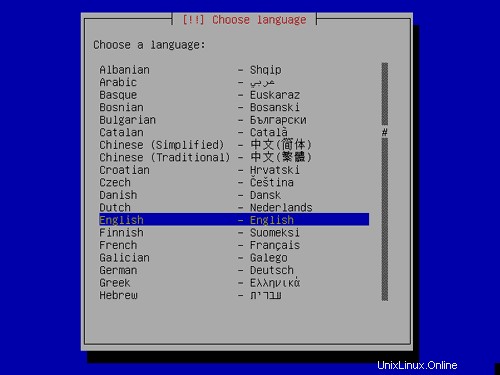
SargeNetinstall CDをシステムに挿入し、そこから起動します( と入力します) linux26 ブートプロンプトで2.6カーネルをインストールします)。インストールが開始され、最初に言語を選択する必要があります:
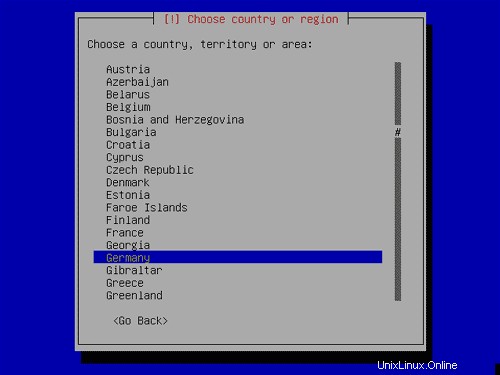
国を選択してください:
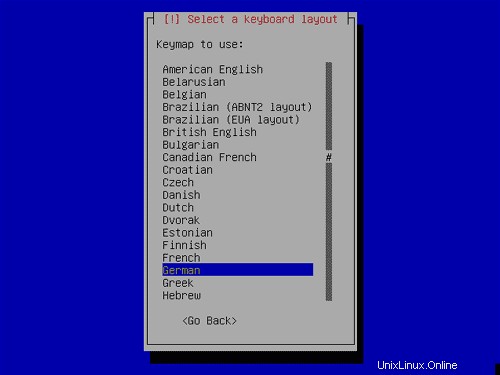
キーボードレイアウトを選択してください:
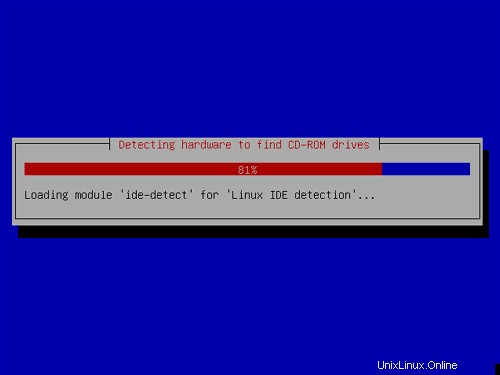
ハードウェアの検出が開始されます:
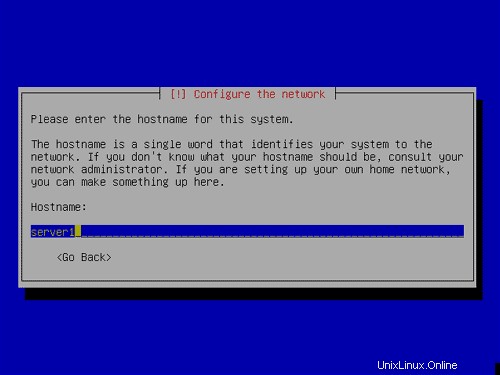
ホスト名を入力します。この例では、私のシステムの名前は server1 .example.com 、だから私は server1と入力します :
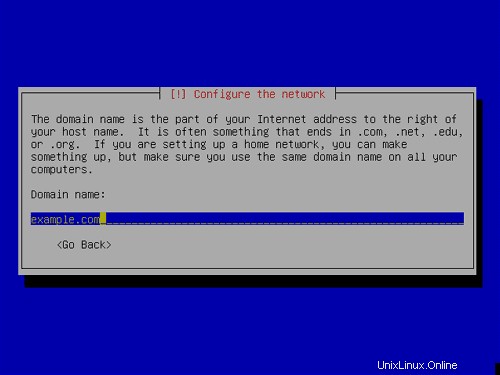
ドメイン名を入力します。この例では、これは example.comです。 :
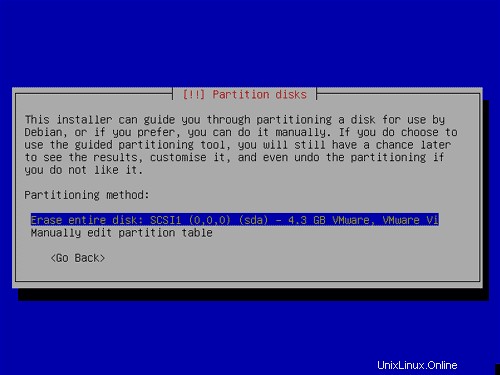
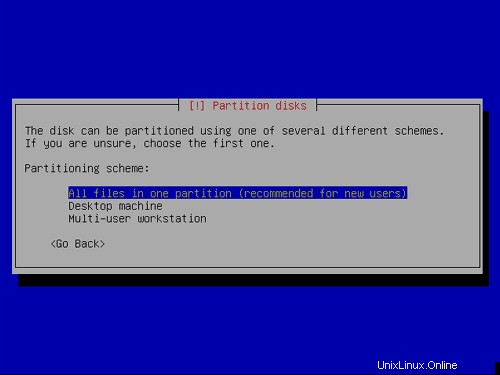
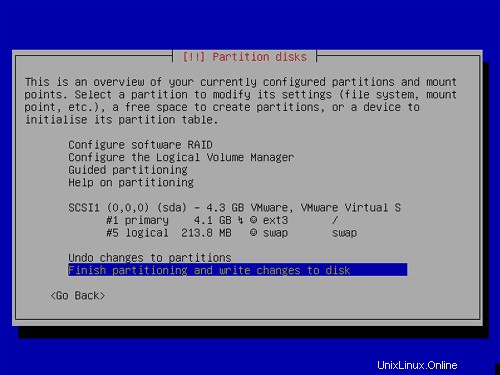
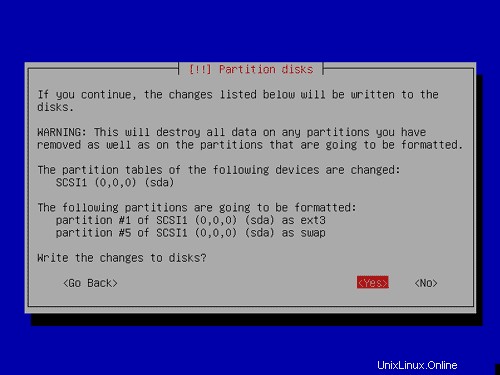
これで、ハードディスクをパーティション分割する必要があります。 1つの大きなパーティションを作成します(マウントポイント
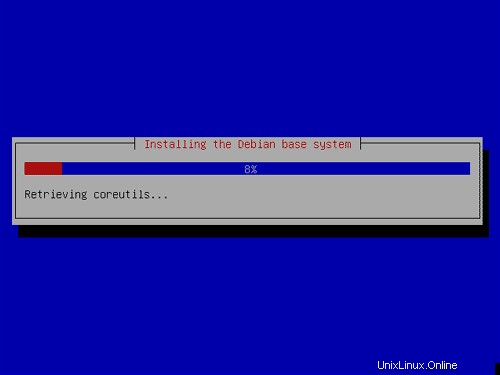
これでベースシステムがインストールされました:
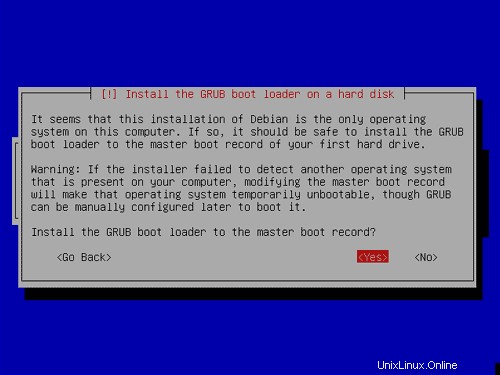
GRUBbootローダーをインストールします マスターブートレコードへ:
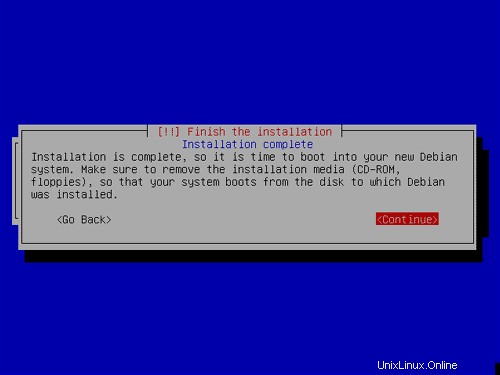
その後、Sarge Netinstall CDをシステムから取り出して再起動します:
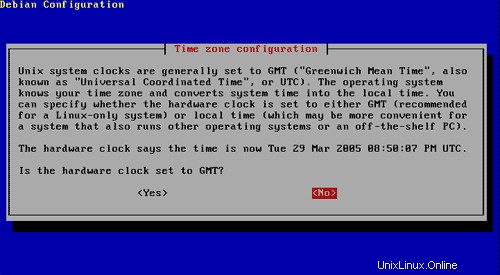
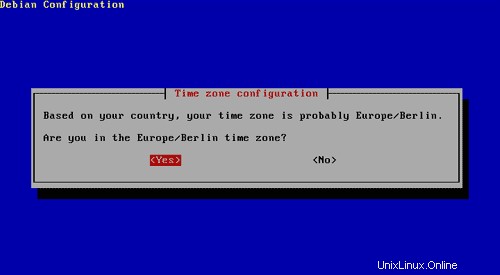
タイムゾーンを構成します:
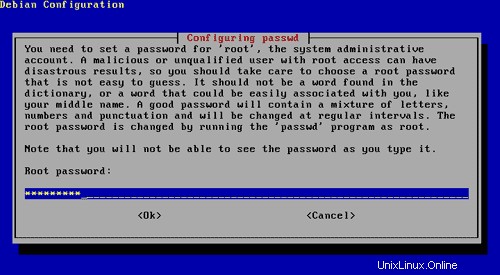
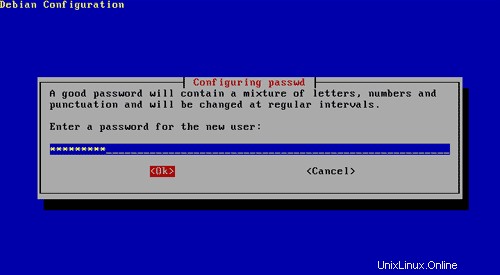
rootのパスワードを入力してください :
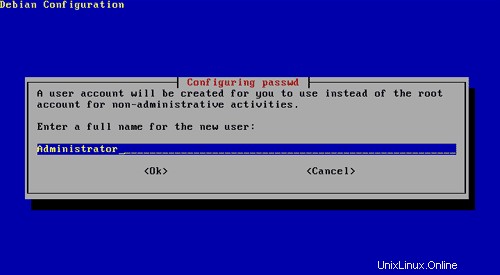
2番目のユーザーを作成する

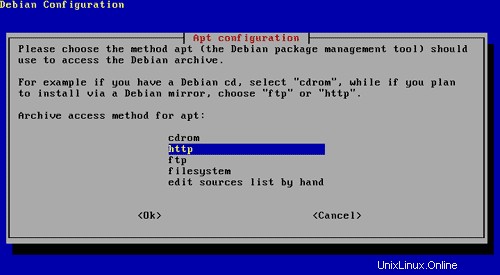
インストール方法を選択してください。ネットワーク経由でインストールを実行したいので、 httpを選択します。 または
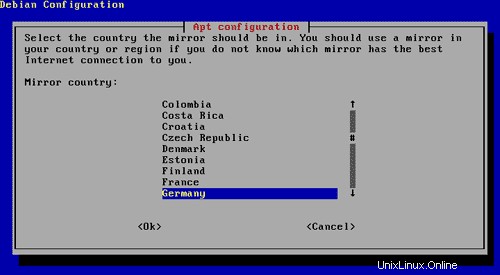
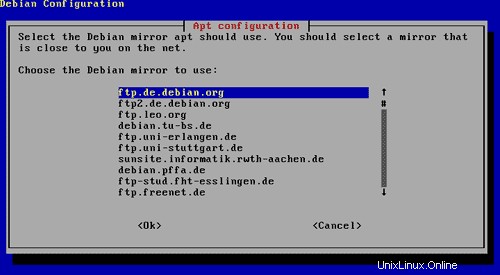
インストールするミラーを選択してください:
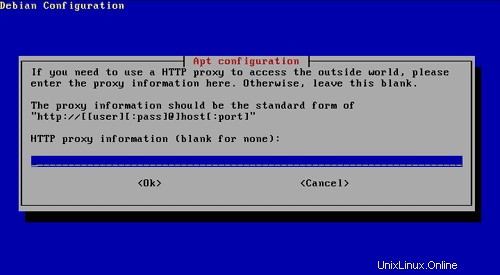
インストールのプロキシを入力します(必要な場合) 。通常、このフィールドは空のままにしておくことができます。
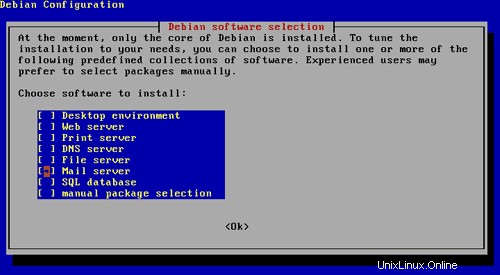
Debianソフトウェアの選択 メールサーバーのみを選択します 。他のすべてのサービスは後で手動でインストールします。
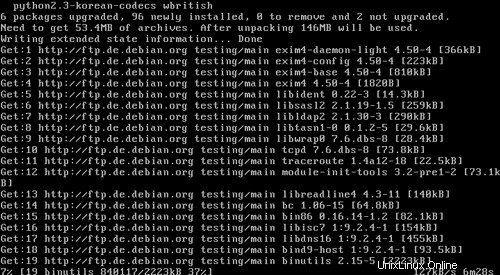
ネットワークのインストールが開始されます:
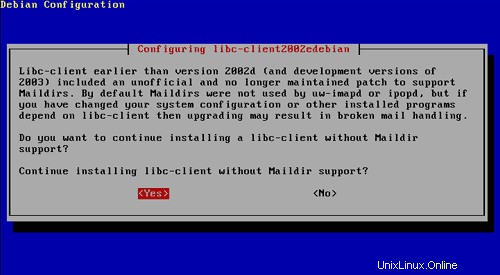
Maildirをサポートせずにlibc-clientのインストールを続行します。 Maildirを使用する場合は、 Courier-POP3をインストールできます。 / Courier-IMAP (後で説明します):
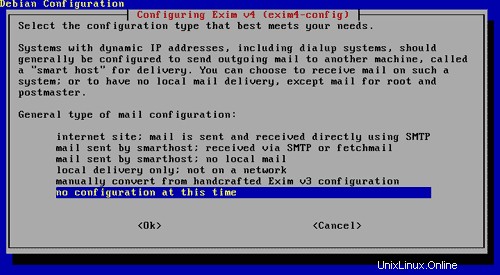
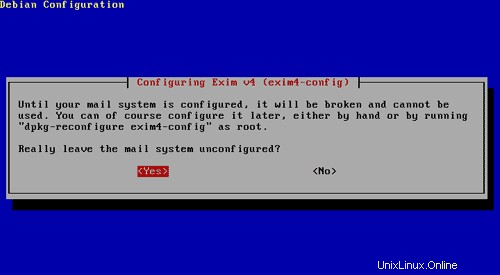
構成しないでください
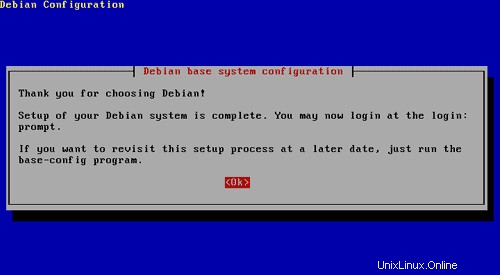
おめでとうございます!ベースシステムはこれで完成です:
次のステップに進みます...
2システムの残りの部分のインストールと構成
TheNetworkの構成
DebianSargeインストーラーはDHCP経由でネットワーク設定を取得するようにシステムを構成しているため、サーバーには静的なものが必要であるため、今すぐ変更する必要がありますIPアドレス。
#/ etc / network / interfaces --ifup(8)、ifdown(8)の構成ファイル |
IPアドレスを追加する場合
#/ etc / network / interfaces --ifup(8)、ifdown(8)の構成ファイル |
次に、ネットワークを再起動します:
/etc/init.d/networkingrestart
編集
検索サーバー |
編集
127.0.0.1 localhost.localdomain localhost server1> |
ホスト名の設定
echo server1.example.com> / etc / hostname
/ bin / hostname -F / etc / hostname
一部のソフトウェアのインストール/削除
次に、必要なソフトウェアをインストールし、不要なパッケージを削除しましょう。
apt-get install wget bzip2rdate fetchmail libdb3 ++-dev unzip zip ncftp xlispstat libarchive-zip-perl zlib1g-devlibpopt-dev nmap openssl lynx fileutils g ++
apt-get remove lpr nfs-commonportmap pidentd pcmcia-cs pppoe pppoeconf ppp pppconfig
update-rc.d -f exim remove
update-inetd --removedaytime
update-inetd --remove telnet
update-inetd- -時間の削除
update-inetd--remove finger
update-inetd --remove talk
update-inetd --remove ntalk
update-inetd --remove ftp
update-inetd --remove destroy
<-はい
/etc/init.d/openbsd-inetdリロード
割り当て
apt-get installquotaquotatool
<-いいえ
編集
#/ etc / fstab:静的ファイルシステム情報。> |
次に実行:
touch /quota.user /quota.group
chmod 600/quota.*
mount -o remount /
quotecheck -avugm
quoteon -avug
DNSサーバー
apt-getinstall bind9
セキュリティ上の理由から、BINDをchrootして実行したいので、次の手順を実行する必要があります。
/etc/init.d/bind9 stop
ファイルを編集 / etc / default / bind9 デーモンが非特権ユーザーとして実行されるように、' バインド '、chrooted to / var / lib / named 。行を変更します: OPTS =" -ubind " OPTS ="-u bind-t / var / lib / named"と表示されます。 :
OPTIONS ="-u bind -t / var / lib / named" |
/ var / libの下に必要なディレクトリを作成します :
mkdir -p / var / lib / named / etc
mkdir / var / lib / named / dev
mkdir -p / var / lib / named / var / cache / bind
mkdir -p / var / lib / named / var / run / bind / run
次に、configdirectoryをから移動します / etc から / var / lib / named / etc :
mv / etc / bind / var / lib / named / etc
古い場所から新しい構成ディレクトリへのシンボリックリンクを作成します(将来、bindisがアップグレードされる際の問題を回避するため):
ln -s / var / lib / named / etc / bind / etc / bind
nullおよびrandomdevicesを作成し、ディレクトリの権限を修正します:
mknod / var / lib / named / dev / nullc 1 3
mknod / var / lib / named / dev / random c 1 8
chmod 666 / var / lib / named / dev / null / var / lib / named / dev / random
chown -R bind:bind / var / lib / named / var / *
chown -R bind:bind / var / lib / named / etc / bind
起動スクリプトを変更する必要があります
#! / bin / sh |
ロギングデーモンを再起動します:
/etc/init.d/sysklogd再起動
BINDを起動し、 / var / log /syslog<を確認します。 / font> エラーの場合:
/etc/init.d/bind9 start
MySQL
apt-getinstall mysql-server mysql-client libmysqlclient12-dev
mysqladmin -u root passwordyourrootsqlpassword
netstat-tapを実行する場合 次のような行が表示されます:
tcp 0 0 localhost.localdo:mysql *:* LISTEN 2449 / mysqld |
これは、MySQLがポート3306の127.0.0.1でアクセス可能であることを意味します。次のセクション(Postfix)に進むことができます。表示されない場合この行で、 /etc/mysql/my.cnfを編集します。 スキップネットワーキングをコメントアウトします :
#skip-networking |
MySQLで利用可能なすべてのIPアドレスをリッスンする場合は、 を編集します。 /etc/mysql/my.cnf bind-address =127.0.0.1をコメントアウトします :
#bind-address =127.0.0.1 |
編集する必要がある場合
/etc/init.d/mysql restart
MySQLがすべてのインターフェイスでリッスンしている場合は、 server1.example.com そうしないと、誰もがデータベースにアクセスする可能性があるためです:
mysqladmin -h server1.example.com -u root password yourrootsqlpassword
Postfix / POP3 / IMAP
SMTP-AUTHとTLS、およびPOP3(ポート995)を実行するPOP3サーバーとIMAPサーバーを使用してPostfixをインストールするためIMAP(ポート993)で次の手順を実行することもできます:
apt-get install postfixpostfix-tls libsasl2 sasl2-bin libsasl2-modules ipopd-ssl uw-imapd-ssl (1line!)
<-pop3およびpop3s
<-いいえ
<-インターネットサイト
<-なし
<-server1.example.com
<-server1.example.com、localhost.example.com、localhost
<-いいえ
postconf -e'smtpd_sasl_local_domain ='
postconf -e'smtpd_sasl_auth_enable =yes'
postconf -e'smtpd_sasl_security_options =noanonymous'
postconf -e' broken_sasl_auth_clients =yes'
postconf -e' smtpd_recipient_restrictions =permit_sasl_authenticated、permit_mynetworks、reject_unauth_destination'
postconf -e' inet_interfaces =all'
e saslauthd'>> /etc/postfix/sasl/smtpd.conf
echo' mech_list:プレーンログイン'>> /etc/postfix/sasl/smtpd.conf
mkdir / etc / postfix / ssl
cd / etc / postfix / ssl /
openssl genrsa- des3 -rand / etc / hosts -out smtpd.key 1024
chmod 600 smtpd.key
openssl req -new -key smtpd.key -out smtpd.csr
openssl x509 -req -days 3650 -in smtpd.csr -signkey smtpd.key -out smtpd.crt
openssl rsa -in smtpd.key -out smtpd.key.unencrypted
mv -f smtpd.key.unencrypted smtpd.key
openssl req -new -x509 -extensions v3_ca -keyoutcakey.pem -out cacert.pem -days3650
postconf -e'smtpd_tls_auth_only =no'
postconf -e'smtp_use_tls =yes'
postconf- e'smtpd_use_tls =yes'
postconf -e'smtp_tls_note_starttls_offer =yes'
postconf -e'smtpd_tls_key_file =/etc/postfix/ssl/smtpd.key'
postconf -e'smtpd_tls_cert_file =/ etc / postfix / ssl / smtpd.crt'
postconf -e' smtpd_tls_CAfile =/etc/postfix/ssl/cacert.pem'
postconf -e' smtpd_tls_loglevel =1'
postconf -e 'smtpd_tls_received_header =yes'
postconf -e'smtpd_tls_session_cache_timeout =3600s'
postconf -e'tls_random_source =dev:/ dev / urandom'
ファイル
#コメント付きのより完全なバージョンについては、/ usr / share / postfix/main.cf.distを参照してくださいmtpd_banner=$ myhostname ESMTP $ mail_name(Debian / GNU )biff =no#.domainを追加するのはMUAの仕事です。append_dot_mydomain=no#次の行のコメントを解除して、「遅延メール」警告を生成します。 / aliasmyorigin =/ etc / mailnamemydestination =server1.example.com、localhost.example.com、localhostrelayhost =mynetworks =127.0.0.0/8mailbox_command =procmail -a "$ EXTENSION" mailbox_size_limit =0recipient_delimiter =+ inet_interfaces =allsmtpd_sasl_local_domain =allsmtpd_sasl_local_domain noanonymousbroken_sasl_auth_clients =yessmtpd_recipient_restrictions =permit_sasl_authenticated、permit_mynetworks、reject_unauth_destinationsmtpd_tls_auth_only =nosmtp_use_tls =yessmtpd_use_tls =yessmtp_tls_note_starttls_ postfix / ssl / smtpd.keysmtpd_tls_cert_file =/etc/postfix/ssl/smtpd.crtsmtpd_tls_CAfile =/etc/postfix/ssl/cacert.pemsmtpd_tls_loglevel =1smtpd_tls_received_header =yessmtpd_tls_received_header =yessmtpd_tls_session_cache |
/etc/init.d/postfixrestart
認証は
mkdir -p /var/spool/postfix/var/run/saslauthd
Now we have toedit /etc/default/saslauthd in order to activate saslauthd .Remove # in front of START=yes and add the line PARAMS="-m /var/spool/postfix/var/run/saslauthd -r" :
# This needs to be uncommented before saslauthd will be run automaticallySTART=yesPARAMS="-m /var/spool/postfix/var/run/saslauthd -r"# You must specify the authentication mechanisms you wish to use.# This defaults to "pam" for PAM support, but may also include# "shadow" or "sasldb", like this:# MECHANISMS="pam shadow"MECHANISMS="pam" |
We must also edit /etc/init.d/saslauthd and change the location of saslauthd's PID file. Change the value of PIDFILE to /var/spool/postfix/var/run/${NAME}/saslauthd.pid :
PIDFILE="/var/spool/postfix/var/run/${NAME}/saslauthd.pid" |
Now start saslauthd :
/etc/init.d/saslauthd start
Next we create the file /etc/c-client.cf with the following contents:
I accept the riskset disable-plaintext 0 |
and restart inetd :
/etc/init.d/openbsd-inetd restart
If we don't do this, then our POP3/IMAP logins will fail.
To see if SMTP-AUTHand TLS work properly now run the following command:
telnetlocalhost 25
After you haveestablished the connection to your postfix mail server type
ehlolocalhost
If you see thelines
250-STARTTLS
and
250-AUTH
everything is fine.
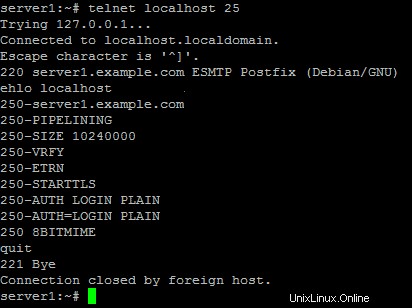
Type
quit
to return to thesystem's shell.
Courier-IMAP/Courier-POP3
If you want touse a POP3/IMAP daemon that has Maildir support (if you do not want to use thetraditional Unix mailbox format) you can install Courier-IMAP/Courier-IMAP-SSL(for IMAPs on port 993) and Courier-POP3/Courier-POP3-SSL (for POP3s on port995). Otherwise you can proceed with the Apache configuration.
apt-get install courier-imapcourier-imap-ssl courier-pop courier-pop-ssl
<- No
ipopd and UW-IMAPwill then be replaced.
Then configurePostfix to deliver emails to a user's Maildir*:
postconf -e 'home_mailbox=Maildir/'
postconf -e 'mailbox_command ='
/etc/init.d/postfix restart
*Please note:Youdo not have to do this if you intend to use ISPConfigon your system as ISPConfig does the necessary configuration using procmailrecipes. But please go sure to enable Maildir under Management -> Settings ->EMail in the ISPConfig web interface.