
この記事では、Ubuntu 20.04 LTS に Askbot をインストールして構成するために必要な手順について説明しました。このチュートリアルを続行する前に、sudo のユーザーとしてログインしていることを確認してください 特権。このチュートリアルのすべてのコマンドは、root 以外のユーザーとして実行する必要があります。
Askbot は、Python と Django フレームワークで構築された Q&A フォーラムを作成するためのオープンソースの質問と回答 (Q&A) ソフトウェアです。シンプルで高度なカスタマイズが可能で、StackOverflow や YahooAnswers などの他のフォーラム ソフトウェアと非常によく似ています。カルマベースのコンテンツ システム、投票、コンテンツ モデレーションなどの優れた機能がいくつかあります。
Ubuntu 20.04 に Askbot をインストールする
ステップ 1. まず、Ubuntu サーバーにパッケージをインストールする前に、すべてのシステム パッケージが更新されていることを確認することを常にお勧めします。
sudo apt update
sudo apt upgrade
sudo apt install python-dev python-setuptools python3-pip python3-psycopg2 libpq-dev
ステップ 2. PostgreSQL データベース サーバーをインストールします。
データベース サーバーには、PostgreSQL データベース サーバーを使用します。これは以下のコマンドでインストールできます:
sudo apt install postgresql postgresql-client
完了したら、以下のコマンドを使用して PostgreSQL のステータスを停止、開始、有効化、および確認できます:
sudo systemctl stop postgresql.service
sudo systemctl start postgresql.service
sudo systemctl enable postgresql.service
sudo systemctl status postgresql.service
ステップ 3. PostgreSQL ユーザー パスワードを作成します。
デフォルトの Postgres ユーザー パスワードを作成または変更することをお勧めします:
sudo passwd postgres
プロンプトが表示されたら、以下に示すように Postgres ユーザー用の新しい Linux パスワードを作成します。
Enter new UNIX password:
Retype new UNIX password:
passwd: password updated successfully
ステップ 4. PostgreSQL データベースを作成します。
次のように入力して、askbot という新しいデータベースを作成します:
su - postgres
psql
create database askbot;
create user askbotuser with password 'your-strong-password-here';
grant all privileges on database askbot to askbotuser;
\q
exit
上記のデータベースとユーザーを作成したら、PostgreSQLの設定ファイルを編集してmd5認証を有効にしましょう。お気に入りのエディターでこれを行うことができます:
sudo nano /etc/postgresql/12/main/pg_hba.conf
強調表示された行を編集して、md5 認証を参照します:
"local" is for Unix domain socket connections only
 local   all             all                                     md5
 IPv4 local connections:
 host    all             all             127.0.0.1/32            md5
 IPv6 local connections:
 host    all             all             ::1/128                 md5
 Allow replication connections from localhost, by a user with the
上記のファイルを編集したら、保存して終了します。ここで、PostgreSQL を再起動する必要があります:
sudo systemctl restart postgresql
ステップ 5. Ubuntu システムに Askbot をインストールします。
まず、askbot という名前の新しいユーザーを作成し、そのユーザー アカウントの新しいパスワードを作成します。
sudo useradd -m -s /bin/bash askbot
sudo passwd askbot
sudo usermod -a -G sudo askbot
次に、ターミナルでこの別のコマンドを実行して、Python 仮想環境 (virtualenv) をインストールします。
sudo pip install virtualenv six
次に、su を使用して、askbot ユーザー アカウントにログインします。 コマンドを実行して、Askbot 用の新しい仮想環境を作成します:
su - askbot
virtualenv askbot
次のステップは、仮想環境に切り替えてアクティブにすることです:
cd askbot
source bin/activate
次に、以下のコマンドを実行して、Askbot、Six、および PostgreSQL モジュールをインストールします。
pip install --upgrade pip
pip install six==1.10.0
pip install askbot==0.11.1 psycopg2
askbot 用に myapps というディレクトリを作成して構成します:
mkdir myapps
cd myapps
コマンドを使用して、Askbot をセットアップします:
askbot-setup
出力:
Deploying Askbot - Django Q&A forum application
Problems installing? -> please email example@unixlinux.online

To CANCEL - press Ctr-C.

Enter the Root directory path (relative or absolute).
This directory will contain the Django project's manage.py file.
Press ENTER to use ./askbot_site.
>
Enter the Project directory name.
Will be a subdirectory within the Root for the settings.py, urls.py files.
Press ENTER to use askbot_site.
>
Select the database engine: 1 - postgresql, 2 - sqlite, 3 - mysql, 4 - oracle.
Type 1/2/3/4, press ENTER to select sqlite
> 1
Enter the database host name
Press ENTER to use empty string (default value).
>
Enter database name. (required)
> askbot
Enter database password. (required)
> type_password_here
Enter database user name. (required)
> askbotuser
Enter the database port
Press ENTER to use empty string (default value).
>
Enter email of the site admin (required)
> example@unixlinux.online
Enter name of the site admin (required)
> superadmin
Enter the default from email
Press ENTER to use example@unixlinux.online
>
Enter the server email
Press ENTER to use example@unixlinux.online
最後に、以下のコマンドを実行してセットアップを完了します:
cd askbot_site/
python manage.py collectstatic
python manage.py migrate
ステップ 6. Askbot を起動します。
以下のコマンドを実行して、Askbot アプリケーションを開始またはテストできます:
python manage.py runserver --insecure 0.0.0.0:8080
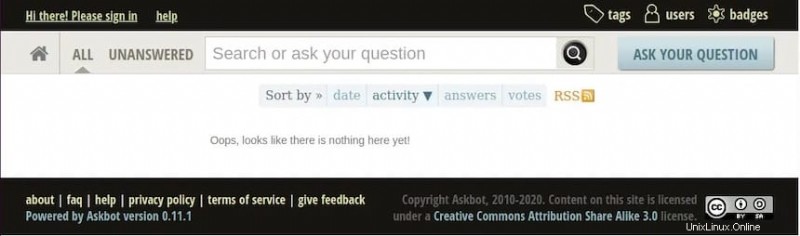
URL 経由で Askbot アプリケーションにアクセスするには、お気に入りの Web ブラウザを開き、ポート 8080 でサーバー IP を参照します。
http://localhost:8080
Ubuntu 20.04 LTS Focal Fossa に Askbot をインストールするために必要なことはこれだけです。この簡単なヒントがお役に立てば幸いです。 Install Askbot の詳細については、公式ナレッジ ベースを参照してください。ご質問やご提案がありましたら、お気軽にコメントを残してください。