
このチュートリアルでは、Ubuntu 20.04 LTSにInvoicePlaneをインストールする方法を紹介します。知らなかった方のために、InvoicePlaneは無料で使用できる請求および顧客管理Webです。ほぼすべての個人または企業がオンデマンドで請求書を発行できるようにするアプリケーション。多くの組織やフリーランサーが支払いや請求書を管理するために使用します。カスタムテンプレート、テーマ、および機能を向上させるのに役立つその他のツールを提供します。 InvoicePlaneの
この記事は、少なくともLinuxの基本的な知識があり、シェルの使用方法を知っていること、そして最も重要なこととして、サイトを独自のVPSでホストしていることを前提としています。インストールは非常に簡単で、ルートアカウントで実行されていますが、そうでない場合は、' sudoを追加する必要があります。 ‘ルート権限を取得するコマンドに。 Ubuntu 20.04(Focal Fossa)にInvoicePlaneを段階的にインストールする方法を紹介します。 Ubuntu 18.04、16.04、およびLinuxMintなどの他のDebianベースのディストリビューションでも同じ手順に従うことができます。
前提条件
- 次のオペレーティングシステムのいずれかを実行しているサーバー:Ubuntu 20.04、18.04、およびLinuxMintなどの他のDebianベースのディストリビューション。
- 潜在的な問題を防ぐために、OSの新規インストールを使用することをお勧めします。
- サーバーへのSSHアクセス(またはデスクトップを使用している場合はターミナルを開く)
非rootsudoユーザーまたはrootユーザーへのアクセス 。非rootsudoユーザーとして行動することをお勧めします ただし、ルートとして機能するときに注意しないと、システムに害を及ぼす可能性があります。
Ubuntu 20.04 LTSFocalFossaにInvoicePlaneをインストールする
手順1.まず、次の apt を実行して、すべてのシステムパッケージが最新であることを確認します。 ターミナルのコマンド。
sudo apt update
sudo apt upgrade
ステップ2.LAMPスタックをインストールします。
Ubuntu 20.04 LAMPサーバーが必要です。LAMPがインストールされていない場合は、こちらのガイドに従ってください。
ステップ3.Ubuntu20.04にInvoicePlaneをインストールします。
デフォルトでは、InvoicePlaneはUbuntu 20.04ベースリポジトリでは使用できません。次に、次のコマンドを使用して最新バージョンのInvoicePlaneをダウンロードします。
wget -c -O v1.5.11.zip https://invoiceplane.com/download/v1.5.11
次に、ダウンロードしたファイルを抽出します:
mkdir /var/www/html/invoiceplane
unzip v1.5.11.zip -d /var/www/html/invoiceplane
次に、ディレクトリを変更し、 ipconfig.phpを編集します。 次のコマンドでファイルを作成します:
cd /var/www/html/invoiceplane
cp ipconfig.php.example ipconfig.php
cp htaccess .htaccess
nano ipconfig.php
次のファイルを追加します:
IP_URL=http://invoice.your-domian.com
DB_HOSTNAME=localhost
DB_USERNAME=invplane
DB_PASSWORD=password
DB_DATABASE=invplanedb
DB_PORT=3306
いくつかのフォルダの権限を変更する必要があります:
chown -R www-data:www-data /var/www/html/invoiceplane/
chmod -R 755 /var/www/html/invoiceplane/
ステップ4.MariaDBを構成します。
デフォルトでは、MariaDBは強化されていません。 mysql_secure_installationを使用してMariaDBを保護できます。 脚本。ルートパスワードを設定し、匿名ユーザーを削除し、リモートルートログインを禁止し、テストデータベースと安全なMariaDBへのアクセスを削除する各手順を注意深く読んでください。
mysql_secure_installation
次のように構成します:
- Set root password? [Y/n] y
- Remove anonymous users? [Y/n] y
- Disallow root login remotely? [Y/n] y
- Remove test database and access to it? [Y/n] y
- Reload privilege tables now? [Y/n] y
次に、MariaDBコンソールにログインし、InvoicePlaneのデータベースを作成する必要があります。次のコマンドを実行します。
mysql -u root -p
これによりパスワードの入力を求められるので、MariaDBルートパスワードを入力してEnterキーを押します。データベースサーバーにログインしたら、次のデータベースを作成する必要があります。 InvoicePlaneのインストール:
MariaDB [(none)]> CREATE DATABASE invplanedb;
MariaDB [(none)]> CREATE USER 'invplane'@'localhost' IDENTIFIED BY 'your-strong-password';
MariaDB [(none)]> GRANT ALL PRIVILEGES ON invplanedb.* TO 'invplane'@'localhost';
MariaDB [(none)]> FLUSH PRIVILEGES;
MariaDB [(none)]> EXIT
ステップ5.Apacheを構成します。
次に、Apacheで新しい仮想ホストディレクティブを作成します。たとえば、「 invoiceplane.conf」という名前の新しいApache構成ファイルを作成します。 ’仮想サーバー上:
nano /etc/apache2/sites-available/invoiceplane.conf
次の行を追加します:
<VirtualHost *:80>
     ServerAdmin admin@your-domain.com
     DocumentRoot /var/www/html/invoiceplane
     ServerName invoice.your-domain.com

     <Directory /var/www/html/invoiceplane/>
          Options +FollowSymlinks
          AllowOverride All
          Require all granted
     </Directory>
     ErrorLog ${APACHE_LOG_DIR}/error.log
     CustomLog ${APACHE_LOG_DIR}/access.log combined

</VirtualHost>
が必要 これで、Apache Webサーバーを再起動して、変更を行うことができます:
sudo a2ensite invoiceplane.conf
sudo a2enmod rewrite
sudo systemctl restart apache2
手順6.HTTPSを設定します。
InvoicePlaneで安全なHTTPS接続を有効にする必要があります。Let'sEncryptから無料のTLS証明書を取得できます。Ubuntu20.04リポジトリからLet'sEncryptクライアント(certbot)をインストールします。
sudo apt install certbot python3-certbot-apache
次に、次のコマンドを実行して、Apacheプラグインを使用して無料のTLS証明書を取得します。
certbot --apache -d invoice.your-domian.com
メールアドレスを入力して利用規約に同意するよう求められます:
Enabled Apache rewrite module
Redirecting vhost in /etc/apache2/sites-enabled/invoice.conf to ssl vhost in /etc/apache2/sites-available/invoice-le-ssl.conf

- - - - - - - - - - - - - - - - - - - - - - - - - - - - - - - - - - - - - - - -
Congratulations! You have successfully enabled https://invoice.your-domain.com

You should test your configuration at:
https://www.ssllabs.com/ssltest/analyze.html?d=invoice.your-domain.com
- - - - - - - - - - - - - - - - - - - - - - - - - - - - - - - - - - - - - - - -

IMPORTANT NOTES:
 - Congratulations! Your certificate and chain have been saved at:
   /etc/letsencrypt/live/invoice.your-domain.com/fullchain.pem
   Your key file has been saved at:
   /etc/letsencrypt/live/invoice.your-domain.com/privkey.pem
   Your cert will expire on 2022-04-23. To obtain a new or tweaked
   version of this certificate in the future, simply run certbot again
   with the "certonly" option. To non-interactively renew *all* of
   your certificates, run "certbot renew"
 - If you like Certbot, please consider supporting our work by:

   Donating to ISRG / Let's Encrypt:   https://letsencrypt.org/donate
   Donating to EFF:                    https://eff.org/donate-le
テストが成功した場合、変更を有効にするためにApacheをリロードします:
sudo apache2ctl -t
sudo systemctl reload apache2
ステップ7.InvoicePlaneWebインターフェイスへのアクセス。
正常にインストールされたら、Webブラウザーを開き、URL https://invoice.your-domain.com> 。次のページが表示されます:
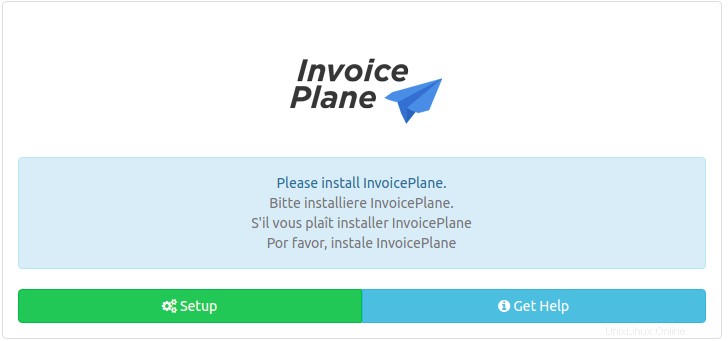
おめでとうございます!InvoicePlaneが正常にインストールされました。Ubuntu20.04LTS Focal FossaシステムにInvoicePlaneをインストールするためにこのチュートリアルを使用していただき、ありがとうございます。追加のヘルプや役立つ情報については、InvoicePlaneの公式Webサイトを確認することをお勧めします。 。