
このチュートリアルでは、Ubuntu 14.04にNtopngをインストールする方法を示します。知らなかった人にとって、Ntopngは、さまざまなネットワークを監視する場合に比較的便利なツールです。サーバー上のプロトコル。さまざまなプロトコル、トラフィックバリアント、およびはい、複数の時間枠にわたる帯域幅を監視するための一連のツールを提供します。Ntopngはlibpcapに基づいており、すべてのUnixで仮想的に実行できるように移植可能な方法で記述されています。プラットフォーム、macOS、およびWin32でも。
この記事は、少なくともLinuxの基本的な知識があり、シェルの使用方法を知っていること、そして最も重要なこととして、サイトを独自のVPSでホストしていることを前提としています。インストールは非常に簡単です。 Ubuntu14.04へのNtopngのステップバイステップのインストールを紹介します。
Ubuntu14.04にNtopngをインストールする
手順1.まず、Ntopngリポジトリをリポジトリリストに追加します。
sudo nano /etc/apt/sources.list.d/ntop.list
次に、次の行を追加します:
deb http://www.nmon.net/apt-stable/12.04/ x64/
deb http://www.nmon.net/apt-stable/12.04/ all/
キーを追加してから更新を実行します:
wget -qO - http://www.nmon.net/apt-stable/ntop.key | sudo apt-key add -
sudo apt-get update
ステップ2.Ntopngと依存関係をインストールします。
sudo apt-get install libpcap-dev libglib2.0-dev libgeoip-dev redis-server libxml2-dev libnl1
sudo apt-get install ntopng pfring nprobe ntopng-data n2disk nbox
手順3.Ntopngを設定します。
Ntopng構成ファイルを作成します。この記事では、nanoをテキストエディターとして使用します。お気に入りのテキストエディターを使用して、Ntopng構成ファイルを作成できます。
>sudo nano /etc/ntopng/ntopng.conf
# /etc/ntopng/ntopng.conf
#
#        The  configuration  file is similar to the command line, with the exception that an equal
#        sign '=' must be used between key and value. Example:  -i=p1p2  or  --interface=p1p2  For
#        options with no value (e.g. -v) the equal is also necessary. Example: "-v=" must be used.
#
#
#       -G|--pid-path
#        Specifies the path where the PID (process ID) is saved.
#
-G=/var/tmp/ntopng.pid
#
#       -e|--daemon
#        This  parameter  causes ntop to become a daemon, i.e. a task which runs in the background
#        without connection to a specific terminal. To use ntop other than as a casual  monitoring
#        tool, you probably will want to use this option.
#
-e=
#
#       -i|--interface
#        Specifies  the  network  interface or collector endpoint to be used by ntopng for network
#        monitoring. On Unix you can specify both the interface name  (e.g.  lo)  or  the  numeric
#        interface id as shown by ntopng -h. On Windows you must use the interface number instead.
#        Note that you can specify -i multiple times in order to instruct ntopng to create  multi‐
#        ple interfaces.
#
-i=1
#
#       -w|--http-port
#        Sets the HTTP port of the embedded web server.
#
-w=3000
#
#       -m|--local-networks
#        ntopng determines the ip addresses and netmasks for each active interface. Any traffic on
#        those  networks  is considered local. This parameter allows the user to define additional
#        networks and subnetworks whose traffic is also considered local in  ntopng  reports.  All
#        other hosts are considered remote. If not specified the default is set to 192.168.1.0/24.
#
#        Commas  separate  multiple  network  values.  Both netmask and CIDR notation may be used,
#        even mixed together, for instance "131.114.21.0/24,10.0.0.0/255.0.0.0".
#
-m=192.168.1.0/24
#
#       -n|--dns-mode
#        Sets the DNS address resolution mode: 0 - Decode DNS responses  and  resolve  only  local
#        (-m)  numeric  IPs  1  -  Decode DNS responses and resolve all numeric IPs 2 - Decode DNS
#        responses and don't resolve numeric IPs 3 - Don't decode DNS responses and don't  resolve
#
-n=1
#
#       -S|--sticky-hosts
#        ntopng  periodically purges idle hosts. With this option you can modify this behaviour by
#        telling ntopng not to purge the hosts specified by -S. This parameter requires  an  argu‐
#        ment  that  can  be  "all"  (Keep  all hosts in memory), "local" (Keep only local hosts),
#        "remote" (Keep only remote hosts), "none" (Flush hosts when idle).
#
-S=
#
#       -d|--data-dir
#        Specifies the data directory (it must be writable). Default directory is ./data
#
-d=/var/tmp/ntopng
#
#       -q|--disable-autologout
#        Disable web interface logout for inactivity.
#
-q=
ntopng.startファイルを作成します:
sudo nano /etc/ntopng/ntopng.start

##Add this line##

--local-networks "192.168.0.0/24"  ## give your local IP Ranges here.
--interface 1
使用可能なすべてのインターフェースとオプションを表示するには、ntopng -hを使用します オプション:
sudo ntopng -h
ステップ4.NtopngとRedisサーバーデーモンを起動します。
sudo service redis-server start
sudo service ntopng start
ステップ5.Ntopngをテストします。
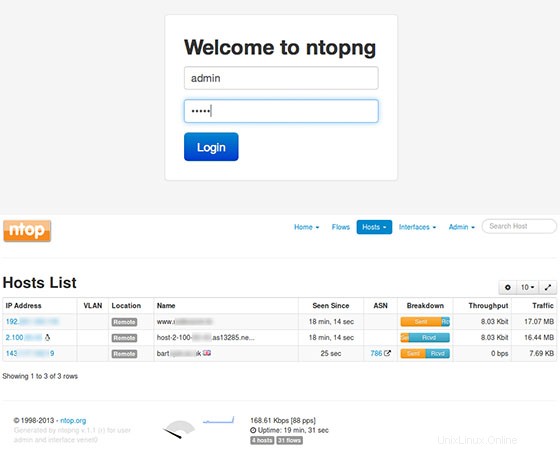
これで、http://yourserver.name:3000と入力して、Ntopngアプリケーションをテストできます。Ntopngログインページのインターフェイスが表示されます。初めて、ユーザー「admin」とパスワード「admin」を使用できます。
おめでとうございます!Ntopngが正常にインストールされました。Ubuntu14.04システムにNtopngサーバーモニタリングをインストールするためにこのチュートリアルを使用していただきありがとうございます。追加のヘルプや役立つ情報については、Ntopngの公式Webサイトを確認することをお勧めします。