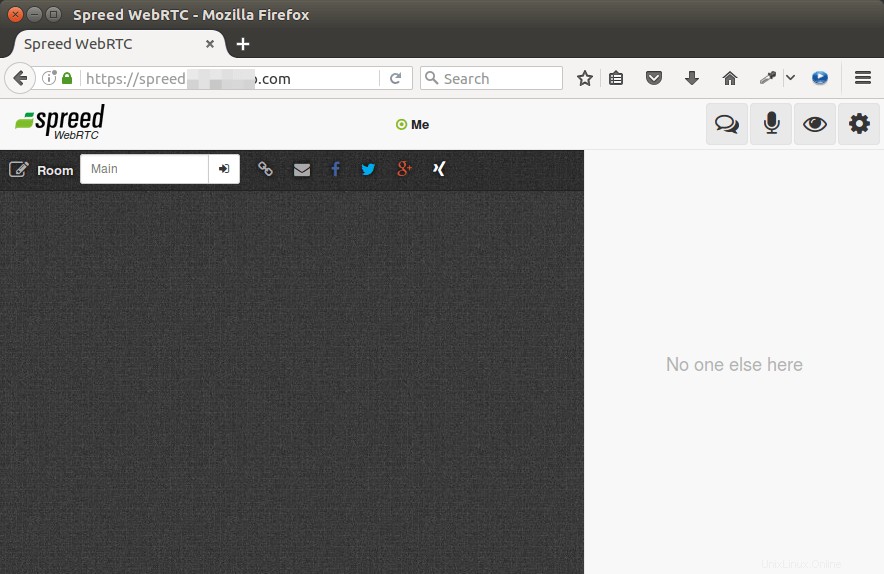
Spreedは、プライバシーを念頭に置いて設計された無料のオープンソース(AGPL)WebRTCオーディオ/ビデオ通話および会議サーバーです。 WebRTCは無料でオープンなテクノロジーであり、ブラウザーがピアツーピア方式で相互に通信できるようにします。 Spreed WebRTCサーバーは、エンドツーエンドの暗号化を使用して、ユーザーのプライバシーとセキュリティを保護します。
Spreed WebRTCを使用すると、次のことができます。
- 安全なオーディオ、ビデオ、テキストチャット
- Web会議
- 1対1のビデオチャット
このチュートリアルでは、SpreedWebRTCサーバーをUbuntu16.04VPSまたは専用サーバーにインストールする方法を説明します。
ステップ1:公式PPAからUbuntu16.04にSpreedWebRTCサーバーをインストールする
Ubuntu16.04の公式PPAからSpreedWebRTCサーバーを簡単にインストールできます。
sudo apt-add-repository ppa:strukturag/spreed-webrtc

sudo apt update

sudo apt install spreed-webrtc
インストールしたら、spreed-webtrc 自動的に起動し、組み込みのWebサーバーが127.0.0.1:8080をリッスンします 。次のコマンドでステータスを確認できます:
systemctl status spreed-webrtc
出力:
● spreed-webrtc.service - Spreed WebRTC server
   Loaded: loaded (/lib/systemd/system/spreed-webrtc.service; enabled; vendor preset: enabled)
   Active: active (running) since Tue 2016-12-13 02:28:18 EST; 3min 0s ago
 Main PID: 925 (spreed-webrtc-s)
    Tasks: 5
   Memory: 1.1M
      CPU: 14ms
   CGroup: /system.slice/spreed-webrtc.service
           └─925 /usr/sbin/spreed-webrtc-server -c /etc/spreed/webrtc.conf -l /var/log/spreed/webrtc/server.log
実行されていない場合は、次のコマンドで手動で開始します:
sudo systemctl start spreed-webrtc
また、起動時に自動起動を有効にします:
sudo systemctl enable spreed-webrtc
主な構成ファイルは/etc/spreed/webrtc.confです。 。
ステップ2:リバースプロキシの設定
Spreed WebRTCは、デフォルトでローカルホストでリッスンします。ブラウザからWebインターフェイスにアクセスするには、NginxまたはApacheを使用してそのリバースプロキシを設定する必要があります。
Nginx
Nginxを使用する場合は、次の手順に従ってください。
まず、Nginxをインストールします。
sudo apt install nginx
次に、SpreedWebRTCのサーバーブロックファイルを作成します。
sudo nano /etc/nginx/conf.d/spreed-webrtc.conf
次のテキストをファイルに入れます。 spreed.your-domain.comを置き換えます ご希望のドメイン名を使用し、Aレコードを設定することを忘れないでください。
server {
        listen 80;
        server_name spreed.your-domain.com;
        location / {
                proxy_pass http://127.0.0.1:8080;
                proxy_http_version 1.1;
                proxy_set_header Upgrade $http_upgrade;
                proxy_set_header Connection "upgrade";
                proxy_set_header X-Forwarded-Proto $scheme;
                proxy_set_header Host $http_host;
                proxy_set_header X-Real-IP $remote_addr;
                proxy_set_header X-Forwarded-For $proxy_add_x_forwarded_for;

                proxy_buffering             on;
                proxy_ignore_client_abort   off;
                proxy_redirect              off;
                proxy_connect_timeout       90;
                proxy_send_timeout          90;
                proxy_read_timeout          90;
                proxy_buffer_size           4k;
                proxy_buffers               4 32k;
                proxy_busy_buffers_size     64k;
                proxy_temp_file_write_size  64k;
                proxy_next_upstream         error timeout invalid_header http_502 http_503 http_504;
        }

        location ~ /.well-known/acme-challenge {
             root /usr/share/nginx/spreed/;
             allow all;
        }
}
ファイルを保存して閉じます。次に、Nginx構成をテストしてリロードします。
sudo nginx -t

sudo systemctl reload nginx
これで、Webブラウザからドメイン名を介してSpreedWebRTCにアクセスできるようになります。
Apache
Apacheを使用する場合は、次の手順に従ってください。
ApacheWebサーバーをインストールします。
sudo apt install apache2
次に、Spreedの仮想ホストファイルを作成します。
sudo nano /etc/apache2/sites-available/spreed-webrtc.conf
次のテキストをファイルに入れます。 spreed.your-domain.comを置き換えます ご希望のドメイン名を使用し、Aレコードを設定することを忘れないでください。
<VirtualHost *:80>
    ServerName spreed.your-domain.com
    <Location />
      ProxyPass http://127.0.0.1:8080/
      ProxyPassReverse http://127.0.0.1:8080/
    </Location>

    <Location /ws>
       ProxyPass ws://127.0.0.1:8080/
    </Location>
    ProxyVia On
    ProxyPreserveHost On
</VirtualHost>
ファイルを保存して閉じます。次に、proxy_httpを有効にする必要があります モジュール。
sudo a2enmod proxy_http
次に、この仮想ホストを有効にします。
sudo a2ensite spreed-webrtc.conf
構成をテストし、Apacheをリロードします
sudo apachectl configtest

sudo systemctl reload apache2
これで、Webブラウザからドメイン名を介してSpreedWebRTCにアクセスできるようになります。
ステップ3:HTTPSを有効にする
それでは、Let'sEncryptから無料のTLS証明書を取得しましょう。次のコマンドを実行して、公式のcertbot PPAからLet’s Encryptクライアント(certbot)をインストールします。
sudo apt install certbot
Apacheを使用する場合 Webサーバーの場合は、CertbotApacheプラグインもインストールする必要があります。
sudo apt install python3-certbot-apache
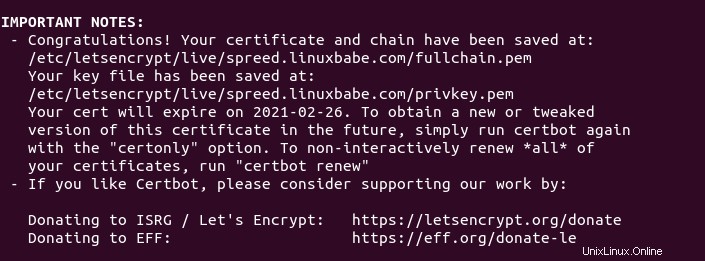
次に、次のコマンドを発行して、無料のTLS/SSL証明書を取得します。
sudo certbot --apache --agree-tos --redirect --hsts --staple-ocsp --email [email protected] -d spreed.example.com
Nginxを使用する場合 Webサーバーの場合は、CertbotNginxプラグインをインストールする必要があります。
sudo apt install python3-certbot-nginx
次に、Nginxプラグインを使用して、次のコマンドを実行して証明書を取得してインストールします。
sudo certbot --nginx --agree-tos --redirect --hsts --staple-ocsp --email [email protected] -d spreed.example.com
TLS証明書を正常に取得したことを示す次のテキストが表示されます。
ステップ4:TURN/STUNサーバーをインストールする
ユーザーが異なるNATデバイスの背後にいる場合、WebRTCは機能しません。ブロックされます。 NATをトラバースするには、Webブラウザ間のリレーとしてTURN/STUNサーバーを設定する必要があります。 ターン Tの略です レイバーサルU Rを歌う N で。 Coturnは、VoIPおよびWebRTC用の無料のオープンソースのTURNおよびSTUNサーバーです。
CoturnはUbuntuリポジトリから入手できるため、次のコマンドを使用してインストールします。
sudo apt install coturn
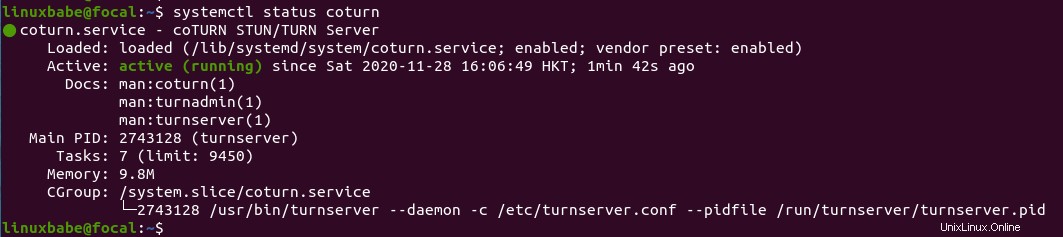
インストールすると、自動的に起動します。次のコマンドでステータスを確認できます:
systemctl status coturn
サンプル出力:
実行されていない場合は、次のコマンドで手動で開始します:
sudo systemctl start coturn
また、起動時に自動起動を有効にします:
sudo systemctl enable coturn
ステップ5:SpreedWebRTC用にCoturnを構成する
メインの構成ファイルを編集します。
sudo nano /etc/turnserver.conf
デフォルトでは、このファイルのすべての行がコメント化されています。以下は、コピーしてファイルに貼り付けることができる構成例です。
-
your-domain.comを置き換えます NextCloudまたはSpreedWebRTCのドメイン名を使用します。 -
12.34.56.78を置き換えます サーバーのパブリックIPアドレスを使用します。 - 長くて安全な認証シークレットを設定します。 (
openssl rand -base64 20を使用できます ランダムな文字列を生成するコマンド。)
# Run as TURN server only, all STUN requests will be ignored.
no-stun

# Specify listening port. Change to 80 or 443 to go around some strict NATs.
listening-port=8443
tls-listening-port=5349

# Specify listening IP, if not set then Coturn listens on all system IPs.
listening-ip=12.34.56.78
relay-ip=12.34.56.78

# These lines enable support for WebRTC
fingerprint
lt-cred-mech
realm=your-domain.com

# Authentication method
use-auth-secret
static-auth-secret=your-auth-secret

total-quota=100

# Total bytes-per-second bandwidth the TURN server is allowed to allocate
# for the sessions, combined (input and output network streams are treated separately).
bps-capacity=0

# This line provides extra security.
stale-nonce

log-file=/var/log/turnserver/turn.log
no-loopback-peers
no-multicast-peers
ファイルを保存して閉じます。次に、次のコマンドでcoturnサーバーを再起動します。
sudo systemctl restart coturn
Coturnはturnserverとして実行されます ユーザー。次のコマンドを実行すると、ポート8443でリッスンしていることがわかります。
sudo ss -lnpt | grep turnserver

それでは、SpreedWebRTC構成ファイルを編集しましょう。
sudo nano /etc/spreed/server.conf
[app]に次の2行を追加します セクション。それに応じて赤いテキストを置き換えます。
turnURIs = turn:coturn-server-ip:8443?transport=udp

turnSecret = your-auth-secrect
ファイルを保存して閉じます。次に、SpreedWebRTCサーバーを再起動します。
sudo systemctl restart spreed-webrtc
Coturnを機能させるには、ファイアウォールでTCPおよびUDPポート8843を開く必要があります。 UFWファイアウォールを使用する場合は、次のコマンドを実行します。
sudo ufw allow 8443/tcp
sudo ufw allow 8443/udp
Coturnが実行され、Spreed WebRTCが再起動されると、NATの背後にいるユーザーは、オーディオ/ビデオ通話を通常どおりに使用できるようになります。
次のステップ
このチュートリアルが、Dockerイメージを使用してUbuntuにSpreedWebRTCサーバーをインストールするのに役立つことを願っています。 Spreed.MeをNextCloudと統合することもできます。
- SpreedMeWebRTCをNextCloudと統合する方法
このチュートリアルが、Ubuntu16.04にSpreedWebRTCサーバーをインストールするのに役立つことを願っています。いつものように、この投稿が役に立った場合は、無料のニュースレターを購読してください。