Let’s Encryptは、TLS暗号化用の無料のX.509SSL証明書を提供する広く知られている認証局です。 2016年4月に発売されました。
Let’s Encryptは、証明書の作成、検証、署名、実装、および証明書の更新のプロセスを自動化します。
現在、自動化されたプロセスでは、Apache、Nginx、Plex、およびHaproxyがサポートされています。
前提条件
先に進む前に、UbuntuシステムにNginxがインストールされるようにLEMPスタックを設定してください。
読む :Ubuntu18.04にLEMPスタックをインストールする方法
読む :Ubuntu16.04にLEMPスタックをインストールする方法
Certbotのインストール
ドメインの証明書を生成するには、ターミナル/シェルアクセスとCertbotACMEクライアントが必要です。証明書の発行とインストールをダウンタイムなしで処理します。
Certbotクライアントをインストールするには、UbuntuでCertbotPPAを構成する必要があります。
sudo apt update

sudo apt install -y software-properties-common

sudo add-apt-repository universe

sudo add-apt-repository ppa:certbot/certbot

sudo apt update
次に、certbotクライアントをインストールします。
sudo apt install -y certbot python-certbot-nginx
Nginx仮想ホストを作成する
ここで、ドメインwww.itzgeek.netの仮想ホスト構成ファイルを作成します。
この仮想ホストは、ドメインのHTTPバージョンを提供します。sudo nano /etc/nginx/conf.d/www.itzgeek.net.conf
以下の情報を使用してください。
server {
   server_name www.itzgeek.net;
   root /opt/nginx/www.itzgeek.net;

   location / {
       index index.html index.htm index.php;
   }

   access_log /var/log/nginx/www.itzgeek.net.access.log;
   error_log /var/log/nginx/www.itzgeek.net.error.log;

   location ~ \.php$ {
      include /etc/nginx/fastcgi_params;
      fastcgi_pass 127.0.0.1:9000;
      fastcgi_index index.php;
      fastcgi_param SCRIPT_FILENAME $document_root$fastcgi_script_name;
   }
}
HTMLファイルを保持するドキュメントルートを作成します。
sudo mkdir -p /opt/nginx/www.itzgeek.net
ディレクトリの権限を変更します。
sudo chown -R nginx:nginx /opt/nginx/
テストHTMLファイルをドメインのドキュメントルートに配置します。
echo "This is a test site @ www.itzgeek.net" | sudo tee /opt/nginx/www.itzgeek.net/index.html
Nginxサービスを再起動します。
sudo systemctl restart nginx
DNSレコードの更新/変更
DNS管理ツールまたはドメインレジストラにアクセスし、ドメインのA/CNAMEレコードを作成します。例:www.itzgeek.net。

レコードが伝播するまでしばらく待ちます。
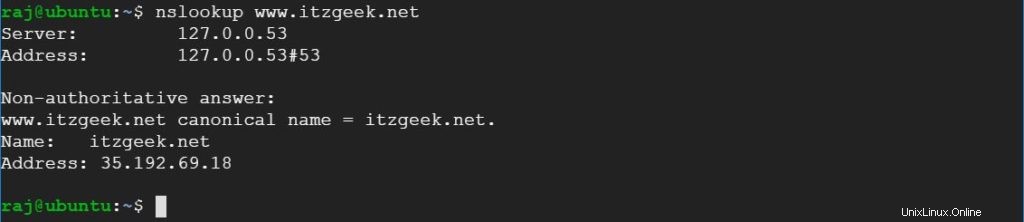
Nslookup sudo apt install-ydnsutilsユーティリティを使用してDNS伝播を確認します。
インストールLet'sEncryptSSL証明書
certbotコマンドを使用して、Let’sEncrypt証明書を手動で作成します。
sudo certbot --nginx
インタラクティブなプロンプトに従い、必要な証明書を生成します。
Saving debug log to /var/log/letsencrypt/letsencrypt.log
Plugins selected: Authenticator nginx, Installer nginx
Enter email address (used for urgent renewal and security notices) (Enter 'c' to
cancel): itzgeek.web@gmail.com  << Enter email address to receive notifications

- - - - - - - - - - - - - - - - - - - - - - - - - - - - - - - - - - - - - - - -
Please read the Terms of Service at
https://letsencrypt.org/documents/LE-SA-v1.2-November-15-2017.pdf. You must
agree in order to register with the ACME server at
https://acme-v02.api.letsencrypt.org/directory
- - - - - - - - - - - - - - - - - - - - - - - - - - - - - - - - - - - - - - - -
(A)gree/(C)ancel: A  << Agree to Terms of Service

- - - - - - - - - - - - - - - - - - - - - - - - - - - - - - - - - - - - - - - -
Would you be willing to share your email address with the Electronic Frontier
Foundation, a founding partner of the Let's Encrypt project and the non-profit
organization that develops Certbot? We'd like to send you email about our work
encrypting the web, EFF news, campaigns, and ways to support digital freedom.
- - - - - - - - - - - - - - - - - - - - - - - - - - - - - - - - - - - - - - - -
(Y)es/(N)o: Y  << Subscribe to Newsletter

Which names would you like to activate HTTPS for?
- - - - - - - - - - - - - - - - - - - - - - - - - - - - - - - - - - - - - - - -
1: www.itzgeek.net
- - - - - - - - - - - - - - - - - - - - - - - - - - - - - - - - - - - - - - - -
Select the appropriate numbers separated by commas and/or spaces, or leave input
blank to select all options shown (Enter 'c' to cancel): 1  << Select domain to install Let's Encrypt SSL certificate
Obtaining a new certificate
Performing the following challenges:
http-01 challenge for www.itzgeek.net
Waiting for verification...
Cleaning up challenges
Deploying Certificate to VirtualHost /etc/nginx/conf.d/www.itzgeek.net.conf

Please choose whether or not to redirect HTTP traffic to HTTPS, removing HTTP access.
- - - - - - - - - - - - - - - - - - - - - - - - - - - - - - - - - - - - - - - -
1: No redirect - Make no further changes to the webserver configuration.
2: Redirect - Make all requests redirect to secure HTTPS access. Choose this for
new sites, or if you're confident your site works on HTTPS. You can undo this
change by editing your web server's configuration.
- - - - - - - - - - - - - - - - - - - - - - - - - - - - - - - - - - - - - - - -
Select the appropriate number [1-2] then [enter] (press 'c' to cancel): 2  << Redirect from HTTP to HTTPS
Redirecting all traffic on port 80 to ssl in /etc/nginx/conf.d/www.itzgeek.net.conf

- - - - - - - - - - - - - - - - - - - - - - - - - - - - - - - - - - - - - - - -
Congratulations! You have successfully enabled https://www.itzgeek.net

You should test your configuration at:
https://www.ssllabs.com/ssltest/analyze.html?d=www.itzgeek.net
- - - - - - - - - - - - - - - - - - - - - - - - - - - - - - - - - - - - - - - -

IMPORTANT NOTES:
 - Congratulations! Your certificate and chain have been saved at:
   /etc/letsencrypt/live/www.itzgeek.net/fullchain.pem
   Your key file has been saved at:
   /etc/letsencrypt/live/www.itzgeek.net/privkey.pem
   Your cert will expire on 2019-11-04. To obtain a new or tweaked
   version of this certificate in the future, simply run certbot again
   with the "certonly" option. To non-interactively renew *all* of
   your certificates, run "certbot renew"
 - Your account credentials have been saved in your Certbot
   configuration directory at /etc/letsencrypt. You should make a
   secure backup of this folder now. This configuration directory will
   also contain certificates and private keys obtained by Certbot so
   making regular backups of this folder is ideal.
 - If you like Certbot, please consider supporting our work by:

   Donating to ISRG / Let's Encrypt:   https://letsencrypt.org/donate
   Donating to EFF:                    https://eff.org/donate-le
www以外のHTTPリクエストをNginxを使用してwwwHTTPSにリダイレクトする(オプション)
ここで、www以外のHTTPサイトからのトラフィックをWW HTTPSサイト、つまり http://itzgeek.netにリダイレクトするようにNginxサーバーを構成します。>> https://www.itzgeek.net 。
ここでは、サイトのHTTPバージョン用に作成したものと同じ構成ファイルを使用して、www以外のHTTPサイトからWWHTTPSへのリダイレクトを実行します。
sudo nano /etc/nginx/conf.d/www.itzgeek.net.conf
ファイルの最後に以下の情報を追加してください。
# Redirect NON-WWW HTTP to WWW HTTPS

server {
    if ($host = itzgeek.net) {
        return 301 https://www.itzgeek.net$request_uri;
    }


   server_name itzgeek.net;
    listen 80;
    return 404;

}
Nginxサービスを再起動します。
sudo systemctl restart nginx
SSL証明書を暗号化しよう
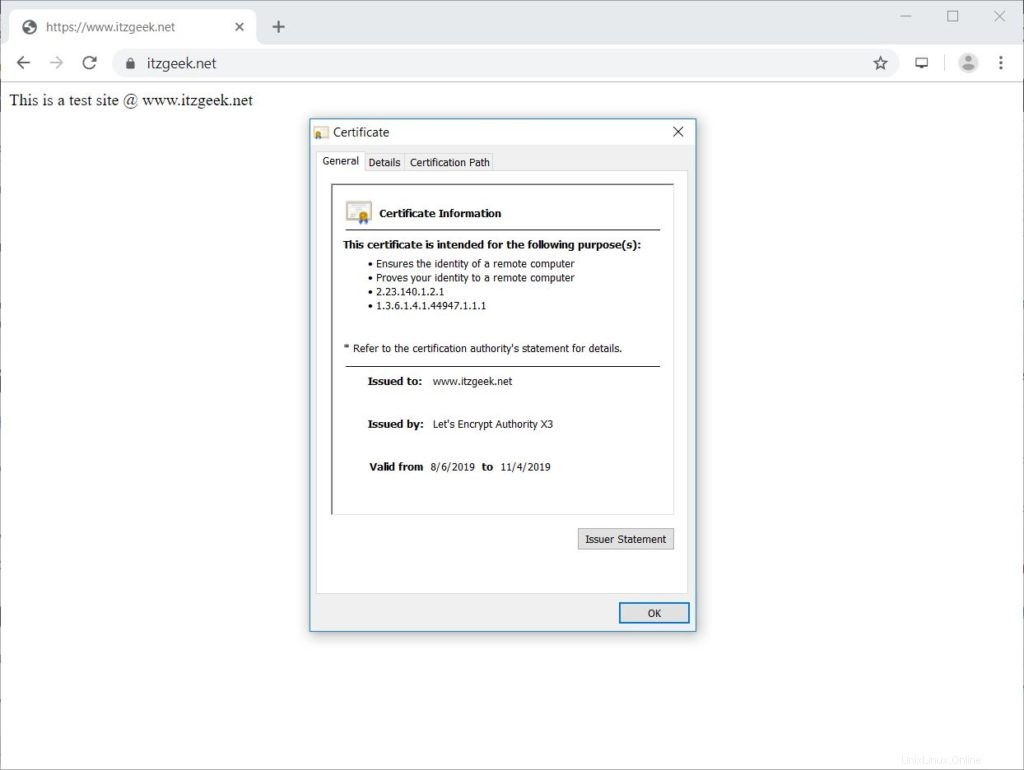
を確認するウェブサイトのHTTPSバージョンにアクセスして、Let’sEncrypt証明書を確認します。
http:// your-http-web-siteまたは
https:// your-https-web-site今すぐサイトのHTTPSバージョンを入手する必要があります。
テストLet'sEncryptSSL証明書
以下のURLにアクセスして、SSL証明書の問題とそのセキュリティ評価をテストします。
https://www.ssllabs.com/ssltest/analyze.html?d=www.itzgeek.net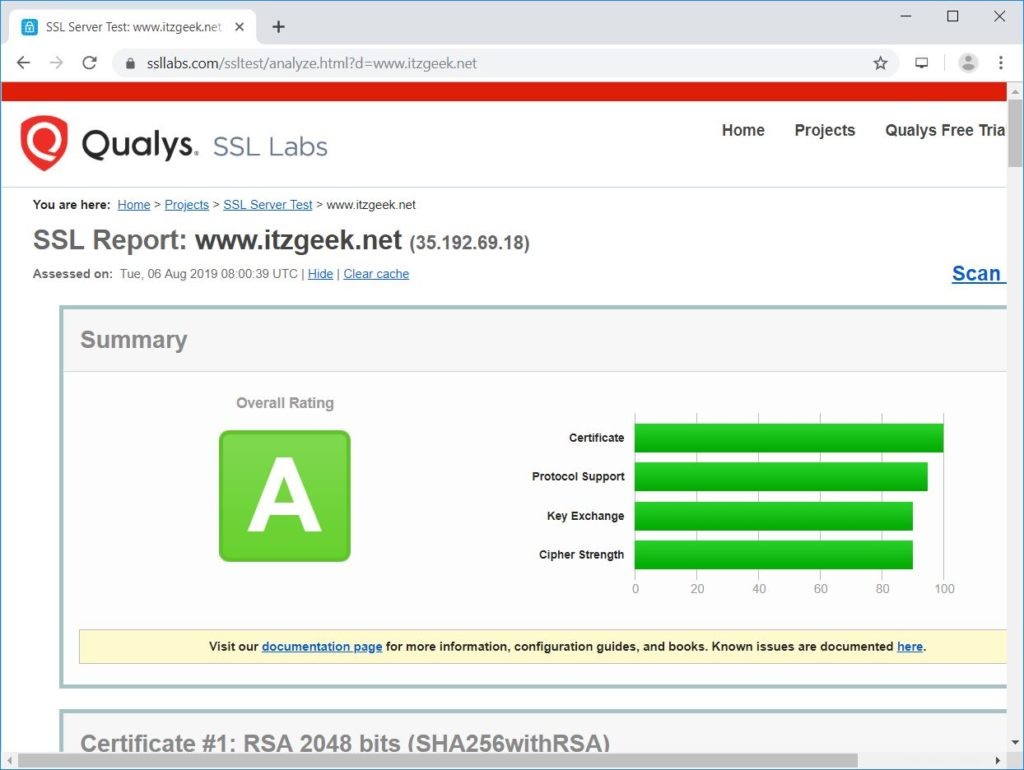
Let'sEncryptのSSL証明書を更新
Let's Encryptの証明書の有効期間は90日です。証明書の有効期限が切れる前に、証明書を更新することを強くお勧めします。
Certbotクライアントに付属している組み込みのcronスケジューラエントリに感謝します。このcronジョブは、有効期限が切れる証明書を更新するために1日2回実行されます。
以下のコマンドを使用して証明書の更新プロセスをシミュレートし、更新がスムーズに行われるようにすることができます。
sudo certbot renew --dry-run
出力:
Saving debug log to /var/log/letsencrypt/letsencrypt.log

- - - - - - - - - - - - - - - - - - - - - - - - - - - - - - - - - - - - - - - -
Processing /etc/letsencrypt/renewal/www.itzgeek.net.conf
- - - - - - - - - - - - - - - - - - - - - - - - - - - - - - - - - - - - - - - -
Cert not due for renewal, but simulating renewal for dry run
Plugins selected: Authenticator nginx, Installer nginx
Renewing an existing certificate
Performing the following challenges:
http-01 challenge for www.itzgeek.net
Waiting for verification...
Cleaning up challenges

- - - - - - - - - - - - - - - - - - - - - - - - - - - - - - - - - - - - - - - -
new certificate deployed with reload of nginx server; fullchain is
/etc/letsencrypt/live/www.itzgeek.net/fullchain.pem
- - - - - - - - - - - - - - - - - - - - - - - - - - - - - - - - - - - - - - - -

- - - - - - - - - - - - - - - - - - - - - - - - - - - - - - - - - - - - - - - -
** DRY RUN: simulating 'certbot renew' close to cert expiry
**          (The test certificates below have not been saved.)

Congratulations, all renewals succeeded. The following certs have been renewed:
  /etc/letsencrypt/live/www.itzgeek.net/fullchain.pem (success)
** DRY RUN: simulating 'certbot renew' close to cert expiry
**          (The test certificates above have not been saved.)
- - - - - - - - - - - - - - - - - - - - - - - - - - - - - - - - - - - - - - - -

IMPORTANT NOTES:
 - Your account credentials have been saved in your Certbot
   configuration directory at /etc/letsencrypt. You should make a
   secure backup of this folder now. This configuration directory will
   also contain certificates and private keys obtained by Certbot so
   making regular backups of this folder is ideal.
上記の出力は、更新が期待どおりに機能することを確認しています。
結論
それで全部です。 Ubuntu18.04およびUbuntu16.04でNginxを使用してSSL証明書を暗号化する方法を学習したことを願っています。コメントセクションでフィードバックを共有してください。