Pandora FMSは、「Pandora Flexible Monitoring System」とも呼ばれ、サーバー、ネットワーク、アプリケーション、および仮想インフラストラクチャに使用される監視ツールです。シンプルでスケーラブルで、複雑で大規模な環境に適しています。 TCP、UDP、SNMP、HTTP、エージェントなどのいくつかのプロトコルを使用して、さまざまなメトリックを収集します。 Pandora FMSを使用して、Webサーバー、データベースサーバー、アプリケーション、ルーター、およびその他のネットワークデバイスのステータスとパフォーマンスを監視できます。
このチュートリアルでは、Ubuntu20.04にPandoraFMSをインストールして構成する方法を示します。
- Ubuntu20.04を実行しているサーバー。
- サーバーIPで指定された有効なドメイン名。
- ルートパスワードがサーバーに設定されます。
まず、システムパッケージを更新されたバージョンに更新することをお勧めします。次のコマンドで更新できます:
apt-get update -y
すべてのパッケージが更新されたら、次のコマンドを使用してPandoraFMSに必要なすべての依存関係をインストールします。
apt-get install snmp snmpd libnet-telnet-perl libgeo-ip-perl libtime-format-perl libxml-simple-perl libxml-twig-perl libdbi-perl libnetaddr-ip-perl libhtml-parser-perl xprobe2 nmap libmail-sendmail-perl traceroute libio-socket-inet6-perl libhtml-tree-perl libsnmp-perl snmp-mibs-downloader libio-socket-multicast-perl libsnmp-perl libjson-perl -y
LAMPサーバーをインストールする
次に、Apacheサーバー、MariaDB、PHP、およびその他の必要な依存関係をシステムにインストールする必要があります。次のコマンドを使用して、それらすべてをインストールできます。
apt-get install apache2 mariadb-server php php-common php-gmp php-curl php-mbstring php-xmlrpc php-mysql php-gd php-bcmath php-xml php-cli php-zip php-pear php-zip php-sqlite3 php-snmp php-db graphviz php-curl php-ldap dbconfig-common unzip git -y
すべてのパッケージをインストールしたら、php.iniファイルを編集して、推奨設定を定義します。
nano /etc/php/7.4/apache2/php.ini
次の行を変更します:
memory_limit = 256M
upload_max_filesize = 100M
max_execution_time = 360
max_input_vars = 2000
date.timezone = Asia/Kolkata
終了したら、次のステップに進むことができます。
MariaDBデータベースを構成する
デフォルトでは、MariaDBルートパスワードは設定されていません。したがって、システムに設定する必要があります。これを行うには、次のスクリプトを実行します。
mysql_secure_installation
以下に示すようにすべての質問に答えて、ルートパスワードを設定します。
Enter current password for root (enter for none):
OK, successfully used password, moving on...
Set root password? [Y/n] Y
Remove anonymous users? [Y/n] Y
Disallow root login remotely? [Y/n] Y
Remove test database and access to it? [Y/n] Y
Reload privilege tables now? [Y/n] Y
次に、次のコマンドを使用してMariaDBシェルにログインします。
mysql -u root -p
プロンプトが表示されたらrootパスワードを入力し、次のコマンドでmysql_native_passwordプラグインを有効にします。
MariaDB [(none)]> USE mysql;
MariaDB [(none)]> UPDATE user SET plugin='mysql_native_password' WHERE User='root';
次に、次のコマンドを使用してPandoraのデータベースとユーザーを作成します。
MariaDB [(none)]> CREATE DATABASE pandora;
MariaDB [(none)]> GRANT ALL PRIVILEGES ON pandora.* to [email protected]'localhost' IDENTIFIED BY 'pandora';
次に、特権をフラッシュし、次のコマンドを使用してMariaDBシェルを終了します。
MariaDB [(none)]> FLUSH PRIVILEGES;
MariaDB [(none)]> EXIT;
次に、/ etc / mysql / my.cnfファイルを編集して、sql_modeを定義する必要があります。
nano /etc/mysql/my.cnf
次の行を追加します:
[mysqld]
sql_mode=NO_ENGINE_SUBSTITUTION
終了したらファイルを保存して閉じ、MariaDBサービスを再起動して変更を適用します。
systemctl restart mariadb
PandoaFMSをダウンロード
次に、Gitリポジトリから最新バージョンのpandoraFMSをダウンロードする必要があります。次のコマンドでダウンロードできます:
cd /var/www/html/
git clone https://github.com/pandorafms/pandorafms.git
次に、ダウンロードしたディレクトリに適切な権限と所有権を付与します。
chown -R www-data:www-data /var/www/html/pandorafms
chown -R www-data:www-data /var/www/html/pandorafms/pandora_console/
chmod -R 775 /var/www/html/pandorafms/pandora_console/
次に、Pandora構成ファイルを編集します:
nano /var/www/html/pandorafms/pandora_console/include/config.inc.php
データベース設定に従って、コメントを外し、次の行を変更します。
// Default values
 $config["dbname"]="pandora";
 $config["dbuser"]="pandora";
 $config["dbpass"]="pandora";
 $config["dbhost"]="localhost";
// This is used for reporting, please add "/" character at the end
// $config["homedir"]="/var/www/pandora_console/";
// $config["homeurl"]="/pandora_console/";
 $config["auth"]["scheme"] = "mysql";
終了したら、ファイルを保存して閉じます。
PandoraFMS用にApacheを構成する
次に、PandoraFMSを提供するための新しいApache仮想ホスト構成ファイルを作成する必要があります。次のコマンドで作成できます:
nano /etc/apache2/sites-available/pandora.conf
次の行を追加します:
<VirtualHost *:80>
ServerAdmin [email protected]
ServerName pandora.linuxbuz.com
DocumentRoot /var/www/html/pandorafms/pandora_console
<Directory /var/www/html/pandorafms/pandora_console>
AllowOverride All
</Directory>
ErrorLog /var/log/apache2/error.log
CustomLog /var/log/apache2/access.log combined
</VirtualHost>
ファイルを保存して閉じ、次のコマンドでPandora仮想ホストを有効にします。
a2ensite pandora
次に、Apacheサービスをリロードして、構成の変更を適用します。
systemctl restart apache2
PandoraFMSにアクセス
次に、Webブラウザーを開き、URL http://pandora.linuxbuz.com/install.phpを入力して、PandoraFMSにアクセスします。以下に示すように、PandoraFMSWebインストールウィザードが表示されます。
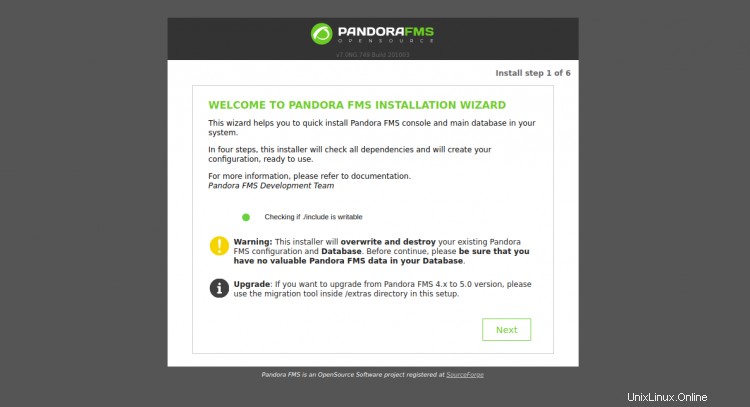
次へをクリックします ボタン。次のページが表示されます:
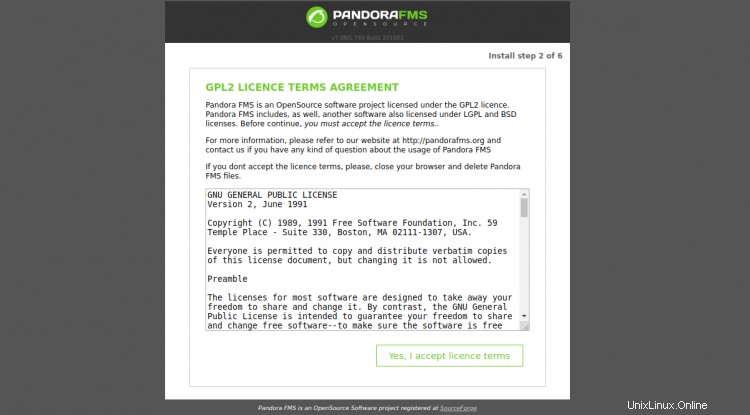
[はい、ライセンス条項に同意します]をクリックします "。次のページが表示されます:
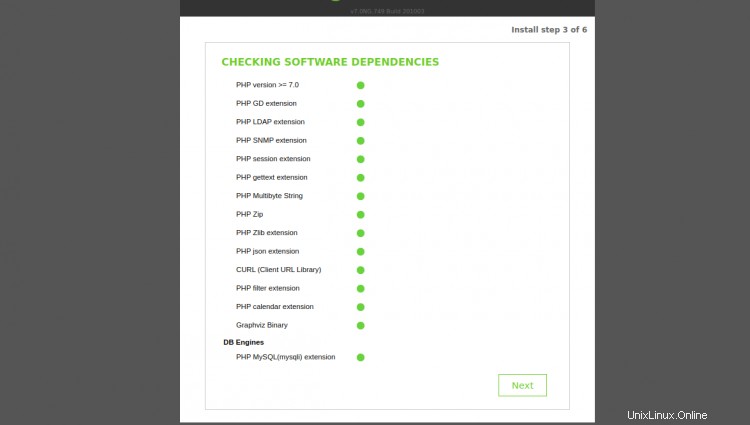
すべてのPHP拡張機能がインストールされていることを確認してから、次へをクリックします。 ボタン。次のページが表示されます:
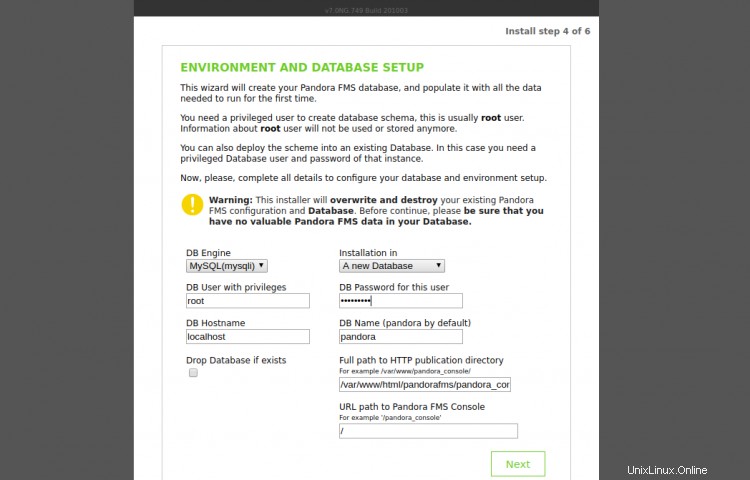
ルートユーザー名、MariaDBルートパスワード、データベース名、Pandoraのパスを入力し、次へをクリックします ボタン。次のページが表示されます:
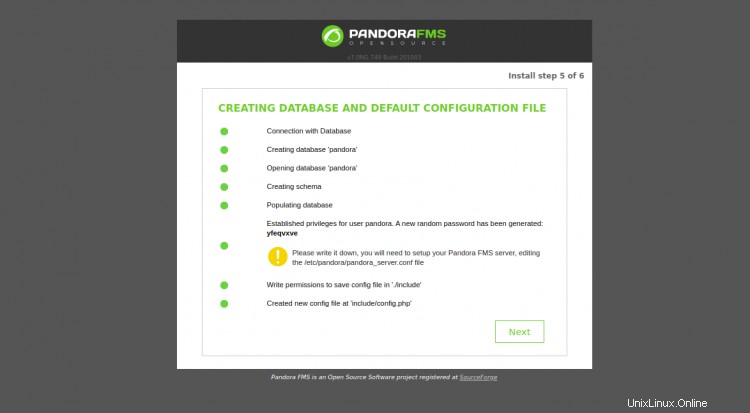
これにより、Pandoraデータベースユーザーのパスワードが変更されます。そのため、config.phpファイルで元のPandoraデータベースのパスワードを定義する必要があります。
ターミナルを開き、config.phpファイルを編集します:
nano /var/www/html/pandorafms/pandora_console/include/config.php
「$config["dbpass"]」フィールドを元のパスワードに変更します:
// Begin of automatic config file
$config["dbtype"] = "mysql"; //DB type (mysql, postgresql...in future others)
$config["mysqli"] = true;
$config["dbname"]="pandora";
$config["dbuser"]="pandora";
$config["dbpass"]="pandora";
$config["dbhost"]="localhost";
ファイルを保存して閉じます。次に、Pandoraインストールウィザードに戻り、次へをクリックします。 ボタン。次のページが表示されます:
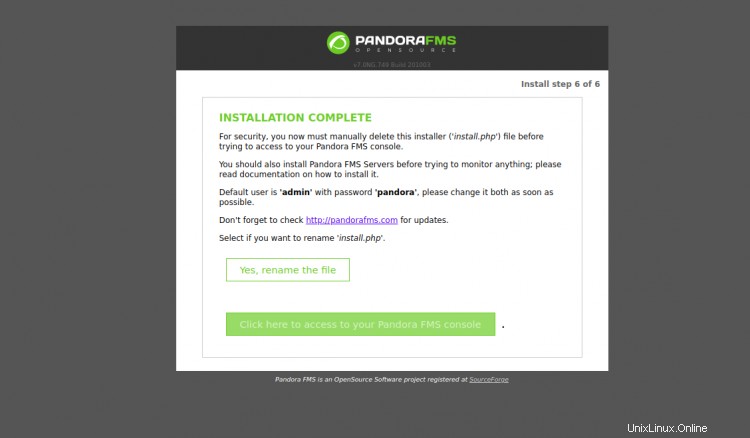
次に、ターミナルを再度開き、install.phpファイルを削除します。
rm -rf /var/www/html/pandorafms/pandora_console/install.php
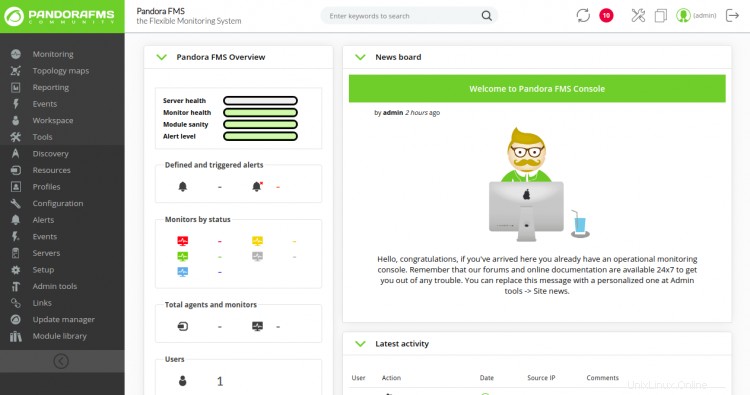
次に、Pandora FMSインストールウィザードに戻り、[ここをクリックしてPandoraFMSコンソールにアクセスします]をクリックします。 "。PandoraFMSログイン画面が表示されます:

デフォルトの管理者ユーザー名をadminとして、パスワードをpandoraとして指定し、ログインをクリックします。 ボタン。次の画面にPandoraダッシュボードが表示されます。
Let'sEncryptを使用したセキュアなPandoraFMS
次に、Let'sEncryptSSLを使用してWebサイトを保護することをお勧めします。まず、次のコマンドを使用してCertbotクライアントをインストールします。
apt-get install python3-certbot-apache -y
インストールしたら、次のコマンドを実行して、Let'sEncryptSSLでWebサイトを保護します。
certbot --apache -d pandora.linuxbuz.com
以下に示すように、メールアドレスを提供し、利用規約に同意するよう求められます。
Saving debug log to /var/log/letsencrypt/letsencrypt.log
Plugins selected: Authenticator standalone, Installer None
Enter email address (used for urgent renewal and security notices) (Enter 'c' to
cancel): [email protected]

- - - - - - - - - - - - - - - - - - - - - - - - - - - - - - - - - - - - - - - -
Please read the Terms of Service at
https://letsencrypt.org/documents/LE-SA-v1.2-November-15-2017.pdf. You must
agree in order to register with the ACME server at
https://acme-v02.api.letsencrypt.org/directory
- - - - - - - - - - - - - - - - - - - - - - - - - - - - - - - - - - - - - - - -
(A)gree/(C)ancel: A

- - - - - - - - - - - - - - - - - - - - - - - - - - - - - - - - - - - - - - - -
Would you be willing to share your email address with the Electronic Frontier
Foundation, a founding partner of the Let's Encrypt project and the non-profit
organization that develops Certbot? We'd like to send you email about our work
encrypting the web, EFF news, campaigns, and ways to support digital freedom.
- - - - - - - - - - - - - - - - - - - - - - - - - - - - - - - - - - - - - - - -
(Y)es/(N)o: Y
Plugins selected: Authenticator apache, Installer apache
Obtaining a new certificate
Performing the following challenges:
http-01 challenge for pandora.linuxbuz.com
Enabled Apache rewrite module
Waiting for verification...
Cleaning up challenges
Created an SSL vhost at /etc/apache2/sites-available/pandora-le-ssl.conf
Enabled Apache socache_shmcb module
Enabled Apache ssl module
Deploying Certificate to VirtualHost /etc/apache2/sites-available/pandora-le-ssl.conf
Enabling available site: /etc/apache2/sites-available/pandora-le-ssl.conf
次に、以下に示すように、HTTPトラフィックをHTTPSにリダイレクトするかどうかを選択します。
Please choose whether or not to redirect HTTP traffic to HTTPS, removing HTTP access.
- - - - - - - - - - - - - - - - - - - - - - - - - - - - - - - - - - - - - - - -
1: No redirect - Make no further changes to the webserver configuration.
2: Redirect - Make all requests redirect to secure HTTPS access. Choose this for
new sites, or if you're confident your site works on HTTPS. You can undo this
change by editing your web server's configuration.
- - - - - - - - - - - - - - - - - - - - - - - - - - - - - - - - - - - - - - - -
Select the appropriate number [1-2] then [enter] (press 'c' to cancel): 2
2と入力し、Enterキーを押して、WebサイトにLet'sEncryptSSLをインストールします。
Enabled Apache rewrite module
Redirecting vhost in /etc/apache2/sites-enabled/pandora.conf to ssl vhost in /etc/apache2/sites-available/pandora-le-ssl.conf

- - - - - - - - - - - - - - - - - - - - - - - - - - - - - - - - - - - - - - - -
Congratulations! You have successfully enabled https://pandora.linuxbuz.com

You should test your configuration at:
https://www.ssllabs.com/ssltest/analyze.html?d=pandora.linuxbuz.com
- - - - - - - - - - - - - - - - - - - - - - - - - - - - - - - - - - - - - - - -

IMPORTANT NOTES:
 - Congratulations! Your certificate and chain have been saved at:
   /etc/letsencrypt/live/pandora.linuxbuz.com/fullchain.pem
   Your key file has been saved at:
   /etc/letsencrypt/live/pandora.linuxbuz.com/privkey.pem
   Your cert will expire on 2020-10-23. To obtain a new or tweaked
   version of this certificate in the future, simply run certbot again
   with the "certonly" option. To non-interactively renew *all* of
   your certificates, run "certbot renew"
 - If you like Certbot, please consider supporting our work by:

   Donating to ISRG / Let's Encrypt:   https://letsencrypt.org/donate
   Donating to EFF:                    https://eff.org/donate-le
これで、URLhttps://pandora.linuxbuz.comを使用してPandoraFMSに安全にアクセスできます。
おめでとう!これで、PandoraFMS監視ツールとApacheおよびLet'sEncryptSSLがUbuntu20.04サーバーに正常にインストールされました。これで、クライアントシステムを追加し、PandoraFMSから監視を開始できます。