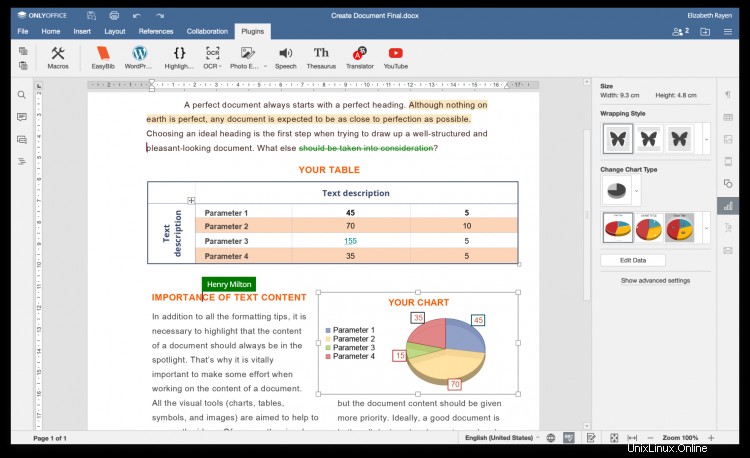
ONLYOFFICE Document Serverは、テキストドキュメント、スプレッドシート、およびプレゼンテーション用のWebベースのビューアと共同エディタで構成され、OOXML形式(docx、xlsx、pptx)との高い互換性を提供します。このスイートはGNUAGPLv3.0で配布されています。
ONLYOFFICE Document Serverは、Nextcloud、ownCloud、Seafile、HumHub、Ploneなどのさまざまなクラウドストレージプラットフォームと統合できるだけでなく、自分で構築しているソリューションにも統合できます。 Document Serverは、オンラインエディタとコラボレーションプラットフォームを備えた無料のオープンソースソリューションであるONLYOFFICECommunityEditionの一部として使用できます。

build_toolsを使用すると、ユーザーは必要なすべてのコンポーネントを自動的にインストールし、ソースコードから最新バージョンのオンラインエディターをコンパイルできます。
このチュートリアルでは、Ubuntuインストール(64ビットUbuntu)用にONLYOFFICEDocumentServerをコンパイルする方法を学習します。
システム要件
- CPU:2GHz以上のデュアルコア
- RAM:2GB以上
- HDD:少なくとも40GBの空き容量
- 少なくとも4GBのスワップ
ステップ1:依存関係をインストールする
PythonとGitがコンピューターにインストールされていない場合は、次のコマンドを使用してインストールします。
sudo apt-get install -y python git
ステップ2:ドキュメントサーバーのソースコードを作成する
build_toolsリポジトリのクローンを作成します:
git clone https://github.com/ONLYOFFICE/build_tools.git
適切なディレクトリに移動します:
cd build_tools/tools/linux
スクリプトを実行します:
./automate.py server
完了すると、構築されたドキュメントサーバーは../../out/linux_64/onlyoffice/documentserver/ディレクトリで利用可能になります。
ステップ3:NGINX、PostgreSQL、RabbitMQをインストールして構成する
Document Serverは、NGINXをWebサーバーとして使用し、PostgreSQLをデータベースとして使用します。正しい作業にはRabbitMQも必要です。
1。 NGINXをインストールして構成する
次のコマンドでNGINXをインストールします:
sudo apt-get install nginx
デフォルトのWebサイトを無効にします:
sudo rm -f /etc/nginx/sites-enabled/default
新しいウェブサイトを設定します。 / etc / nginx / sites-available / onlyoffice-documentserverを作成します 次のデータを含むファイル:
map $http_host $this_host {
  "" $host;
  default $http_host;
}
map $http_x_forwarded_proto $the_scheme {
  default $http_x_forwarded_proto;
  "" $scheme;
}
map $http_x_forwarded_host $the_host {
  default $http_x_forwarded_host;
  "" $this_host;
}
map $http_upgrade $proxy_connection {
  default upgrade;
  "" close;
}
proxy_set_header Host $http_host;
proxy_set_header Upgrade $http_upgrade;
proxy_set_header Connection $proxy_connection;
proxy_set_header X-Forwarded-Host $the_host;
proxy_set_header X-Forwarded-Proto $the_scheme;
server {
  listen 0.0.0.0:80;
  listen [::]:80 default_server;
  server_tokens off;
  rewrite ^\/OfficeWeb(\/apps\/.*)$ /web-apps$1 redirect;
  location / {
    proxy_pass http://localhost:8000;
    proxy_http_version 1.1;
  }
  location /spellchecker/ {
    proxy_pass http://localhost:8080/;
    proxy_http_version 1.1;
  }
}
新しく作成されたWebサイトへのシンボリックリンクを/etc/ nginx / sites-availableディレクトリに追加します:
sudo ln -s /etc/nginx/sites-available/onlyoffice-documentserver /etc/nginx/sites-enabled/onlyoffice-documentserver
NGINXを再起動します:
sudo nginx -s reload
2。 PostgreSQLのインストールと構成
PostgreSQLのインストール:
sudo apt-get install postgresql
PostgreSQLデータベースとユーザーを作成します(ユーザーとパスワードの両方に「onlyoffice」と入力します):
sudo -i -u postgres psql -c "CREATE DATABASE onlyoffice;"
sudo -i -u postgres psql -c "CREATE USER onlyoffice WITH password 'onlyoffice';"
sudo -i -u postgres psql -c "GRANT ALL privileges ON DATABASE onlyoffice TO onlyoffice;"
データベースを構成します:
psql -hlocalhost -Uonlyoffice -d onlyoffice -f ../../out/linux_64/onlyoffice/documentserver/server/schema/postgresql/createdb.sql
上記のコマンドは1行です! onlyoffice PostgreSQLユーザーのパスワードを入力するように求められたら、「onlyoffice」パスワードを入力します。
3。 RabbitMQをインストールする
次のコマンドを使用してRabbitMQをインストールします。
sudo apt-get install rabbitmq-server
ステップ4:フォントデータを生成する
コマンドを実行します:
cd out/linux_64/onlyoffice/documentserver/
mkdir fonts
LD_LIBRARY_PATH=${PWD}/server/FileConverter/bin server/tools/allfontsgen \
  --input="${PWD}/core-fonts" \
  --allfonts-web="${PWD}/sdkjs/common/AllFonts.js" \
  --allfonts="${PWD}/server/FileConverter/bin/AllFonts.js" \
  --images="${PWD}/sdkjs/common/Images" \
  --selection="${PWD}/server/FileConverter/bin/font_selection.bin" \
  --output-web='fonts' \
  --use-system="true"
ステップ5:プレゼンテーションテーマを生成する
次のコマンドを実行します:
cd out/linux_64/onlyoffice/documentserver/
LD_LIBRARY_PATH=${PWD}/server/FileConverter/bin server/tools/allthemesgen \
  --converter-dir="${PWD}/server/FileConverter/bin"\
  --src="${PWD}/sdkjs/slide/themes"\
  --output="${PWD}/sdkjs/common/Images"
ステップ6:ドキュメントサーバーを実行する
ONLYOFFICE Document Serverのすべてのコンポーネントは、フォアグラウンドプロセスとして実行されます。ターミナルコンソールを分離して実行するか、フォアグラウンドプロセスをバックグラウンドモードで実行できる特定のツールを起動する必要があります。
FileConverterサービスを開始します:
cd out/linux_64/onlyoffice/documentserver/server/FileConverter
LD_LIBRARY_PATH=$PWD/bin NODE_ENV=development-linux NODE_CONFIG_DIR=$PWD/../Common/config ./converter
SpellCheckerサービスを開始します:
cd out/linux_64/onlyoffice/documentserver/server/SpellChecker
NODE_ENV=development-linux NODE_CONFIG_DIR=$PWD/../Common/config ./spellchecker
DocServiceサービスを開始します:
cd out/linux_64/onlyoffice/documentserver/server/DocService
NODE_ENV=development-linux NODE_CONFIG_DIR=$PWD/../Common/config ./docservice
それで全部です!これで、はじめに説明したONLYOFFICEドキュメントサーバー(オンラインエディター)の使用方法のオプションの1つを選択できます。クラウドストレージサービスと統合するか、独自のソリューションに統合するか、またはONLYOFFICEコミュニティサーバーと組み合わせます。