Striderは、Node.JS、JavaScriptで記述された無料のオープンソースの継続的インテグレーションおよびデプロイメントサーバーであり、MongoDBを使用してデータを保存します。 Striderには、アプリケーションにさまざまな機能を追加するために使用できる多くのプラグインが付属しています。
このチュートリアルでは、Ubuntu18.04サーバーにStriderをインストールする方法を説明します。
- Ubuntu18.04を実行しているサーバー。
- ルートパスワードはサーバーで構成されています。
開始する前に、パッケージを最新バージョンに更新することをお勧めします。次のコマンドを実行して、すべてのパッケージを更新できます。
apt-get update -y
 apt-get upgrade -y
すべてのパッケージが更新されたら、システムを再起動して変更を適用します。
次に、次のコマンドを使用してcurlおよびgitパッケージをインストールします。
apt-get install curl git -y
必要なパッケージがすべてインストールされたら、次の手順に進むことができます。
Node.jsをインストール
次に、Node.jsとその他の必要なパッケージをサーバーにインストールする必要があります。
デフォルトでは、Node.jsはUbuntu18.04のデフォルトリポジトリでは使用できません。そのため、Node.jsリポジトリをシステムに追加する必要があります。次のコマンドでリポジトリを追加できます:
curl -sL https://deb.nodesource.com/setup_12.x | bash -
リポジトリが追加されたら、リポジトリを更新し、次のコマンドを使用してNode.jsをインストールします。
apt-get install nodejs node-gyp -y
Node.jsをインストールした後、次のコマンドでNode.jsとNPMのバージョンを確認します。
node -v
次の出力が表示されます。
v12.6.0
npm -v
次の出力が表示されます。
6.9.0
MongoDBのインストールと構成
StriderはMongoDBをバッキングストアとして使用します。そのため、MongoDBをシステムにインストールする必要があります。
まず、次のコマンドを使用して、MongoDBのGPG公開鍵をインポートします。
apt-key adv --keyserver hkp://keyserver.ubuntu.com:80 --recv 9DA31620334BD75D9DCB49F368818C72E52529D4
次に、次のコマンドを使用してMongoDBリポジトリを追加します。
echo "deb [ arch=amd64 ] https://repo.mongodb.org/apt/ubuntu bionic/mongodb-org/4.0 multiverse" | tee /etc/apt/sources.list.d/mongodb-org-4.0.list
次の出力が表示されます:
Executing: /tmp/apt-key-gpghome.mmTr2ifzC1/gpg.1.sh --keyserver hkp://keyserver.ubuntu.com:80 --recv 9DA31620334BD75D9DCB49F368818C72E52529D4
gpg: key 68818C72E52529D4: public key "MongoDB 4.0 Release Signing Key <[email protected]>" imported
gpg: Total number processed: 1
gpg:               imported: 1
次に、リポジトリを更新し、次のコマンドを使用してMongoDBをインストールします。
apt-get update -y
 apt-get install mongodb-org -y
インストールが完了したら、MongoDBサービスを開始し、次のコマンドを使用してシステムの再起動後にサービスを開始できるようにします。
systemctl start mongod
 systemctl enable mongod
次のコマンドを使用して、MongoDBのステータスを確認することもできます。
systemctl status mongod
次の出力が表示されます。
? mongod.service - MongoDB Database Server
   Loaded: loaded (/lib/systemd/system/mongod.service; disabled; vendor preset: enabled)
   Active: active (running) since Sat 2019-07-13 05:24:41 UTC; 5s ago
     Docs: https://docs.mongodb.org/manual
 Main PID: 13619 (mongod)
   CGroup: /system.slice/mongod.service
           ??13619 /usr/bin/mongod --config /etc/mongod.conf

Jul 13 05:24:41 ubuntu1804 systemd[1]: Started MongoDB Database Server.
次に、認証用にMongoDBをセットアップする必要があります。
これを行うには、次のコマンドを使用してMongoDBシェルを開きます。
mongo
次の出力が表示されます。
MongoDB shell version v4.0.10
connecting to: mongodb://127.0.0.1:27017/?gssapiServiceName=mongodb
Implicit session: session { "id" : UUID("e3edd538-03c4-469a-8c8c-227a16d214d0") }
MongoDB server version: 4.0.10
Welcome to the MongoDB shell.
For interactive help, type "help".
For more comprehensive documentation, see
	http://docs.mongodb.org/
Questions? Try the support group
	http://groups.google.com/group/mongodb-user
Server has startup warnings:
2019-07-13T05:24:46.255+0000 I STORAGE  [initandlisten]
2019-07-13T05:24:46.255+0000 I STORAGE  [initandlisten] ** WARNING: Using the XFS filesystem is strongly recommended with the WiredTiger storage engine
2019-07-13T05:24:46.256+0000 I STORAGE  [initandlisten] **          See http://dochub.mongodb.org/core/prodnotes-filesystem
2019-07-13T05:24:48.774+0000 I CONTROL  [initandlisten]
2019-07-13T05:24:48.774+0000 I CONTROL  [initandlisten] ** WARNING: Access control is not enabled for the database.
2019-07-13T05:24:48.774+0000 I CONTROL  [initandlisten] **          Read and write access to data and configuration is unrestricted.
2019-07-13T05:24:48.775+0000 I CONTROL  [initandlisten]
---
Enable MongoDB's free cloud-based monitoring service, which will then receive and display
metrics about your deployment (disk utilization, CPU, operation statistics, etc).

The monitoring data will be available on a MongoDB website with a unique URL accessible to you
and anyone you share the URL with. MongoDB may use this information to make product
improvements and to suggest MongoDB products and deployment options to you.

To enable free monitoring, run the following command: db.enableFreeMonitoring()
To permanently disable this reminder, run the following command: db.disableFreeMonitoring()
---
次に、データベースをadminに変更し、次のコマンドを使用してadminユーザーを作成します。
>use admin
db.createUser( { user: "admin", pwd: "adminpassword", roles: [ { role: "userAdminAnyDatabase", db: "admin" }, "readWriteAnyDatabase" ] } ) 次に、次のコマンドを使用してMongoDBシェルを終了します。
> exit
次に、MongoDB構成ファイルを開き、次のコマンドで認証を有効にします。
nano /etc/mongod.conf
次の変更を行います:
security:
  authorization: enabled
ファイルを保存して閉じます。次に、MongoDBサービスを再起動して、次のコマンドで構成の変更を適用します。
systemctl restart mongod
まず、次のコマンドを使用して最新バージョンのStriderをダウンロードします。
cd /opt
 git clone https://github.com/Strider-CD/strider.git
次に、次のコマンドを使用して必要な依存関係をインストールします。
cd strider
 npm install
次に、新しいストライダーユーザーを作成し、データベースストライダーに割り当てる必要があります。
これを行うには、次のコマンドを使用してMongoDBシェルを開きます。
mongo
次に、管理者ユーザーでMongoDBセッションを認証します:
use admin
 db.auth("admin", "adminpassword" )
次に、データベースユーザーを作成し、データベース名ストライダーに割り当てます。
use strider
 db.createUser({user: "strider", pwd: "password", roles: [{role: "dbOwner", db: "strider"}]})
次に、MongoDBシェルを終了し、次のコマンドを使用してStriderの管理ユーザーを作成します。
cd /opt/strider
 DB_URI="mongodb://strider:[email protected]:27017/strider" node bin/strider addUser
以下に示すように、必要なすべての情報を提供します。
Connecting to MongoDB URL: mongodb://strider:[email protected]:27017/strider

Enter email []: [email protected]
Enter password []: ****
Is admin? (y/n) [n]y

Email:        [email protected]
Password:    admin
isAdmin:    y
OK? (y/n) [y]y
User created successfully! Enjoy.
PM2のインストールと構成
次に、Node.jsプロセスを管理するためにPM2をインストールする必要があります。まず、以下に示すように、npmを使用してPM2をインストールします。
npm install pm2 -g
次に、次のコマンドを使用してPM2の新しい構成ファイルを作成します。
cd /opt/strider
 nano ecosystem.config.js
次の行を追加します:
module.exports = {
  apps : [{
    name   : "strider",
    script : "npm",
    args : "start",
    env: {
      "NODE_ENV": "production",
      "DB_URI": "mongodb://strider:[email protected]:27017/strider",
      "SERVER_NAME": "http://your-server-ip:3000",
      "HOST": "0.0.0.0",
      "PORT": "3000"
    }
  }]
}
終了したら、ファイルを保存して閉じます。次に、次のコマンドを使用してアプリケーションを起動します。
pm2 start ecosystem.config.js
次の出力が表示されます。
                        -------------

__/\\\\\\\\\\\\\____/\\\\____________/\\\\____/\\\\\\\\\_____
 _\/\\\/////////\\\_\/\\\\\\________/\\\\\\__/\\\///////\\\___
  _\/\\\_______\/\\\_\/\\\//\\\____/\\\//\\\_\///______\//\\\__
   _\/\\\\\\\\\\\\\/__\/\\\\///\\\/\\\/_\/\\\___________/\\\/___
    _\/\\\/////////____\/\\\__\///\\\/___\/\\\________/\\\//_____
     _\/\\\_____________\/\\\____\///_____\/\\\_____/\\\//________
      _\/\\\_____________\/\\\_____________\/\\\___/\\\/___________
       _\/\\\_____________\/\\\_____________\/\\\__/\\\\\\\\\\\\\\\_
        _\///______________\///______________\///__\///////////////__


                          Runtime Edition

        PM2 is a Production Process Manager for Node.js applications
                     with a built-in Load Balancer.

                Start and Daemonize any application:
                $ pm2 start app.js

                Load Balance 4 instances of api.js:
                $ pm2 start api.js -i 4

                Monitor in production:
                $ pm2 monitor

                Make pm2 auto-boot at server restart:
                $ pm2 startup

                To go further checkout:
                http://pm2.io/


                        -------------

[PM2] Spawning PM2 daemon with pm2_home=/root/.pm2
[PM2] PM2 Successfully daemonized
[PM2][WARN] Applications strider not running, starting...
[PM2] App [strider] launched (1 instances)
??????????????????????????????????????????????????????????????????????????????????????????????????????????
? App name ? id ? version ? mode ? pid   ? status ? restart ? uptime ? cpu ? mem       ? user ? watching ?
??????????????????????????????????????????????????????????????????????????????????????????????????????????
? strider  ? 0  ? N/A     ? fork ? 21502 ? online ? 0       ? 0s     ? 0%  ? 25.6 MB   ? root ? disabled ?
??????????????????????????????????????????????????????????????????????????????????????????????????????????
 Use `pm2 show <id|name>` to get more details about an app
次に、次のコマンドを使用して、システムの再起動後にPM2が自動的に起動するようにします。
pm2 startup
終了したら、次のステップに進むことができます。
これでStriderがインストールおよび構成されたので、WebブラウザーからStriderにアクセスします。
Webブラウザーを開き、URL http:// your-server-ip:3000を入力します。以下に示すように、Striderログインページにリダイレクトされます。
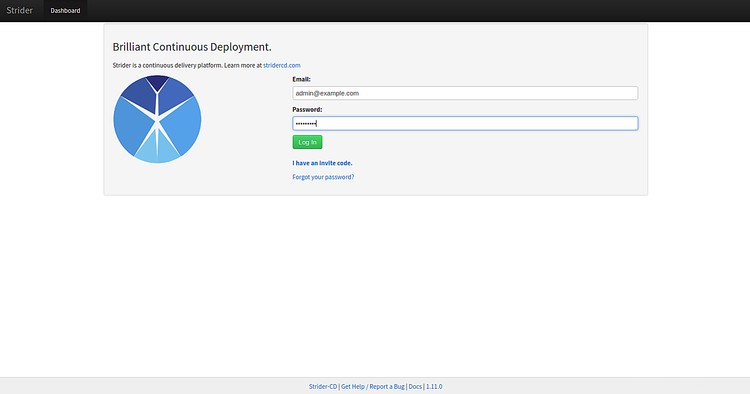
次に、前に作成した管理者のユーザー名とパスワードを入力して、ログインをクリックします。 ボタン。ログインに成功すると、次のページが表示されます。
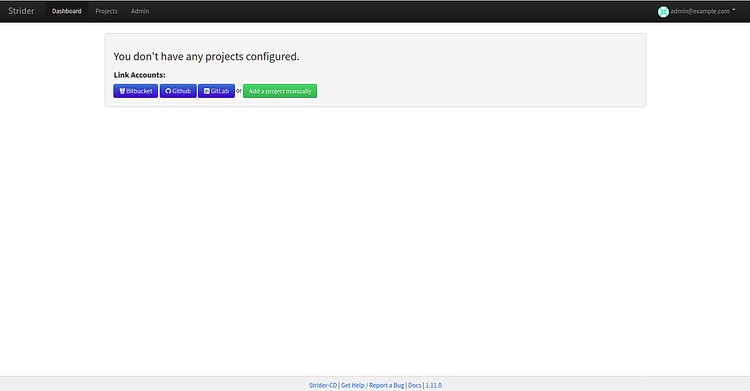
おめでとう!これで、Ubuntu18.04サーバーにStriderが正常にインストールおよび構成されました。ご不明な点がございましたら、お気軽にお問い合わせください。詳細については、Strider Doc
の公式ドキュメントをご覧ください。