
すべてのシステム、アプリケーション、およびソフトウェアは、ログと呼ばれるファイルに保存される情報を生成します。問題のシステムが適切に機能していることを確認し、エラーやセキュリティリスクを防ぐために、これらのログを常に監視する必要があります。多くの場合、それらは複数のサーバーに分散しており、データの量が増えるにつれて、それらの管理はますます複雑になります。
グレーログ は、Elasticsearch、MongoDB、Graylogサーバーで構成される無料のオープンソースのエンタープライズグレードのログ管理システムです。これは、さまざまなサーバーにインストールされているクライアントからデータを受信するメインサーバーと、サーバーによって収集されたデータを表示するために使用されるWebインターフェイスで構成されます。 Graylogは、SplunkやLogStashと同様のツールです。
このチュートリアルでは、Graylog4をインストールする方法を学びます。 Ubuntu 20.04 。また、Let'sEncryptを使用してSSL証明書でGraylogサーバーを保護します。
要件:
- Ubuntu20.04マシン以降
- ハードウェア-4CPUコア、8 GB RAM、Elasticsearchログストレージ用の高IOPSを備えたSSDハードディスク
- Elasticsearch
- MongoDB
- Oracle Java SE 8(OpenJDK 8以降)
ステップ1:Ubuntu20.04にMongoDBをインストールする
GraylogはMongoDBを使用して、ストリーム、アラート、ユーザー、設定などの構成データを保存します。メタデータのみが保存され、ログデータは保存されません。まず、Ubuntu20.04にMongoDBをインストールしましょう。
まず、すべての前提条件パッケージをインストールします。
$ sudo apt update
$ sudo apt install apt-transport-https openjdk-11-jre-headless uuid-runtime pwgen dirmngr gnupg wget
次に、公開GPGキーをインポートします:
$ wget -qO - https://www.mongodb.org/static/pgp/server-5.0.asc | sudo apt-key add -ソースリストファイルを作成するには、次のように入力します。
$ sudo touch /etc/apt/sources.list.d/mongodb-org-5.0.list次に、Ubuntu20.04のリポジトリソースを追加します。
$ echo "deb [ arch=amd64,arm64 ] https://repo.mongodb.org/apt/ubuntu focal/mongodb-org/5.0 multiverse" | sudo tee /etc/apt/sources.list.d/mongodb-org-5.0.list次に、aptインデックスを更新します:
$ sudo apt updateUbuntuにMongoDBをインストールするには、次のように入力します。
$ sudo apt install mongodb-orgインストールプロセスが完了した後、MongoDBサービスは自動的に開始されません。サービスを開始してサービスを有効にするには、次のように入力します。
$ sudo systemctl enable --now mongod.serviceMongoDBサービスのステータスを確認します:
$ sudo systemctl status mongod.service出力:
● mongod.service - MongoDB Database Server
      Loaded: loaded (/lib/systemd/system/mongod.service; disabled; vendor preset: enabled)
      Active: active (running) since Sun 2021-08-22 04:47:46 UTC; 3s ago
        Docs: https://docs.mongodb.org/manual
    Main PID: 17965 (mongod)
      Memory: 66.1M
      CGroup: /system.slice/mongod.service
              └─17965 /usr/bin/mongod --config /etc/mongod.conf
 Aug 22 04:47:46 li175-223 systemd[1]: Started MongoDB Database Server.
出力にMongoDBが開始され、サービスが稼働中であることが示されています。
インストールされているMongoDBのバージョンを確認できます
$ sudo mongod --versiondb version v5.0.2
Build Info: {
"version": "5.0.2",
"gitVersion": "6d9ec525e78465dcecadcff99cce953d380fedc8",
"openSSLVersion": "OpenSSL 1.1.1f 31 Mar 2020",
"modules": [],
"allocator": "tcmalloc",
"environment": {
"distmod": "ubuntu2004",
"distarch": "x86_64",
"target_arch": "x86_64"
}
}出力は、MongoDBバージョン5.0.2をインストールしたことを示しています 。
ステップ2:Ubuntu20.04にElasticsearchをインストールする
GraylogはすべてのログデータをElasticsearchに保存します。サポートされているバージョンのelasticseachについては、Graylogの公式Webサイトを参照してください。
ElasticseachにはJavaが必要です。JavaバンドルバージョンのOpenJDKが付属しています
リポジトリのGPGキーをインポートします:
$ wget -qO - https://artifacts.elastic.co/GPG-KEY-elasticsearch | sudo apt-key add -次に、Elasticsearchリポジトリを追加します:
# echo "deb https://artifacts.elastic.co/packages/oss-7.x/apt stable main" | sudo tee -a /etc/apt/sources.list.d/elastic-7.x.list次に、リポジトリを更新します
$ sudo apt update最後に、次のように入力して、elasticsearchのオープンソースバージョンをインストールします。
$ sudo apt install elasticsearch-ossElasticsearch構成ファイルを変更して、クラスター名、elasticsearchがリッスンしているIPアドレス、およびポート番号などの情報を設定します
$ sudo vi /etc/elasticsearch/elasticsearch.ymlcluster.name: graylog-server
network.host: 0.0.0.0
http.port: 9200
discovery.zen.ping.unicast.hosts: ["127.0.0.1"]
action.auto_create_index: falseElasticsearchの主な構成ファイルとディレクトリは次のとおりです:
データが保存されます-/var/ lib/elasticsearchディレクトリ。
設定ファイル-/etc/elasticsearchディレクトリ
Java起動オプション-/etc/ default/elasticsearchファイル
Elasticsearchには、OpenJDKのバンドルバージョンが付属しています。独自のバージョンのJavaを使用するには、ES_JAVA_HOME環境変数を設定します。
次の1つのコマンドを使用して、Elasticsearchサービスを有効にして開始できます。
$ sudo systemctl enable --now elasticsearch.service次のコマンドを使用して、サービスが正しく実行されていることを確認します。
$ sudo systemctl status elasticsearch.service出力:
● elasticsearch.service - Elasticsearch
      Loaded: loaded (/lib/systemd/system/elasticsearch.service; disabled; vendor preset: enabled)
      Active: active (running) since Sun 2021-08-22 12:38:24 UTC; 11min ago
        Docs: http://www.elastic.co
    Main PID: 19502 (java)
       Tasks: 41 (limit: 1071)
      Memory: 833.2M
      CGroup: /system.slice/elasticsearch.service
              ├─19502 /bin/java -Xms1g -Xmx1g -XX:+UseConcMarkSweepGC -XX:CMSInitiatingOccupancyFraction=75 -XX:+UseCMSInitiatingOccupancyOnly -Des.networkaddress.cache.ttl=60 -Des.networkaddress.cache.negat>
              └─19565 /usr/share/elasticsearch/modules/x-pack-ml/platform/linux-x86_64/bin/controller
 Aug 22 12:38:24 li663-124 systemd[1]: Started Elasticsearch.
qを押して終了し、コマンドプロンプトに戻ります。
Elasticsearchはデフォルトでポート9200で動作します 、ファイアウォールで開く必要があります。
$ sudo ufw allow 9200動作しているかどうかを確認できます
$ sudo curl -XGET 'http://localhost:9200'"name" : "Ubuntunode",
"cluster_name" : "graylog-server",
"cluster_uuid" : "sz3jP3rKTPWZlasWwD-rBg",
"version" : {
"number" : "7.10.2",
"build_flavor" : "oss",
"build_type" : "deb",
"build_hash" : "747e1cc71def077253878a59143c1f785afa92b9",
"build_date" : "2021-01-13T00:42:12.435326Z",
"build_snapshot" : false,
"lucene_version" : "8.7.0",
"minimum_wire_compatibility_version" : "6.8.0",
"minimum_index_compatibility_version" : "6.0.0-beta1"
},
"tagline" : "You Know, for Search"
}
コマンドの出力を見ると、"number": "7.10.2"の行が表示されます。 Elasticsearchのバージョンを表示します。
ステップ3:Ubuntu20.04にGraylogをインストールする
Graylogは、さまざまな入力からログを収集し、ログを管理するために提供するWebインターフェイスに出力を提供します。
まず、wgetコマンドを使用してGraylogリポジトリファイルをダウンロードする必要があります:
$ wget https://packages.graylog2.org/repo/packages/graylog-4.1-repository_1-3_all.debGraylogリポジトリを構成するには、次のように入力します。
$ sudo dpkg -i graylog-4.1-repository_1-3_all.deb これで、Graylogサーバーをインストールできます
$ apt update
$ sudo apt install graylog-server
グレイログサーバーサービスを有効にして開始します
$ sudo systemctl enable --now graylog-server.service構成ファイルの編集
次に、password_secretを設定する必要があります そして、ルートグレイログの速攻値root_password_sha2 。
ユーザーパスワードを保護するためのシークレットを設定するには、pwgenコマンドを使用できます。
$ pwgen -N 1 -s 968KOikhjxetTdcJ7qhtPlgtLgBqCX5y4vL36Ig423pqUQn32QatiecCcYol5UEw3XDzwgWDvcFOmMBJzkBZKC52aEpBrItwke次に、構成ファイルを編集してパスワードを設定します
$ sudo vi /etc/graylog/server/server.confpassword_secret = RlTRqWSBENLKeg89iAWlxSaf1zfqLvBW7VX5SH1d2ji3RMKyeXb8bmfOXLl3GaWkxp9oDRfvbjXiEr36AFd6T9CMmnjdG7dnここで、Graylogルートパスワードアカウントのハッシュ値を定義する必要があります
$ echo -n GraylogRootPassword | shasum -a 2564b09467e174a03d5ebd720d514f57783ad1e03b4877fff5e0dc45356340ab215 -これで、コピーして貼り付けることができます
sudo vi /etc/graylog/server/server.confroot_password_sha2 = 4b09467e174a03d5ebd720d514f57783ad1e03b4877fff5e0dc45356340ab215GraylogルートメールアドレスおよびGraylogHTTPインターフェースで使用されるネットワークインターフェースとして追加情報を追加できます
root_email = "admin.graylog@websitefortesting.com"
root_timezone = UTC
http_bind_address = 0.0.0.0:9000
ファイアウォールのポートを開く必要があります
$ sudo ufw allow 9000グレイログサーバーサービスを有効にして開始します
$ sudo systemctl enable --now graylog-server.serviceGraylog /var/log/graylog-server/server.logのログデータを見つけることができ、デバッグやサーバーが起動しない場合に役立ちます。
サーバーのパブリックIPとブラウザからのポート番号(http:// adminです。 パスワードはハッシュ値に使用されるものです
ステップ4:NginxをSSLターミネーションプロキシとして構成する(オプション)
グレイログのウェブインターフェースをHTTPSで保護することをお勧めします。ここでは、リバースプロキシとしてNginxを使用し、Let'sEncryptを使用してドメインの無料のSSL証明書を生成します。
まず、Nginxをインストールしてから、証明書を暗号化するためのcerbotをインストールする必要があります。
それでは、Nginxをインストールしましょう
$ sudo apt install nginxそれでは、ファイアウォールでNginxを許可しましょう
$ sudo ufw allow 'Nginx Full'それでは、ドメイン名設定ファイルの内容を編集しましょう。ファイル名をドメイン名に置き換えることを忘れないでください
$ sudo vim /etc/nginx/sites-available/websitefortesting.com.confserver {
listen 80;
server_name websitefortesting.com;
add_header Strict-Transport-Security max-age=2592000;
rewrite ^ https://$server_name$request_uri? permanent;
access_log /var/log/nginx/websitefortesting.com.access.log combined;
error_log /var/log/nginx/websitefortesting.com.error.log;
}それではアクティブにしましょう
$ sudo ln -s /etc/nginx/sites-available/websitefortesting.com.conf /etc/nginx/sites-enabled/websitefortesting.com.conf次に、構成が適切かどうかを確認します
$ sudo nginx -tnginx: the configuration file /etc/nginx/nginx.conf syntax is ok
nginx: configuration file /etc/nginx/nginx.conf test is successful次に、nginxに必要なパッケージを使用してcerbotをインストールする必要があります
$ sudo apt install certbot python3-certbot-nginx次に、Nginx用のcerbotを実行する必要があります
$ sudo certbot --nginx Saving debug log to /var/log/letsencrypt/letsencrypt.log
Plugins selected: Authenticator nginx, Installer nginx
Enter email address (used for urgent renewal and security notices) (Enter 'c' to
cancel): francois@websitefortesting.com
Please read the Terms of Service at
https://letsencrypt.org/documents/LE-SA-v1.2-November-15-2017.pdf. You must
agree in order to register with the ACME server at
https://acme-v02.api.letsencrypt.org/directory
(A)gree/(C)ancel: A
Would you be willing to share your email address with the Electronic Frontier
Foundation, a founding partner of the Let's Encrypt project and the non-profit
organization that develops Certbot? We'd like to send you email about our work
encrypting the web, EFF news, campaigns, and ways to support digital freedom.
(Y)es/(N)o: N
Which names would you like to activate HTTPS for?
1: websitefortesting.com
Select the appropriate numbers separated by commas and/or spaces, or leave input
blank to select all options shown (Enter 'c' to cancel): 1
Obtaining a new certificate
Performing the following challenges:
http-01 challenge for websitefortesting.com
Waiting for verification…
Cleaning up challenges
Deploying Certificate to VirtualHost /etc/nginx/sites-enabled/websitefortesting.com.conf
Please choose whether or not to redirect HTTP traffic to HTTPS, removing HTTP access.
1: No redirect - Make no further changes to the webserver configuration.
2: Redirect - Make all requests redirect to secure HTTPS access. Choose this for
new sites, or if you're confident your site works on HTTPS. You can undo this
change by editing your web server's configuration.
Select the appropriate number [1-2] then [enter] (press 'c' to cancel): 2
Redirecting all traffic on port 80 to ssl in /etc/nginx/sites-enabled/websitefortesting.com.conf
Congratulations! You have successfully enabled https://websitefortesting.com
You should test your configuration at:
https://www.ssllabs.com/ssltest/analyze.html?d=websitefortesting.com
IMPORTANT NOTES:
Congratulations! Your certificate and chain have been saved at:
/etc/letsencrypt/live/websitefortesting.com/fullchain.pem
Your key file has been saved at:
/etc/letsencrypt/live/websitefortesting.com/privkey.pem
Your cert will expire on 2021-11-18. To obtain a new or tweaked
version of this certificate in the future, simply run certbot again
with the "certonly" option. To non-interactively renew all of
your certificates, run "certbot renew"
If you like Certbot, please consider supporting our work by:
Donating to ISRG / Let's Encrypt: https://letsencrypt.org/donate
Donating to EFF: https://eff.org/donate-le 出力から、SSL証明書と秘密鍵の場所を確認できます。この情報を使用して、NginxのSSLを構成できます。
$ sudo vi /etc/nginx/sites-available/websitefortesting.com.confserver {
listen 80;
server_name websitefortesting.com;
add_header Strict-Transport-Security max-age=2592000;
rewrite ^ https://$server_name$request_uri? permanent;
access_log /var/log/nginx/websitefortesting.com.access.log combined;
error_log /var/log/nginx/websitefortesting.com.error.log;
}
server {
listen 443 ssl; # managed by Certbot
server_name websitefortesting.com;
ssl_certificate /etc/letsencrypt/live/websitefortesting.com/fullchain.pem; # managed by Certbot
ssl_certificate_key /etc/letsencrypt/live/websitefortesting.com/privkey.pem; # managed by Certbot
include /etc/letsencrypt/options-ssl-nginx.conf; # managed by Certbot
ssl_dhparam /etc/letsencrypt/ssl-dhparams.pem; # managed by Certbot
location / { proxy_set_header Host $http_host; proxy_set_header X-Forwarded-Host $host;
proxy_set_header X-Forwarded-Server $host;
proxy_set_header X-Forwarded-For $proxy_add_x_forwarded_for; proxy_pass http://127.0.0.1:9000;
}
}それでは、
でもう一度確認しましょう$ sudo nginx -tそして、Nginxサービスを再起動します
$ sudo systemctl restart nginx.service 次に、HTTPSのドメイン名を使用してGraylogURLにアクセスします。
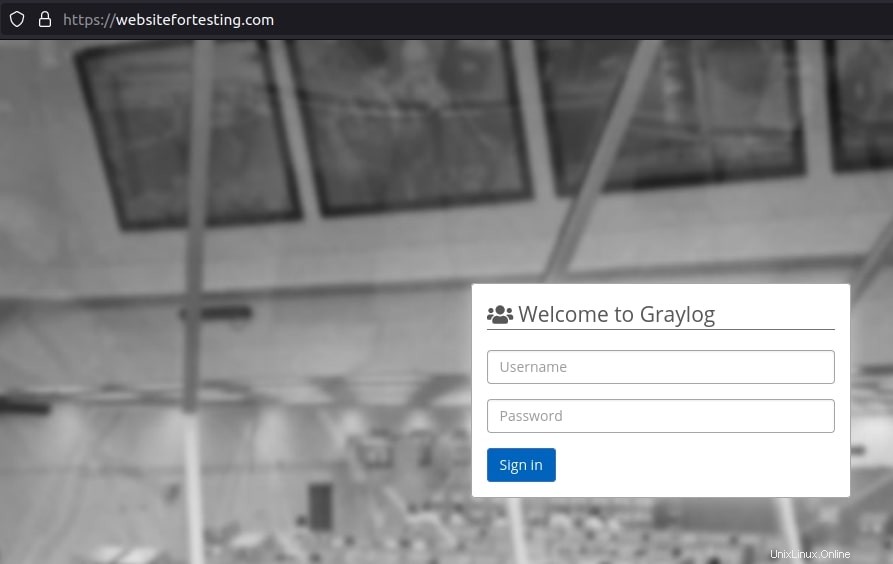
ログイン後、ホームページが表示されます
結論
このチュートリアルでは、GraylogサーバーをUbuntu 20.04にインストールし、Nginxをリバースプロキシとして使用してSSLを構成する方法を学びました。
セットアッププロセス中に問題が発生した場合は、コメントセクションでコメントまたは質問してください。