はじめに
このチュートリアルでは、Ubuntu 20.04にNginxをインストールして、システムリソースの負荷を軽減しながら、優れたパフォーマンスベースのWebサーバーを正常に実行できるようにする方法を示します。 Nginxは、サーバーで使用できる強力なウェブサーバーソフトウェアです。
前提条件
静的IPアドレスで構成されたUbuntu20.04サーバーが必要です。サーバーをまだお持ちでない場合は、VPSホスティングページにアクセスして、30秒以内に新しいサーバーを起動できます。
サーバーの準備
サーバーが完全に最新であることを確認しましょう。
apt-get update
サーバーを最新の状態にすると、サーバーのインストールプロセスを続行できます。
Nginxをインストール
Nginxをインストールするには、apt-getコマンドを使用して、ソフトウェアをインストールできるようにする必要があります。
sudo apt-get install nginx -y
これでNGINXがサーバーにインストールされ、ブラウザのIPアドレス(http://YOUR.IP.ADD.RESS)で次のように入力して確認できます
次のコマンドを使用して、サーバーからIPを取得できます。
ip addr show wlan0 | grep inet | awk '{ print $2 }' 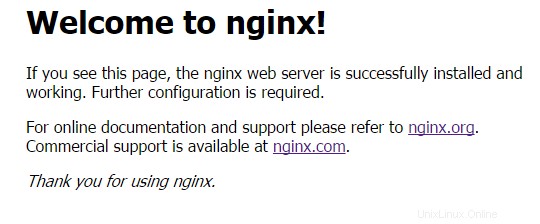
Ubuntu20.04にインストールしたときにNginxが提供するデフォルトのWebページの例
Nginxを構成する
次に、中央構成ファイルを開き、ドメインでserver_name行を編集して、Nginxを構成します。
nano /etc/nginx/sites-available/default
server {
        listen 80 default_server;
        listen [::]:80 default_server ipv6only=on;

        root /usr/share/nginx/html;
        index index.html index.htm;

        # Make site accessible from http://localhost/
        server_name YOURDOMAIN.com;

        location / {
                # First attempt to serve request as file, then
                # as directory, then fall back to displaying a 404.
                try_files $uri $uri/ =404;
                # Uncomment to enable naxsi on this location
                # include /etc/nginx/naxsi.rules
        }

        # Only for nginx-naxsi used with nginx-naxsi-ui : process denied requests
        #location /RequestDenied {
        #       proxy_pass http://127.0.0.1:8080;
        #}

        #error_page 404 /404.html;

        # redirect server error pages to the static page /50x.html
        #
        #error_page 500 502 503 504 /50x.html;
        #location = /50x.html {
        #       root /usr/share/nginx/html;
        #}

        # pass the PHP scripts to FastCGI server listening on 127.0.0.1:9000
        #
        #location ~ \.php$ {
        #       fastcgi_split_path_info ^(.+\.php)(/.+)$;
        #       # NOTE: You should have "cgi.fix_pathinfo = 0;" in php.ini
        #
        #       # With php5-cgi alone:
        #       fastcgi_pass 127.0.0.1:9000;
        #       # With php5-fpm:
        #       fastcgi_pass unix:/var/run/php5-fpm.sock;
        #       fastcgi_index index.php;
        #       include fastcgi_params;
        #}

        # deny access to .htaccess files, if Apache's document root
        # concurs with nginx's one
        #
        #location ~ /\.ht {
        #       deny all;
        #}
}
ファイルを保存してNginxサービスを再起動し、変更を有効にします。
systemctl restart nginx
これで、Webコンテンツを作成してNginxのHTMLディレクトリにアップロードできます(既存のindex.htmlファイルをホームページであるindex.htmlに置き換えることを忘れないでください)Ubuntu20.04のデフォルトディレクトリは/usr / share /nginx/です。 html/。次のコマンドでインデックスを更新します:
nano /usr/share/nginx/html/
次は?
これで、NginxがインストールされたUbuntu 20.04サーバーができました。これで、新しくインストールしたWebサーバーを使用して高性能Webサイトの構築を開始できます。フォローしていただきありがとうございます。今後の更新については、お気軽にご確認ください。