はじめに
このハウツーは、Ubuntu20.04サーバーへのApacheのインストールと構成に役立ちます。 Apacheは、Linuxシステムやインターネットで非常に人気のあるWebサーバーです。ワールドワイドウェブ上でサイトをホスティングする際の人気と効率性から、世界中の多くのウェブホスティング会社で使用されています。
前提条件
静的IPアドレスで構成されたUbuntu20.04サーバーが必要です。サーバーをまだお持ちでない場合は、30秒以内に安全な仮想プライベートサーバーを起動できます。
Ubuntu20.04にApacheをインストールする
最初のステップは、次のコマンドを使用してApacheをインストールすることです。
sudo apt-get install apache2
次のコマンドでApacheを起動します。
service apache2 start
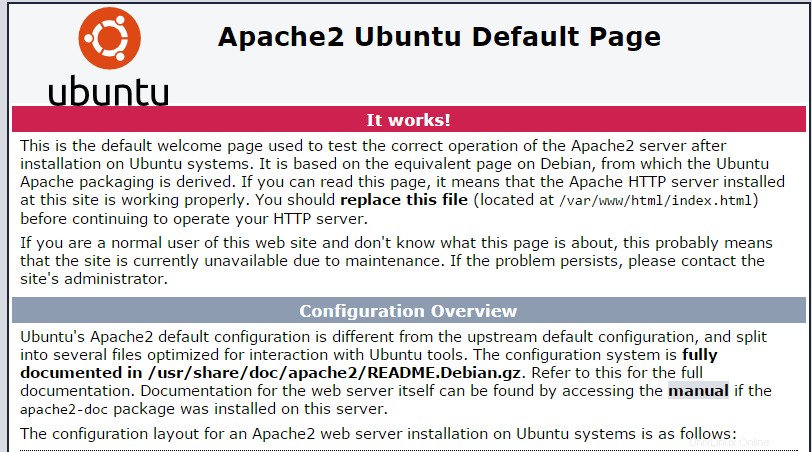
http://YOUR.IP.ADD.RESSと入力して、すべてが機能しているかどうかを確認します。
次のコマンドを使用して、サーバーからIPを取得できます。
ifconfig eth0 | grep inet | awk '{ print $2 }' 
このイメージは、Ubuntu20.04にApacheをインストールするときのデフォルトのWebページです
Apache(シングルホスト)の構成
次に、メインの構成ファイルを開いてApacheを構成し、それに応じてServerNameとServerAdminの行を編集します。
nano /etc/apache2/sites-available/000-default.conf
<VirtualHost *:80>
        # The ServerName directive sets the request scheme, hostname and port that
        # the server uses to identify itself. This is used when creating
        # redirection URLs. In the context of virtual hosts, the ServerName
        # specifies what hostname must appear in the request's Host: header to
        # match this virtual host. For the default virtual host (this file) this
        # value is not decisive as it is used as a last resort host regardless.
        # However, you must set it for any further virtual host explicitly.
        #ServerName www.example.com

        ServerAdmin [email protected]
        DocumentRoot /var/www/html

        # Available loglevels: trace8, ..., trace1, debug, info, notice, warn,
        # error, crit, alert, emerg.
        # It is also possible to configure the loglevel for particular
        # modules, e.g.
        #LogLevel info ssl:warn

        ErrorLog ${APACHE_LOG_DIR}/error.log
        CustomLog ${APACHE_LOG_DIR}/access.log combined

        # For most configuration files from conf-available/, which are
        # enabled or disabled at a global level, it is possible to
        # include a line for only one particular virtual host. For example the
        # following line enables the CGI configuration for this host only
        # after it has been globally disabled with "a2disconf".
        #Include conf-available/serve-cgi-bin.conf
</VirtualHost>

# vim: syntax=apache ts=4 sw=4 sts=4 sr noet
ファイルを保存してApacheHTTPサービスを再起動すると、変更が有効になります。
service apache2 restart
これで、Webコンテンツを作成してApacheのHTMLディレクトリにアップロードできます(既存のindex.htmlファイルをホームページであるindex.htmlに置き換えることを忘れないでください)
nano /var/www/html/index.html
Apache(マルチホスト)の構成
複数のWebサイトをホストする場合は、メインの構成ファイルを開き、既存の仮想ホストエントリをコピーして、その下に貼り付けます。次に、ServerName、ServerAdmin、およびDocumentRootの行を適宜編集します。
nano /etc/apache2/sites-available/000-default.conf
または、次のエントリをコピーして、それに応じて編集することもできます。
<VirtualHost *:80>
ServerAdmin [email protected]
DocumentRoot /var/www/site1
ServerName site1.com
ServerAlias www.site1.com
 ErrorLog ${APACHE_LOG_DIR}/error.log
 CustomLog ${APACHE_LOG_DIR}/access.log combined
</VirtualHost>

<VirtualHost *:80>
ServerAdmin [email protected]
DocumentRoot /var/www/site2
ServerName site2.com
ServerAlias www.site2.com
 ErrorLog ${APACHE_LOG_DIR}/error.log
 CustomLog ${APACHE_LOG_DIR}/access.log combined
</VirtualHost>
ここで、構成したばかりのサイト、site1とsite2のディレクトリを作成する必要があります。
mkdir /var/www/site1
mkdir /var/www/site2
これで、ApacheのsitesディレクトリでWebコンテンツの作成/アップロードを開始できます。
nano /var/www/site1/index.html
nano /var/www/site2/index.html
次は?
これで、Apacheを使用してサーバーをインストールおよび構成できました。これで、Webサイトの構築を続けることができます。フォローしていただきありがとうございます。今後のアップデートについては、お気軽にご確認ください。ブログの他のUbuntu関連の投稿をご覧になるか、受賞歴のあるVPSホスティングソリューションの詳細をご覧ください。