PowerShell は、Windowsオペレーティングシステム用の、対話型のコマンドラインシェルとスクリプト言語で構成される、分散型のスケーラブルな異種構成および自動化フレームワークです。 .NET上に構築されています フレームワークであり、ユーザーがシステムタスクを自動化および簡素化できるようにします。 PowerShellの詳細については、次のリンクを参照してください。

この簡単なチュートリアルでは、Ubuntu 14.04 / 16.04 /18.04LTSおよびCentOS764ビットサーバーエディションにPowerShellをインストールする方法を見てみましょう。
LinuxにWindowsPowerShellCore6.0をインストールする
PowerShellは、Arch Linux、Debian、Ubuntu、Fedora、CentOS、SUSEなどの多くの一般的なLinuxディストリビューションにインストールできます。ここに、Debian、Ubuntu、CentOSのインストール手順を記載しました。
Ubuntu 14.04 LTSの場合:
PowerShellリポジトリGPGキーをダウンロードして登録します:
$ wget -q https://packages.microsoft.com/config/ubuntu/14.04/packages-microsoft-prod.deb
$ sudo dpkg -i packages-microsoft-prod.deb
ソフトウェアソースリストを更新します:
$ sudo apt-get update
次に、コマンドを使用してPowerShellをインストールします:
$ sudo apt-get install -y powershell
Ubuntu 16.04 LTSの場合:
PowerShellリポジトリのGPGキーを追加する:
$ wget -q https://packages.microsoft.com/config/ubuntu/16.04/packages-microsoft-prod.deb
$ sudo dpkg -i packages-microsoft-prod.deb
ソフトウェアソースリストを更新します:
$ sudo apt-get update
次に、コマンドを使用してPowerShellをインストールします:
$ sudo apt-get install -y powershell
Ubuntu 18.04 LTSの場合:
PowerShellリポジトリGPGキーを登録します:
$ wget -q https://packages.microsoft.com/config/ubuntu/18.04/packages-microsoft-prod.deb
$ sudo dpkg -i packages-microsoft-prod.deb
リポジトリリストを更新し、PowerShellをインストールします:
$ sudo apt-get update
$ sudo apt-get install -y powershell
Debian 8の場合:
$ sudo apt-get install curl apt-transport-https
$ curl https://packages.microsoft.com/keys/microsoft.asc | sudo apt-key add -
$ sudo sh -c 'echo "deb [arch=amd64] https://packages.microsoft.com/repos/microsoft-debian-jessie-prod jessie main" > /etc/apt/sources.list.d/microsoft.list'
$ sudo apt-get update
$ sudo apt-get install -y powershell
Debian 9の場合:
$ sudo apt-get install curl gnupg apt-transport-https
$ curl https://packages.microsoft.com/keys/microsoft.asc | sudo apt-key add -
$ sudo sh -c 'echo "deb [arch=amd64] https://packages.microsoft.com/repos/microsoft-debian-stretch-prod stretch main" > /etc/apt/sources.list.d/microsoft.list'
$ sudo apt-get update
$ sudo apt-get install -y powershell
CentOS 7の場合:
PowerShellリポジトリをrootとして追加します ユーザー:
# curl https://packages.microsoft.com/config/rhel/7/prod.repo | sudo tee /etc/yum.repos.d/microsoft.repo
PowerShellのインストール:
# yum install -y powershell
その他のディストリビューションについては、公式のインストール手順を参照してください。 。
これでPowerShellがインストールされました。次に、リアルタイムでの使用方法を見ていきます。
PowerShellの使用を開始する
Linux用のPowerShellはまだ開発段階にあるため、いくつかのバグが発生することに注意してください。バグがある場合は、PowerShellコミュニティブログに参加してください。 (リンクはこの記事の最後にあります)そして助けを求めてください。
PowerShellをインストールしたら、次のコマンドを実行してPowerShellコンソール/セッションに入ります。
pwsh
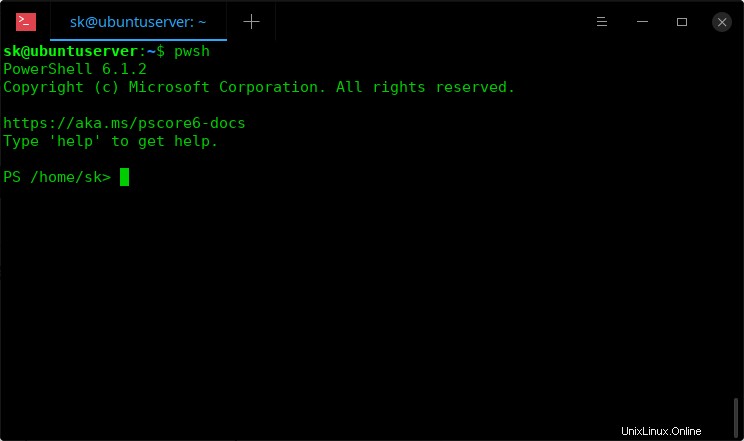
これは、Ubuntu18.04LTSサーバーでのPowerShellコンソールの外観です。
PowerShell 6.1.2
Copyright (c) Microsoft Corporation. All rights reserved.

https://aka.ms/pscore6-docs
Type 'help' to get help.

PS /home/sk>
PowerShell
PowerShellセッションでは、PowerShellコマンドをコマンドレットと呼びます。 、PowerShellプロンプトサインを PS />と呼びます 。
PowerShellでの作業は、BASHとほぼ同じです。 PowerShellでいくつかのLinuxコマンドを実行しました。ほとんどすべてのLinuxコマンドがPowerShellで機能しているようです。また、PowerShellには独自のコマンドセット(コマンドレット)があります。 TAB機能(オートコンプリート)機能はBASHと同じように機能します。
クリアしますか?さて、いくつか例を挙げましょう。
PowerShellバージョンの表示
PowerShellのバージョンを表示するには、次のように入力します。
$PSVersionTable
出力例:
Name                           Value
----                           -----
PSVersion                      6.1.2
PSEdition                      Core
GitCommitId                    6.1.2
OS                             Linux 4.15.0-45-generic #48-Ubuntu SMP Tue Jan ...
Platform                       Unix
PSCompatibleVersions           {1.0, 2.0, 3.0, 4.0...}
PSRemotingProtocolVersion      2.3
SerializationVersion           1.1.0.1
WSManStackVersion              3.0
上記の出力に示されているように、PowerShellのバージョンは 6.1.2です。 。
ファイルの作成
新しいファイルを作成するには、'New-Item'を使用します 以下に示すコマンド。
New-Item ostechnix.txt
出力例:
    Directory: /home/sk


Mode                LastWriteTime         Length Name
----                -------------         ------ ----
------          2/11/19  10:28 AM              0 ostechnix.txt
以下に示すように、
または単に">"を使用します:
"" > ostechnix.txt
ここで、 "" -ファイルが空であることを示します。 ostechnix.txt はファイル名です。
ファイルにコンテンツを追加するには、次のコマンドを実行します。
Set-Content ostechnix.txt -Value "Welcome to OSTechNix blog!"
または
"Welcome to OSTechNix blog!" > ostechnix.txt
ファイルの内容の表示
PowerShellからいくつかのファイルを作成しました。そのファイルの内容をどのように表示しますか?簡単です。
'Get-Content'を使用するだけです 任意のファイルの内容を表示するコマンド。
Get-Content <Path> <filename>
例:
Get-Content ostechnix.txt
出力例:
Welcome to OSTechNix blog!
ファイルの削除
ファイルまたはアイテムを削除するには、「Remove-Item」を使用します 以下に示すコマンド。
Remove-Item ostechnix.txt
コマンドを使用して、アイテムが本当に削除されたかどうかを確認しましょう:
Get-Content ostechnix.txt
次のような出力が表示されます。
Get-Content : Cannot find path '/home/sk/ostechnix.txt' because it does not exist.
At line:1 char:1
+ Get-Content ostechnix.txt
+ ~~~~~~~~~~~~~~~~~~~~~~~~~
+ CategoryInfo          : ObjectNotFound: (/home/sk/ostechnix.txt:String) [Get-Content], ItemNotFoundException
+ FullyQualifiedErrorId : PathNotFound,Microsoft.PowerShell.Commands.GetContentCommand
または、単に "ls"を使用することもできます ファイルが存在するかどうかを表示するコマンド。
実行中のプロセスの表示
実行中のプロセスのリストを表示するには、次のコマンドを実行します:
Get-Process
出力例:
 NPM(K) PM(M) WS(M) CPU(s) Id SI ProcessName
 ------ ----- ----- ------ -- -- -----------
 0 0.00 0.00 0.02 599 599 agetty
 0 0.00 0.00 0.00 2385 385 anacron
 0 0.00 0.00 0.00 257 0 ata_sff
 0 0.00 0.00 0.07 556 556 auditd
 0 0.00 0.00 0.03 578 578 avahi-daemon
 0 0.00 0.00 0.00 590 578 avahi-daemon
 0 0.00 0.00 0.05 2327 327 bash
 0 0.00 0.00 0.00 19 0 bioset
 0 0.00 0.00 0.00 352 0 bioset
 0 0.00 0.00 0.00 360 0 bioset
 0 0.00 0.00 0.35 597 597 crond
 0 0.00 0.00 0.00 31 0 crypto
 0 0.00 0.00 0.11 586 586 dbus-daemon
 0 0.00 0.00 0.03 63 0 deferwq
 0 0.00 0.01 0.93 585 585 firewalld
 0 0.00 0.00 0.00 30 0 fsnotify_mark
 0 0.00 0.00 0.00 43 0 ipv6_addrconf
 0 0.00 0.00 0.02 94 0 kauditd
 0 0.00 0.00 0.00 20 0 kblockd
 0 0.00 0.00 0.00 14 0 kdevtmpfs
 0 0.00 0.00 0.00 351 0 kdmflush
 0 0.00 0.00 0.00 359 0 kdmflush
 0 0.00 0.00 0.00 13 0 khelper
 0 0.00 0.00 0.03 29 0 khugepaged
 0 0.00 0.00 0.00 26 0 khungtaskd
 0 0.00 0.00 0.00 18 0 kintegrityd
 0 0.00 0.00 0.00 41 0 kmpath_rdacd
 0 0.00 0.00 0.00 42 0 kpsmoused
 0 0.00 0.00 0.00 28 0 ksmd
 0 0.00 0.00 0.17 3 0 ksoftirqd/0
 0 0.00 0.00 0.02 27 0 kswapd0
 0 0.00 0.00 0.00 2 0 kthreadd
 0 0.00 0.00 0.00 39 0 kthrotld
 0 0.00 0.00 0.01 2313 0 kworker/0:0
 0 0.00 0.00 0.04 2369 0 kworker/0:0H
 0 0.00 0.00 0.00 2440 0 kworker/0:1
 0 0.00 0.00 0.05 2312 0 kworker/0:2H
 0 0.00 0.00 0.28 2376 0 kworker/0:3
 0 0.00 0.00 0.25 6 0 kworker/u2:0
 0 0.00 0.00 0.00 272 0 kworker/u2:2
 0 0.00 0.00 0.01 473 473 lvmetad
 0 0.00 0.00 0.02 2036 036 master
 0 0.00 0.00 0.00 21 0 md
 0 0.00 0.00 0.00 7 0 migration/0
 0 0.00 0.00 0.00 15 0 netns
 0 0.00 0.00 0.22 653 653 NetworkManager
 0 0.00 0.00 0.00 16 0 perf
 0 0.00 0.00 0.01 2071 036 pickup
 0 0.00 0.00 0.05 799 799 polkitd
 0 0.00 0.02 5.02 2401 327 powershell
 0 0.00 0.00 0.00 2072 036 qmgr
 0 0.00 0.00 0.00 8 0 rcu_bh
 0 0.00 0.00 0.73 10 0 rcu_sched
 0 0.00 0.00 0.00 9 0 rcuob/0
 0 0.00 0.00 0.51 11 0 rcuos/0
 0 0.00 0.00 0.06 582 582 rsyslogd
 0 0.00 0.00 0.00 267 0 scsi_eh_0
 0 0.00 0.00 0.00 271 0 scsi_eh_1
 0 0.00 0.00 0.00 275 0 scsi_eh_2
 0 0.00 0.00 0.00 269 0 scsi_tmf_0
 0 0.00 0.00 0.00 273 0 scsi_tmf_1
 0 0.00 0.00 0.00 277 0 scsi_tmf_2
 0 0.00 0.00 0.03 1174 174 sshd
 0 0.00 0.00 0.79 2322 322 sshd
 0 0.00 0.00 1.68 1 1 systemd
 0 0.00 0.00 0.24 453 453 systemd-journal
 0 0.00 0.00 0.04 579 579 systemd-logind
 0 0.00 0.00 0.19 481 481 systemd-udevd
 0 0.00 0.00 0.54 1175 175 tuned
 0 0.00 0.00 0.02 12 0 watchdog/0
 0 0.00 0.00 0.01 798 798 wpa_supplicant
 0 0.00 0.00 0.00 17 0 writeback
 0 0.00 0.00 0.00 378 0 xfs_mru_cache
 0 0.00 0.00 0.00 379 0 xfs-buf/dm-1
 0 0.00 0.00 0.00 539 0 xfs-buf/sda1
 0 0.00 0.00 0.00 382 0 xfs-cil/dm-1
 0 0.00 0.00 0.00 542 0 xfs-cil/sda1
 0 0.00 0.00 0.00 381 0 xfs-conv/dm-1
 0 0.00 0.00 0.00 541 0 xfs-conv/sda1
 0 0.00 0.00 0.00 380 0 xfs-data/dm-1
 0 0.00 0.00 0.00 540 0 xfs-data/sda1
 0 0.00 0.00 0.51 383 0 xfsaild/dm-1
 0 0.00 0.00 0.00 543 0 xfsaild/sda1
 0 0.00 0.00 0.00 377 0 xfsalloc
上記のコマンドは、Linuxシステムで実行中のプロセスの全リストを表示します。
特定の実行中のプロセスを表示するには、'-Name'を使用します 上記のコマンドでオプションを選択します。
たとえば、PowerShellプロセスを表示するには、次のコマンドを実行します:
Get-Process -Name pwsh
出力例:
 NPM(K)    PM(M)      WS(M)     CPU(s)      Id  SI ProcessName
 ------    -----      -----     ------      --  -- -----------
      0     0.00      99.32       3.28    2575 398 pwsh
コマンドエイリアスの表示
コマンド全体を入力するのが面倒ですか? Linux BASHシェルの場合と同様に、いくつかの単語を入力してTabキーを押すだけで、コマンドがオートコンプリートされるか、提案されたコマンドのリストが表示されます。
または、一部のコマンドにはエイリアスがあります。
たとえば、画面をクリアするには、次のように入力します。 Clear-Host 。
または、上記のコマンド「cls」または「clear」のエイリアスを入力するだけで、画面をクリアできます。
使用可能なエイリアスのリストを表示するには、次のコマンドを実行します:
Get-Alias
使用可能なエイリアスの完全なリストは次のとおりです:
CommandType Name Version Source
----------- ---- ------- ------
Alias ? -> Where-Object
Alias % -> ForEach-Object
Alias cd -> Set-Location
Alias chdir -> Set-Location
Alias clc -> Clear-Content
Alias clear -> Clear-Host
Alias clhy -> Clear-History
Alias cli -> Clear-Item
Alias clp -> Clear-ItemProperty
Alias cls -> Clear-Host
Alias clv -> Clear-Variable
Alias cnsn -> Connect-PSSession
Alias copy -> Copy-Item
Alias cpi -> Copy-Item
Alias cvpa -> Convert-Path
Alias dbp -> Disable-PSBreakpoint
Alias del -> Remove-Item
Alias dir -> Get-ChildItem
Alias dnsn -> Disconnect-PSSession
Alias ebp -> Enable-PSBreakpoint
Alias echo -> Write-Output
Alias epal -> Export-Alias
Alias epcsv -> Export-Csv
Alias erase -> Remove-Item
Alias etsn -> Enter-PSSession
Alias exsn -> Exit-PSSession
Alias fc -> Format-Custom
Alias fhx -> Format-Hex 3.1.0.0 Microsoft.PowerShell.Utility
Alias fl -> Format-List
Alias foreach -> ForEach-Object
Alias ft -> Format-Table
Alias fw -> Format-Wide
Alias gal -> Get-Alias
Alias gbp -> Get-PSBreakpoint
Alias gc -> Get-Content
Alias gci -> Get-ChildItem
Alias gcm -> Get-Command
Alias gcs -> Get-PSCallStack
Alias gdr -> Get-PSDrive
Alias ghy -> Get-History
Alias gi -> Get-Item
Alias gin -> Get-ComputerInfo 3.1.0.0 Microsoft.PowerShell.Management
Alias gjb -> Get-Job
Alias gl -> Get-Location
Alias gm -> Get-Member
Alias gmo -> Get-Module
Alias gp -> Get-ItemProperty
Alias gps -> Get-Process
Alias gpv -> Get-ItemPropertyValue
Alias group -> Group-Object
Alias gsn -> Get-PSSession
Alias gsv -> Get-Service
Alias gu -> Get-Unique
Alias gv -> Get-Variable
Alias h -> Get-History
Alias history -> Get-History
Alias icm -> Invoke-Command
Alias iex -> Invoke-Expression
Alias ihy -> Invoke-History
Alias ii -> Invoke-Item
Alias ipal -> Import-Alias
Alias ipcsv -> Import-Csv
Alias ipmo -> Import-Module
Alias kill -> Stop-Process
Alias md -> mkdir
Alias measure -> Measure-Object
Alias mi -> Move-Item
Alias move -> Move-Item
Alias mp -> Move-ItemProperty
Alias nal -> New-Alias
Alias ndr -> New-PSDrive
Alias ni -> New-Item
Alias nmo -> New-Module
Alias nsn -> New-PSSession
Alias nv -> New-Variable
Alias oh -> Out-Host
Alias popd -> Pop-Location
Alias pushd -> Push-Location
Alias pwd -> Get-Location
Alias r -> Invoke-History
Alias rbp -> Remove-PSBreakpoint
Alias rcjb -> Receive-Job
Alias rcsn -> Receive-PSSession
Alias rd -> Remove-Item
Alias rdr -> Remove-PSDrive
Alias ren -> Rename-Item
Alias ri -> Remove-Item
Alias rjb -> Remove-Job
Alias rmo -> Remove-Module
Alias rni -> Rename-Item
Alias rnp -> Rename-ItemProperty
Alias rp -> Remove-ItemProperty
Alias rsn -> Remove-PSSession
Alias rv -> Remove-Variable
Alias rvpa -> Resolve-Path
Alias sajb -> Start-Job
Alias sal -> Set-Alias
Alias saps -> Start-Process
Alias sasv -> Start-Service
Alias sbp -> Set-PSBreakpoint
Alias sc -> Set-Content
Alias select -> Select-Object
Alias set -> Set-Variable
Alias si -> Set-Item
Alias sl -> Set-Location
Alias sls -> Select-String
Alias sp -> Set-ItemProperty
Alias spjb -> Stop-Job
Alias spps -> Stop-Process
Alias spsv -> Stop-Service
Alias sv -> Set-Variable
Alias type -> Get-Content
Alias where -> Where-Object
Alias wjb -> Wait-Job
特定のコマンドのエイリアスを表示するには、次のように入力します。
Get-Alias cls
出力例:
CommandType Name Version Source
----------- ---- ------- ------
Alias cls -> Clear-Host
使用可能なコマンドの完全なリストを表示する
使用可能なすべてのPowerShellコマンドのリストを表示するには、次のコマンドを実行します:
Get-Command
ヘルプの表示
特定の機能がわからない場合は、問題ない。ヘルプを取得するには、「help」と入力するだけです。インターネットで検索する必要はありません。
'Get-Help'を使用することもできます 任意のPowerShellコマンドと一緒にコマンド。 「男」に似ています Linuxのコマンド。
たとえば、「Clear-Host」というコマンドのヘルプセクションを表示するには、次のコマンドを実行します。
Get-Help Clear-Host
出力例:
NAME
 Clear-Host

SYNOPSIS


SYNTAX
 Clear-Host [<CommonParameters>]


DESCRIPTION


RELATED LINKS
 https://go.microsoft.com/fwlink/?LinkID=225747

REMARKS
 To see the examples, type: "get-help Clear-Host -examples".
 For more information, type: "get-help Clear-Host -detailed".
 For technical information, type: "get-help Clear-Host -full".
 For online help, type: "get-help Clear-Host -online
上記のように、「Get-Help」は、コマンドの名前、構文形式、エイリアス、コメントなど、特定のPowerShellコマンドのヘルプセクションを表示します。
PowerShellコンソールを終了するには、次のように入力します。
exit
Linux(UbuntuおよびCentOS)にPowerShell Coreアルファ版をインストールする方法と、基本的な使用法についての基本的な考え方を理解していただければ幸いです。
参考資料:
- GitHubのPowerShell
- Channel9からPowerShellの使用を開始する-ビデオチュートリアル
- PowerShellコミュニティページ
- PowerShellYouTubeチャンネル
関連記事:
- 単一のコマンドでLinux用のWindowsサブシステムをインストールする