Mumbleは、ゲーマー向けに設計されたボイスチャットアプリケーションであり、Mumbleクライアントを同じサーバーに接続することでゲーマーが互いに会話できるようになっています。このVoiceoverIPアプリケーションは、VentriloやTeamSpeakに似ています。シンプルな管理インターフェース、高品質のコーデック、低遅延により、非常に人気があります。この記事では、システムにMurmurをインストールして構成する方法について説明します。 MurmurはMumbleのサーバーコンポーネントです。
Murmurを使用すると、ユーザーは独自のパブリックまたはプライベートボイスチャットサーバーを実行できます。
次の手順は、rootユーザーとして実行する必要があります。 rootユーザーになるには、シェルで「通常の」ubuntuユーザーとしてログインし、次のコマンドを実行します。
sudo su
rootユーザーになります。
Ubuntuアップデートのインストール
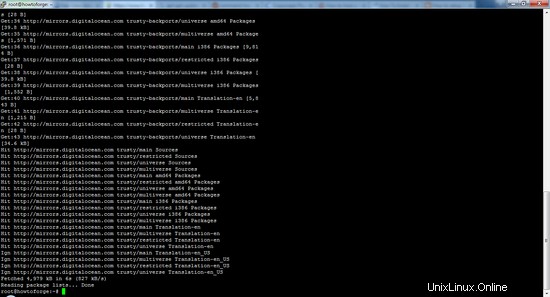
murmurのインストールを続行する前に、サーバーに最新の更新がインストールされていることを確認する必要があります。以下のコマンドを実行して、Ubuntuリポジトリから更新されたパッケージリストをダウンロードします。
apt-get update
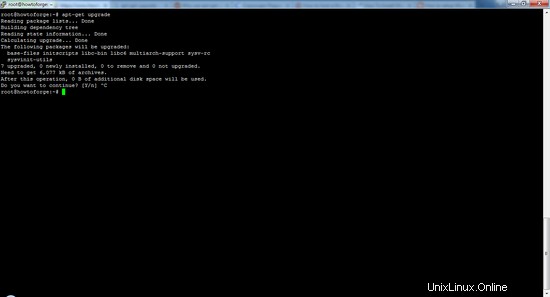
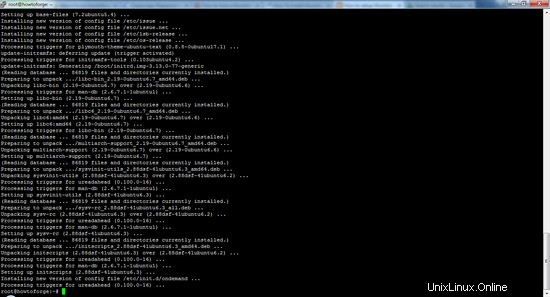
次に、次のコマンドを使用して更新をインストールします。
apt-get upgrade
Reading package lists... Done
Building dependency tree
Reading state information... Done
Calculating upgrade... Done
The following packages will be upgraded:
 base-files initscripts libc-bin libc6 multiarch-support sysv-rc
 sysvinit-utils
7 upgraded, 0 newly installed, 0 to remove and 0 not upgraded.
Need to get 6,077 kB of archives.
After this operation, 0 B of additional disk space will be used.
Do you want to continue? [Y/n]
Yを押して続行します。
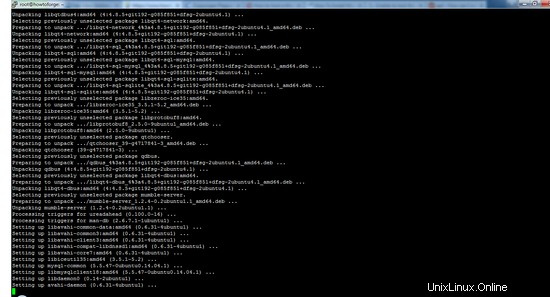
Mumbleは、公式のUbuntuリポジトリでMumble-Serverという名前で入手できます。
次のコマンドを実行してパッケージをインストールします:
apt-get install mumble-server
Reading package lists... Done
Building dependency tree
Reading state information... Done
The following extra packages will be installed:
 avahi-daemon libavahi-client3 libavahi-common-data libavahi-common3
 libavahi-compat-libdnssd1 libavahi-core7 libdaemon0 libiceutil35
 libmysqlclient18 libnss-mdns libprotobuf8 libqt4-dbus libqt4-network
 libqt4-sql libqt4-sql-mysql libqt4-sql-sqlite libqt4-xml libqtcore4
 libqtdbus4 libzeroc-ice35 mysql-common qdbus qtchooser qtcore4-l10n
Suggested packages:
 avahi-autoipd libqt4-dev libicu48 libthai0 mumble-server-web mumble-django
 qt4-default qt5-default
The following NEW packages will be installed:
 avahi-daemon libavahi-client3 libavahi-common-data libavahi-common3
 libavahi-compat-libdnssd1 libavahi-core7 libdaemon0 libiceutil35
 libmysqlclient18 libnss-mdns libprotobuf8 libqt4-dbus libqt4-network
 libqt4-sql libqt4-sql-mysql libqt4-sql-sqlite libqt4-xml libqtcore4
 libqtdbus4 libzeroc-ice35 mumble-server mysql-common qdbus qtchooser
 qtcore4-l10n
0 upgraded, 25 newly installed, 0 to remove and 0 not upgraded.
Need to get 5,879 kB of archives.
After this operation, 27.9 MB of additional disk space will be used.
Do you want to continue? [Y/n]
次に、パッケージがインストールされることを確認するように求められます。Yを押してから、Enterキーを押します。
MurMur構成
インストールの完了後、package reconfigurationコマンドを実行して、いくつかの基本的なサーバーとユーザーの設定を作成する必要があります。ここでは、矢印キーを使用して回答を選択し、Enterキーを押して続行できます。
dpkg-reconfigure mumble-server
 Mumble-server (murmurd) can start automatically when the server is booted. ?
 ? ?
 ? Autostart mumble-server on server boot?
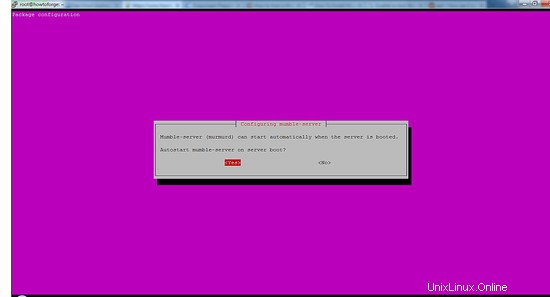
サーバーの起動時に雑音も実行する必要があるため、デフォルト値の[はい]を受け入れます。
Mumble-server (murmurd) can use higher process and network priority to ensure low latency audio forwarding even on highly loaded servers. ?
 ? ?
 ? Allow mumble-server to use higher priority?
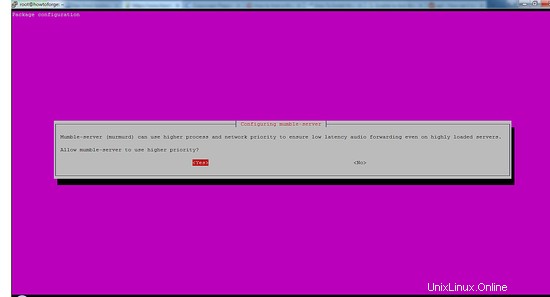
レイテンシを可能な限り低くするには、[はい]を選択します。
Murmur has a special account called "SuperUser" which bypasses all privilege checks. ?
 ? ?
 ? If you set a password here, the password for the "SuperUser" account will be updated. ?
 ? ?
 ? If you leave this blank, the password will not be changed. ?
 ? ?
 ? Password to set on SuperUser account:
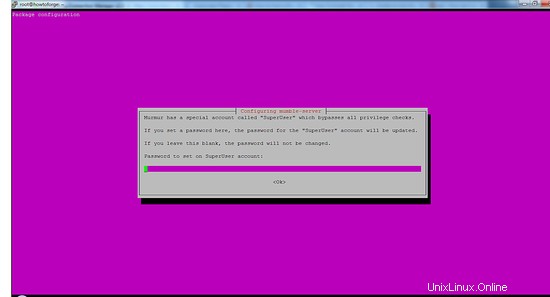
サーバーを管理する場合は、このユーザーでMumbleにログインする必要があります。これは、Mumbleの最高レベルの管理者アカウントです。
パスワードフィールドを空白のままにすると、パスワードはデフォルトのままになります。このアカウントのパスワードを変更し、長くて安全なパスワードを選択することを強くお勧めします。
フィールドに目的のパスワードを入力し、Tabキーを押し、Enterキーを押して新しいパスワードを設定します。
現在、SuperUserという1つのアカウントでMumbleサーバーを使用しています。
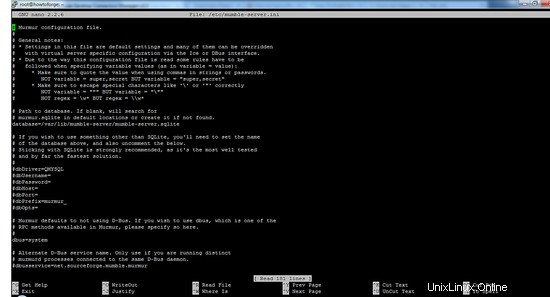
次に、構成ファイルを編集して、最も一般的なものを確認します。サーバー構成ファイルは、/ etc/mumble-server.iniにあります。
お気に入りのテキストエディタで設定ファイルを開きます:
nano /etc/mumble-server.ini
General notes:
# * Settings in this file are default settings and many of them can be overridden
# with virtual server specific configuration via the Ice or DBus interface.
# * Due to the way this configuration file is read some rules have to be
# followed when specifying variable values (as in variable = value):
# * Make sure to quote the value when using commas in strings or passwords.
# NOT variable = super,secret BUT variable = "super,secret"
# * Make sure to escape special characters like '\' or '"' correctly
# NOT variable = """ BUT variable = "\""
# NOT regex = \w* BUT regex = \\w*

# Path to database. If blank, will search for
# murmur.sqlite in default locations or create it if not found.
database=/var/lib/mumble-server/mumble-server.sqlite

# If you wish to use something other than SQLite, you'll need to set the name
# of the database above, and also uncomment the below.
# Sticking with SQLite is strongly recommended, as it's the most well tested
# and by far the fastest solution.
#
#dbDriver=QMYSQL
#dbUsername=
#dbPassword=
#dbHost=
#dbPort=
#dbPrefix=murmur_
#dbOpts=

# Murmur defaults to not using D-Bus. If you wish to use dbus, which is one of the
# RPC methods available in Murmur, please specify so here.
#
dbus=system

# Alternate D-Bus service name. Only use if you are running distinct
# murmurd processes connected to the same D-Bus daemon.
#dbusservice=net.sourceforge.mumble.murmur
以下に、参照用に一般的に変更される値の一部を示します。設定を有効にするには、#文字を削除する必要があります。 #は、行のコメント解除と呼ばれます。 #で始まる行はサーバーによって処理されません。
- autobanTimeframe、autobanAttempts 、 autobanTime –これらの値は、ブルートフォースログインの試行を防ぎます。これにより、条件が満たされるまで特定の期間IPが禁止されます。以下の設定は、30秒以内に3回接続(失敗)しようとすると60秒間禁止される設定です。この設定には注意してください。設定が低すぎると、禁止される可能性があります。高く設定すると、ほとんど効果がありません。
#autobanAttempts = 3 #autobanTimeframe = 30 #autobanTime = 60
- ウェルカムテキスト –この設定では、ユーザーがサーバーにログインするたびにメッセージが表示されます。ルールやWebサイトへのリンクなどについてユーザーに通知します。HTML文字とタグを使用するには、エントリを引用符で囲みます。
# welcometext=Thank you for choosing howtoforge.com! We hope you enjoy your stay
- ポート – 64738はデフォルトのマンブルポートです。このポートはいつでも変更できますが、この新しいポートについてユーザーに通知するようにしてください。そうしないと、ユーザーはサーバーに接続できなくなります。ただし、21、22、25、80、443などの他のサービスに標準のポート番号を使用することは避けてください。「netstat-ntap」コマンドを使用して、サーバーで使用されているポートを確認し、空きポートを見つけることができます。
# port=64738
- ホスト – mumbleは、デフォルトで任意のホスト名にバインドします。単一のホスト名を使用する場合は、そのホスト名を入力して変更できます。
- 帯域幅 –これは、各ユーザーが消費できる帯域幅の量です。より高い値を設定すると、各コンシューマーはより多くのRAMを消費します。 512 RAMで50人のユーザーをホストするには、60000〜72000の値が適切です。
#bandwidth=72000- ユーザー –サーバーに接続できる同時ユーザーの最大数。
#users=150
- textmessagelength –これにより、ユーザーがテキストメッセージごとに送信できる文字数が制限されます。この設定はデフォルトでは有効になっていません。
- imagemessagelength –これにより、ユーザーが送信できる画像の数が制限されます。デフォルトでは有効になっていません。
- allowhtml –メッセージでHTMLを使用できるようにするには、Allowhtmlをtrueに設定します
#allowhtml=true
- registerName 、 RegisterUrl –これらの設定を有効にすると、サーバーの名前がMumbleクライアントで利用可能なパブリックリストに表示されます。有効になっていない場合、ユーザーはサーバーに接続するためにIPアドレスとホスト名を知っている必要があります。
変更した構成設定を保存するには、Ctrl + Xを押し、Yを押してから、Enterキーを押して保存します。そうしないと、変更が以前の値に戻ります。変更された構成を有効にするには、Murmurを再起動する必要があります。これにより、すべてのユーザーがサーバーから切断されます。
雑音を再起動するには、次のコマンドを実行します。
service mumble-server restart
次の手順は、スーパーユーザーとMumbleサーバーに接続するのに役立ちます。他のユーザーが同じ手順を実行して、後で接続することができます。他のユーザーはパスワードを必要とせず、接続するにはIPアドレスとポート番号が必要です。
- Mumbleクライアントをシステムにダウンロードします
- コンピューターでMumbleクライアントを開きます
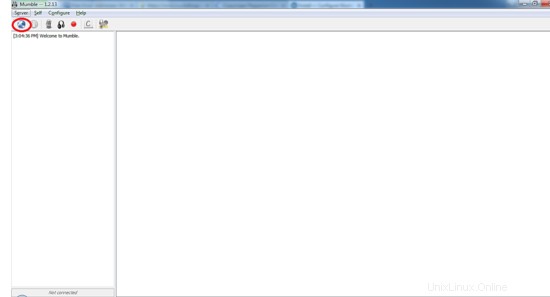
- 接続をクリックします
- [新規追加]をクリックします

- Mumbleサーバーに必要な情報を入力します。アドレスは、ホスト名またはサーバーのIPアドレスのいずれでもかまいません。デフォルトのポートは64736です。新しいポートを変更した場合、ユーザーは接続するために新しいポートを入力する必要があります。 [OK]をクリックして設定を保存します。
- サーバーに接続するには、[接続]をクリックするだけです。サーバーはお気に入りに表示されます。
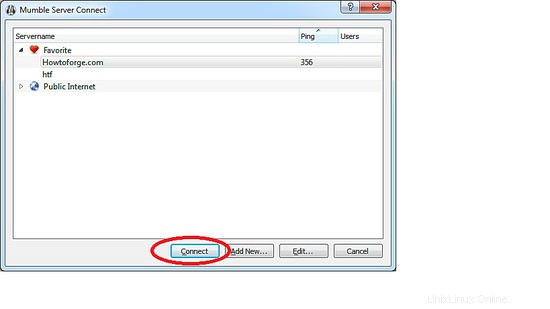
- サーバーの署名付き証明書を受け入れる必要があります。
- 正常に接続すると、「接続済み」というメッセージが表示されます。
- これで、このサーバーに存在するすべてのユーザーとチャットできます。
Mumbleサーバーがインストールされ、使用できるようになりました。