このチュートリアルでは、CentOS 7にNagiosをインストールする方法を紹介します。知らない人のために、Nagiosはネットワークとインフラストラクチャに使用できるオープンソースソフトウェアです。監視。Nagiosはサーバー、スイッチ、アプリケーション、およびサービスを監視します。問題が発生した場合はシステム管理者に警告し、問題が修正された場合も警告します。監視できるリソースには、CPU、メモリ、ディスクスペースの負荷、ログなどがあります。ファイル、温度、またはハードウェアエラー。プラグインを使用して、HTTP、SMTP、DNSなどのサービスのさまざまなパラメータや問題を監視でき、高度に拡張できます。
この記事は、少なくともLinuxの基本的な知識があり、シェルの使用方法を知っていること、そして最も重要なこととして、独自のVPSでサイトをホストしていることを前提としています。インストールは非常に簡単です。 CentOS7へのNagiosの段階的なインストールを示します。
前提条件
- 次のオペレーティングシステムのいずれかを実行しているサーバー:CentOS7。
- 潜在的な問題を防ぐために、OSの新規インストールを使用することをお勧めします。
- サーバーへのSSHアクセス(またはデスクトップを使用している場合はターミナルを開く)
non-root sudo userまたはroot userへのアクセス 。non-root sudo userとして行動することをお勧めします ただし、ルートとして機能するときに注意しないと、システムに害を及ぼす可能性があるためです。
CentOS7にNagiosをインストールする
ステップ1.まず、必要なパッケージと依存関係をインストールします。
yum install httpd php php-cli gcc glibc glibc-common gd gd-devel net-snmp wget -y
ステップ2.「nagios」ユーザーを作成し、「apache」ユーザーをNagiosグループに追加します。
useradd nagios
passwd nagios
ここで、nagiosセットアップ「nagcmd」のグループを作成し、nagiosユーザーをこのグループに追加します。また、nagiosユーザーをapacheグループに追加します:
groupadd nagcmd
usermod -a -G nagcmd nagios
usermod -a -G nagcmd apache
ステップ3.CentOS7にNagiosをインストールします。
公式サイトからNagiosソースコードをダウンロードします:
cd /opt/
wget https://assets.nagios.com/downloads/nagioscore/releases/nagios-4.4.6.tar.gz
tar xzf nagios-4.4.6.tar.gz
cd nagios-4.4.6
./configure --with-command-group=nagcmd
make all
make install
make install-init
make install-config
make install-commandmode
make install-webconf
次に、最新のnagios-pluginsソースをダウンロードし、次のコマンドを使用してインストールします。
cd /opt
wget http://nagios-plugins.org/download/nagios-plugins-2.0.3.tar.gz
tar xzf nagios-plugins-2.0.3.tar.gz
cd nagios-plugins-2.0.3
./configure --with-nagios-user=nagios --with-nagios-group=nagios
make
make install
ステップ4.Apache認証を構成します。
ユーザーnagiosadminのパスワードを設定する必要があります。このユーザー名はWebインターフェースへのアクセスに使用されるため、入力するパスワードを覚えておくことが重要です。ここで、次のコマンドを実行してパスワードを設定し、パスワードを2回入力します。
# htpasswd -s -c /usr/local/nagios/etc/htpasswd.users nagiosadmin
New password:
Re-type new password:
Adding password for user nagiosadmin
ステップ5.Nagios構成チェックを実行します。
次に、起動時にNagiosを起動する必要があるため、最初に次のコマンドを実行して構成ファイルにエラーがないことを確認します。
/usr/local/nagios/bin/nagios -v /usr/local/nagios/etc/nagios.cfg
そして、出力を取得する必要があります:
Nagios Core 4.0.10
Copyright (c) 2009-present Nagios Core Development Team and Community Contributors
Copyright (c) 1999-2009 Ethan Galstad
Last Modified: 11-1-2016
License: GPL

Website: http://www.nagios.org
Reading configuration data...
 Read main config file okay...
 Read object config files okay...

Running pre-flight check on configuration data...

Checking objects...
 Checked 8 services.
 Checked 1 hosts.
 Checked 1 host groups.
 Checked 0 service groups.
 Checked 1 contacts.
 Checked 1 contact groups.
 Checked 24 commands.
 Checked 5 time periods.
 Checked 0 host escalations.
 Checked 0 service escalations.
Checking for circular paths...
 Checked 1 hosts
 Checked 0 service dependencies
 Checked 0 host dependencies
 Checked 5 timeperiods
Checking global event handlers...
Checking obsessive compulsive processor commands...
Checking misc settings...

Total Warnings: 0
Total Errors: 0

Things look okay - No serious problems were detected during the pre-flight check
ステップ6.ApacheおよびNagiosサービスを開始します。
systemctl enable httpd
systemctl start httpd
chkconfig nagios on
/etc/init.d/nagios start
ステップ7.NagiosWebインターフェイスにアクセスします。
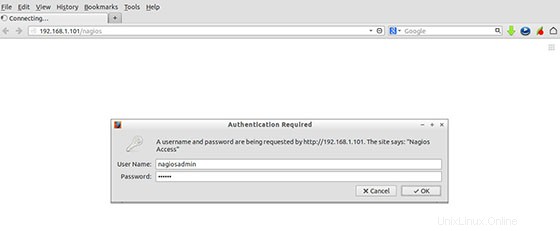
Nagiosは独自のApache構成ファイルを作成します/etc/httpd/conf.d/nagios.conf 。変更する必要はありません。ブラウザでURLを開くだけですhttp://nagios-server-ip/nagios 。
ユーザー名とパスワードの入力を求められたら、ユーザー名「nagiosadmin」と手順4で入力したパスワードを入力します。このパスワードを忘れた場合は、変更できます。手順4でhtpasswdコマンドを再実行します。

おめでとうございます!Nagiosが正常にインストールされました。CentOS7システムにNagiosをインストールするためにこのチュートリアルを使用していただき、ありがとうございます。追加のヘルプや役立つ情報については、Nagiosの公式Webサイトを確認することをお勧めします。