はじめに
YOURLS(Your Own URL Shortener)は、オープンソースのURL短縮およびデータ分析アプリケーションです。
CentOS8サーバーにYOURLSをインストールするプロセスについて説明します。
インストール
以下の手順に従ってください:
- システムを更新する
sudo dnf install epel-release -y
sudo dnf clean all && sudo dnf update -y- httpdWebサーバーをインストールします
sudo dnf install httpd -y- Apacheウェルカムページを削除します
sudo sed -i 's/^/#&/g' /etc/httpd/conf.d/welcome.conf- Apacheが訪問者のブラウザでファイルを公開しないようにします
sudo sed -i "s/Options Indexes FollowSymLinks/Options FollowSymLinks/" /etc/httpd/conf/httpd.conf- 開始してからhttpdを有効にします
sudo systemctl start httpd && sudo systemctl enable httpd- mariadbをインストールする
sudo dnf install mariadb mariadb-server -y- mariadbを起動して有効にする
sudo systemctl start mariadb.service && sudo systemctl enable mariadb.service- MariaDBのインストールを保護する
mysql_secure_installation受け取った質問に答えて、rootパスワードを入力することを忘れないでください。
- 次のコマンドを使用して、ルートとしてmysqlシェルにログインします。
mysql -u root -p- データベースを作成するyourls_db 、データベースユーザー yourls_user 、およびデータベースユーザーのパスワードを以下に示します。
CREATE DATABASE yourls_db DEFAULT CHARACTER SET UTF8 COLLATE utf8_unicode_ci;
CREATE USER 'yourls_user'@'localhost' IDENTIFIED BY 'unixcopPassword';
GRANT ALL PRIVILEGES ON yourls_db.* TO 'yourls_user'@'localhost' IDENTIFIED BY 'unixcopPassword' WITH GRANT OPTION;
FLUSH PRIVILEGES;
\q;- 以下のコマンドを実行して、phpと必要な拡張機能とパッケージをインストールします。
sudo dnf -y install yum-utils

sudo dnf -y install https://dl.fedoraproject.org/pub/epel/epel-release-latest-8.noarch.rpm

sudo dnf -y install https://rpms.remirepo.net/enterprise/remi-release-8.rpm

dnf module reset php    #run this with root user

sudo dnf module install php:remi-7.3

sudo yum install wget git php php-bcmath php-json php-xml php-common php-curl php-intl php-zip php-imap php-pear php-cgi php-mbstring php-gd php-mysqlnd php-gettext -y- YOURLSをインストールします gitを使用します。
cd /var/www/html/
sudo git clone https://github.com/YOURLS/YOURLS.git
sudo chown -R apache:apache /var/www/html/YOURLS- 以下のコマンドを実行してYOURLSを構成します
cd YOURLS
sudo cp user/config-sample.php user/config.php
sudo chown apache:apache user/config.php- ファイルconfig.phpの一部の値も変更します
vim /var/www/html/YOURLS/user/config.php- config.phpで以下の行を見つけます ファイル
define( 'YOURLS_DB_USER', 'your db user name' );

define( 'YOURLS_DB_PASS', 'your db password' );

define( 'YOURLS_DB_NAME', 'yourls' );

define( 'YOURLS_SITE', 'http://your-own-domain-here.com' );

define( 'YOURLS_COOKIEKEY', 'modify this text with something random' );

$yourls_user_passwords = array(
'username' => 'password',- 次のように1つずつ交換します。
define( 'YOURLS_DB_USER', 'yourls_user' );

define( 'YOURLS_DB_PASS', 'unixcopPassword' );

define( 'YOURLS_DB_NAME', 'yourls_db' );

define( 'YOURLS_SITE', 'http://yourls.unixcop.com' );

define( 'YOURLS_COOKIEKEY', 'ueejdmbsfffgsjskwnxsjssxiejdoedchcvg' ); // Use a long string consists of random characters.

$yourls_user_passwords = array(
'unixcop' => 'unixcopPassword', // Use your own username and password.- 次に保存して終了します
- YOURLSの仮想ホストを作成します
vim /etc/httpd/conf.d/yourls.conf- 次に、以下を追加します
<VirtualHost *:80>
ServerAdmin [email protected]
DocumentRoot /var/www/html/YOURLS/
ServerName yourls.unixcop.com
ServerAlias www.yourls.unixcop.com
<Directory /var/www/html/YOURLS/>
Options FollowSymLinks
AllowOverride All
Order allow,deny
allow from all
</Directory>
ErrorLog /var/log/httpd/yourls.unixcop.com-error_log
CustomLog /var/log/httpd/yourls.unixcop.com-access_log common
</VirtualHost>- httpdを再起動します
sudo systemctl restart httpd- httpを許可する ファイアウォールのポート
sudo firewall-cmd --zone=public --permanent --add-service=http
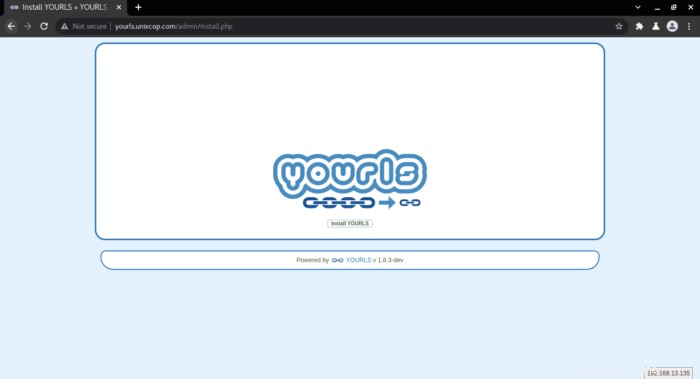
sudo firewall-cmd --reload- Webブラウザにアクセスしてhttp://yourls.unixcop.com/adminにアクセスします またはhttp:// IP_address / admin 次に、[YOURLSのインストール]をクリックします 以下のスクリーンショットに示すように。

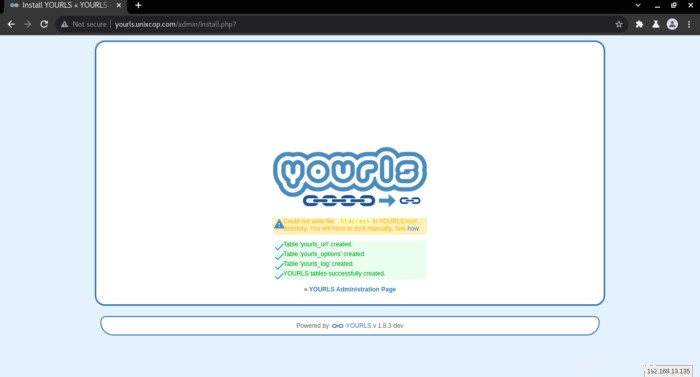
- すべてが正常であることを確認し、右または緑色のライトを確認してから、Enterキーを押して続行します。

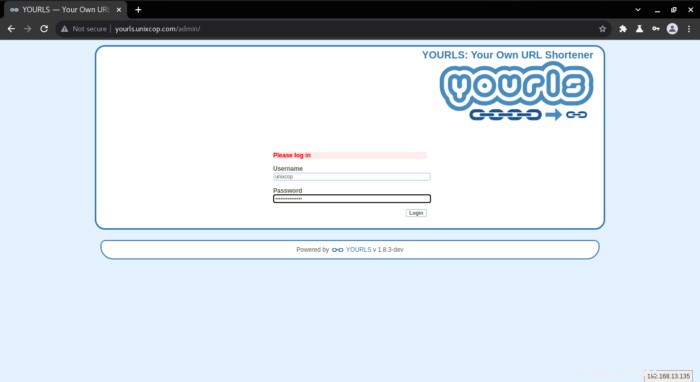
- 以下に示すように、ログインページにリダイレクトされます。.. config.phpで変更したユーザー名とパスワードを入力します。 ファイル。

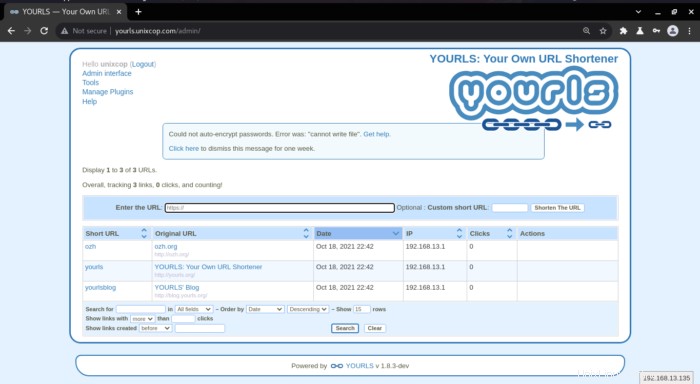
- 以下のスクリーンショットはダッシュボードを示しています

- YOURLSでお楽しみください。
結論
それだけです..
CentOS8サーバーにYOURLSYOURLS(独自のURL短縮サービス)をインストールする方法を説明しました。