はじめに
なぜOpenLDAPなのか?
プロジェクトは、LDAP参照ソースコードをコピーすることです。 OpenLDAPは、ライトウェイトディレクトリアクセスプロトコルの略語です。LDAPは、ISPを介した分散ディレクトリ情報サービスを評価および維持できる、ベンダーに依存しないアプリケーションプロトコルです。ディレクトリを提供するには、さまざまな方法があります。たとえば、LDAPを使用すると、次のことが可能になります。ユーザー名とパスワードを保存するための中心的な場所を提供します。
そのため、さまざまなアプリケーションやサービスがLDAPサーバーに接続して、ユーザーを検証できます。 LDAPサーバーは、ユーザー名とパスワードを集中型サーバーに保存するために組織で広く使用されており、ユーザーはこれに対して、ネットワーク上に存在するプログラムやサービスに対してさらに認証を行うことができます。さらに、オペレーティングシステムにネイティブな標準のソフトウェアメンテナンスコマンドにSymas OpenLDAPパッケージを使用します。SymasOpenLDAPは、OpenLDAPコードの90%を作成する主な貢献者です。
OpenLDAPの長所
無料です。 Linuxと同様にオープンソースです。標準プロトコル。第二に、さらに、認証を多くのアプリケーションにバインドするのは簡単です。カスタマイズ可能で軽量。
OpenLDAPの短所
インフラストラクチャに加えて、すべての要件をサポートします。ポリシーとセキュリティルールを設定します。したがって、データベースまたはActiveDirectoryは常にデータを保存する必要があります。現在の情報がない場合、すべての属性とポリシーが機能しなくなります。お住まいの地域にMicrosoftがいると仮定すると、ActiveDirectoryを使用したOpenLDAPが許可されます。
RockyまたはCentos8へのインストール
さらに、チュートリアルでは(Rocky Linux / Centos 8)を使用できます。そのため、アカウントに関するレコード認証を処理します。このチュートリアルをより適切に機能させるために、以下を検討してください。
Firewalldサービス。このコマンドラインでルールを追加できます。非セキュアアソシエーションのために、ターミナルポート389でこれを使用してfirewalld制限を追加しています。ポート636は、安全なポート接続に固有のものになります。
# firewall-cmd --permanent --add-port=389/TCP# firewall-cmd --permanent --add-port=636/TCP# firewall-cmd --reload必要なパッケージをインストールする必要があります。さらに、クライアントにはSssd、openldap-clients、oddjob-mkhomedirが必要です。
# dnf install wget vim cyrus-sasl-devel libtool-ltdl-devel openssl-devel libdb-devel make libtool autoconf tar gcc perl perl-devel -yLinux用のSymasOpenLDAPへようこそ
サポートされているプラットフォームの手順:
RHEL7
RHEL8
Ubuntu16.04 LTS
Ubuntu18.04 LTS
Ubuntu20.04 LTS
RHEL8 / Rocky/Centos8でのLinux用のSymasOpenLdapの設定
必要なバイナリをインストールした後。 事前設定されたリポジトリファイルをSymasからコピーします リポジトリ。
次の手順で、LDAPをすばやく起動して実行できます。
必要なSymasOpenLDAPパッケージをインストールします
•Symas-OpenLDAP-クライアントにはクライアントライブラリとコマンドのみが含まれます。これは、Symas OpenLDAPへのアクセスが必要であるが、サーバーソフトウェアが必要ないシステムで使用します。
•Symas-OpenLDAP-Nonoptは、標準のサーバー/クライアントインストールから最適化フラグを削除します。パフォーマンスは低下しますが、デバッグ機能とトラブルシューティング機能が向上しました。
•Symas-OpenLDAP(つまり、サーバーインストーラー)には、完全に機能するLDAPディレクトリを立ち上げるために必要なすべてのクライアントおよびサーバーコンポーネントが含まれています。
•Symas-OpenLDAP-Syas-OpenLDAPの一部であるライブラリに基づいてソフトウェアを開発することが目的の場合に使用される開発。
# wget -q https://repo.symas.com/configs/SOFL/rhel8/sofl.repo -O /etc/yum.repos.d/sofl.repo- パッケージsymas-openldap-clientおよびsymas-openldap-serversをインストールします。
# dnf install symas-openldap-clients symas-openldap-servers -y
- サービスを開始する 。
# systemctl start slapd- 秘密鍵からLDAPパスワードを生成します。
# slappasswd -s rocky -n > /etc/openldap/passwd- 新しい証明書は、365日間有効なX509を生成する必要があります。
# openssl req -new -x509 -nodes -out /etc/openldap/certs/cert.pem -keyout /etc/openldap/certs/priv.pem -days 365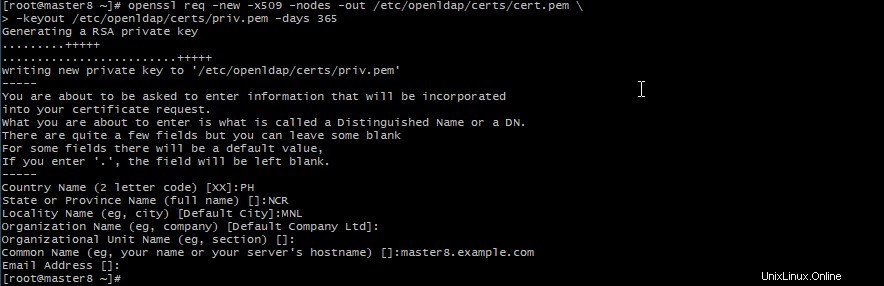
- さらに、生成されたコンテンツをマスターldapの/ etc / openldap / certsディレクトリに移動します。cert.pemをクライアントにコピーして、ldap接続で認証します。
# cd /etc/openldap/certs.# chown ldap:ldap *# chmod 600 priv.pemインストールされているOpenLDAPに含まれるデータベーステンプレートを準備します
# cp -r /usr/share/openldap-servers/DB_CONFIG.example /var/lib/ldap/DB_CONFIG- データベースファイルを生成します。
[root@master ~]#slaptest
config file testing succeeded
[root@master ~]#- データベースファイルの所有権を変更します。
# chown ldap:ldap /var/lib/ldap/*- 起動時にslapdサービスをアクティブにすると、すぐに開始されます。
# systemctl enable slapd --now- サービスが実行されているかどうかを確認してください。
# netstat -lt | grep ldap
tcp 0 0 0.0.0.0:ldaps 0.0.0.0:* LISTEN

tcp 0 0 0.0.0.0:ldap 0.0.0.0:* LISTEN
- rootパスワードを設定します。
# slappasswd
New password:

Re-enter new password:

{SSHA}xxxxxxxxxxxxxxxxxxxxxxxx
# vi chroot.ldif
# specify the password generated above for "olcRootPW" section
dn: olcDatabase={0}config,cn=config
changetype: modify
add: olcRootPW
olcRootPW: {SSHA}xxxxxxxxxxxxxxxxxxxxxxxx# ldapadd -Y EXTERNAL -H ldapi:/// -f chroot.ldif
SASL/EXTERNAL authentication started
SASL username: gidNumber=0+uidNumber=0,cn=peercred,cn=external,cn=auth
SASL SSF: 0
modifying entry "olcDatabase={0}config,cn=config"cosine、nis、inetorgpersonLDAPを追加するように構成されています スキーマ。
# ldapadd -Y EXTERNAL -H ldapi:/// -f /etc/openldap/schema/cosine.ldif
SASL/EXTERNAL authentication started
SASL username: gidNumber=0+uidNumber=0,cn=peercred,cn=external,cn=auth
SASL SSF: 0
adding new entry "cn=cosine,cn=schema,cn=config"
# ldapadd -Y EXTERNAL -H ldapi:/// -f /etc/openldap/schema/nis.ldif
SASL/EXTERNAL authentication started
SASL username: gidNumber=0+uidNumber=0,cn=peercred,cn=external,cn=auth
SASL SSF: 0
adding new entry "cn=inetorgperson,cn=schema,cn=config"# ldapadd -Y EXTERNAL -H ldapi:/// -f /etc/openldap/schema/inetorgperson.ldif
SASL/EXTERNAL authentication started
SASL username: gidNumber=0+uidNumber=0,cn=peercred,cn=external,cn=auth
SASL SSF: 0
adding new entry “cn=inetorgperson,cn=schema,cn=config”- ディレクトリ/etc/openldap/にchanges.ldifファイルを作成します。 slappasswdによって生成された{SSHA}xxxを含む{SSHA}を含む出力行を貼り付けます。
# slappasswd
New password:

Re-enter new password:

{SSHA}xxxxxxxxxxxxxxxxxxxxxxxx- したがって、DB名はmdbになります。mdbバックエンドに保存されている情報は、/ etc / openldap / slapd.d / cn =config / olcDatabase ={2}mdb.ldifファイルにあります。
# vi /etc/openldap/changes.ldif
dn: olcDatabase={2}mdb,cn=config

changetype: modify

replace: olcSuffix

olcSuffix: dc=example,dc=com

dn: olcDatabase={2}mdb,cn=config

changetype: modify

replace: olcRootDN

olcRootDN: cn=Manager,dc=example,dc=com

dn: olcDatabase={2}mdb,cn=config

changetype: modify

replace: olcRootPW

olcRootPW: {SSHA}xxxxxxxxxxxxxxxxxxxxxxxx

dn: cn=config

changetype: modify

replace: olcTLSCertificateFile

olcTLSCertificateFile: /etc/openldap/certs/cert.pem

dn: cn=config

changetype: modify

replace: olcTLSCertificateKeyFile

olcTLSCertificateKeyFile: /etc/openldap/certs/priv.pem

dn: olcDatabase={1}monitor,cn=config

changetype: modify

replace: olcAccess

olcAccess: {0}to * by dn.base=”gidNumber=0+uidNumber=0,cn=peercred,cn=external,cn=auth” read by dn.base=”cn=Manager,dc=example,d
c=com” read by * none- 構成をマシンにインポートします。これは、LDAPディレクトリのメインエントリになります。
# ldapmodify -Y EXTERNAL -H ldapi:/// -f /etc/openldap/changes.ldif
SASL/EXTERNAL authentication started

SASL username: gidNumber=0+uidNumber=0,cn=peercred,cn=external,cn=auth

SASL SSF: 0

modifying entry “olcDatabase={2}mdb,cn=config”

modifying entry “olcDatabase={2}mdb,cn=config”

modifying entry “olcDatabase={2}mdb,cn=config”

modifying entry “cn=config”

modifying entry “cn=config”

modifying entry “olcDatabase={1}monitor,cn=config”- 構成を確認する
# slaptest -u出力は出力のようになります。
# config file testing succeeded- 以下の設定で/etc/openldap/base.ldifを作成します。
vi /etc/openldap/base.ldif
dn: dc=example,dc=com

dc: example

objectClass: top

objectClass: domain

dn: ou=People,dc=example,dc=com

ou: People

objectClass: top

objectClass: organizationalUnit

dn: ou=Group,dc=example,dc=com

ou: Group

objectClass: top

objectClass: organizationalUnit
# ldapadd -x -w redhat -D cn=Manager,dc=example,dc=com -f /etc/openldap/base.ldifファイルusers.ldifを作成してユーザーを作成します
# vi users.ldif
dn: uid=user01,ou=People,dc=example,dc=com

uid: user01

cn: user01

objectClass: account

objectClass: posixAccount

objectClass: top

objectClass: shadowAccount

userPassword: {crypt}$6$zz2TKRQVGLyPJoTU$//n.UkHKrrfkeUQUOund2QbSGRMXjU0GV73o.UlprOB3CxBxmQArsESrNUUHC7v3ZhwojszXGh7LowRSnjWhG.

shadowLastChange: 18818

shadowMin: 0

shadowMax: 99999

shadowWarning: 7

loginShell: /bin/bash

uidNumber: 1001

gidNumber: 1001

homeDirectory: /home/guests/user01- ユーザーが存在する場合は、構成をテストします。
# ldapsearch -x cn=user01 -b dc=example,dc=com- 出力は次のようになります。
[root@master8 ~]# ldapsearch -x cn=user01 -b dc=example,dc=com
#extended LDIF
#

#LDAPv3
#base with scope subtree
#filter: cn=user01
#requesting: ALL
# user01, People, example.com

dn: uid=user01,ou=People,dc=example,dc=com
uid: user01
cn: user01
objectClass: account
objectClass: posixAccount
objectClass: top
objectClass: shadowAccount
userPassword:: e2NyeXB0fSQ2JHp6MlRLUlFWR0x5UEpvVFUkLy9uLlVrSEtycmZrZVVRVU91bmQ
yUWJTR1JNWGpVMEdWNzNvLlVscHJPQjNDeEJ4bVFBcnNFU3JOVVVIQzd2M1pod29qc3pYR2g3TG93
UlNualdoRy4=
shadowLastChange: 18818
shadowMin: 0
shadowMax: 99999
shadowWarning: 7
loginShell: /bin/bash
uidNumber: 1001
gidNumber: 1001
homeDirectory: /home/guests/user01

user01, Group, example.com
dn: cn=user01,ou=Group,dc=example,dc=com
objectClass: posixGroup
objectClass: top
cn: user01
userPassword:: e2NyeXB0fXg=
gidNumber: 1001

search result
search: 2
result: 0 Success

numResponses: 3
numEntries: 2
結論
したがって、OpenLDAPのインストールは、手順を正しく実行すれば非常に簡単です。ただし、以下の手順を実行すると、サービスが正しく実行されません。SymasOpenLDAPは、openldap.orgからopenldapパッケージをコンパイルするための優れた代替手段です。私の見解では、理論よりも実践的な学習に勝るものはありません。最後に、それは心から新しいことを探求し、あなたがしていることを愛する旅でした。